Cardboard Craft
How to Make Cardboard Cat Tutorial For Kids

Cat lovers! We have got an easy and adorable craft for you! This step-by-step tutorial will guide you on making a cardboard cat model!
If you adore cats then this craft is a must for you to make! This step-by-step tutorial will serve you as a guide to make a cardboard cat model craft that will be a fantastic decor for a cat lover! This craft can also be called a recycled one as we use cardboard to make it, which is a mere waste at most times! Kiddos will definitely love to make this craft while being keen to know about these cute pets and also, flaunt it in front of everyone! Open the doors of your creativity, grab the listed materials, and let’s begin to make an adorable cat!
Recycled Cardboard Cat Craft Tutorial For Kids

Read More: Easy Cardboard Tube Tiger For Kids
Materials Required
- Cardboard
- Scissors
- Hot Glue Gun
- Colored Paper Sheets (White, Black, And Pink)
- Black Marker
- Craft Tweezers
- Pencil
Procedure
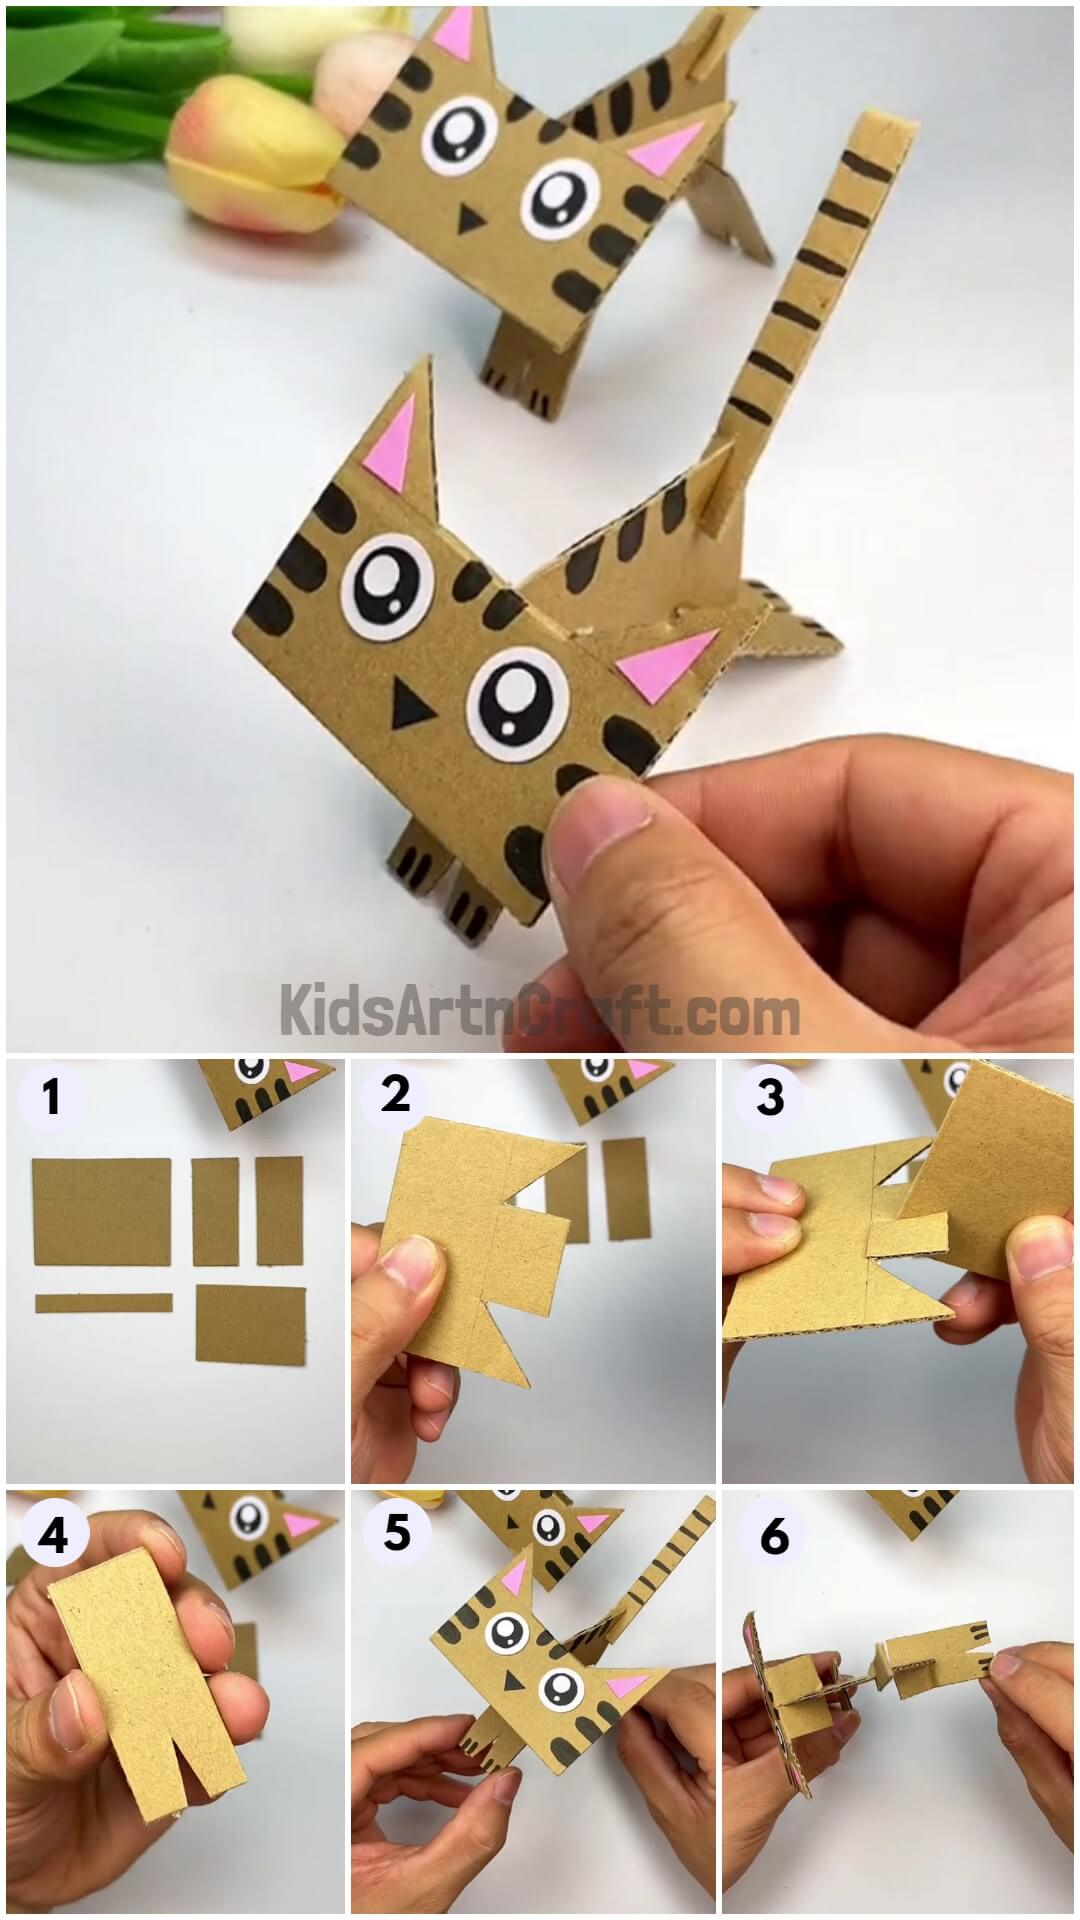
Step 1: Cutting Out Cardboard Pieces
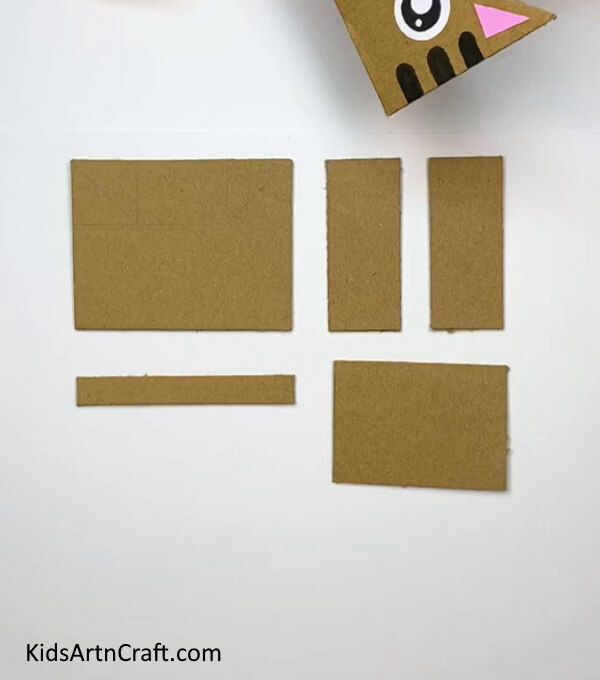

Begin this craft by taking a cardboard and a pair of scissors. Using scissors, cut out the types of rectangles you can see in the image above.
Step 2: Drawing Lines And Triangles
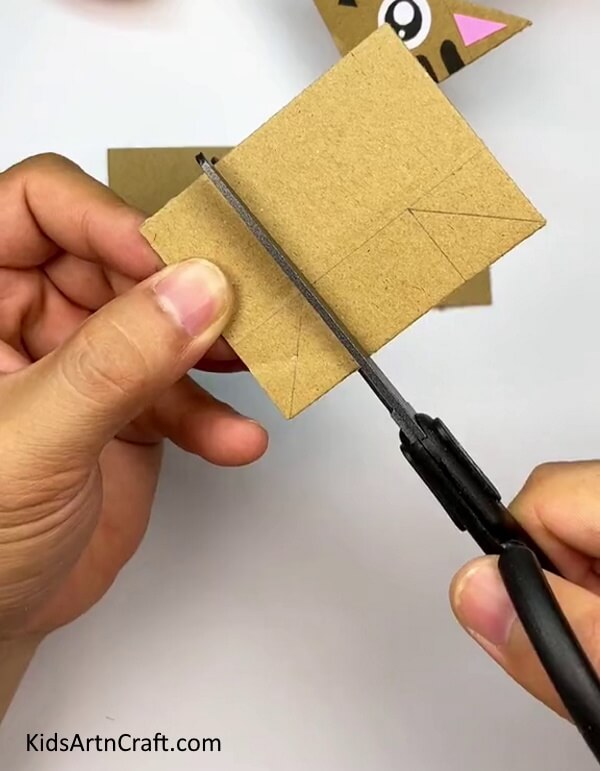

Using a pencil, draw a straight line along the longer side of the big rectangle piece and make 2 lines perpendicular to the longer one making 2 squares on the corners. Now, draw a slanting line on both squares to differentiate the squares into 2-2 triangles.
Step 3: Cutting Out The Triangles
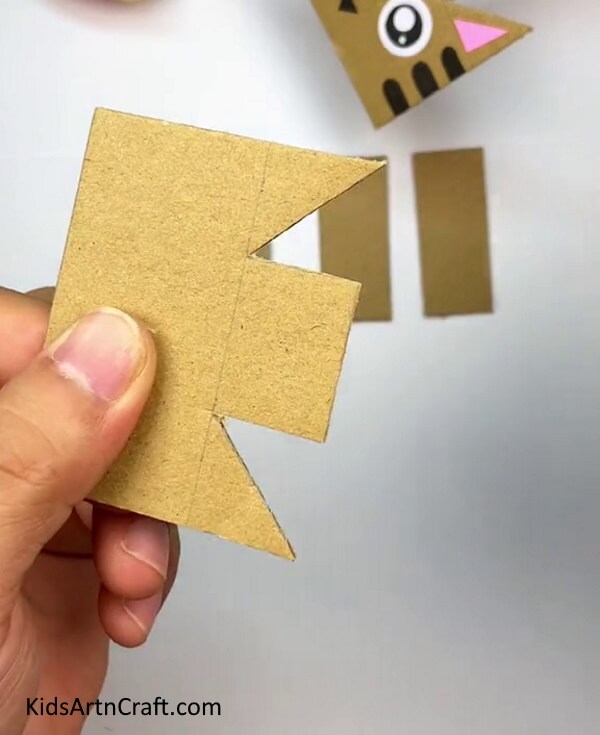

Now, using scissors, cut out the triangles from the longer side of the rectangle piece. This cardboard piece will be the face of the cat.
Step 4: Making A Cut In The Center Till The Drawn Line
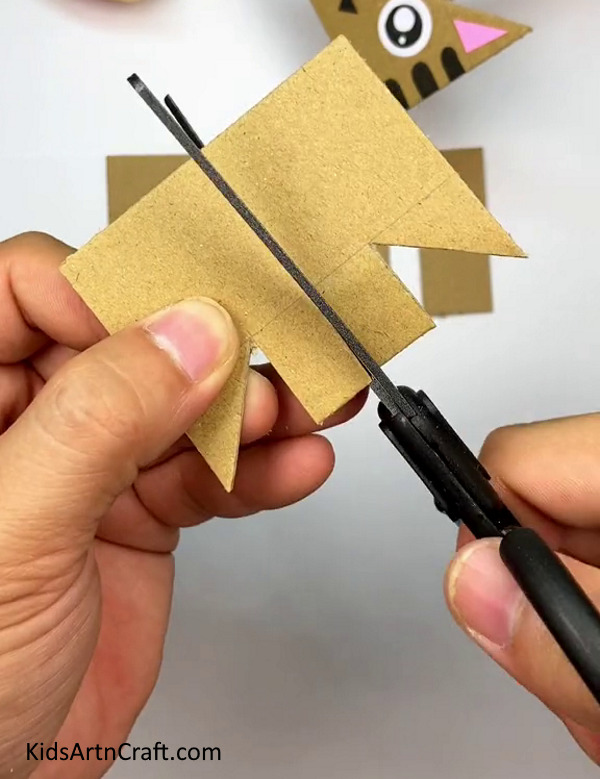

Using scissors, make a cut in the middle of the cutout rectangle side till the long drawn line as shown in the image.
Step 5: Placing The Other Rectangle In The Cut
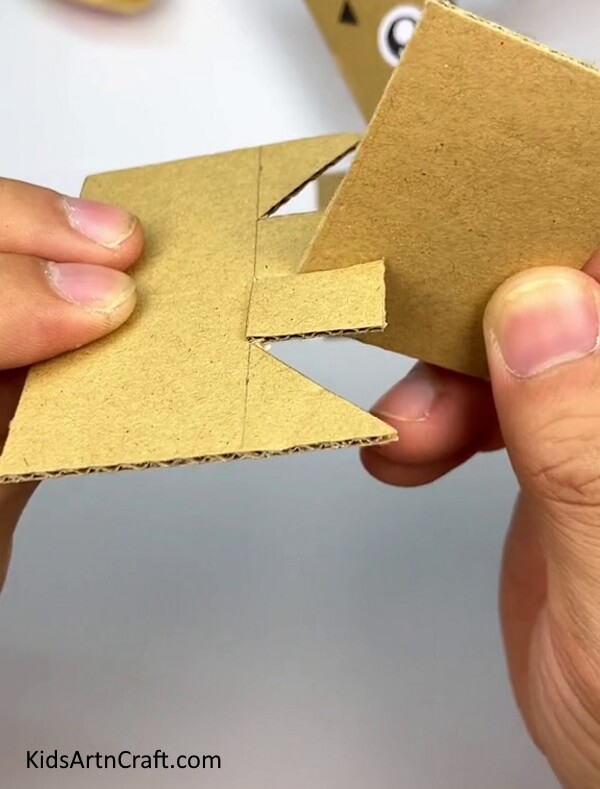

Take the other thick and big rectangle and put it inside the cut perpendicularly from the shorter side of it on the corner (not in the center). The inserted rectangle will be the body of the cat.
Step 6: Making A Triangular Cut In The Thick Rectangular Cardboard Strip
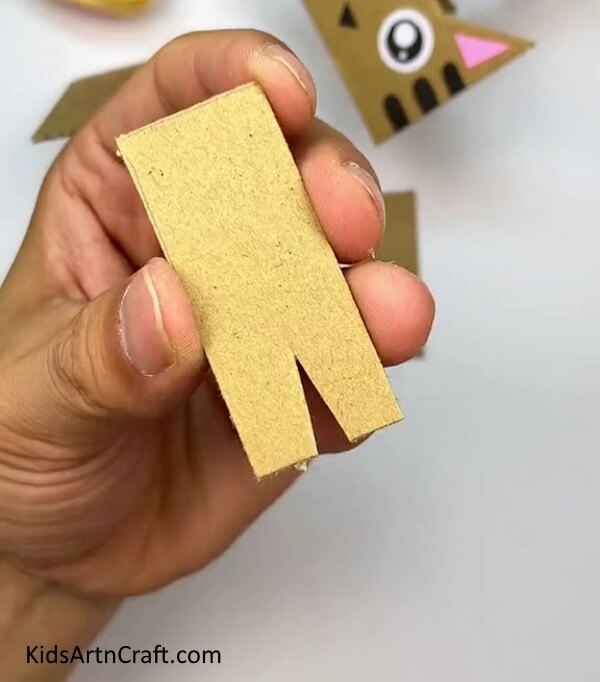

Using scissors, cut out a thin triangle from the shorter side of the thick rectangular cardboard strip as shown in the image.
Step 7: Making The Legs Of The Cat
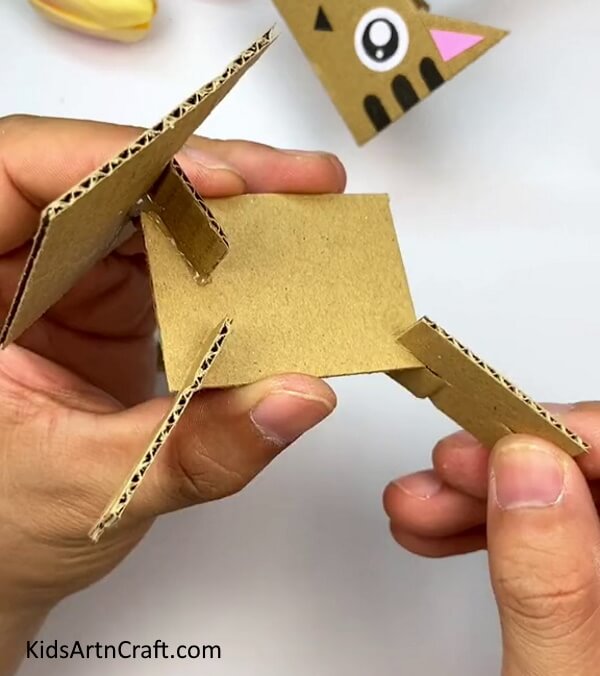

Bend the face from the drawn long line to shape it and also secure the body cardboard inserted into the face with hot glue. Now, as you made the triangular cut previously in the thick cardboard rectangular strip, make the same on the other cardboard piece too and these two will be the legs of the cat. Now, slantingly place them on the body by making a cut on the legs from the opposite side of the triangular cut and secure them with hot glue.
Step 8: Making The Eyes And Tail Of The Cat
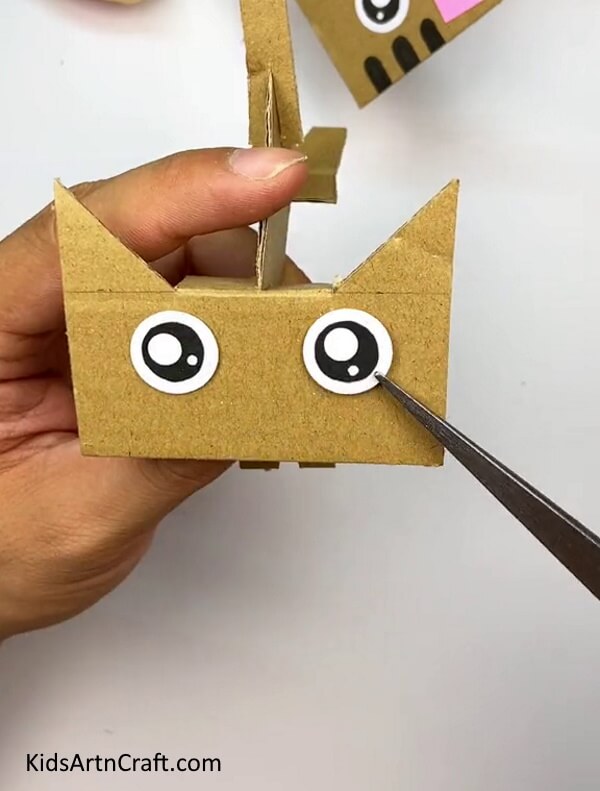

Using scissors, cut out 2 big circles from the white paper sheets 2 relatively smaller circles from the black sheet, and stick the black ones over the white using hot glue. Using scissors, cut out 2 tiny circles from the white sheet and a further 2 from the same. Stick these 4 circles 2-2 on each eye using hot glue to add shine to the eye. Now, paste the eyes side by side over the face of the cat using hot glue and craft tweezers.
Take the last remaining thin cardboard piece strip and make a cut at the end of it. Place the strip piece on the upper right corner of the cat’s body slantingly to add a tail to it.
Step 9: Making The Ears And Nose Of The Cat
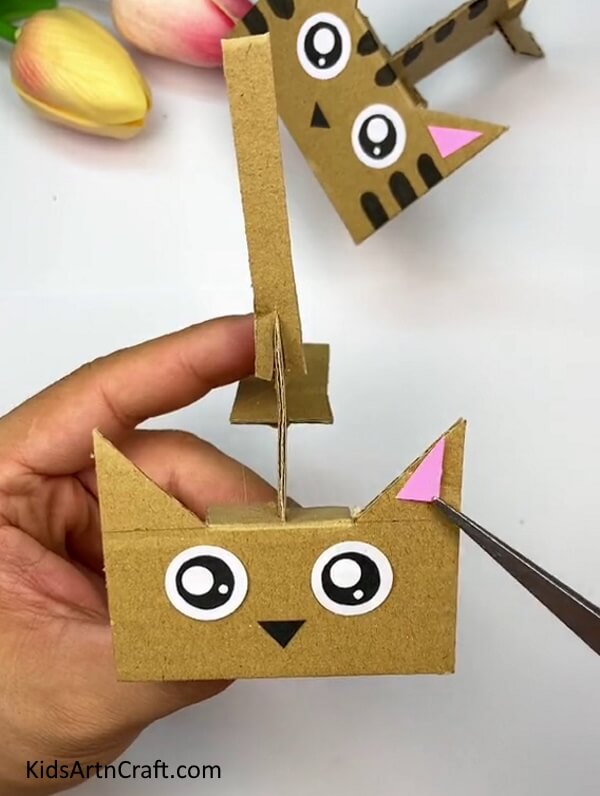

Using scissors, cut out 2 small triangles from the pink paper aligning with the boundary of the triangles over the face of the cat, and stick them over using hot glue. This completes the ears of your cat. Also, cut out a small triangle from the black paper and stick it on the face below and in between the eyes to make the nose of the cat.
Step 10: Drawing The Cat’s Texture Over It
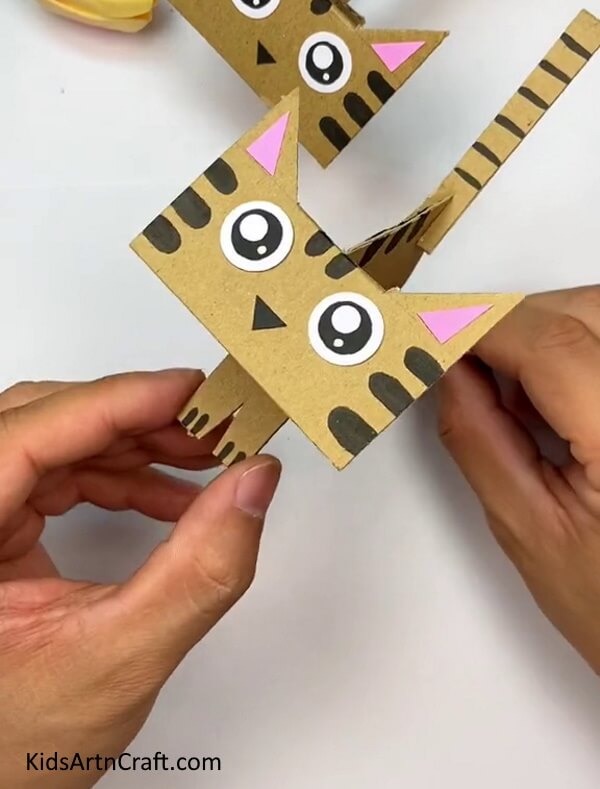
Grab a black marker to make the texture over it. Make thick curved end strips, 2 on the top of the face between the eyes, 3-3 on the left and right sides of the face, 3 on the top of the body, and 2-2 on the end of the legs. Also, make horizontal lines on the tail of the cat.
Yay! Your Cat Cardboard Model Craft Is Ready!
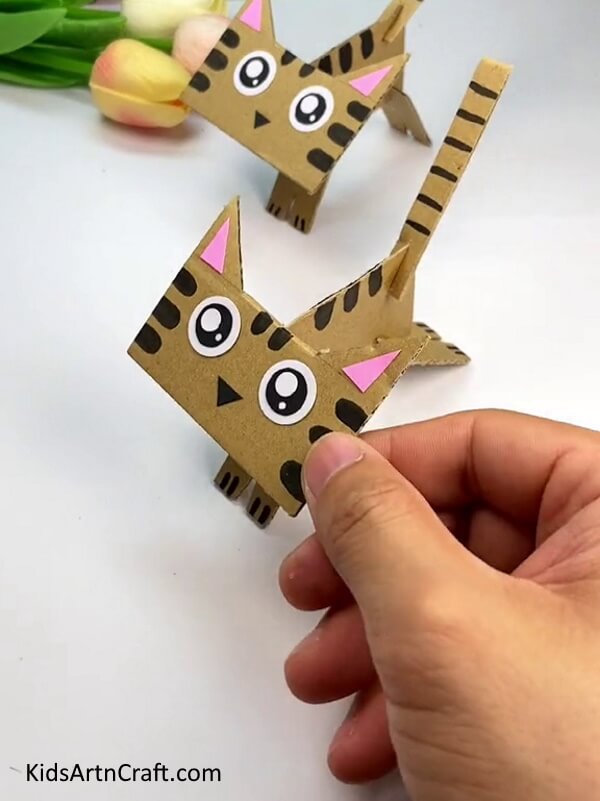

Congratulations! You have finally succeeded in making your cat cardboard model craft just in time!
You can now show it off to your friends and family and let them admire your creation! This craft can also be a learning one as you can teach the kiddos about the cats through this craft-making! You can also encourage your kiddos to customize the cat and add their touch of creativity to it! Like coloring the cat, making the features more detailed, anything! Their imagination and creativity will be the limit! This craft will definitely present you as a cat lover and admirer!
Hope you liked the article! Share it as much as you can and drop your feedback in the comments section below! We would love to hear from you!
Follow us on YouTube for art and craft tutorials and much more.
More Articles from Kids Art & Craft
- Learn To Make Cardboard Tube Flower Bracelet Tutorial
- Easy Cardboard Tube Shark Craft for Kids
- DIY Cardboard Tube Owl Craft
- How to Make Cardboard Ice cream Craft in Easy Steps
- How To Make Leaf Hedgehog Craft For Kids