Paper Crafts
How to Make Beautiful Paper Ladybug Tutorial for kids

This tutorial will show kids how to make a beautiful paper ladybug! It includes step-by-step instructions and materials needed to make a ladybug craft in no time. Perfect for a fun craft activity for kids of all ages
Hey everyone, welcome to this tutorial, do you like ladybugs? Ladybug is one of the cutest bugs with shiny body. Are you ready to make your own ladybug? In this tutorial, we going to learn how to create your own beautiful paper ladybug. You can make this craft with simple effort and with simple craft items. Here, we give you simple instructions to make this beautiful paper ladybug craft.
How To Make Beautiful Paper Ladybug For Kids

Read More: Easy Ladybug Craft For Kids Using Leaves and Paper
Materials Required
- Colored paper (Pink, Red, Yellow &Blue)
- Acrylic paint (Black, White, Green &Yellow)
- Painting brush
- Black pen
- Glue
- Scissors
- Doll eyes
Procedure
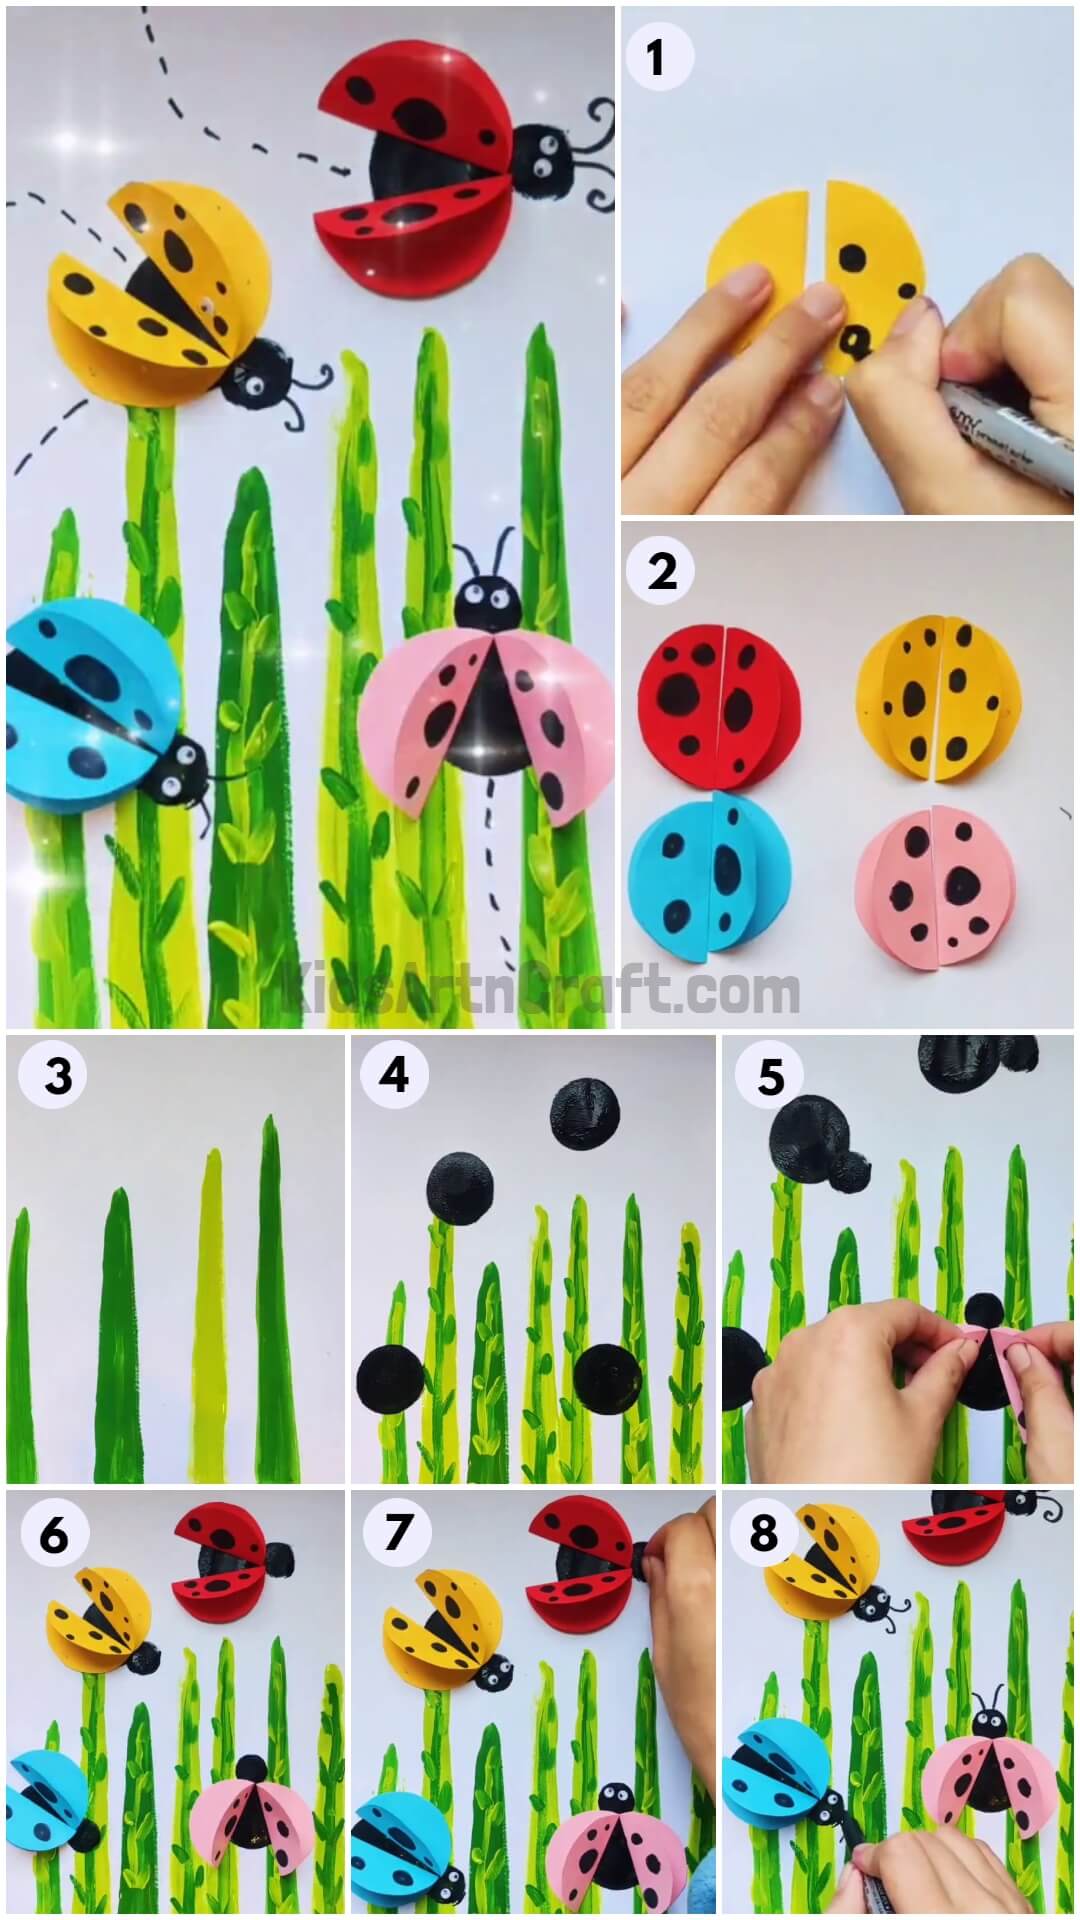
Step 1: Making Ladybug Wings Using Color Paper
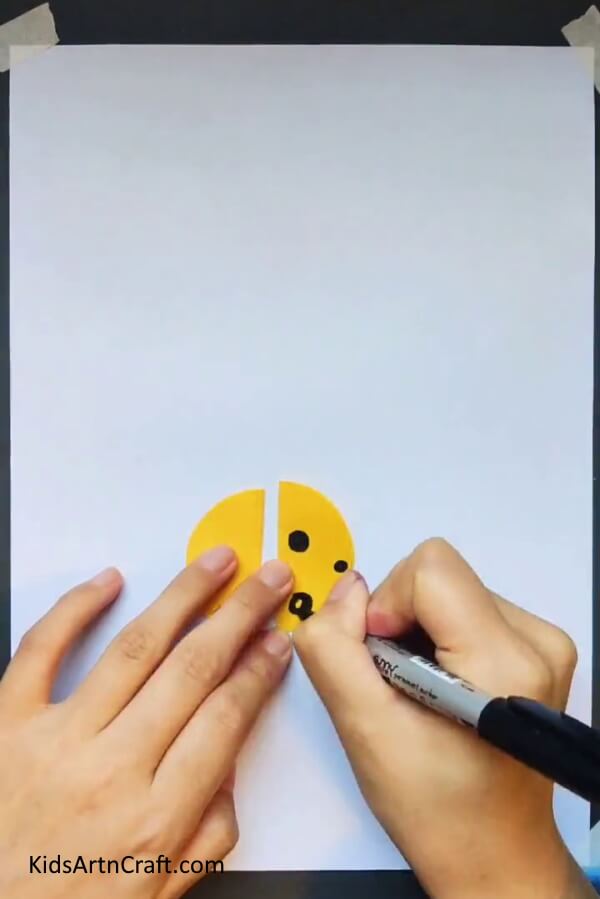

Let’s start! Take your colored paper and cut two circles from it using scissors. Then fold those circles and draw little random circles on both pieces with the use of the black pen.
Step 2: Making Wings With Remaining Color Papers
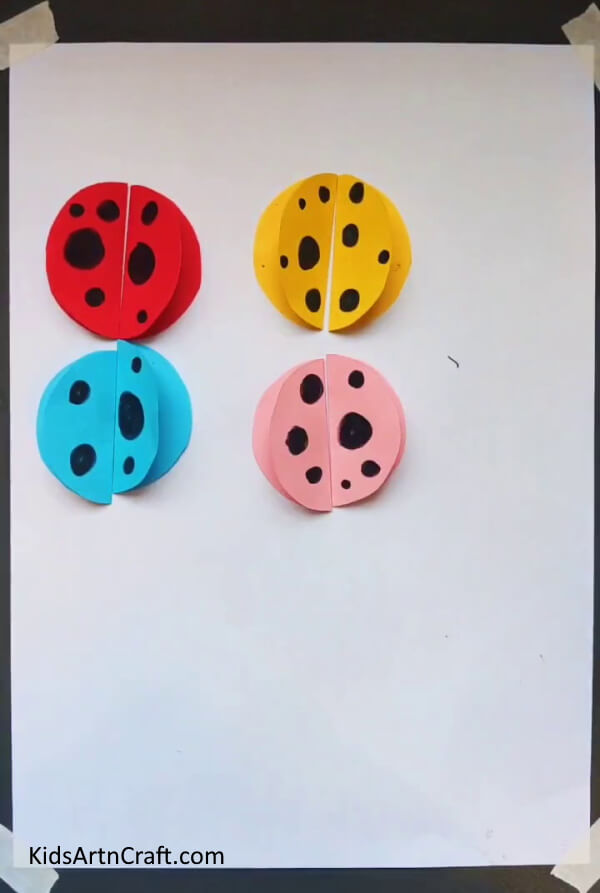

Cut two circles from each color paper and as before, fold it all, draw small circles on it, and keep it for later use.
Step 3: Drawing Trees with Acrylic Paint
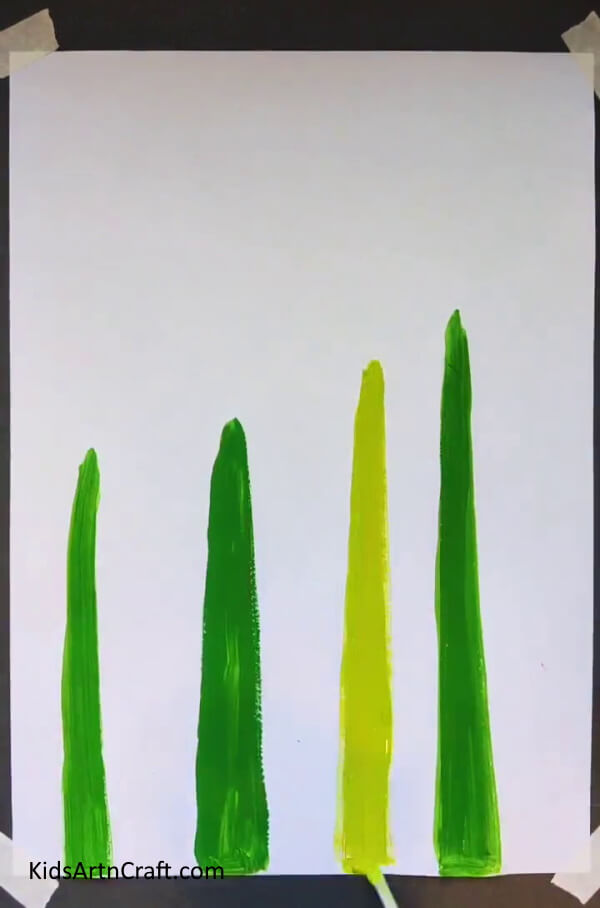

Take your painting brush and take green paint on it. To draw trees, move your brush up and down on white paper to paint trees. Then, take yellow paint on your brush and draw one yellow tree in-between the green tree as shown in the image. Make sure, the top end should be thin and the bottom should be broad.
Step 4: Highlighting Your Trees
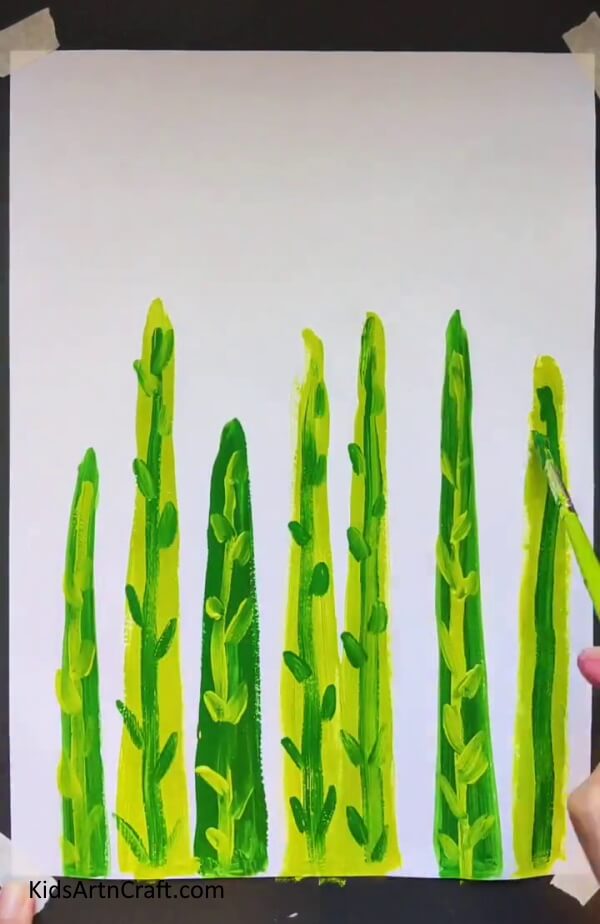

To highlight trees, take green paint on your brush and paint branches on yellow trees. Then, take yellow color paint and as before, draw branches on green trees as shown.
Step 5: Painting Black Circles
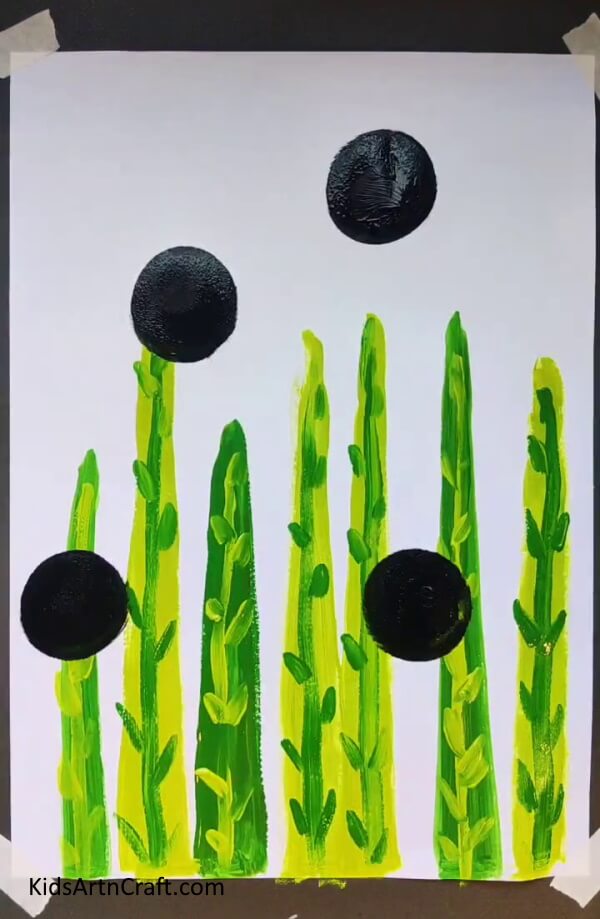

Now we going to draw the body of the ladybug, take black color paint on your brush, and draw some black circles randomly on trees.
Step 6: Drawing Small Circles Near Big Black Circles
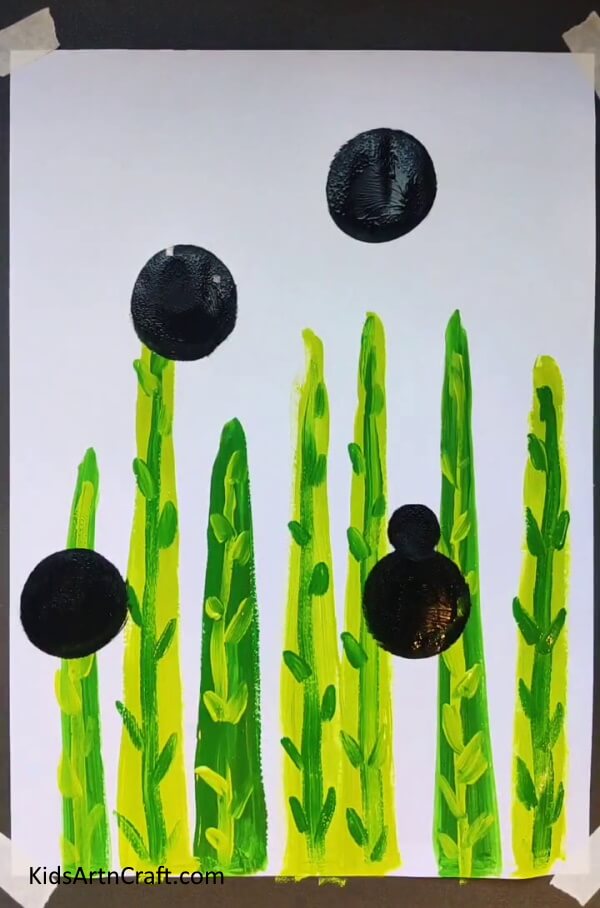
Draw small circles near all those big black circles, that we paint before for the ladybug’s body.
Step 7: Pasting Wings on Bug’s Body
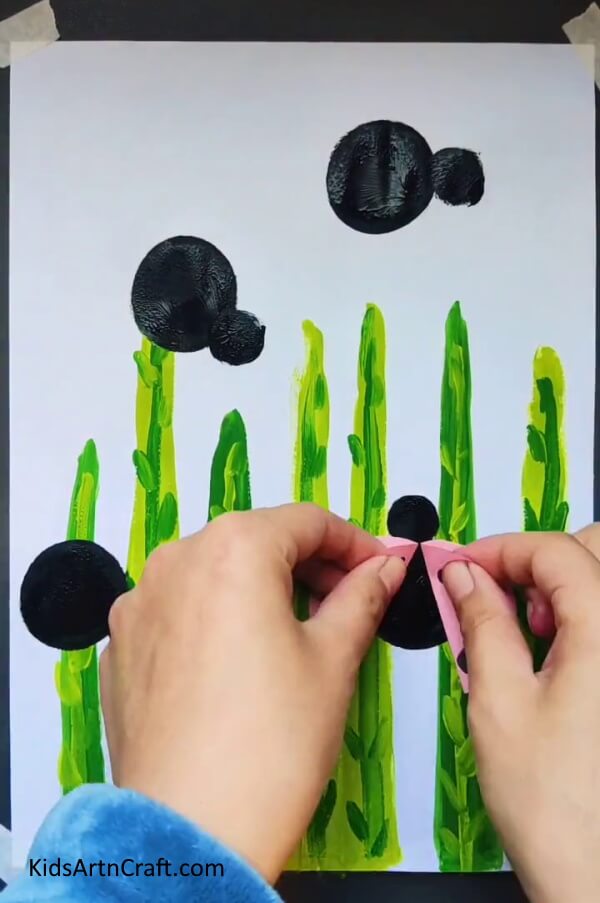

Take all wings, which we make before, and paste the wings on that big black circles, which we paint before for the bug’s body.
Step 8: Pasting Remaining Wings on Bug’s Body


Paste all wings on the bug’s body as shown in the image.
Step 9: Pasting Doll Eyes for Bugs


Take small doll eyes and paste two eyes on the small black circle using glue.
Step 10: Drawing Antenna
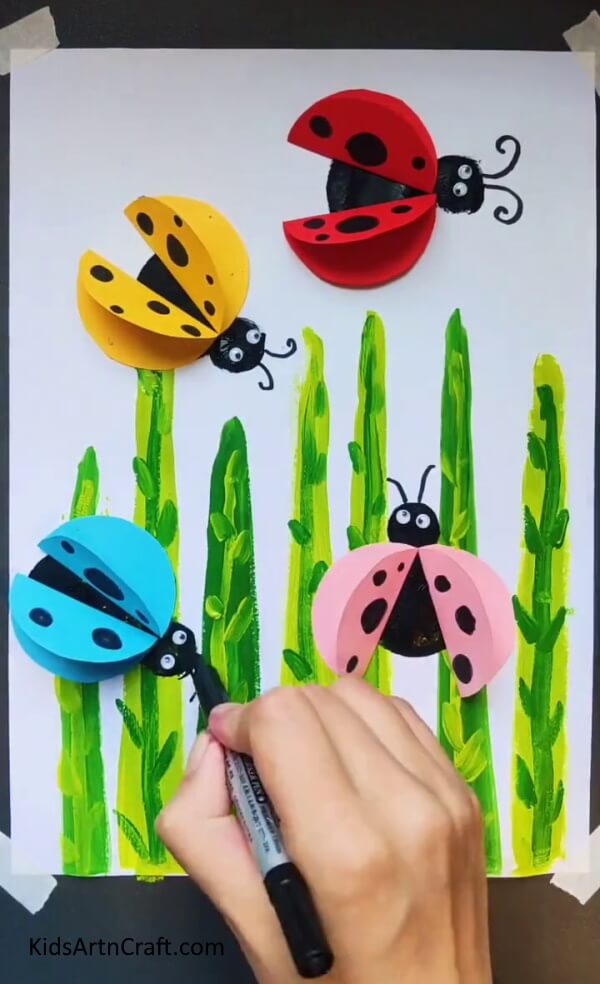

Draw two antennae at the top of each bug’s head using a black pen.
Finishing our Ladybug Craft by Decorating It!!
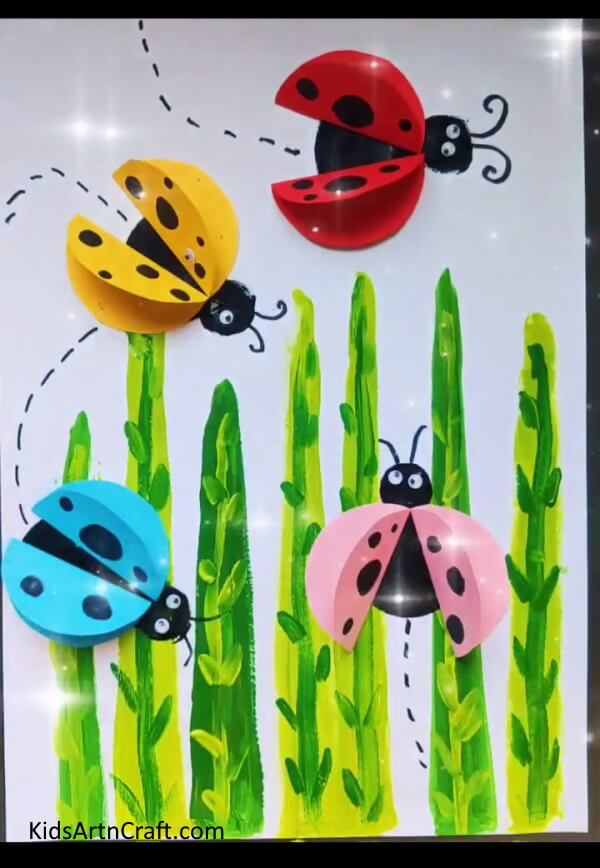

Draw small lines under each ladybug as shown in the image to decorate our colorful ladybugs. You can frame it and hang this beautiful painting on your wall for decoration.
This is a colorful craft which gives pleasant for the eyes. We hope you all like this beautiful ladybug craft. In this tutorial, we give you easy instructions to make this craft. You can also make these little bugs on your wall instead of using white sheets to decorate your room. Please put your comments in the comment box and tell us how do you create this craft.
Thank you for visiting our website!
Some More Ladybug Craft Tutorial
Adorable Paper Ladybug Craft For Children


Image Source/Tutorial: Kids Art & Craft
This paper ladybug craft is a great activity for children of all ages! It’s an easy and fun craft that will keep them busy and help them learn about colors and shapes. Plus, the end result is an adorable paper ladybug they can proudly display!
Follow us on Youtube for art and craft tutorials and much more.
More Articles from Kids Art & Craft
- How To Make Cardboard Tube Swan Craft Tutorial For Kids
- Easy Frog Paper Craft For Kids Easy Tutorial
- How to make Paper Butterfly Easy Tutorial For Kids
- Frog-Shaped Paper Umbrella Kids Craft For Kids
- DIY Paper Butterfly Craft Tutorial For Kids