Painting
Pretty Flower Bouquet Painting Artwork Tutorial

Looking for a pretty flower bouquet artwork tutorial? If yes, then you have come to the right place. Here you will get step-by-step easy instructions to make it.
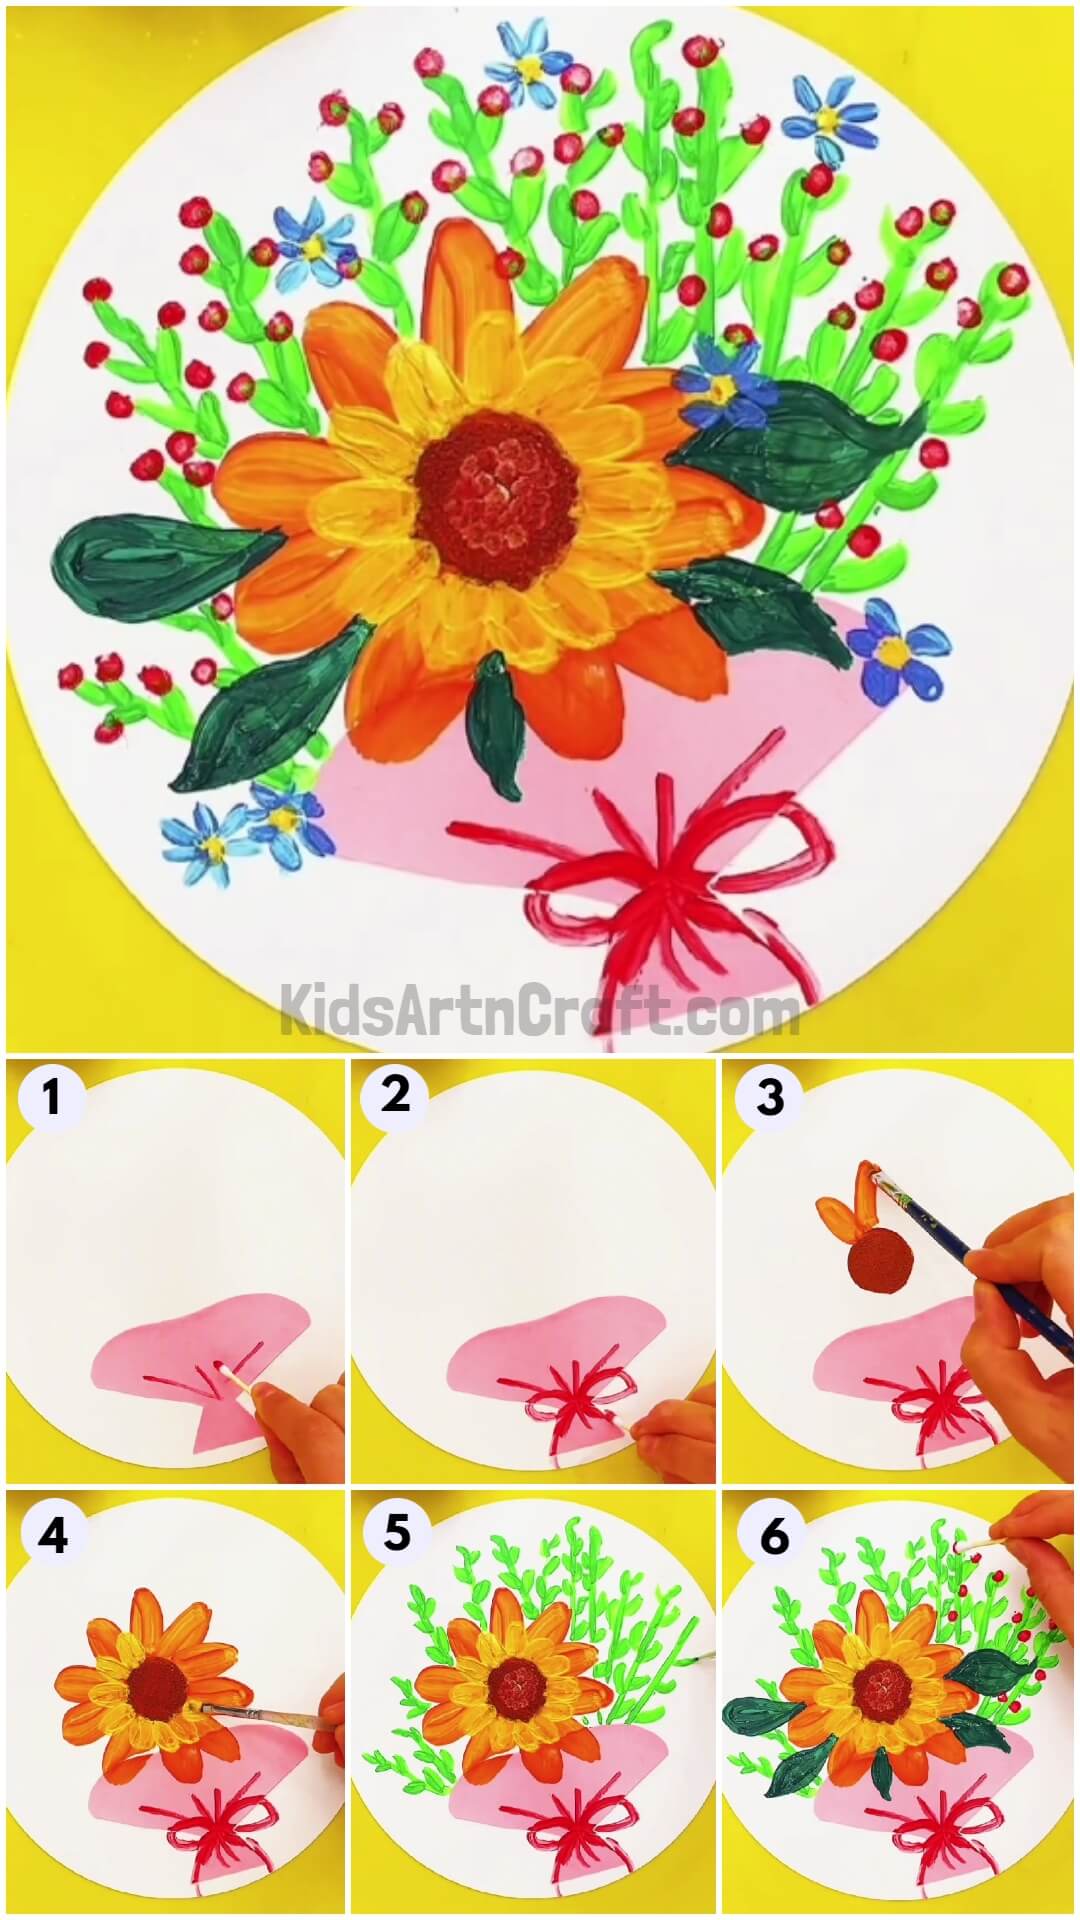
Simple Pretty Flower Bouquet Painting

Read More: Realistic Tree Landscape Stamp Painting Using Fruit foam
Materials Required
- A white circular sheet
- A pink colored translucent paper
- Ear swabs
- Poster color of red, brown, orange, yellow, light green, dark green, and blue colors
- A paint brush
- A pair of scissors
- Glue
Procedure
Step 1: Cut the Base of the Bouquet
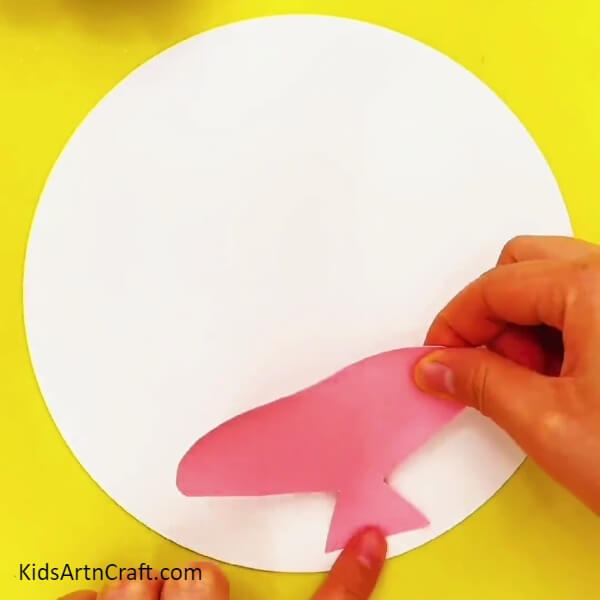

Take the pink translucent paper and cut it using a pair of scissors, make it look like the base of the bouquet. Look at the picture for better understanding. Paste the cut piece on the white circular sheet using glue.
Step 2: Add Details on the Base of the Bouquet
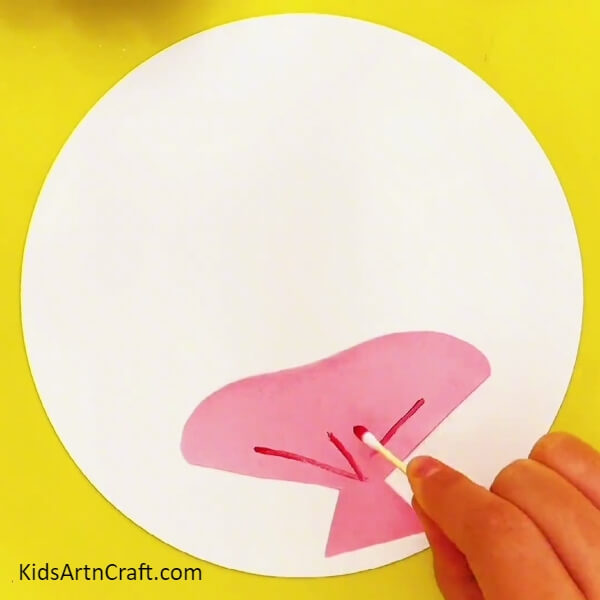
To make the cut piece look like the base of the bouquet add some details.
Step 3: Paint a Ribbon on the Base of the Bouquet
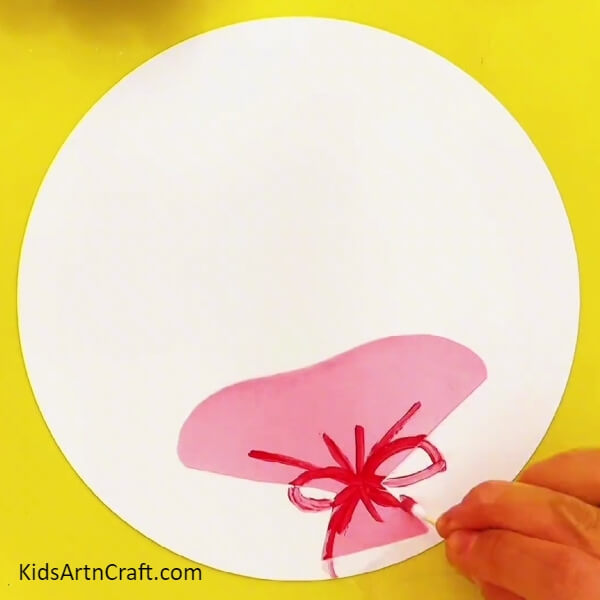
To make a ribbon, take red poster color and an ear swab. Draw a ribbon on the base. Refer to the given picture.
Step 4: Flower of the Bouquet
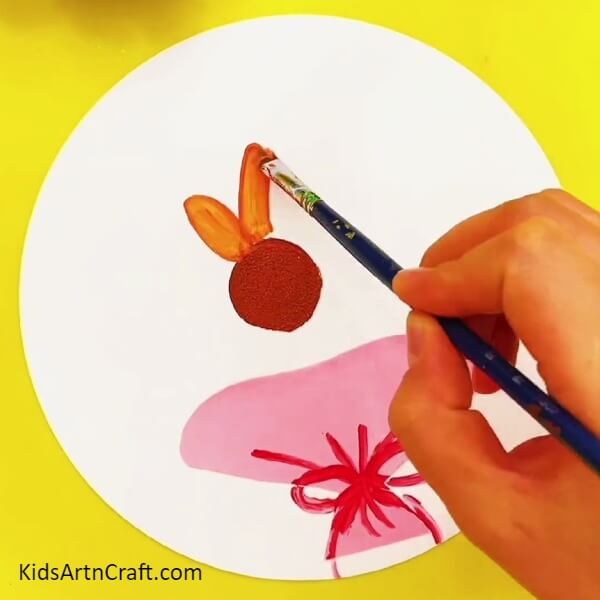
For the center of the flower petals, take a brown poster color and a paintbrush. Paint the flower center as shown in the picture.
Step 5: Paint the Petals of the Flower
Take an orange poster color and a paintbrush to paint the petals of the flower.
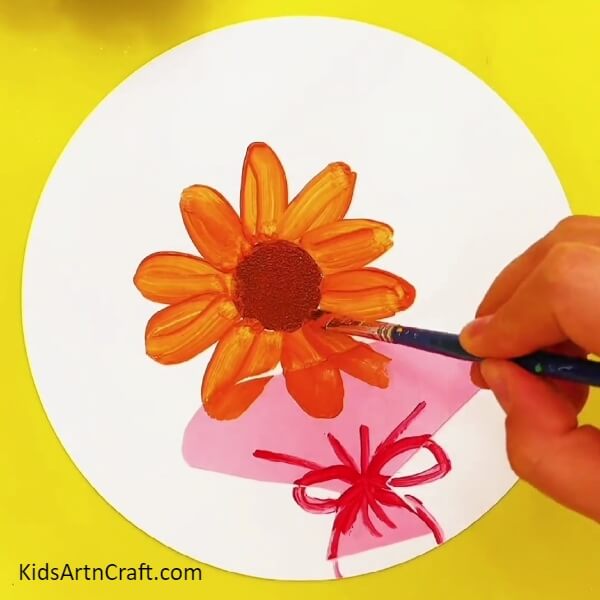
Step 6: Add Details on the Petals
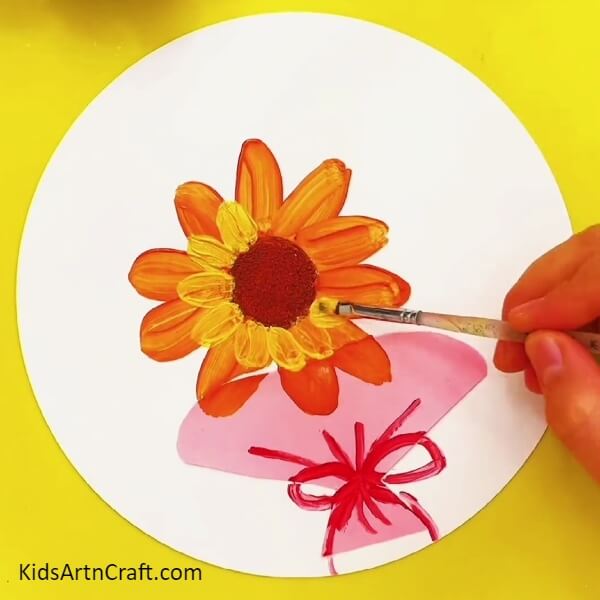
By using a yellow poster color, add details on the petals. Paint small petals on the orange petals as shown in the picture.
Step 7: Add Details on the Central Part of the Flower
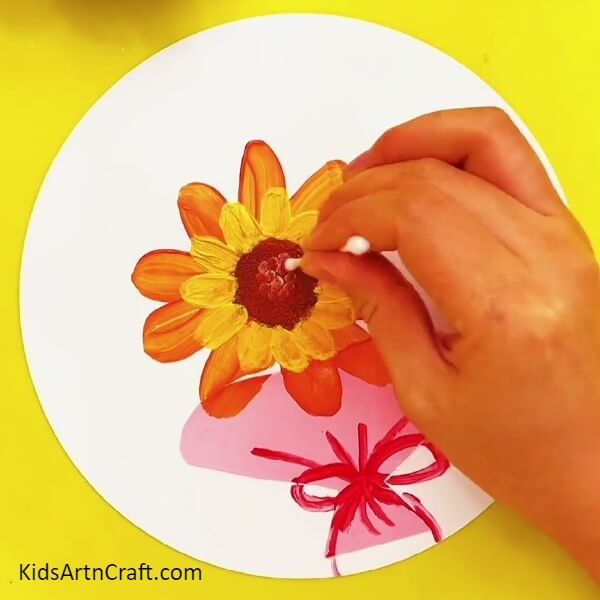
Take a yellow poster color and an ear swab. Just make imprints of the ear swab dipped in yellow color on its center.
Step 8: Additional Details on the Bouquet
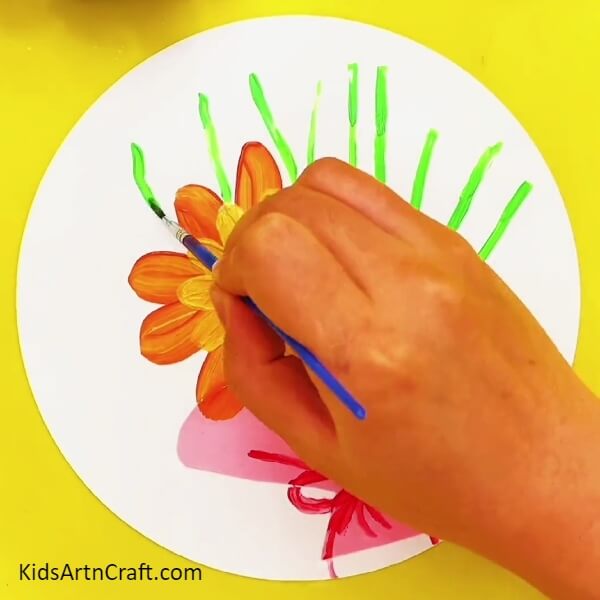
To make it more visually appealing, paint some green plants. Take a light green poster color and the paintbrush and draw the green colored stems.
Step 9: Paint the Leaves of the Green Plants
Use the same light green poster color and the paintbrush to make the leaves of the stem. Look at the picture for the reference.
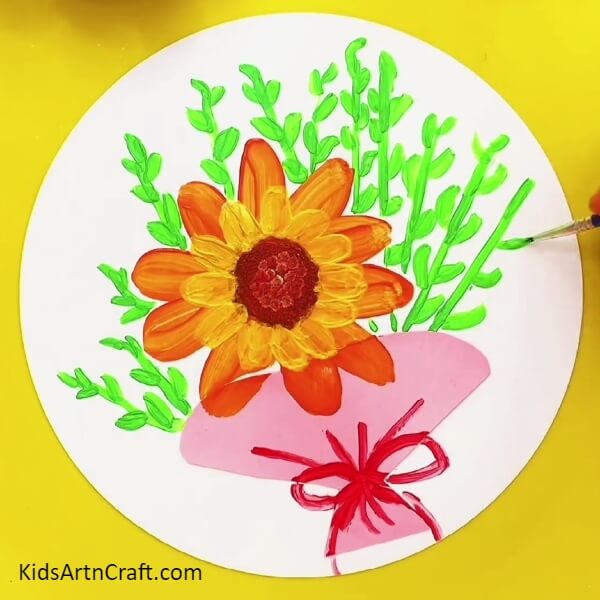
Step 10: Draw Leaves of the Flower
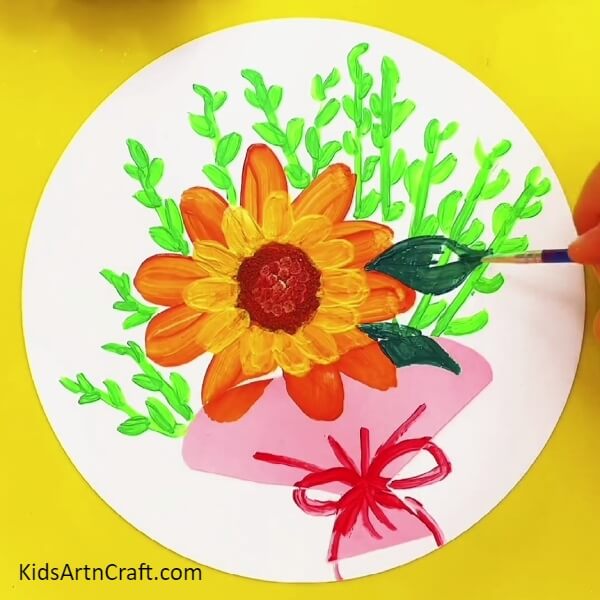
Take a dark green poster color and the paintbrush to draw the leaves of the flower. Draw 3-4 leaves.
Step 11: Some Details
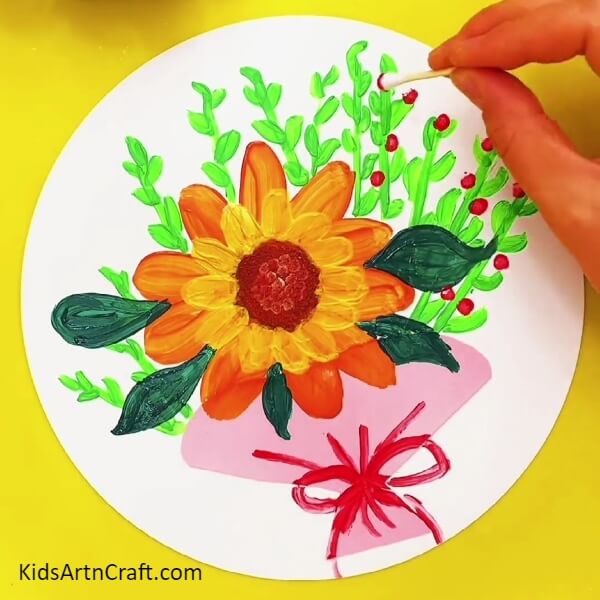
By using an ear swab and red poster color make dots on the green plants as shown in the picture.
Step 12: Finishing Touch
For final touch, make tiny flowers on the green plants. Take ear swabs and blue, and yellow and blue poster colors. Make the tiny flowers as shown in the picture.
Pretty Flower Bouquet Painting for Kids

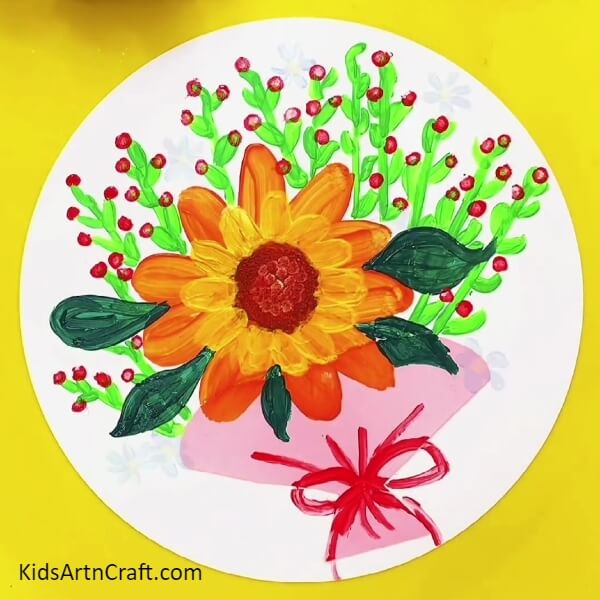
A beautiful and eye pleasing flower bouquet painting is ready! It is a very colorful painting. This tutorial is followed by step-by-step instructions. By following those instructions and getting some help from either teachers and elders, this art work could be successfully made. Get on action, grab your brushes and colors and become an artist!
A beautiful artwork which can be made just from the tutorial. The pretty bouquet could be made by 6 to 9 years of children. This activity will polish their creative skills which will help them in future.
Thanks for visiting our website.
Follow us on Youtube for art and craft tutorials and much more.
More Articles from Kids Art & Craft
- DIY Flower Basket Step by Step Tutorials for Kids
- How to make Sunflower From Paper Cup Craft
- DIY Easy Paper Flower Craft For Kids
- How to Make Clay Flower Easy Tutorial for Kids
- DIY paper Sunflower Easy craft For Kids