Paper Crafts
How to make Paper cherry Easy Tutorial for Kids

Welcome to this easy tutorial on how to make paper cherries! Making paper cherries is a fun and easy activity that children can enjoy doing with their parents or educators. It requires just a few supplies and can be enjoyed by kids of all ages. This tutorial will show you how to make a beautiful paper cherry that you can use for decorations, gifts, or just to have fun with. With this tutorial, you and your kids will be able to make paper cherries in no time! Let’s get started! So, get ready to make something special with your kids!
Easy Paper Cherry Craft Tutorial With Step by Step Instructions

Read More: How to Make Paper Sheep With Step-By-Step Tutorial
Materials Required
- Colored Paper( Red, Green)
- Pencil
- Glue
- Scissors
- Black marker
Procedure
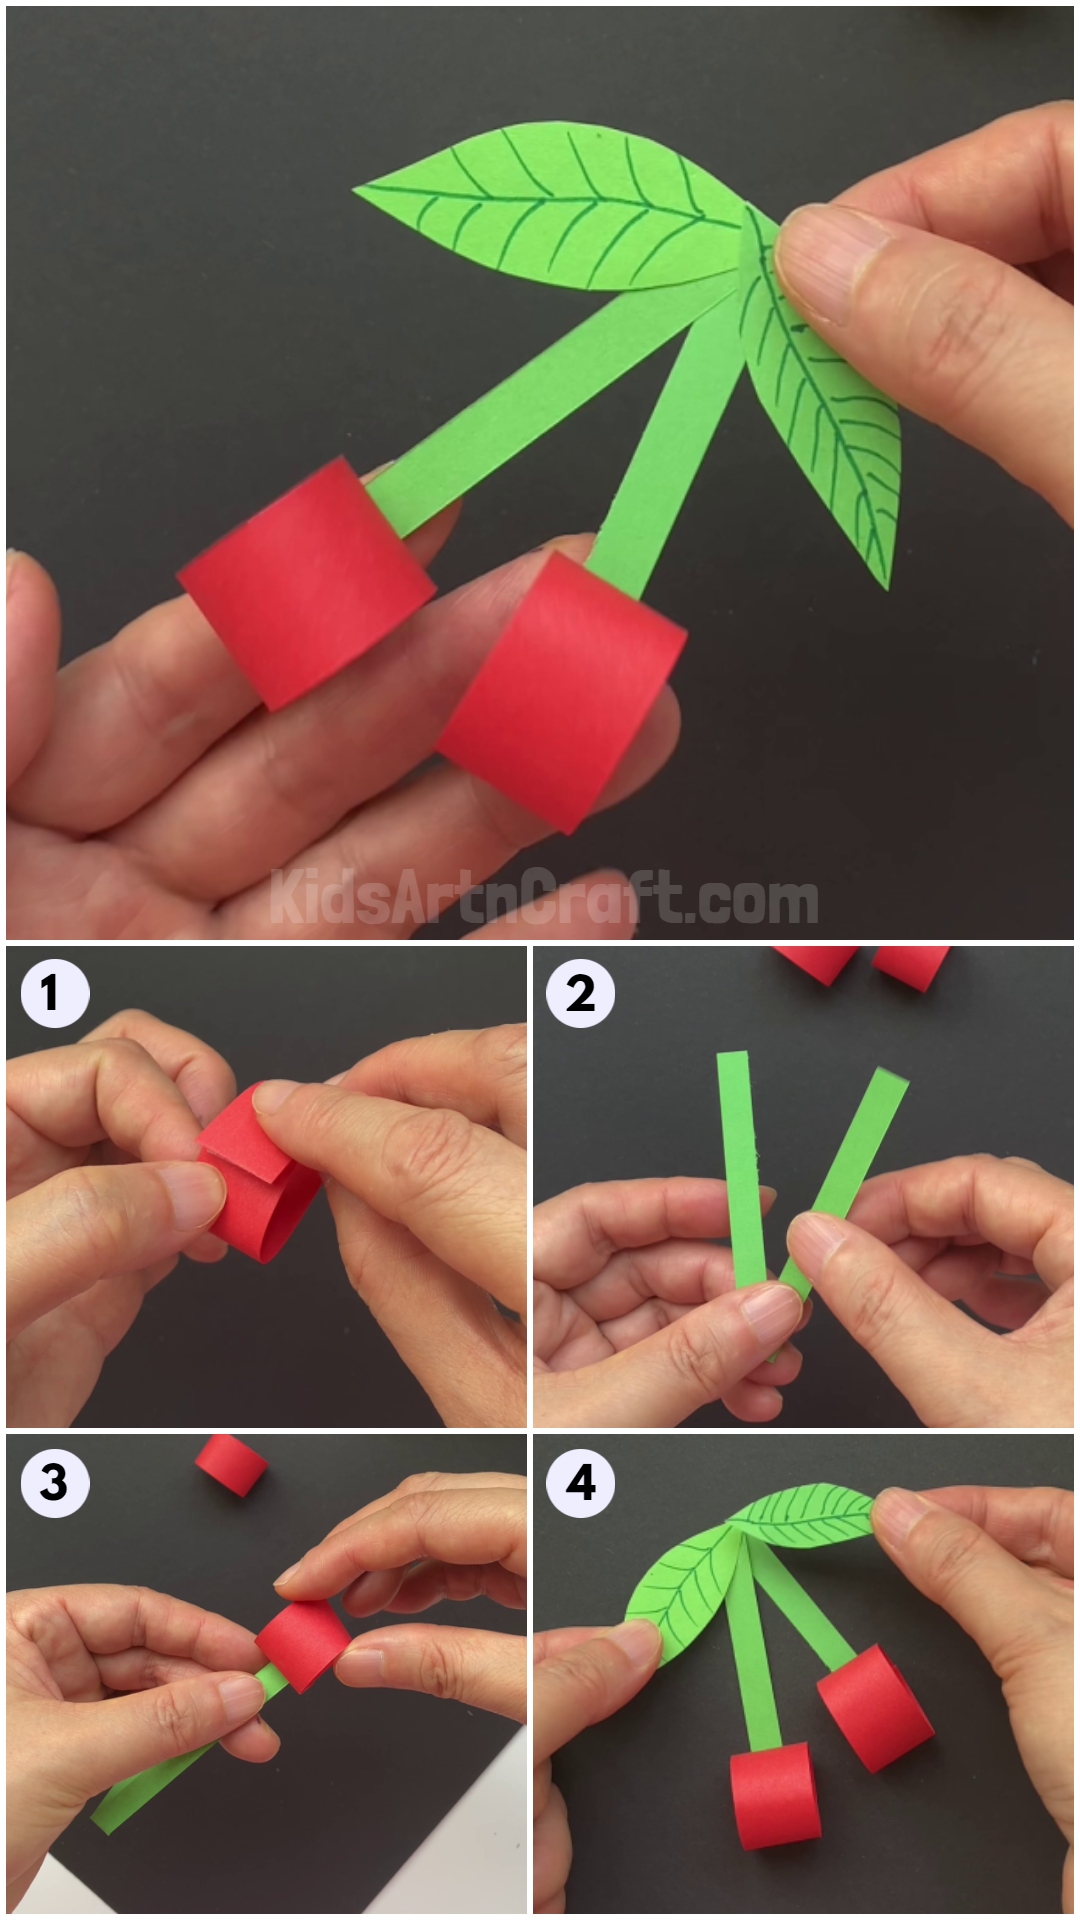
Step-1: Rolling A Rectangular Paper Strip
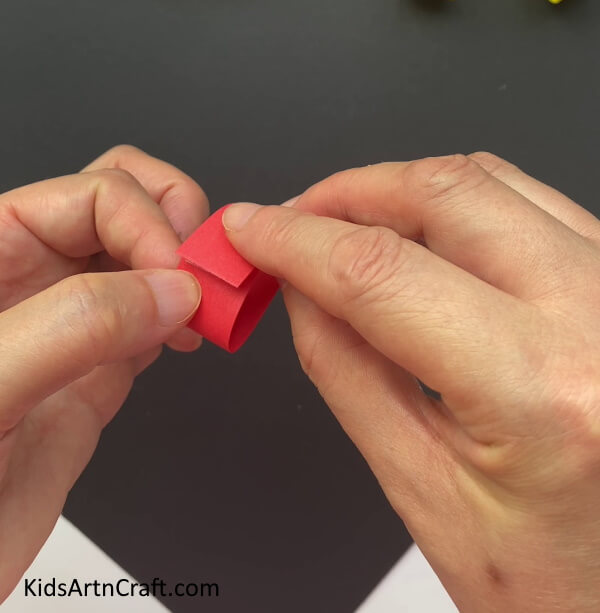

Let’s begin by taking red paper. Cut a rectangular strip out of it. Roll it to form a ring as shown.
Step-2: Applying Double Side Tape On The Ends
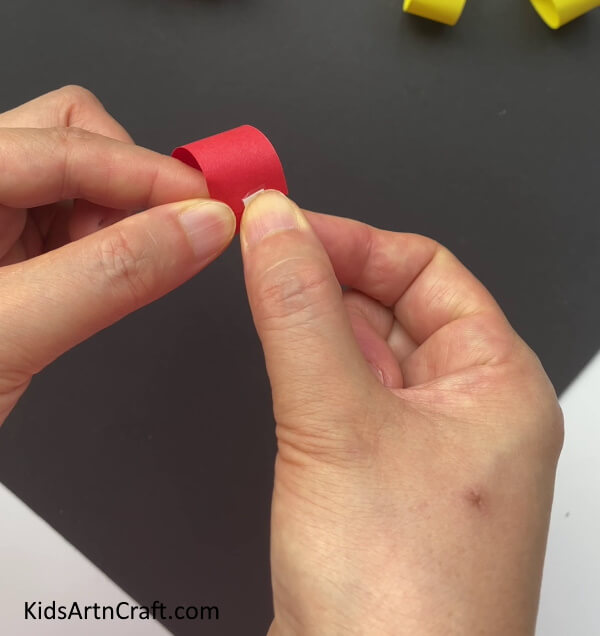

Now, paste the ends of the red ring with double side tape.
Step-3: Making One More Red Ring And Folding Green Strip
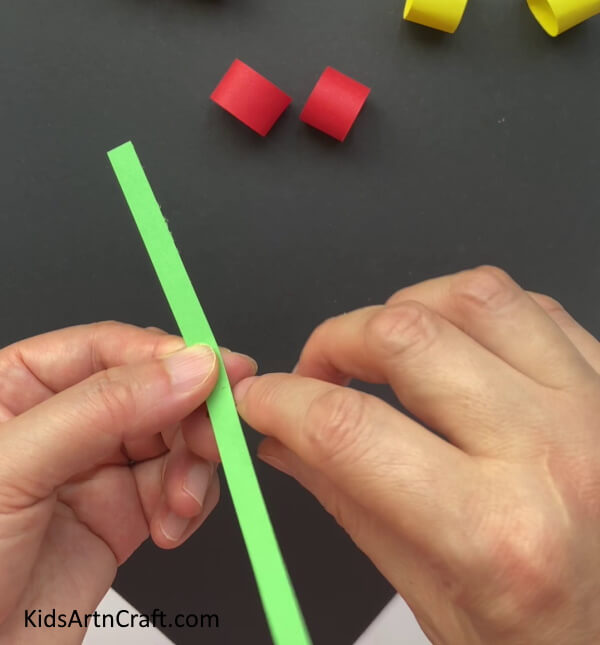

Repeating the above steps, make one more red ring. Take green paper and cut a rectangular strip out of it. Fold it in half to get the middle crease as shown.
Step-4: Making A V-Shape From The Green Strip
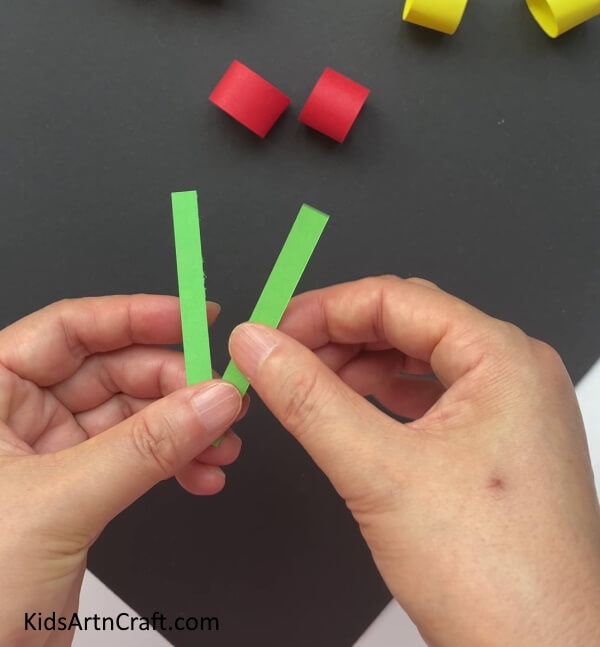

Now, fold the green strip along the middle crease in such a way that it forms a v-shape as shown.
Step-5: Pasting The Red Ring On The Green Strip
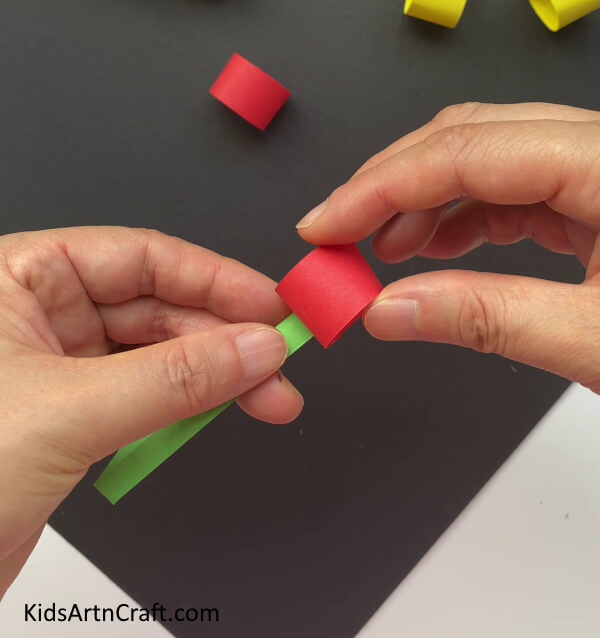

Now, take a red ring and paste it on the tip of one of the ends of the green strip as shown. Now, similarly, paste the other red ring on the other end.
Step-6: Adding Leaves To The Paper Cherry
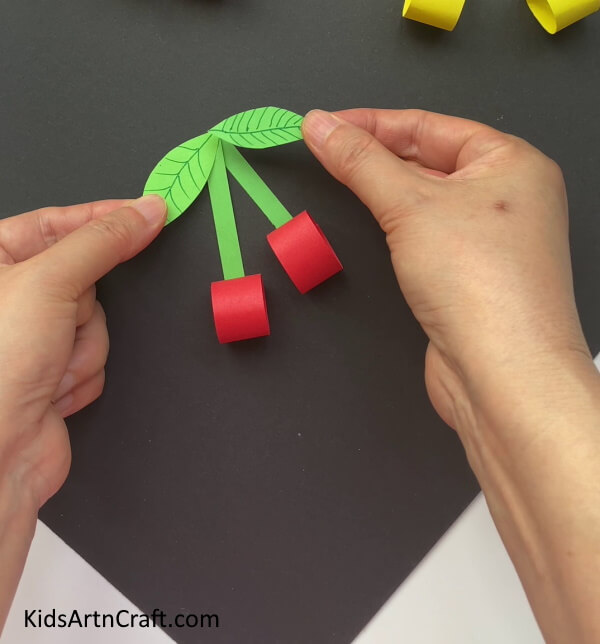

Take green paper, and cut two leaves out of it. With the help of a black marker, draw veins on the leaves. Paste the leaves on the top of the green strip as shown.
This Is The Final Look Of Our Paper Cherry!
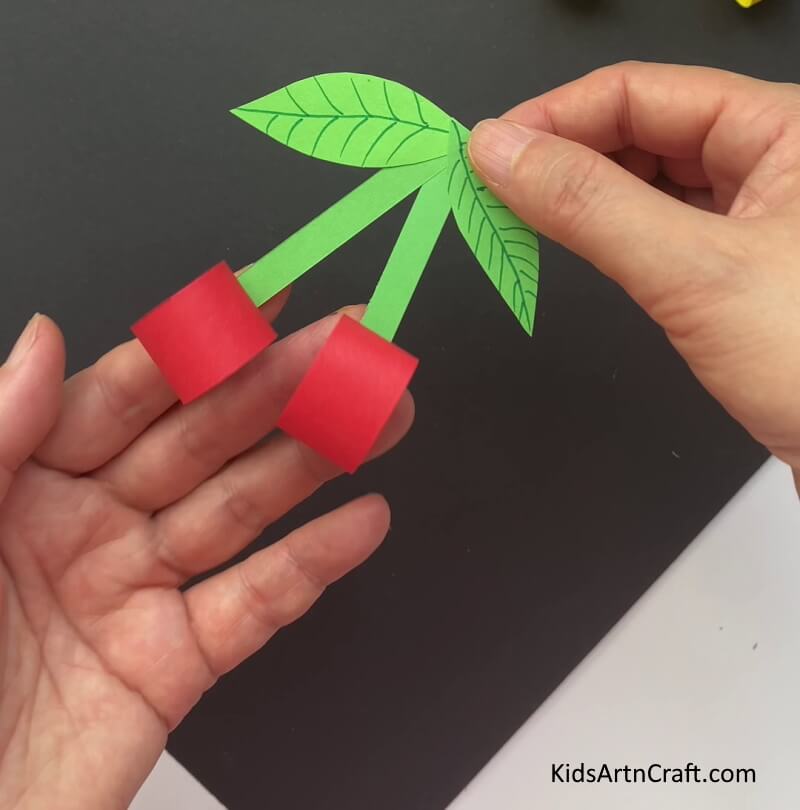

Congratulations on creating a beautiful paper cherry! It looks amazing and it was a lot of fun to make. What a great way to add a touch of color to your paper craft project! We hope you enjoyed learning how to make this paper cherry and that you have a lot of fun creating more paper crafts! The final outcome of this paper cherry is simply stunning! Have fun!
FAQ’S How to Make Paper Cherry Easy Tutorial for Kids
1. What color paper should I use?
You can use any color paper you like! Red is traditionally used for cherries, but you can get creative and use different colors.
2. How do I make the cherry look realistic?
To make the cherry look realistic, you can add details like coloring the edges of the petals or adding dots with a marker.
3. What can I do with my paper cherries?
You can use your paper cherries to decorate cards, scrapbooks, or other crafts. You can also use them to make a cherry tree or garland.
4. How long does it take to make a paper cherry?
It should take about 5 minutes to make a paper cherry.
5. Can I use different materials instead of paper?
Yes, you can use felt, fabric, or other materials instead of paper.
Making paper cherries is an easy and fun activity for kids. With just a few simple materials, they can have a fun craft to take home and display. This concluded our tutorial on how to make paper cherries. With a few simple steps, your kids can have a fun and creative activity to do. We hope this tutorial was helpful in teaching your kids how to make paper cherries!
Follow us on Youtube for art and craft tutorials and much more.
More Articles from Kids Art & Craft
- Simple Paper Crafts Make At Home Video Tutorial for Kids
- Easy to Make Paper Crafts Video Tutorial for Kids
- Easy Paper & Popsicle Cloud Rainbow Craft For Kids
- Recycled Plastic Bottle Dragon Craft Tutorial for Kids
- How To Make Cardboard Tube Swan Craft Tutorial For Kids