Recycled Crafts
DIY Paper Cup Basket Step-by-Step Tutorials

Make your own paper cup basket with this easy step-by-step tutorial! Learn the basics of paper crafting and create a beautiful and functional piece of decor. Perfect for everyday use, special occasions, or gifting.
Welcome to the article DIY Paper Cup Basket Tutorial! In this tutorial, we’ll show you how to make a basket using paper cups in a few simple steps. It’s ideal for special occasions like weddings and birthdays. It is a simple and quick project that can be done with materials you have around your home.
It’s a great way to make a DIY basket out of a paper cup – perfect for making chocolate bowls, storing jewelry, or even as a decorative element in your living space. With easy-to-follow steps and simple materials, you can quickly create a beautiful and practical basket for your home. Be sure to check out this tutorial for a fun and creative project!
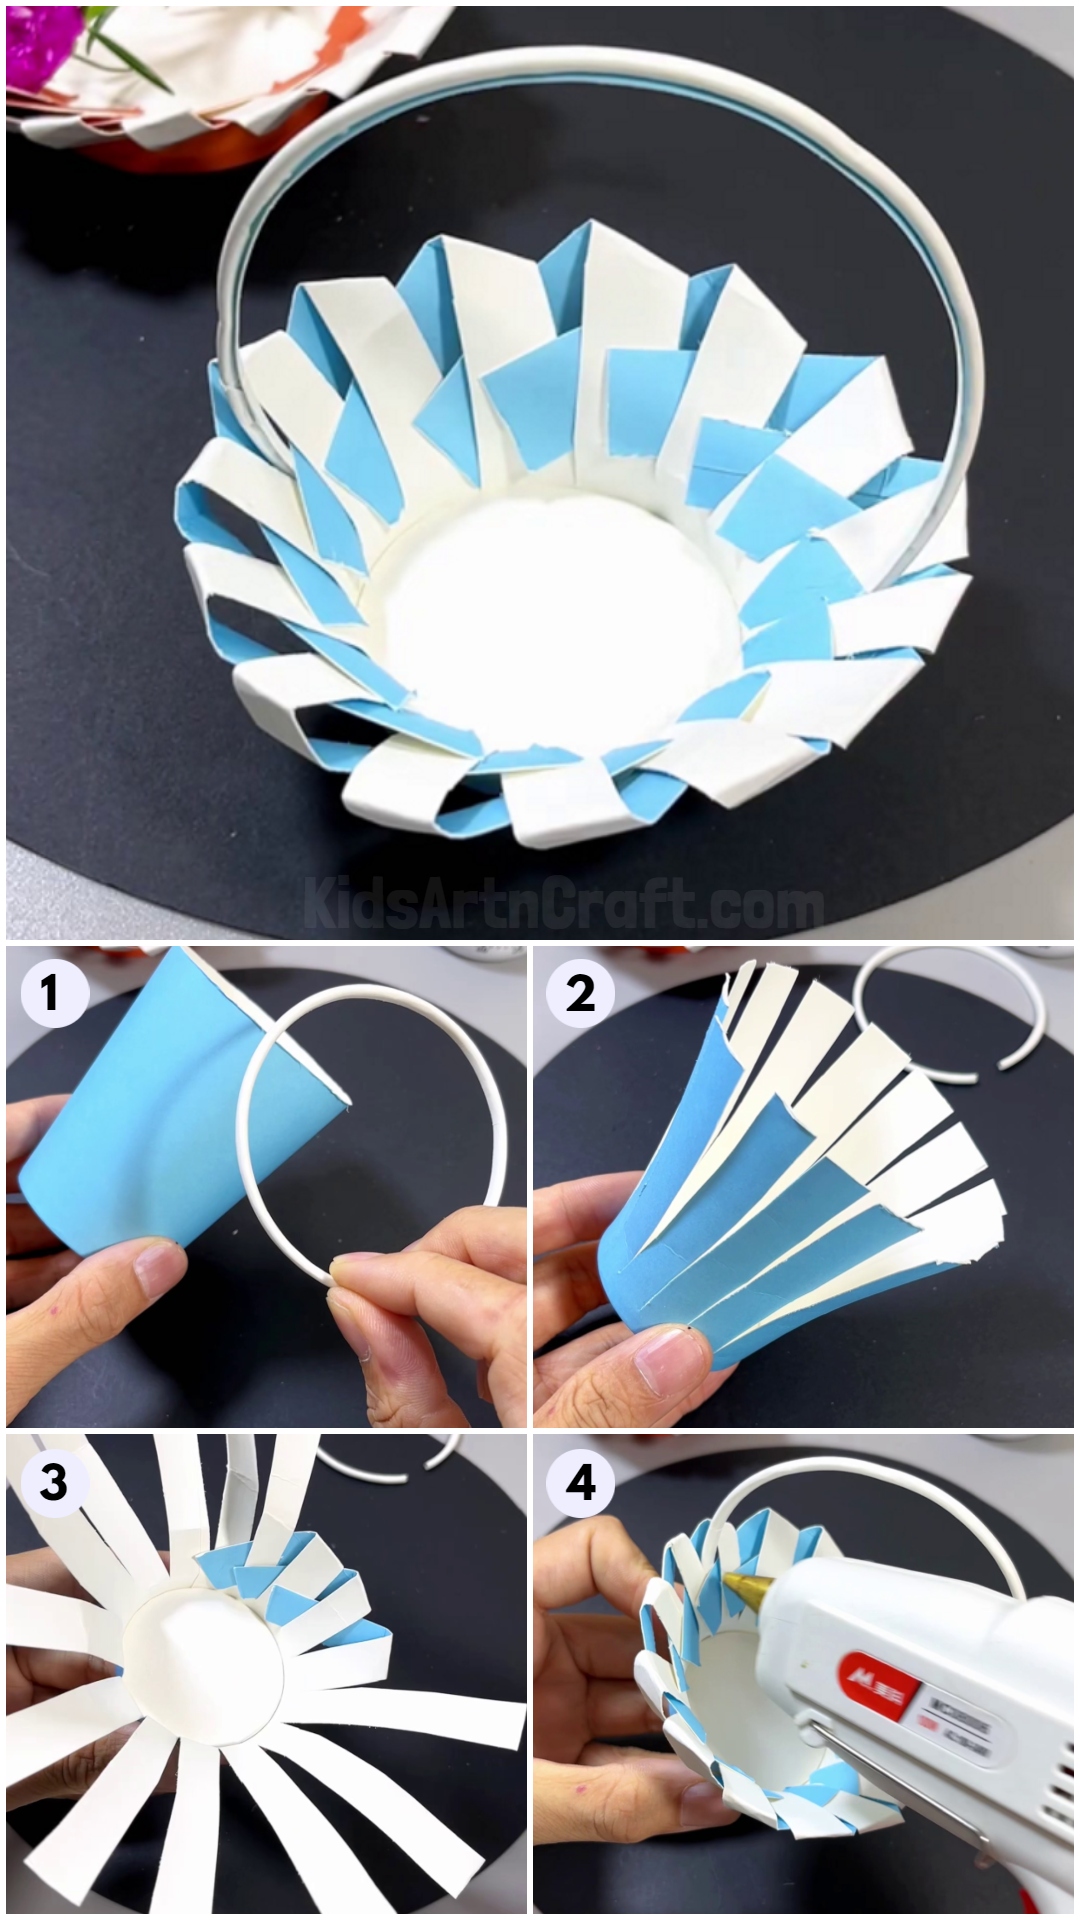
Easy Paper Cup Basket Craft Tutorial With Step by Step Instructions

Read More: How to Make Paper Cup Wrist Watch Tutorial for Kids
Materials Required
- Paper Cup
- Hot Glue
- Scissors
Procedure
Step 1: Grabbing A Paper Cup
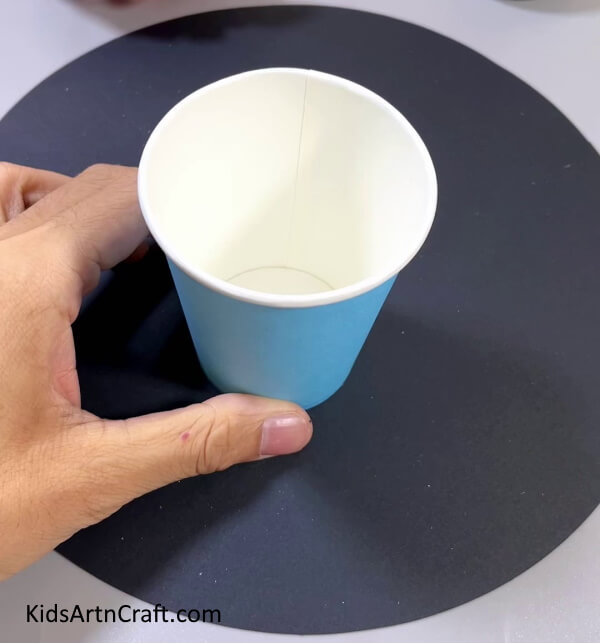

Begin the craft by grabbing a paper cup. You can choose any color for your paper cup.
Step 2: Cutting The Top Rim
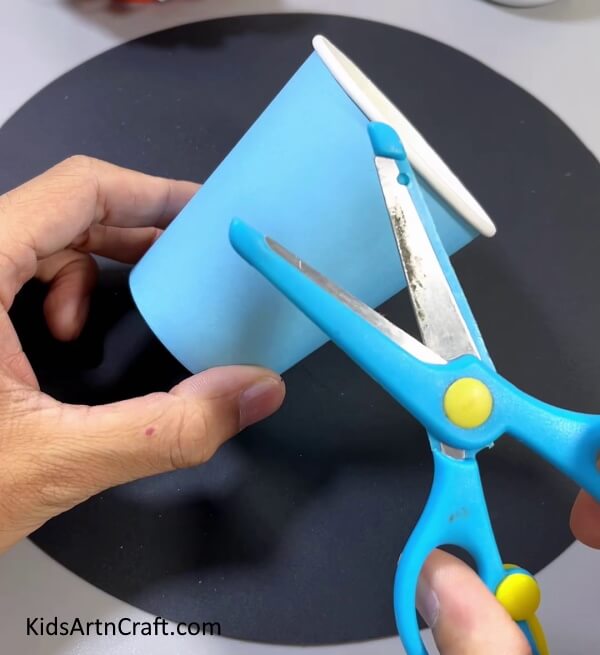

Take a pair of scissors and cut the top rim of the paper cup.
Step 3: Separating Rim From Cup

Carefully, cut out the rim from the paper cup.
Step 4: Cutting Strips
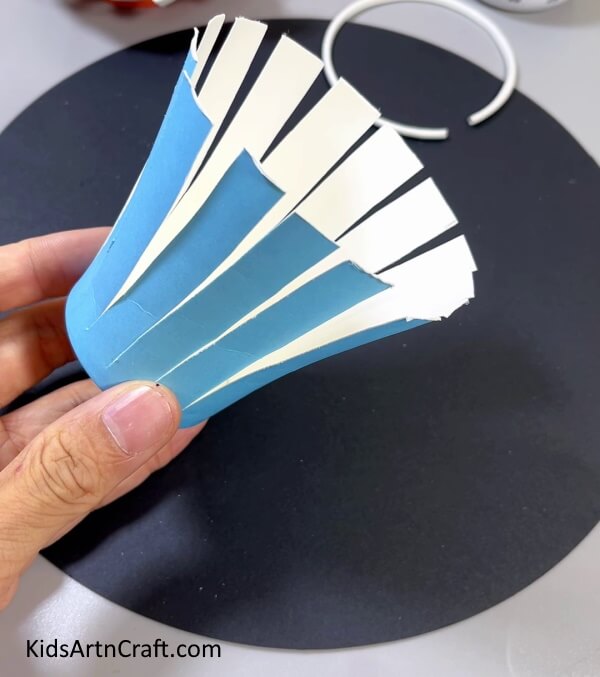

Once the rim is separated from the paper cup, cut the strips. Don’t cut them till the end, leave a margin at the end.
Step 5: Folding Paper Strip
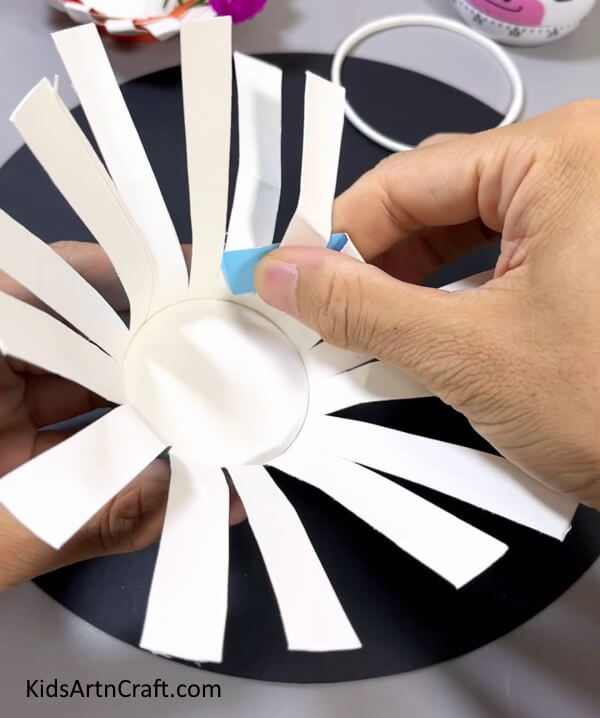

Now, fold a paper strip to cross the right adjacent strip and tuck in the strip as shown in the above image.
Step 6: Tucking In Paper Strips


Similarly, fold the strips to crisscross the right adjacent strips.
Step 7: Repeating Process To Form Basket
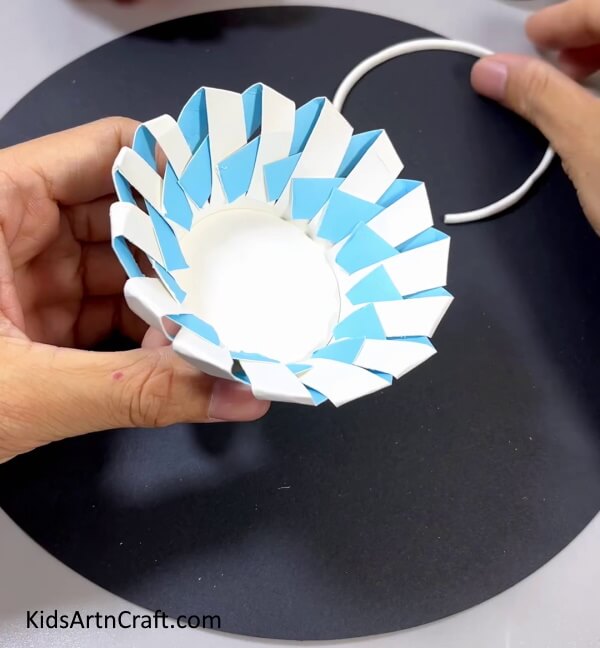

Repeat the process till all strips are folded. You should get a basket shape.
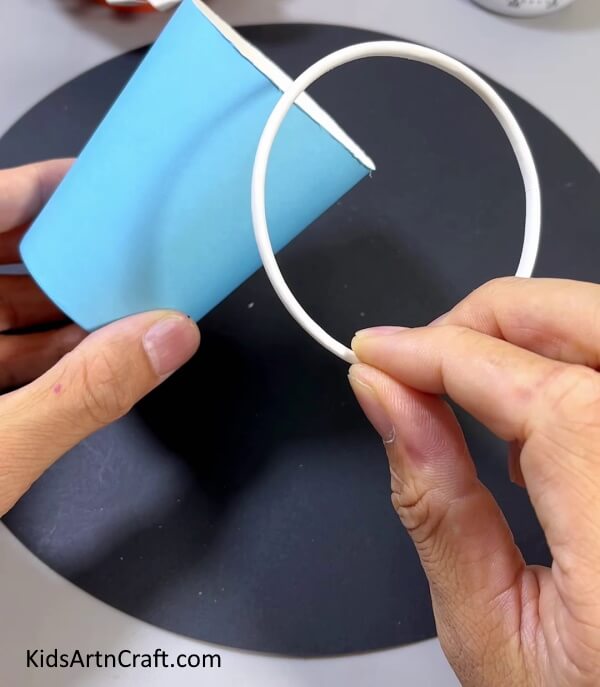
Step 8: Applying Hot Glue
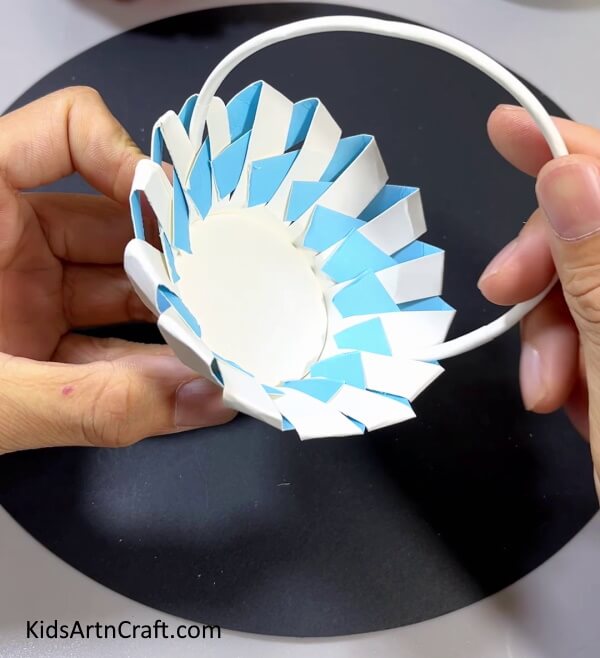

Make a cut on the rim of the paper cup. Paste it on the sides of the basket to make the handle of the basket.
Step 9: Pasting Handle
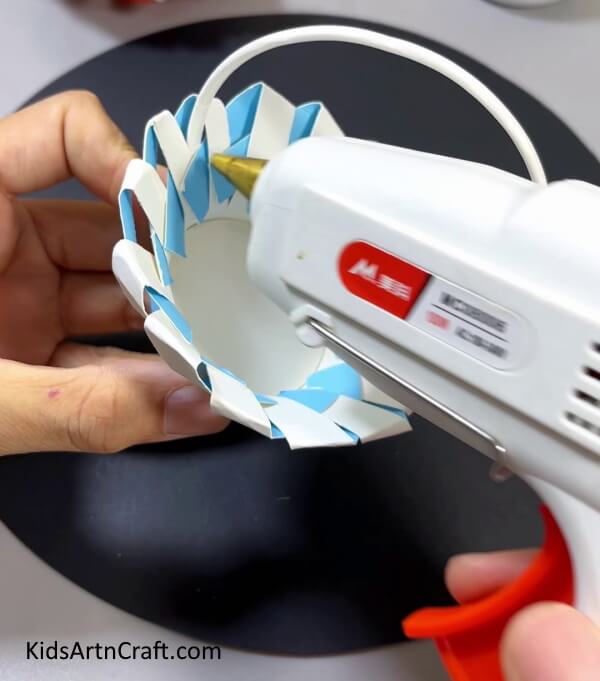

Once the basket is formed. apply hot glue on the sides of the basket.
Paper Cup Basket Craft Is Ready To Store Things!
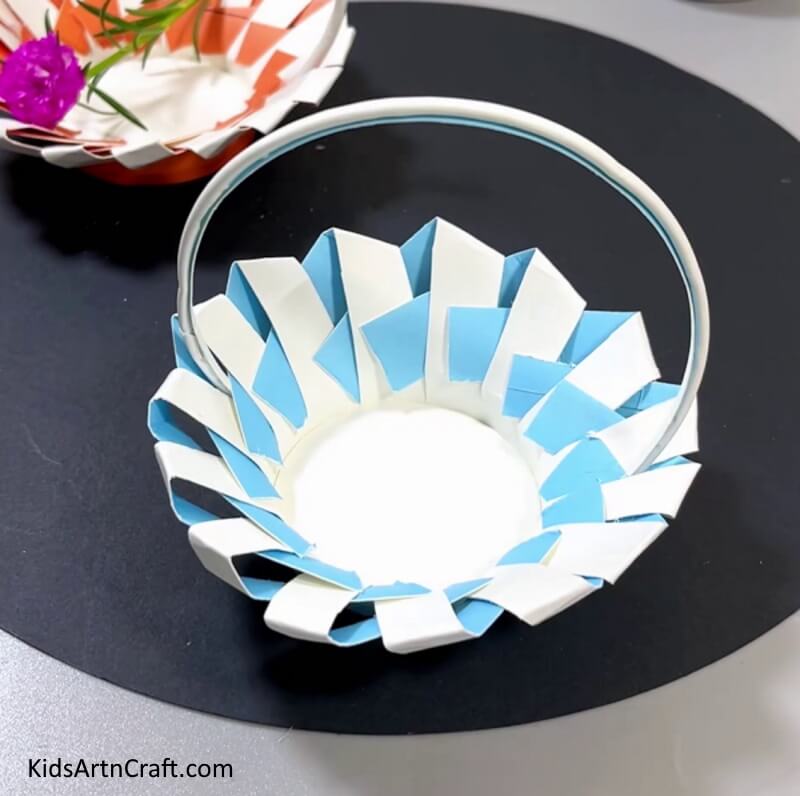

Yay! Your handmade paper cup is ready!
This DIY Paper Cup Basket step-by-step tutorial is an easy and fun project that anyone can do! It can be used to store things or add special decor to your home. You can gift it to someone to make them feel special as this basket is. This craft is for kids as well as adults to bring creativity to them. Stop thinking and make this craft today!
Follow us on Youtube for art and craft tutorials and much more.
More Articles from Kids Art & Craft
- How to Make Bubble Wrap Corn Craft Easy Tutorial
- DIY Easy Paper Cup Octopus Craft For Kids
- Water Bottle Airplane Tutorial for Kids
- DIY Crafts Making At Home Video Tutorial for Kids
- Easy Friendship Bracelets Make At Home Video Tutorial for Beginners