Kids Activities
Paper Flower Tree Craft Step-by-Step Tutorials for Kids

This article provides step-by-step tutorials for kids to create a beautiful paper flower tree craft. Learn how to make a unique and colorful tree decoration with simple materials like paper, scissors, and glue. Perfect for any season, this craft is a great way to foster creativity and imagination in children.
Welcome to our paper flower tree craft tutorials for kids! With just a few simple materials, you can create a beautiful and vibrant paper flower tree. This craft is perfect for bringing some life and color into any room. With our easy step-by-step tutorials, you and your child can have fun creating a fun and unique paper flower tree. So, grab your supplies, and let’s get started!
DIY Paper Flower Tree Craft Tutorial With Step By Step Instructions

Read More: Easy to Make Paper Pineapple with Step-by-Step Instructions
Materials Required
- Colored Construction Papers
- Cardboard Tube
- Brown Color
- Pencil
- Glue
- Scissors
Procedure
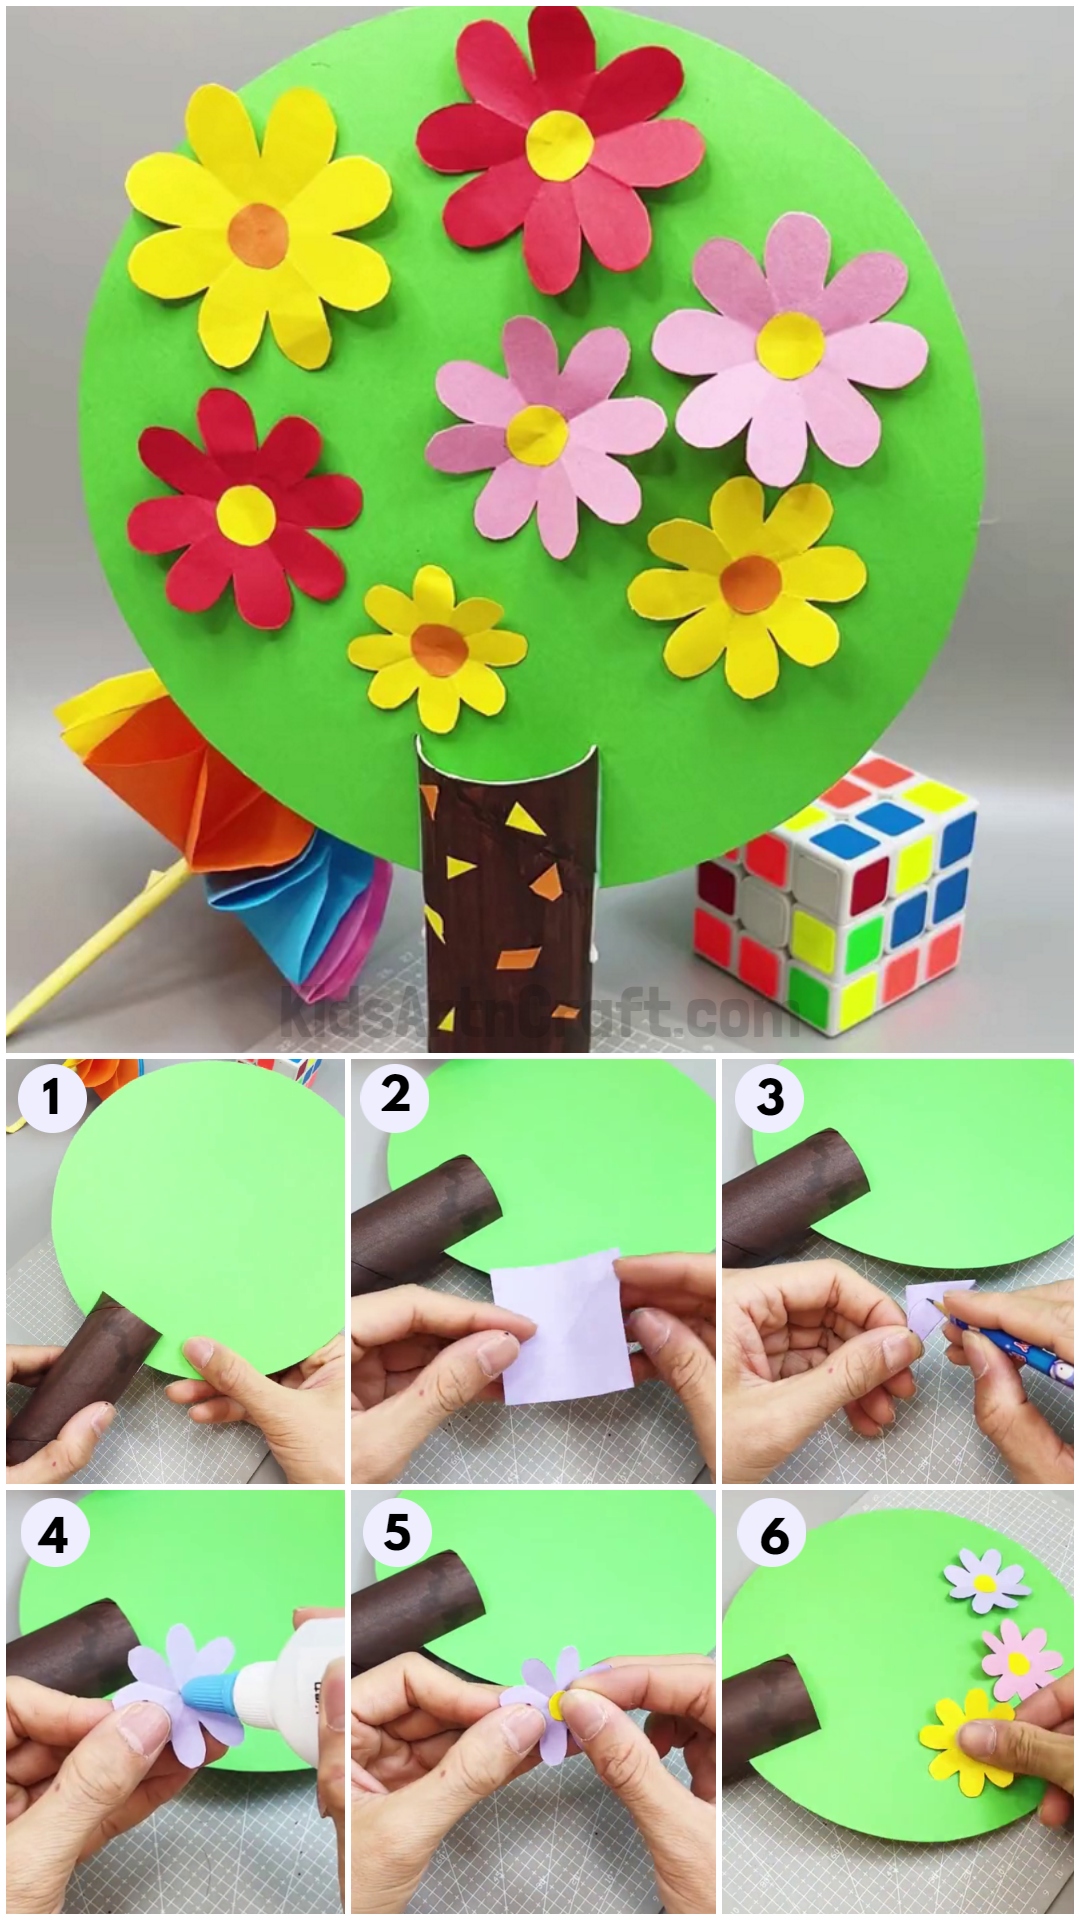
Step 1: Pasting Green Circle On Cardboard Tube

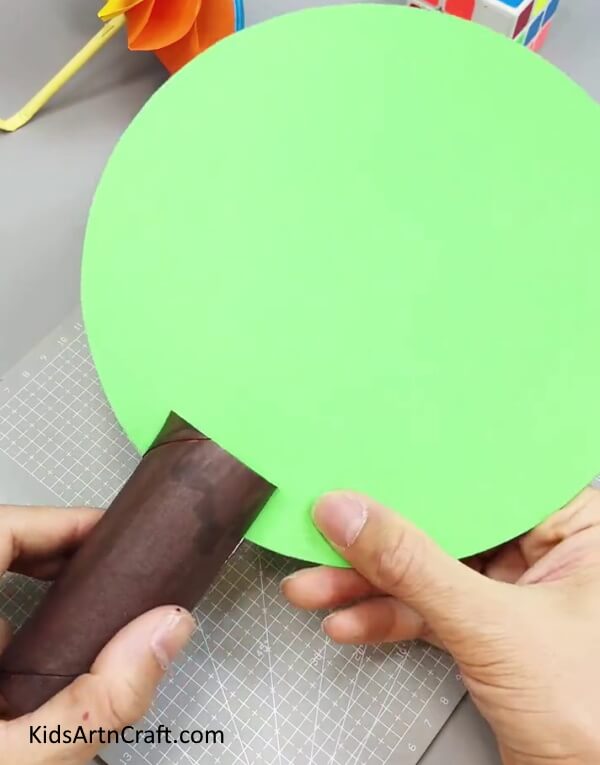
Begin by grabbing a cardboard tube and green paper. Cut a big circle out of green paper. Color the cardboard tube brown and make two vertical cuts on the top of the cardboard tube. Insert the green circle in the cuts of the cardboard tube.
Step 2: Folding Square Paper

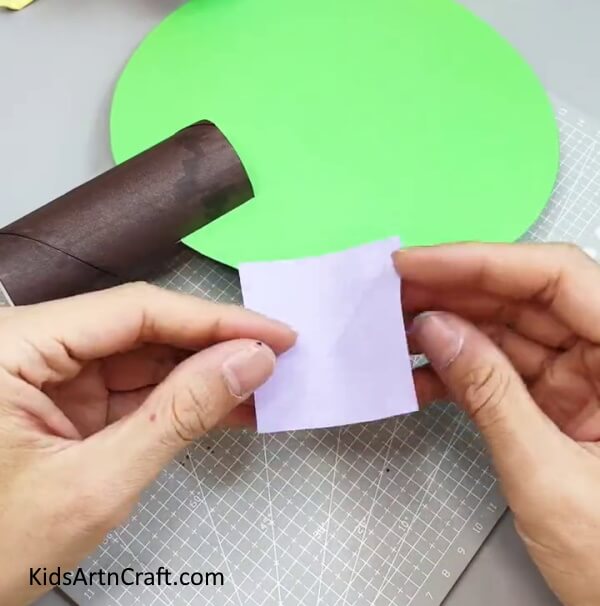
Now, take a small white square of paper and fold it in half diagonally to form a triangle. Again, fold the triangle in half.
Step 3: Drawing Petal Shape

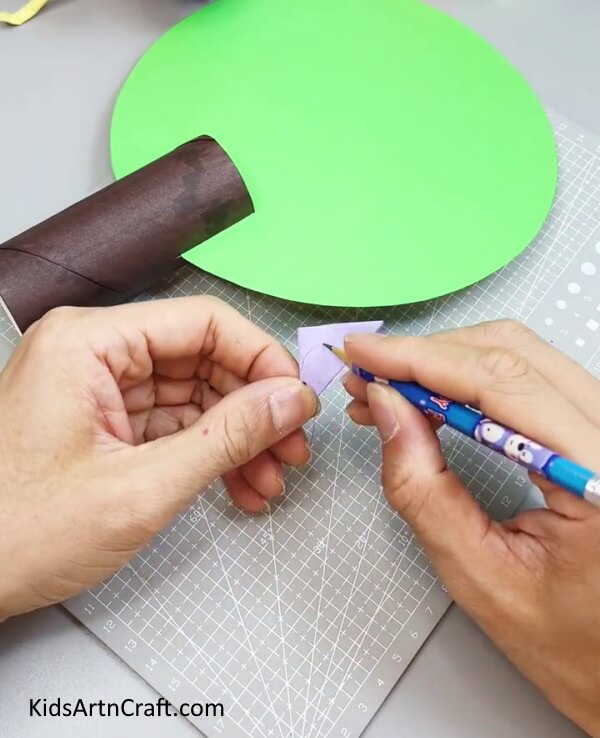
Using a pencil, draw a petal shape on the folded paper.
Step 4: Cutting Petal Shape

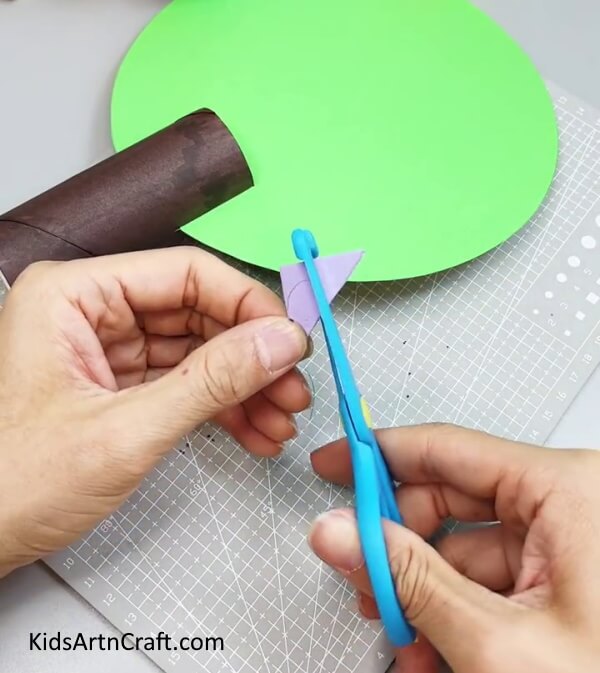
Cut the paper along with the petal shape using scissors.
Step 5: Applying Glue

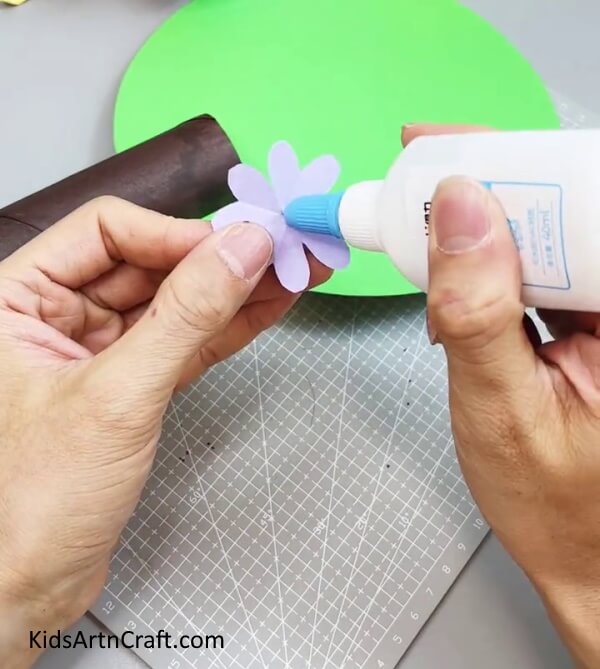
Next, unfold the paper and apply glue in the middle of the flower.
Step 6: Pasting A Circle in the Middle of the Flower

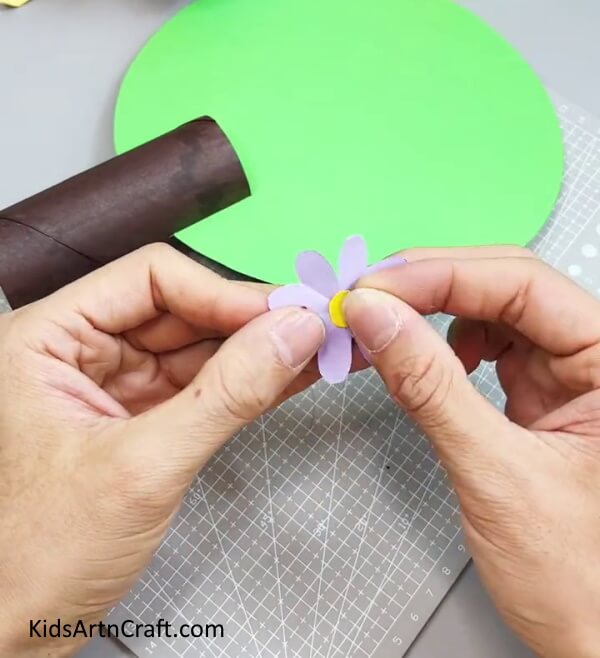
Cut a small circle out of yellow paper and paste it in the middle of the flower to make the center of the flower.
Step 7: Applying Glue In the Middle

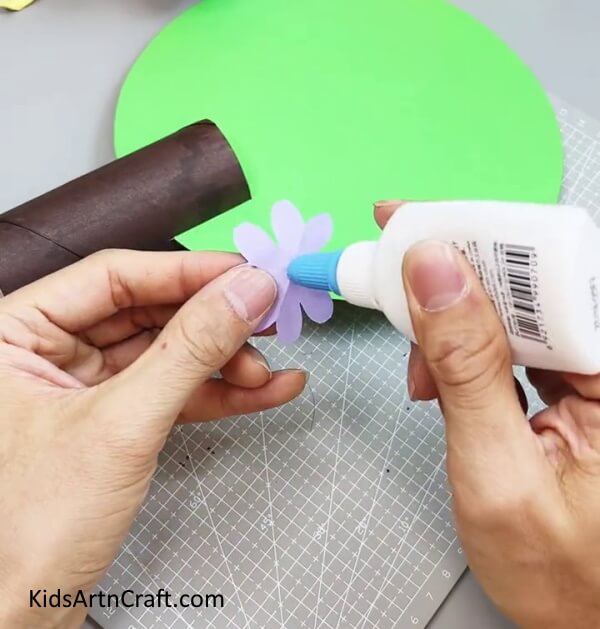
Turn the flower and apply glue in the middle.
Step 8: Pasting Flowers On Tree

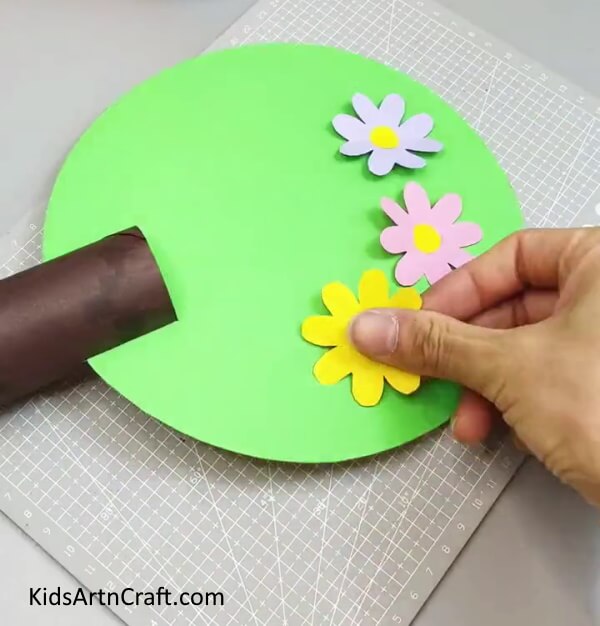
Paste the flower on the tree, Make flowers of different colors and paste them on the tree.
Your Paper Flower Tree Craft Is Ready!

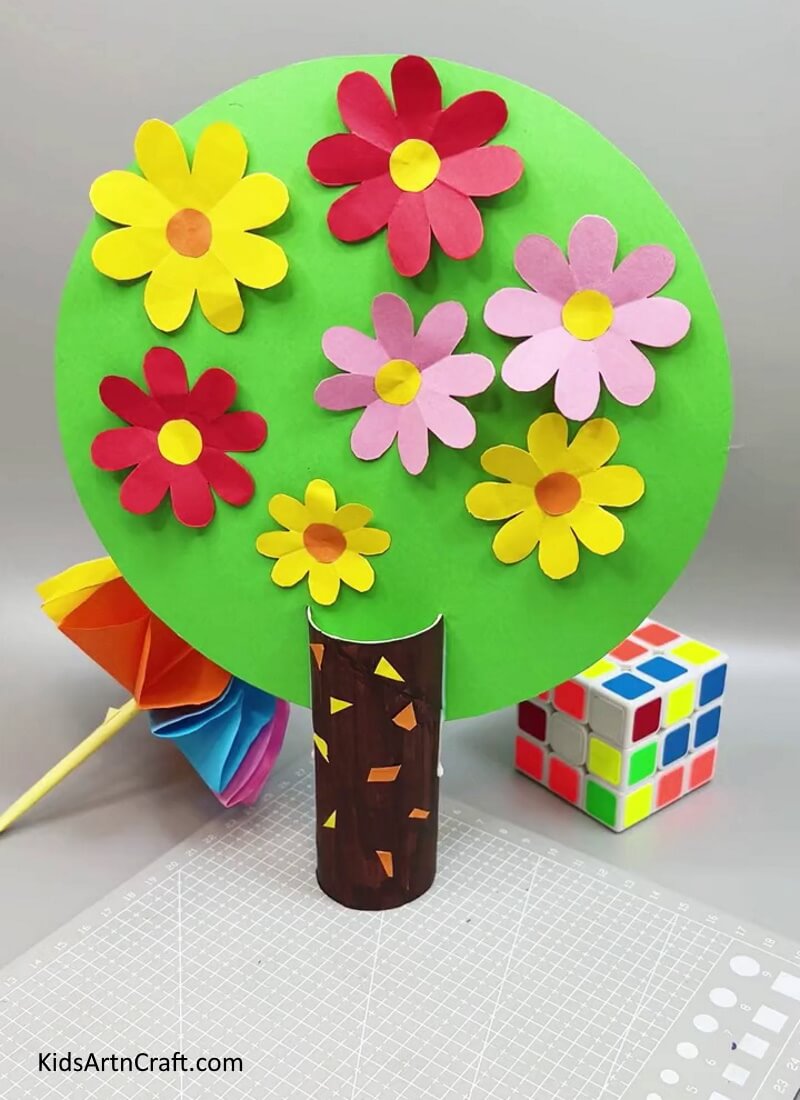
You can add paper triangles and designs on the cardboard tube to give it a final touch. And, here you go! Your paper flower craft is ready!
Some More Tree Craft Tutorial
How To Make Paper Tree Craft For Kids

Image Source/Tutorial: Kids Art & Craft
Kids can have fun and learn a new craft by making a PaperTree. They can decorate it with colorful designs or create a unique pattern to make it stand out. It’s a great way to spark creativity while also teaching them about art and design.
FAQs Related To Paper Flower Tree Craft Step-by-Step Tutorial
1. What materials do I need to make a paper flower tree craft?
You will need paper (construction paper, cardstock, or any other type of paper you prefer), scissors, glue, and any other decorative materials you want to use (markers, glitter, etc.).
2. How long does it take to make a paper flower tree craft?
Depending on the size and complexity of the craft, it can take anywhere from 30 minutes to an hour.
3. What age is this craft suitable for?
This craft is suitable for ages 6 and up.
4. Can I use any type of decorations for my paper flower tree craft?
Yes, you can use any type of decorations you like such as markers, glitter, buttons, etc.
5. Is there an easy way to make the flowers for the tree?
Yes, you can use punched circles of paper and glue them together to form flowers.
With this step-by-step tutorial, your kids can make beautiful paper flower trees that will bring a smile to their faces. This paper flower tree craft is a great way for your kids to explore their imagination and create something unique and beautiful. With a few simple materials and the help of this tutorial, kids can make a special paper flower tree that will be cherished for years to come.
Follow us on Youtube for art and craft tutorials and much more.
More Articles from Kids Art & Craft
- Learn To Make a Tree with paper step-by-step Tutorial
- DIY Easy Paper Strawberry Tutorial For Kids
- How To Make A Paper Heart Bee Craft Tutorial
- Simple Paper Crafts Activity At Home Video Tutorial
- How to Make 3D Paper Pineapple Craft for Kids