Kids Activities
Learn to Make Paper Cannon – Step by Step Tutorial

Making a paper cannon is a fun and easy way to have a good time! With the right materials and a few simple steps, you can create a cannon that will launch paper balls across the room.
Are you looking for a fun and easy craft project to do with the kids? Look no further! This step-by-step tutorial will teach you how to make a paper cannon – a simple and easy paper craft that can provide hours of fun for the whole family.
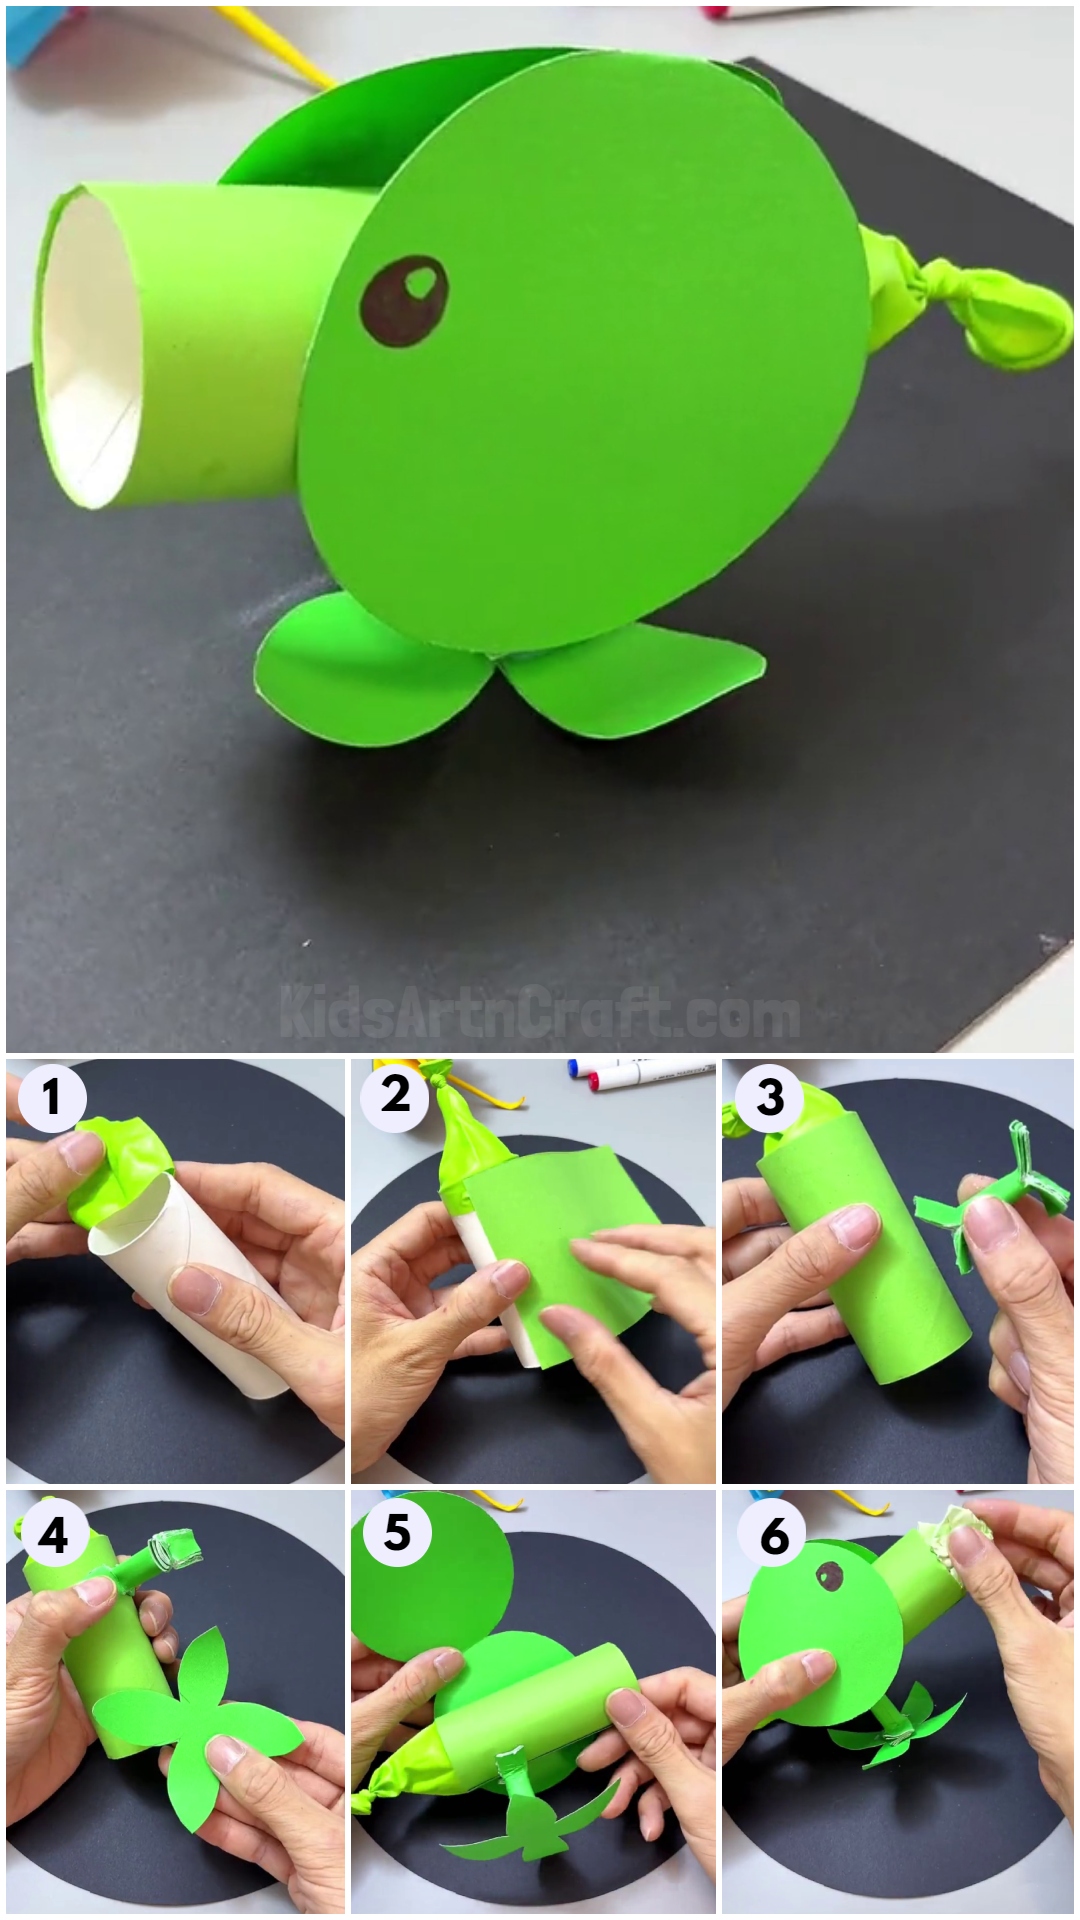
Paper Cannon – Step-by-Step Tutorial

Read More: Easy Frog Paper Craft For Kids Easy Tutorial
Materials Required
- Green Balloon
- Empty toilet paper roll
- Green colored paper
- Glue
- Scissors
- Black sketch pen
- Tissue
Procedure
Step 1: Tieing A Knot Of A Balloon
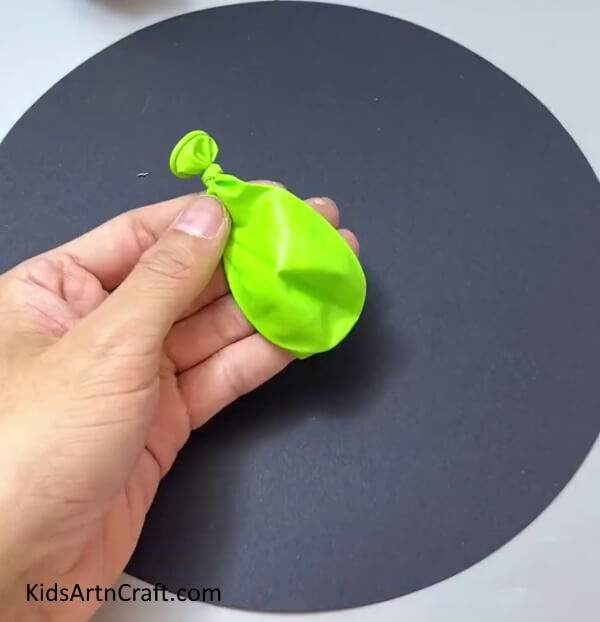

Let’s begin with this craft, take a green balloon and tie its knot
Step 2: Cutting It With Scissors
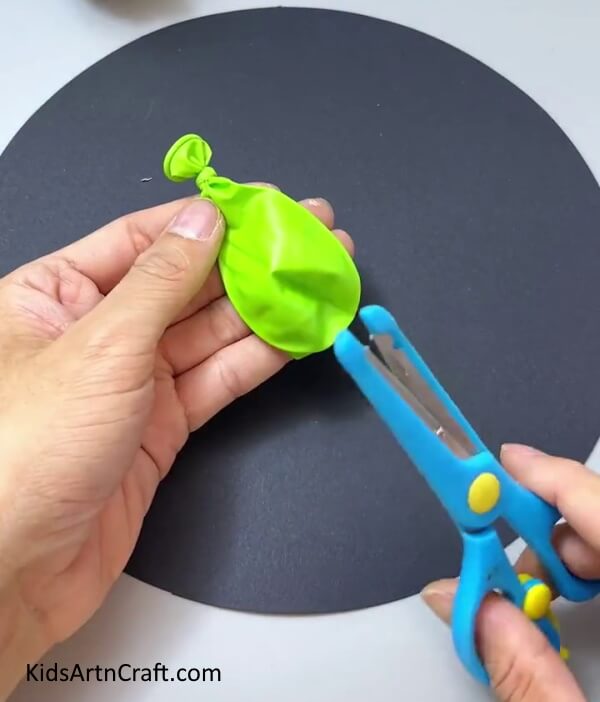

Cut the bottom end of the balloon using scissors.
Step 3: Putting The Balloon Over An Empty Toilet Paper Roll
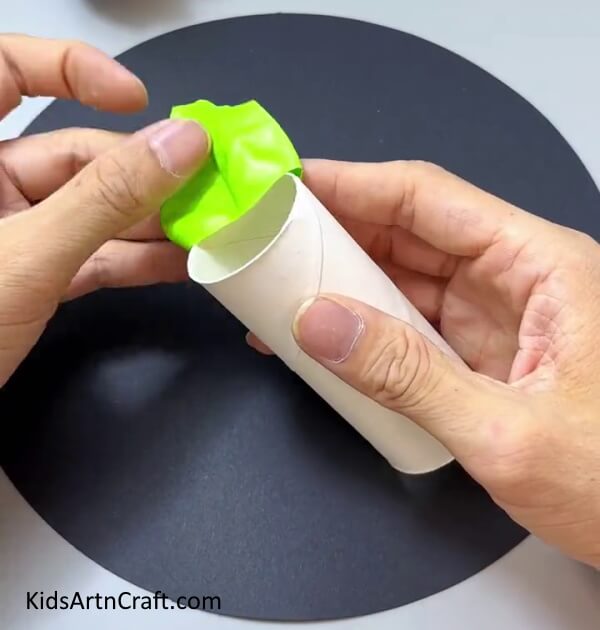

From the cut-out portion of the balloon put it over an empty toilet paper roll.
Step 4: Putting Tape Around The Balloon And Roll
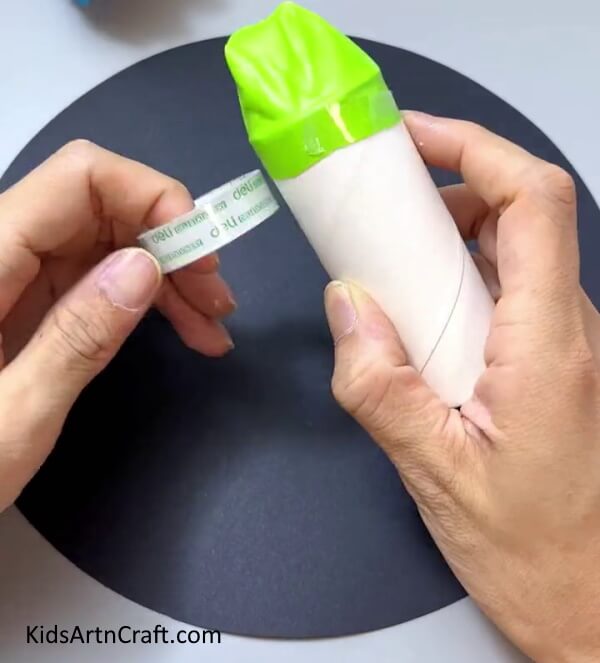

Secure the balloon over the roll by sticking tape around it.
Step 5: Covering The Roll With A Green Paper
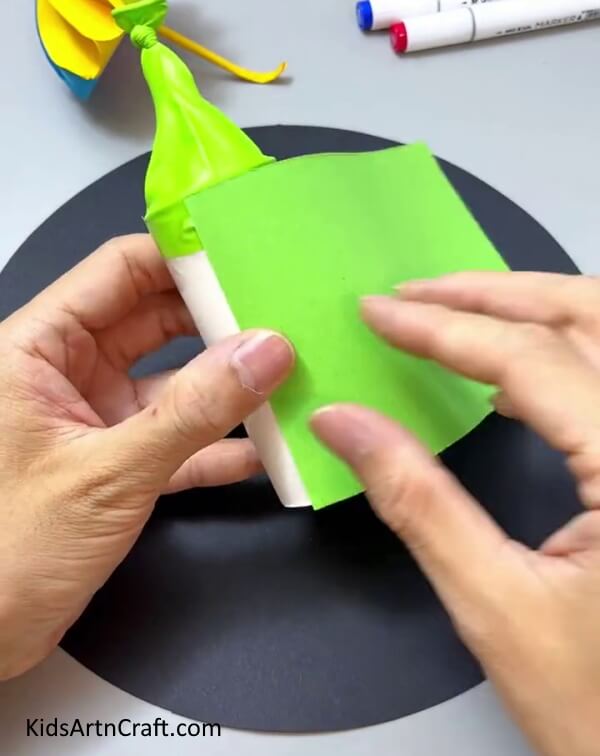

Use a green-colored sheet and wrap it around the roll to cover it and make the mouth of the cannon.
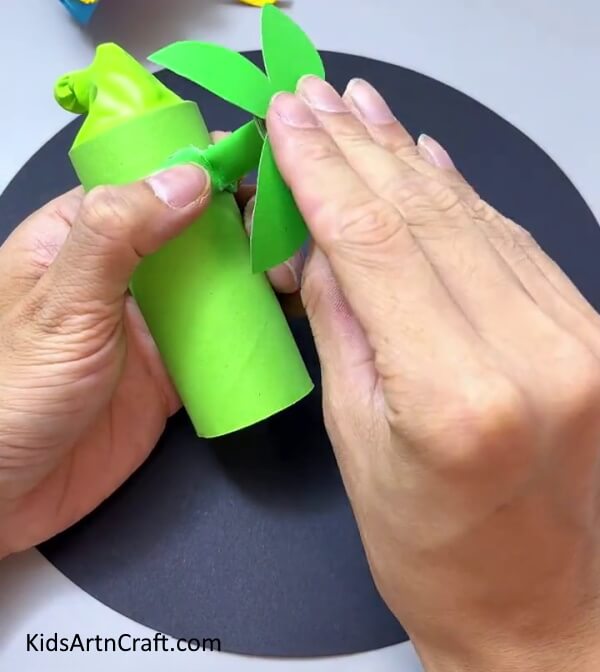
Step 6: Making Stand For The Cannon
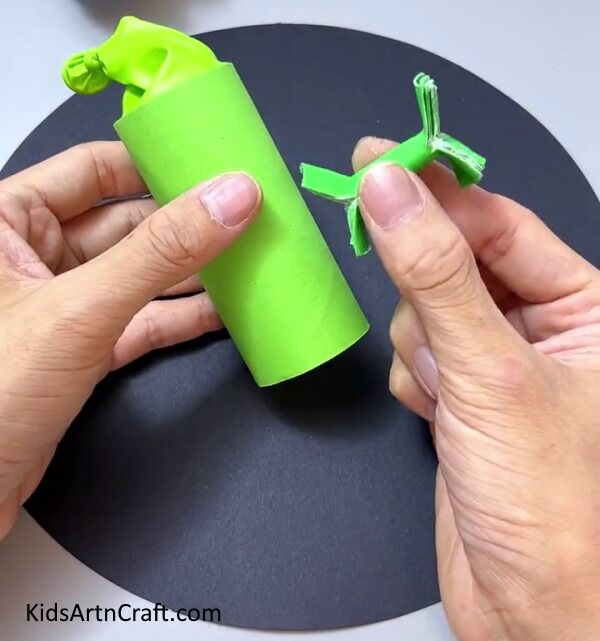

Make the cannon stand by rolling over a rectangular sheet and flatten it by pressing. Using the scissors, make 2 cuts on both ends of the stand and fold the strands outwards. Stick one end of the stand over the back of the roll by applying glue on the strands.
Step 7: Cutting Out A Foot for Cannon Stand
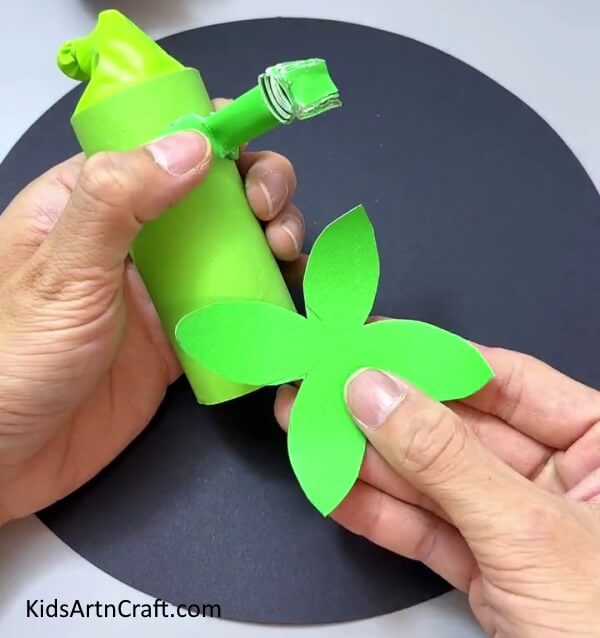

Make a pointed foot by cutting it out from a green-colored sheet.
Step 8: Pasting The Foot Over Stand

Paste the foot on the other side of the stand by applying glue on the strands of the stand.
Step 9: Making Body Of Cannon
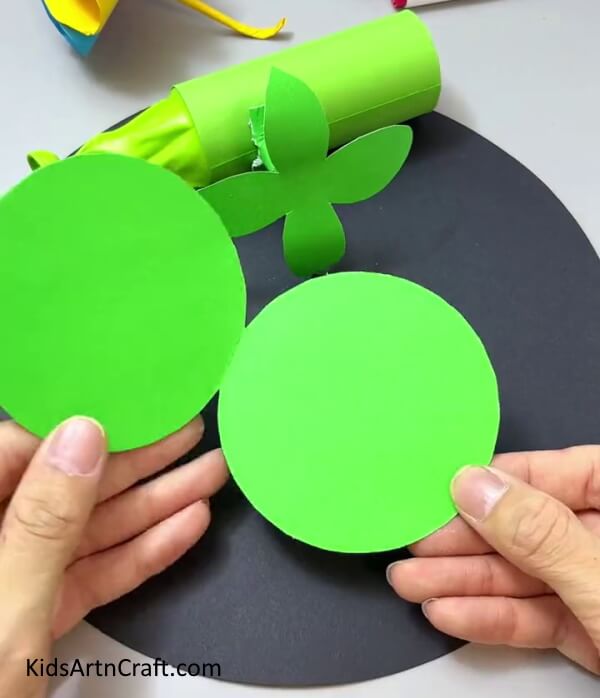

Make the body of your cannon by cutting out 2 circles attached to each other by a green-colored sheet and making a crease between them.
Step 10: Making Eyes Of The Cannon
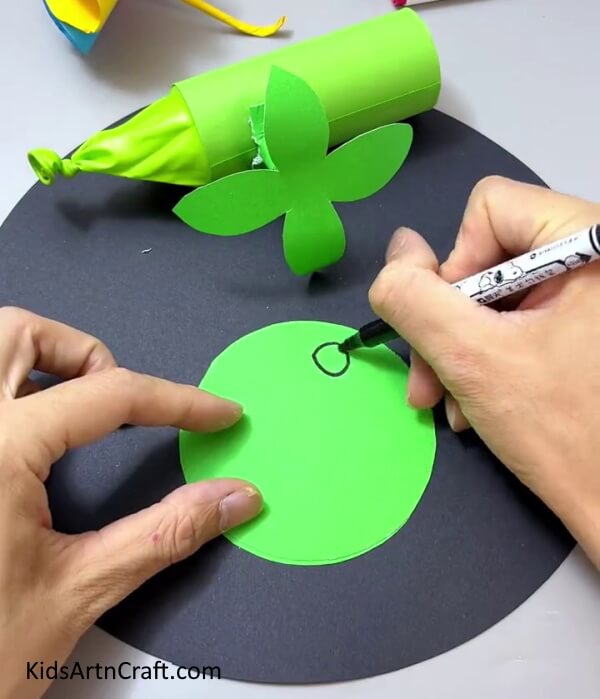

Draw the eyes of your cannon with a black sketch pen on both circles.
Step 11: Pasting One Side Of The Cannon
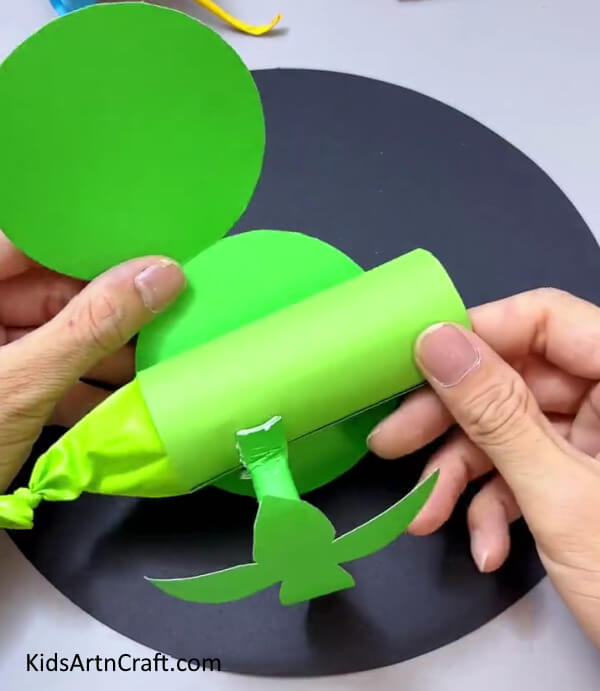

Paste one side of the cannon by unfolding the circles and pasting it from inside on the roll.
Step 12: Pasting The Other Side Of The Cannon
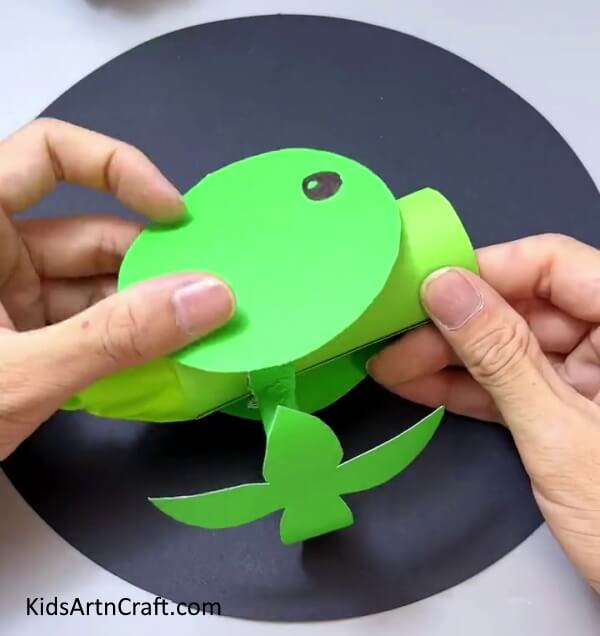

Paste the other side of the cannon in the same way pasted before.
Step 13: Taking A Tissue Paper For Its Shot
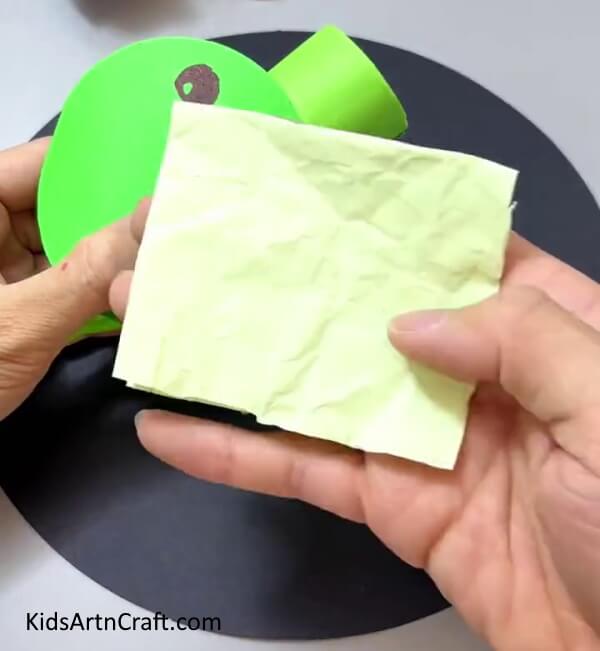

Take tissue paper for making the cannon’s shot.
Step 14: Putting The Shot Inside Mouth Of The Cannon


Crush the tissue paper and put it inside the mouth of the cannon.
Your DIY Paper Cannon Craft Is Ready!
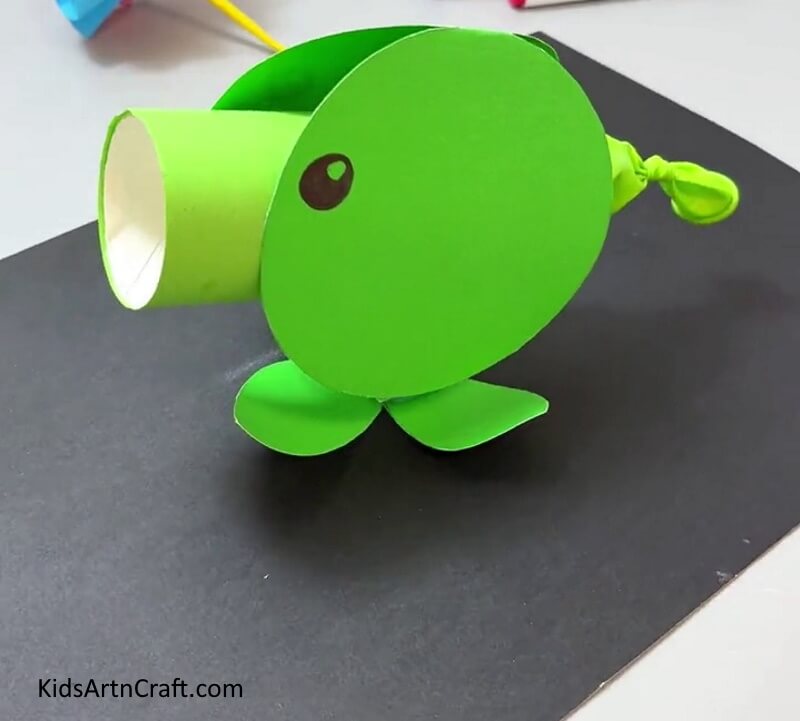

Congratulations! Your Paper Cannon Craft Toy is ready! play with it around your house and have fun with your friends and family! Keep crafting!
Making a paper cannon is a great way to have fun in a safe and creative way. With a few simple materials, you can create a fun and exciting toy that can be used to entertain family and friends. Try it out today and have a blast!
Follow us on Youtube for art and craft tutorials and much more.
More Articles from Kids Art & Craft
- Easy to Make Paper Chicken Craft Tutorial
- How To Make A Paper Heart Bee Craft Tutorial
- Simple Paper Animal Craft Ideas Video Tutorial for All
- Learn To Make Tree with paper step by step Tutorial
- Paper Crafts And Activities Video Tutorial for Kids