Clay Crafts
How to make Different Tree Using clay for kids

This is a step-by-step tutorial for making trees easily for younger kids with a twist! Using the clay they will be making circular leaves of the tree!
If you are looking for a very basic and easy craft for young ones, this craft will put a full stop to your search! Tree drawing is the very first thing a kid learns to make, today they will learn to make trees with a twist! Using clay! This clay tree craft is a very simple artwork craft that your kiddos will love to make! This craft is also a hands-on sensory art for kids as involving drawing with colors and also shaping clay into the required shapes! This tutorial will let them each and every step to making this and they can even make this artwork craft without any help! Let’s roll then!
Learn to Make Different Clay Tree Art Tutorial For Kids


Read More: How To Make Caterpillar Eating Apple Using Clay
Materials Required
- Circular White Paper Sheet
- Colored Clay (Yellow, Red, And Green)
- Scale
- Sketch Pens (Green And Brown)
Procedure
Step 1: Drawing Tree Trunks And Branches

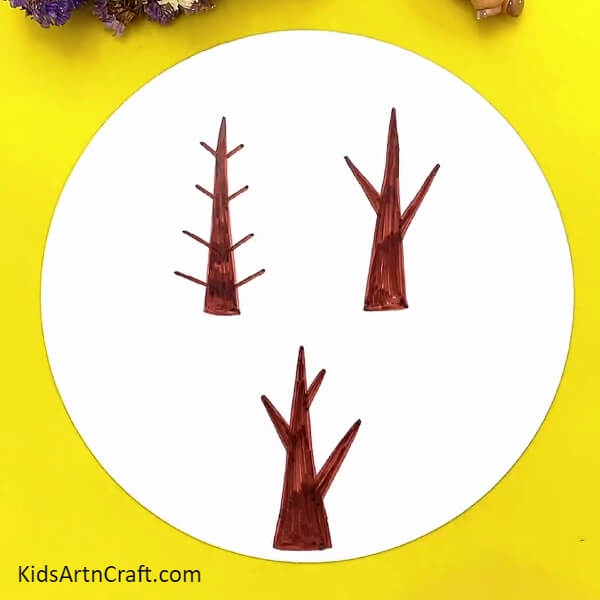
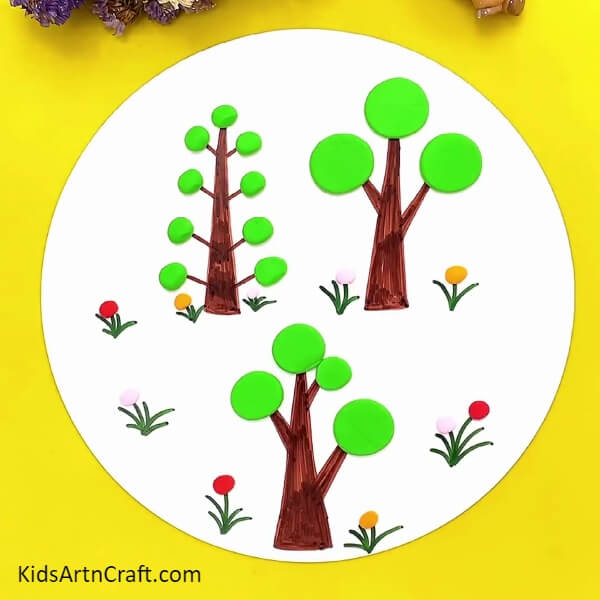
To begin this artwork craft, take a white circular paper sheet and a brown sketch pen. Now, using the brown sketch pen draw triangular 3 trunks over the sheet, 2 above and 1 at the bottom in thier middle, also draw different branches of them as shown in the image.
Step 2: Plucking Out A Piece Of Green Clay
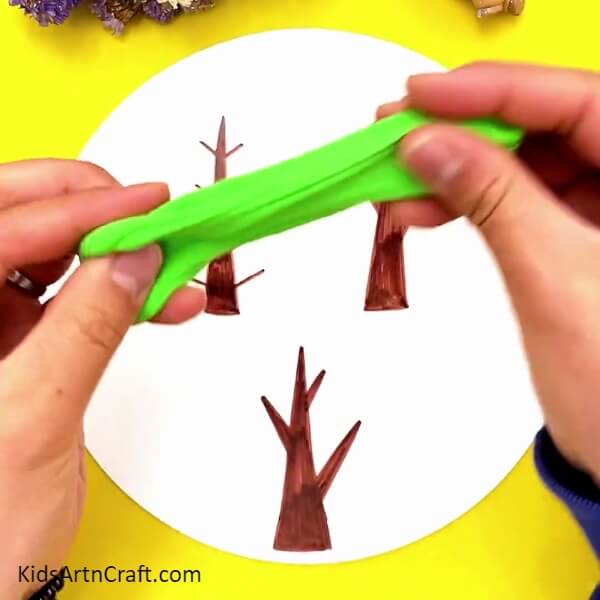
Take green-colored clay, stretch it, and pluck out a piece of clay from it.
Step 3: Making Leaves Of The First Tree
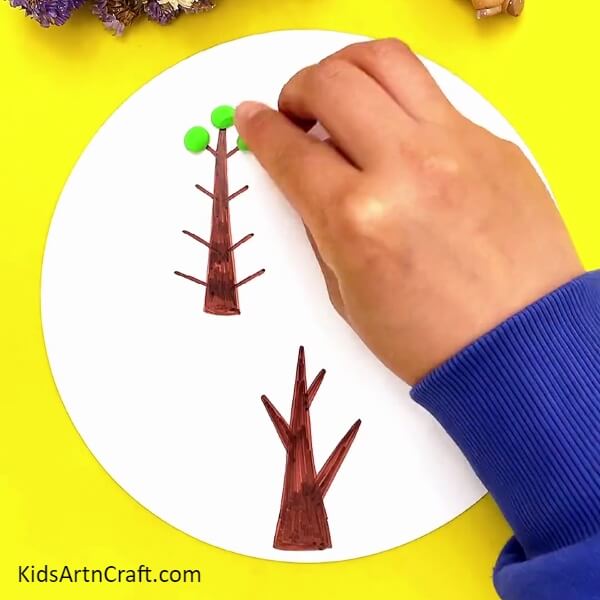
Make small clay balls and place them one by one over each branch of it. Press the clay balls gently to make the leaves of the first tree.
Step 4: Making The Leaves Of The Second Tree
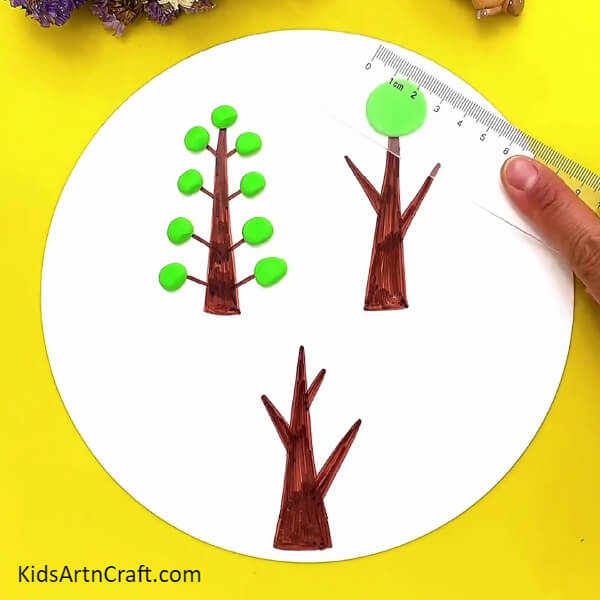
For the second tree, make 3 balls relatively larger than the first and place them over the ends of the 3 branches of the second tree. Now, using a scale, press those balls to spread them evenly in a circle shape.
Step 5: Making The Leaves Of The Third Tree
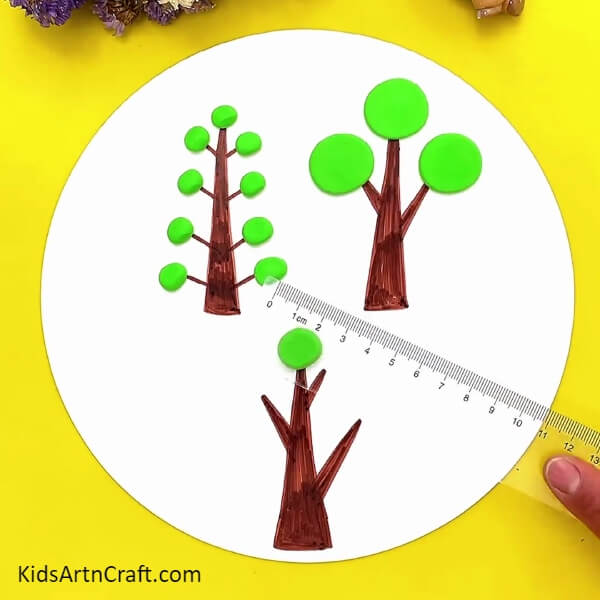
Make uneven-sized 4 balls of clay, place the first over the top end of the tree branch, and using the scale, press it over to make it stick and spread evenly the leaf of it.
Step 6: Making All The Leaves
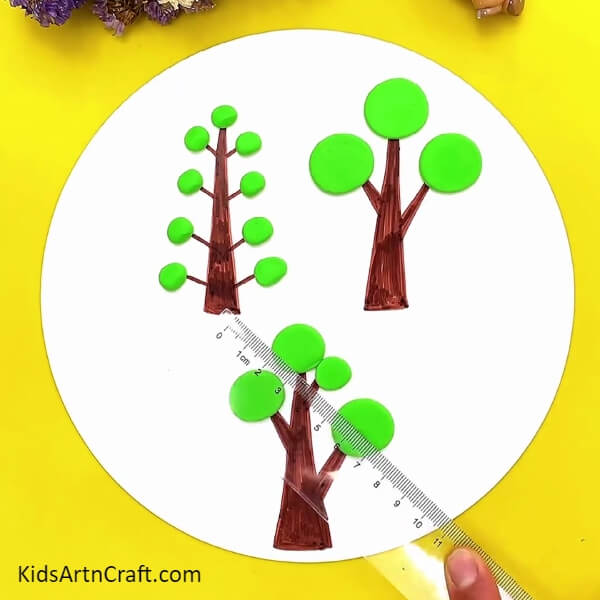
Place all the 3 remaining balls over the end of the branches of the 3rd tree and press them using the scale, press to make all the leaves of the 3rd tree.
Step 7: Drawing Grass
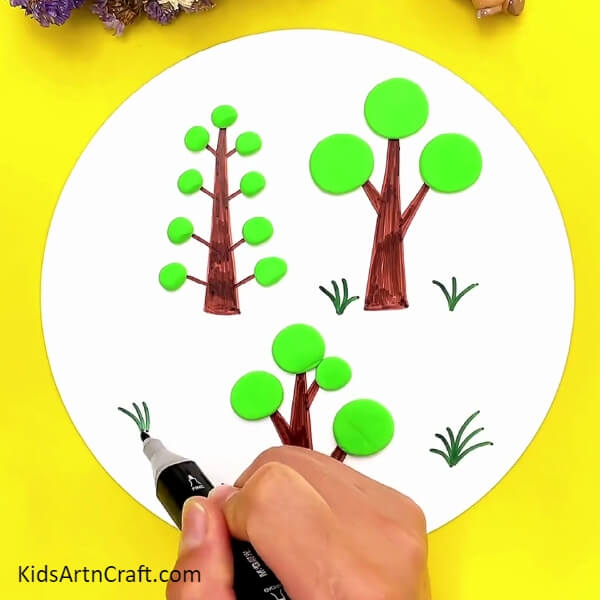
Using a green sketch pen, make 3-6 collective strokes randomly over the white sheet base around the trees.
Step 8: Adding Flowers To The Grasses
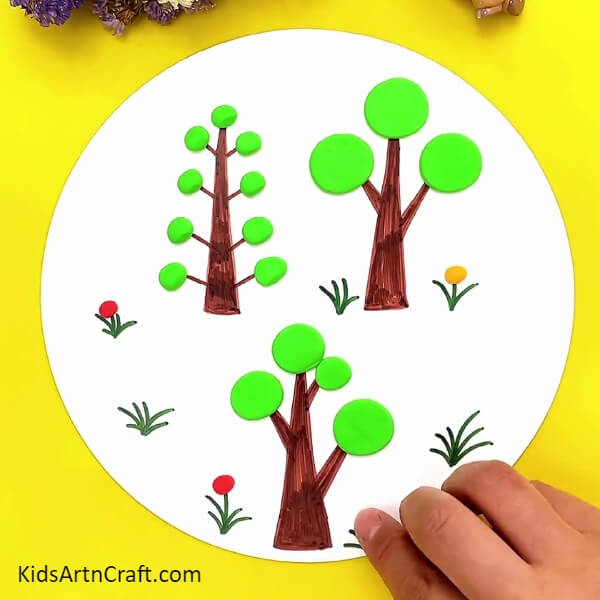
Using red, pink, and yellow-colored clay make flowers over the grass by making small balls of them, then randomly placing them over the end of the grass stroke. Using fingers, press the clay balls to flatten them and make them stick to the paper.
This Is The Final Look Of Your Trees Artwork Craft!
Congratulations! Your easy round trees craftwork is ready in no time!
Some More Paper Tree Craft Tutorial
Easy Paper Flower Tree Craft For Kids

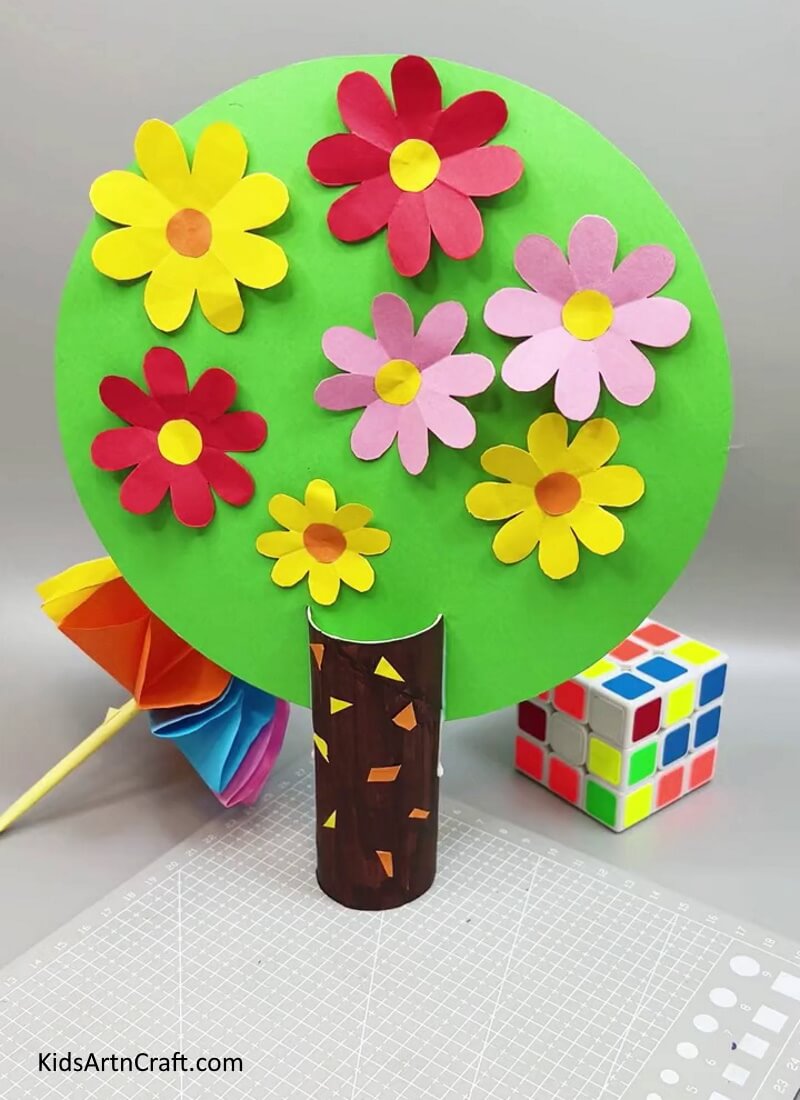
Image Source/Tutorial: Kids Art & Craft
This Very Easy Paper Flower Tree Craft For Kids is a great way to get your children involved in a fun and creative activity. It uses simple materials and is a fun and easy craft that both kids and adults can enjoy.
Show off your craftwork to your friends and family and make everyone proud of your creation! This craftwork will definitely help the kiddos to get creative without any help and supervision, as this craft-making doesn’t require any sharp objects so there is no need to worry about it! You can even use this craft as your craft school project, I’m sure everyone will envy you when your teacher will appreciate your creative skills!
Follow us on Youtube for art and craft tutorials and much more.
More Articles from Kids Art & Craft
- Simple & Tasty Ice-Cream Craft Using Clay – Step by Step Tutorial
- How to Make a Clay Bird Easy Artwork tutorial for kids
- Clay watermelon ice cream easy craft tutorial
- DIY Creative Clay Craft Activities Video Tutorial for Kids
- DIY Homemade Clay Art & Crafts Video Tutorials for Kids