Kids Activities
DIY Blossom Flower On Tree Easy Artwork For Kids

Bring the pretty blossom flowers to your home with this craft! This tutorial includes very easy steps and supplies to make this blossom flower craft!
Who doesn’t love the prettiest spring season of blossom flowers!? This is an amazing inspired craftwork from this season! This tutorial will guide you to the easiest steps to make this craftwork from various materials that you already have at your home will turn out budget-friendly for you! Create this craftwork to bring the spring season right into the room where this craft is hanged upon! This craft will definitely be the piece to showcase and will be admired by everyone who passes by! Unleash your creativity in a craft of nature to get the best results! Now, grab your supplies, and let’s roll on!
Easy To Make Blossom Flower On Tree

Read More: Creative Forest Painting Art Tutorial For Kids
Materials Required
- Colorful Paper Sheets (Blue And Red)
- White And Brown Paint
- Glue
- Cardboard
- Scissors
- Paintbrush
- Colored Clay ( Red And Orange)
- Circle Stamp
Procedure
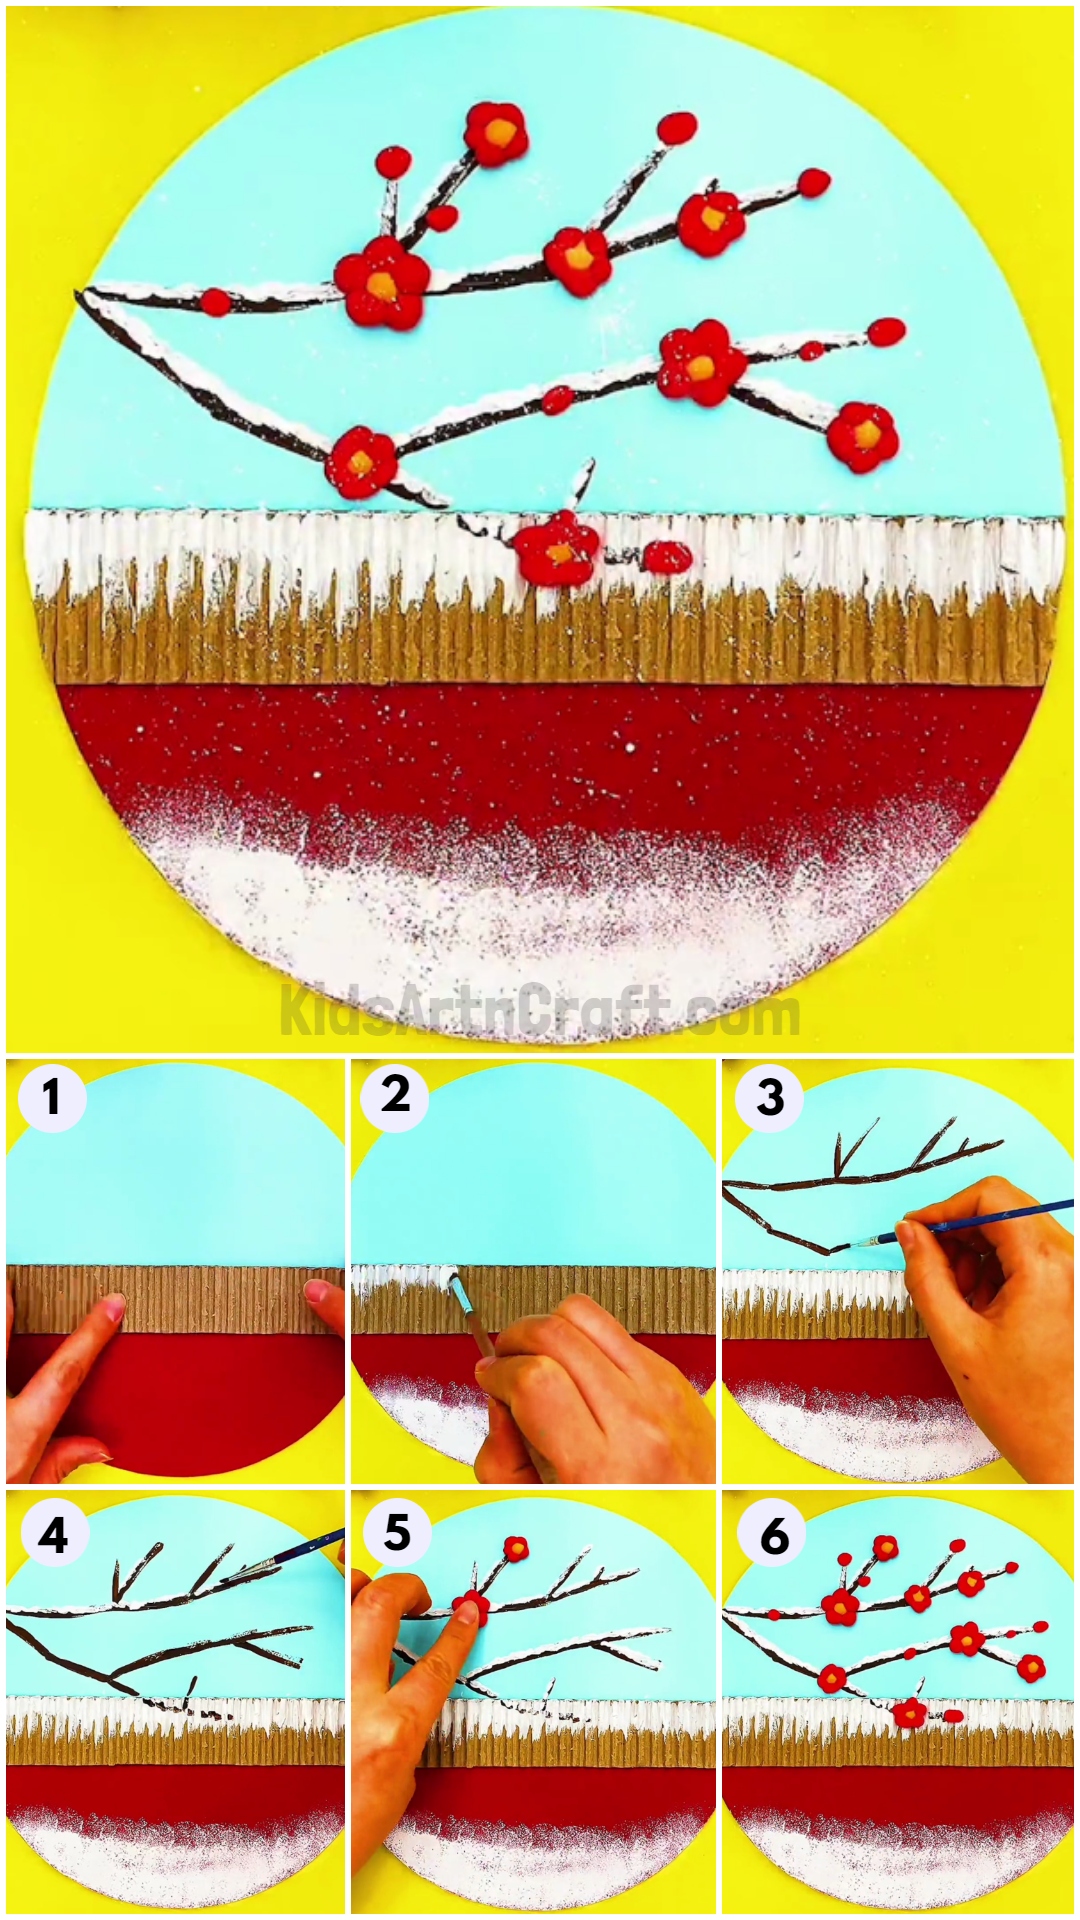
Step 1: Pasting A Red Sheet Cutout

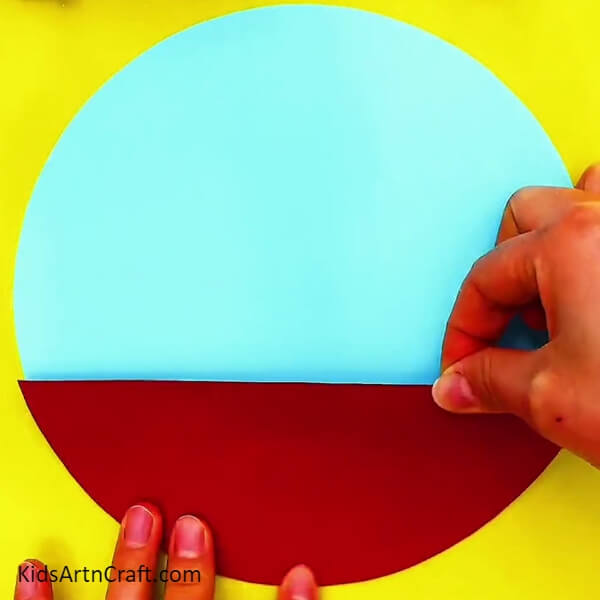
Let’s begin this craft by taking a red and a blue colored sheet. Using scissors, cut down the blue sheet into a circle as the base of the craft and cut out a less-than-half semicircle at the end of the base using glue.
Step 2: Pasting A Cardboard Strip
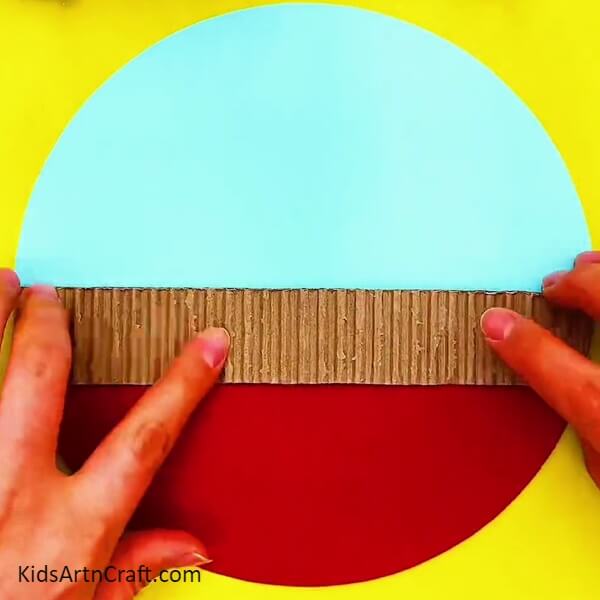
Now, take a cardboard and cut out a thick strip from it, also remove the first layer of the cardboard to get the zigzag strips of it. Paste the strip right above the red cutout using glue.
Step 3: Stamping White Irregular Circles
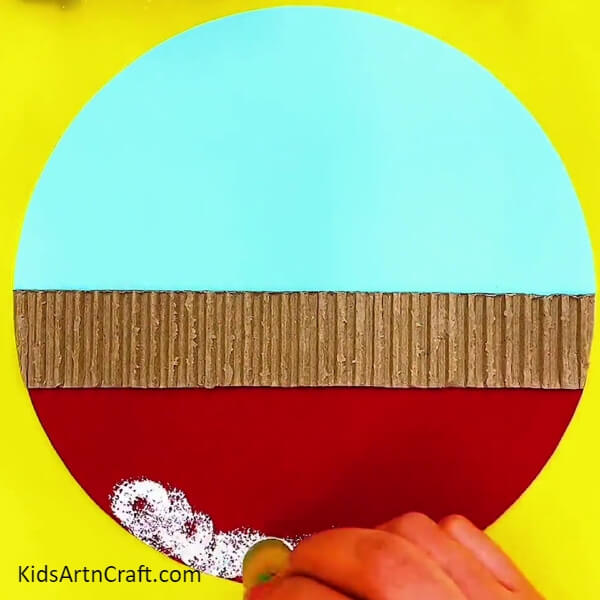
Dip a circle stamp lightly into white paint and start dabbing over the circumference of the red circle to above it dabbing it lighter as you gradually move upward. This will look like snow.
Step 4: Painting Over The Cardboard Strip
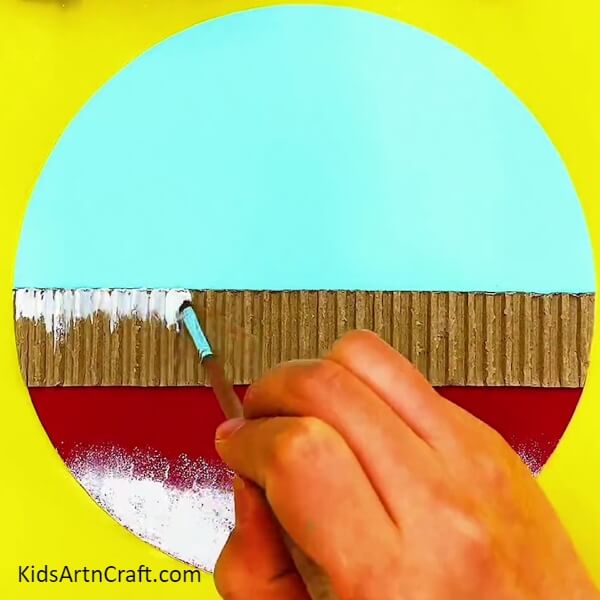
Dip a paintbrush into white paint and start covering the top part of the cardboard strip by making small strokes using the paintbrush.
Step 5: Making Snow Over The Cardboard Strip
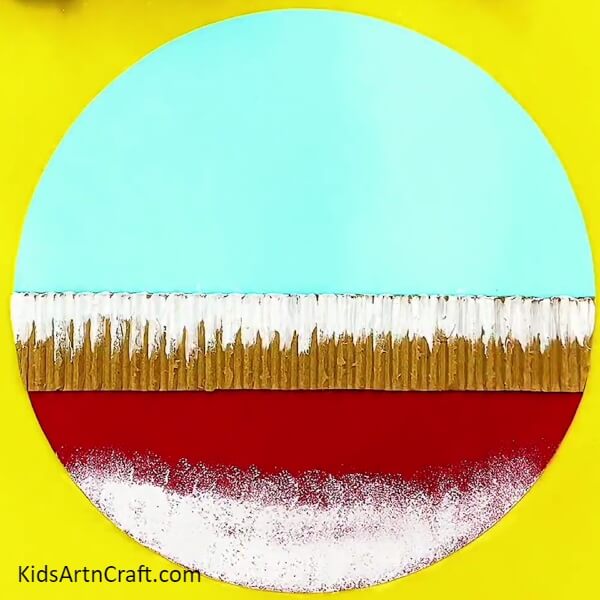
Completely cover the whole strip with white strokes to make it look like snow over it.
Step 6: Making A Tree Branch
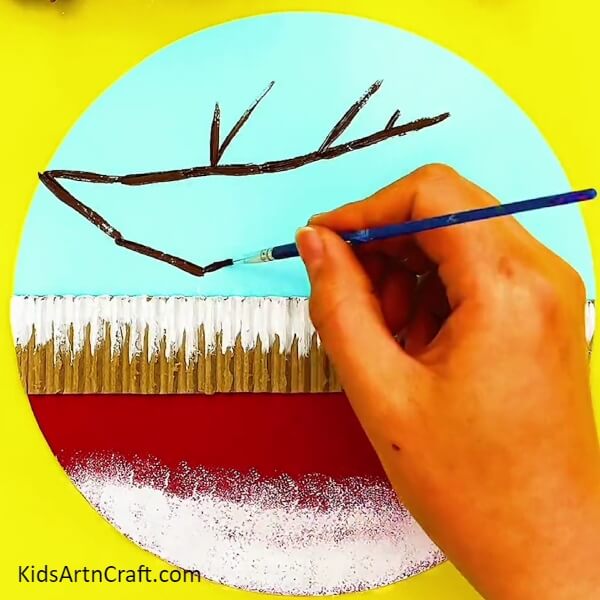
Dip the paintbrush into brown paint and make irregular tree branches coming from the left top of the blue sheet.
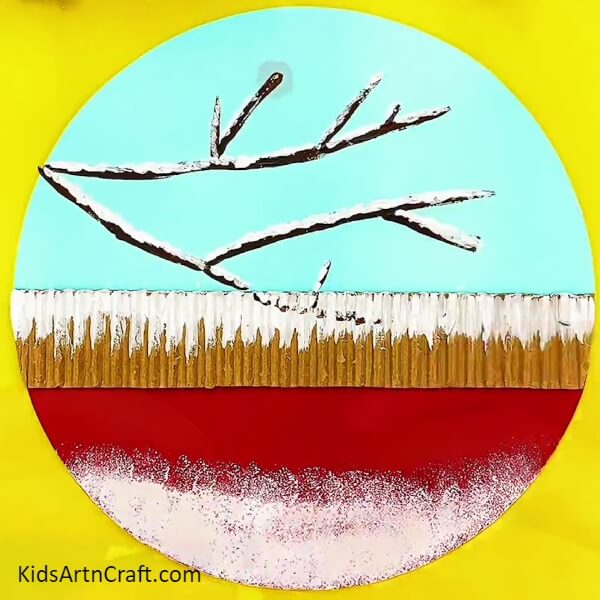
Step 7: Making Snow Over The Tree Branch

Dip the paintbrush into white paint and form irregular lines on the top half of the tree branches to make snow over it.
Step 8: Completing Making Snow Over Branches
Cover each tree branch from the upper half with white paint to make it look like snow over them.
Step 9: Making Flowers
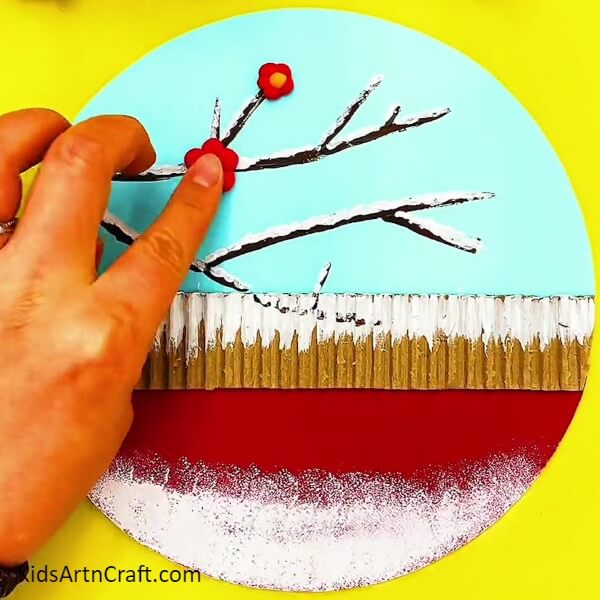
For making a flower, dough red clay into 5 balls and orange clay into a ball. Now, stick together the red clay balls in a circle and put the orange clay ball over them in the middle of the circle to form a flower. Gently press this flower over the branches to make it stick to the paper.
Step 10: Making More Flowers
In the same way, as mentioned above, make more flowers and stick them randomly over the branches, also just stick a red clay ball over the branches to make them look like flower buds.
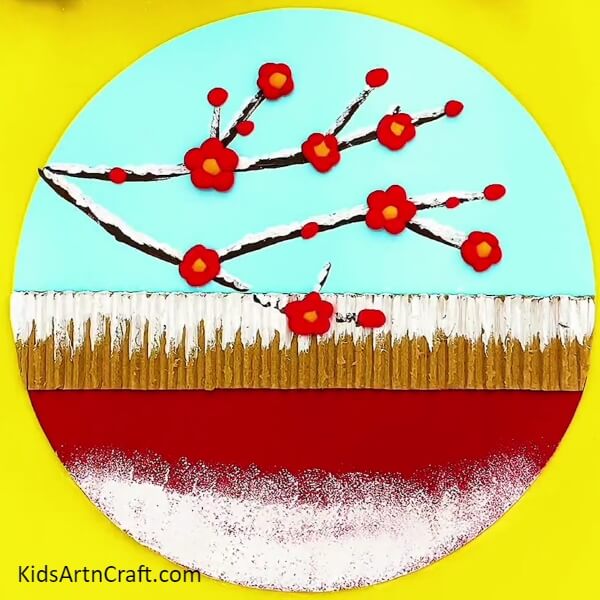
Step 11: Sprinkling Some White Paint
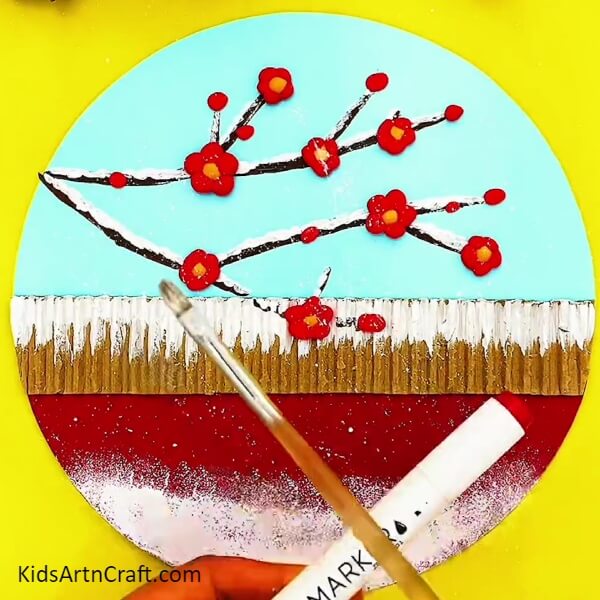
Dip the paintbrush into white paint and gently start striking it to a pen over the craft to sprinkle some white paint over the craft. This will look like falling snow in your artwork.
Finally !Your Blossom Artwork Is Ready!

Look at the astonishing results! You are stunned too, right!? Well, I told you before that you will love this craft, guess I was right! This amazing craft will only take some minutes to be formed and will definitely be the best craft you ever made! The white paint texture we made using different-different equipment makes this craft realistic and it looks like it is actually snowing! Decorate this craft in the drawing room and show off your creation to everyone who sees it!
Follow us on Youtube for art and craft tutorials and much more.
More Articles from Kids Art & Craft
- How to Draw Flower Drawing Video Tutorial for Kids With Parents
- Easy Drawing Tricks With Your Parents Video Tutorial for Kids
- Easy Drawing Tricks Video Tutorial for Kids
- Easy Drawing Tricks Learn At Home Video Tutorial for Kids
- Paper Flower Tree Craft Step-by-Step Tutorials for Kids