


Kids Activities
Creative Forest Painting Art Tutorial For Kids

This painting tutorial for kids is great for encouraging them to use their imagination and creativity. We give clear steps and helpful advice to make sure your kid’s artwork turns out great. Help your kid find their creative side and make a stunning forest painting!
Forest is a piece of land that is surrounded by big trees and plants from all sides. Sometimes, forests are also a home to many animals. But due to selfishness of human beings, all forests are slowly being cut down and animals are losing their homes. So, to know the importance of the forests and to conserve it, today we will paint some creative forest.
Bring all your art kit to the table and follow the basic and simple steps to make creative forest.
Unique Forest Painting Art For Kids

Read More: Recycled Bookmark Ideas for Kids
Materials Required
- Sea green craft paper
- Prussian blue poster colour
- Light green poster colour
- Yellow poster colour
- Red poster colour
- Black marker/sketch pen
- Cotton
- Earbud
Procedure
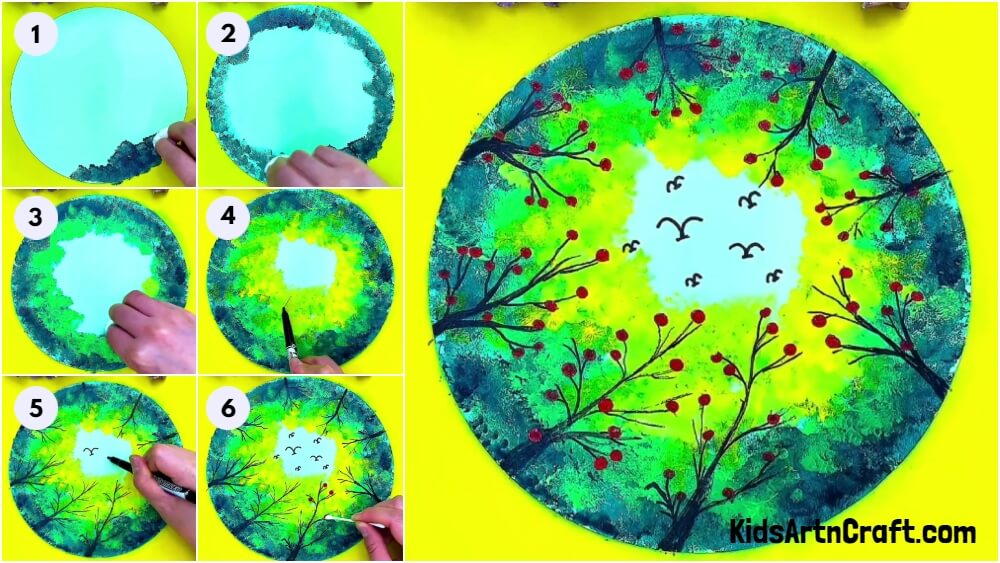
Step 1: Taking Prussian Blue Poster Colour in a Cotton
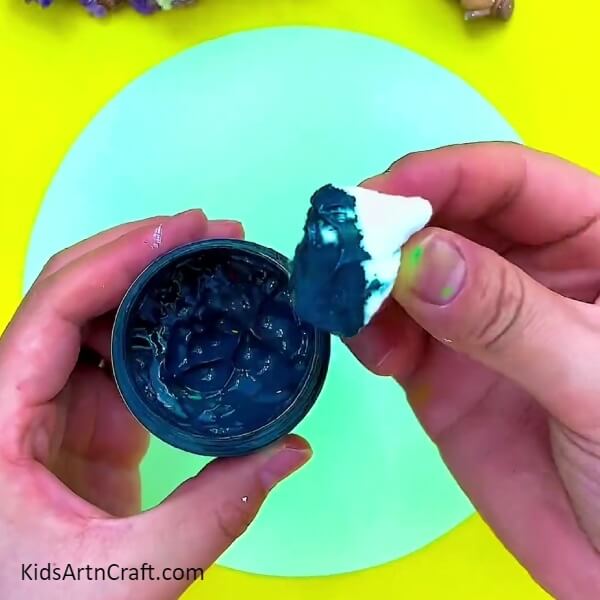
Your first step is to take a sea green coloured craft paper. The sea green coloured craft paper should be in circle shape. Then, take a cotton and dip the cotton in the Prussian blue poster colour.
Step 2: Dabbing Prussian Blue Poster Colour Around the Circumference
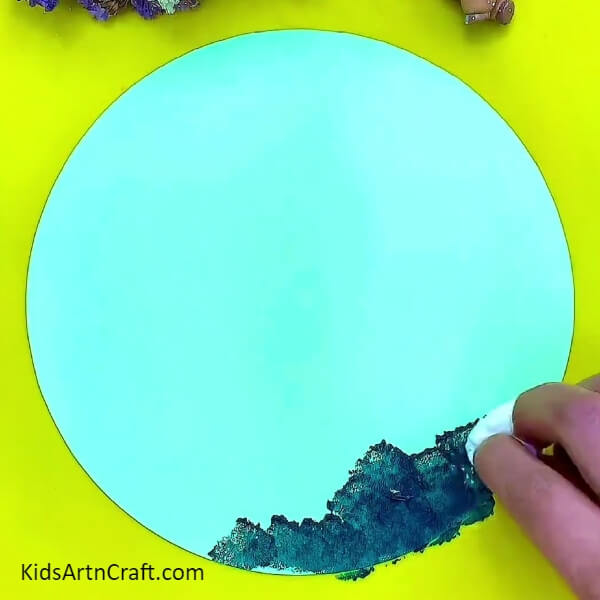
After taking the Prussian blue poster colour in a cotton, dab the cotton on the circumference of the sea green circular craft paper.
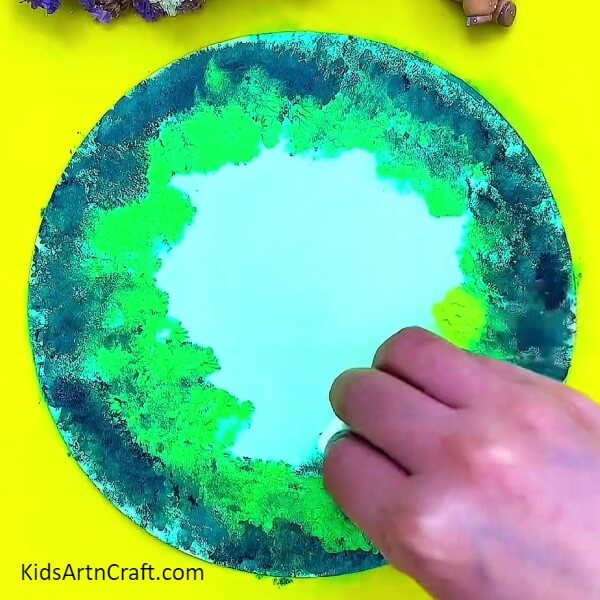
Step 3: Filling the Whole Circumference with Prussian Blue Poster Colour
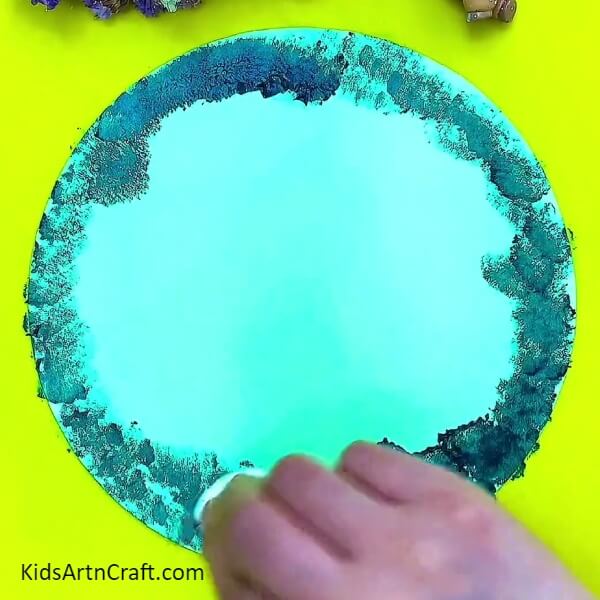
Keep repeating the above step of dabbing the cotton which has Prussian blue poster colour in it around the whole circumference of the sea green coloured craft paper as shown.
Step 4: Dabbing Light Green Poster Colour and Merge with Cotton
Now, take the light green poster colour and dip the cotton in the light green poster colour. After dipping the cotton in the light green poster colour, dab the light green coloured cotton along the Prussian blue poster colour on the sea green coloured craft paper. Dab the light green coloured cotton in such a way that Prussian blue poster colour and light green poster colour merge together as shown.
Step 5: Dabbing Yellow Poster Colour and Merge with Cotton
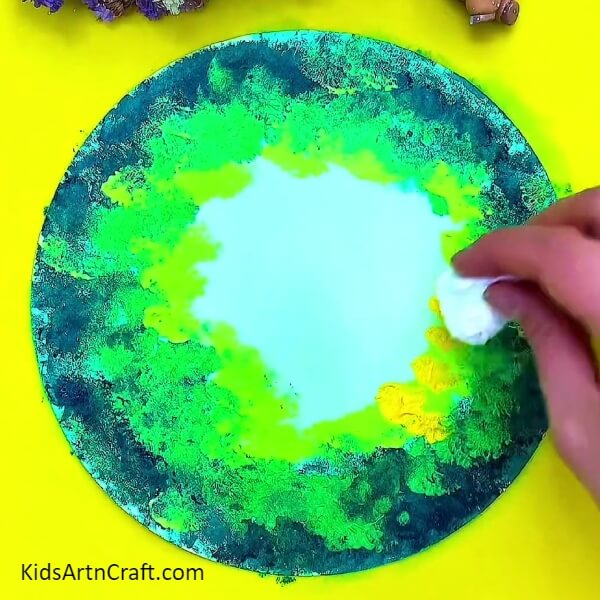
Now, take the yellow poster colour and a cotton. After taking yellow poster colour and the cotton, dip the cotton in the yellow poster colour. After dipping, dab the yellow coloured cotton along the light green poster colour. Dab the yellow coloured cotton in such a way that the light green poster colour and yellow poster colour merges together.
Step 6: Taking Black Marker/Sketch pen
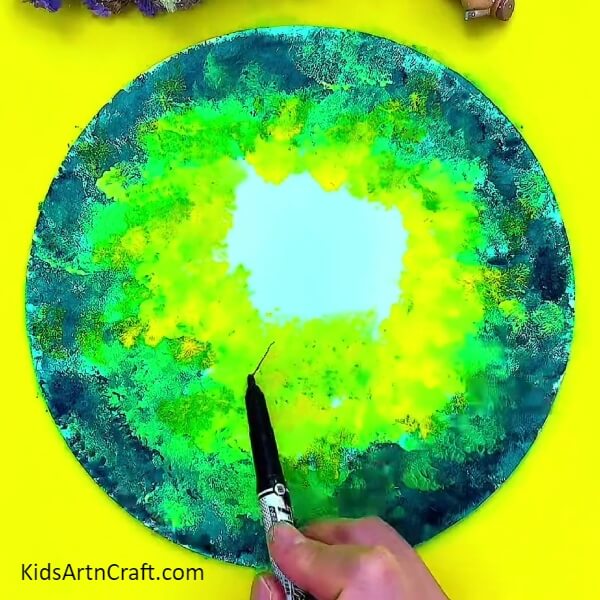
Take black marker/sketch pen and with the help of black marker/sketch pen start making spooky trees from the circumference of the sea green coloured craft paper. Make trees in a circular motion.
Step 7: Making Birds with Black Marker/Sketch pen
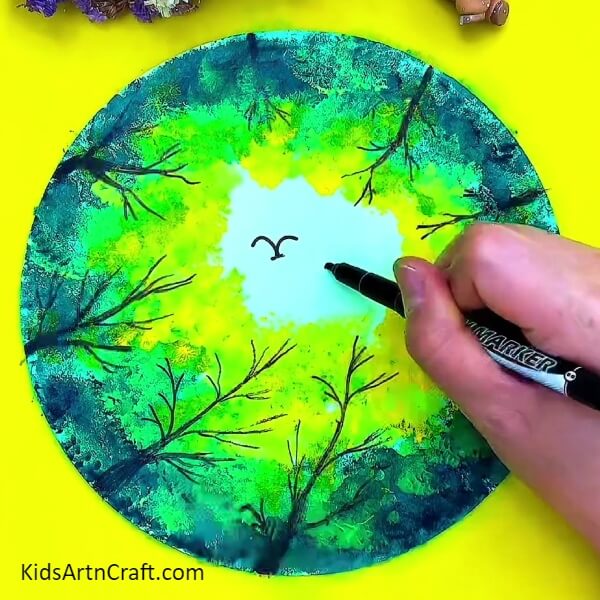
With the help of black marker/sketch pen, make birds in the center of the sea green coloured craft paper. Make birds in a normal ‘V’ shape with black marker/sketch pen and put underline under it as shown in the picture.
Step 8: Making Red Dots with An Earbud
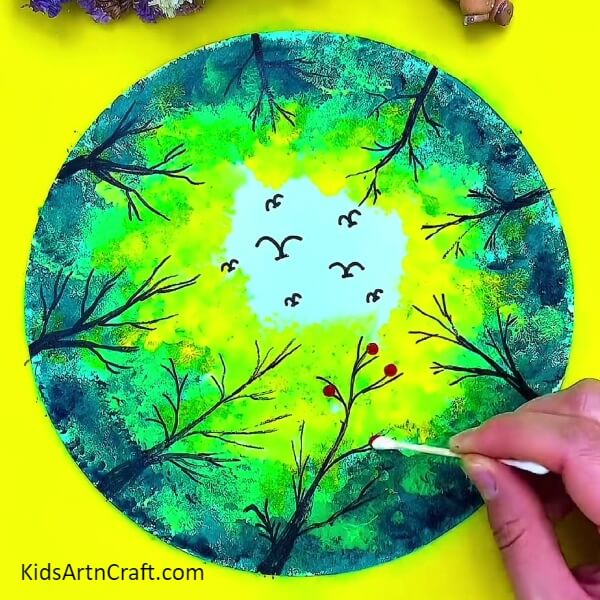
Now, take red poster colour and an earbud. After taking red poster colour and an earbud, dip the earbud in a red poster colour. After dipping the earbud in the red poster colour, make dots on each branch of the trees that you have made with the help of black marker/sketch pen in the above step.
Wow!! You Are Done look of Creative Forest Painting
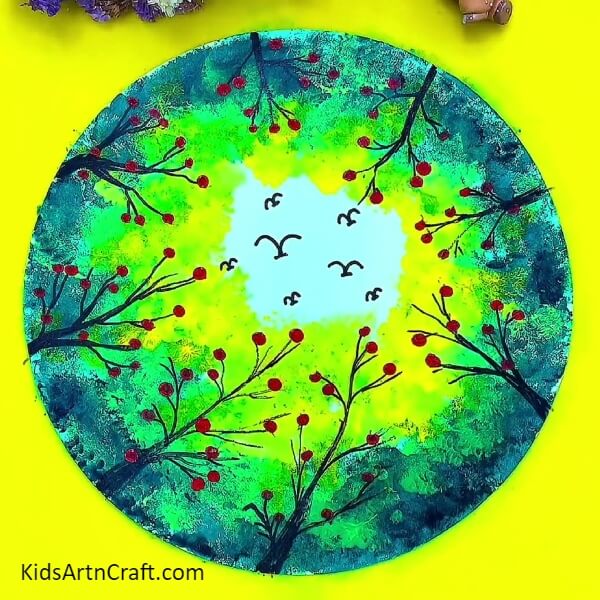
Finally your forest is ready to be saved and conserved as it should be. If you do not save your forests now, one day all animals are going to lose their abode to us human beings and that time is not far away when animals are going to invade our homes because they have no place to live. So, start planting trees and stuff. Also from this painting you can learn the importance of forests and conservation. You can even learn different painting techniques with this painting.
I have literally told you so many advantages of this painting, now it is your time to shine by making this painting and teach others too about the importance of forests and its conservation.
Follow us on Youtube for art and craft tutorials and much more.
More Articles from Kids Art & Craft
- Mother’s Day Card Crafts to Make Easy Video Tutorial for Kids
- DIY Step-by-Step Finger Puppet Craft for Kids
- DIY Foam Net Home Craft For Kids
- Easy Emoji Crafts with Balloons For Kids To Play
- DIY Miniature Clay Cake Craft Activities for Kids


