Connect with us

How To Make Paper Eye For Kids At Home

How To Make Paper Eye For Kids At Home

Kids Activities

How To Make Paper Eye For Kids At Home

Activities for Kids
Make your own paper eye with us! This tutorial will guide you on making an amazing paper eye that moves even! Check the article to make it!
Are you ready to make a paper eye that blinks? Get your origami skills ready because we have an exciting project for you! In just a few simple steps, using a red origami sheet and a sketch pen, you can create an eye that comes to life. Fold, unfold, and draw to bring out the magic of this craft. Let’s dive into the world of origami and learn how to make a paper eye that will surely grab everyone’s attention!

Creative Paper Eye Craft Idea For Kids To Make At Home

How To Make Paper Eye For Kids At Home

Read More: Paper Rainbow Cloud Craft step by step Tutorial

Materials Required

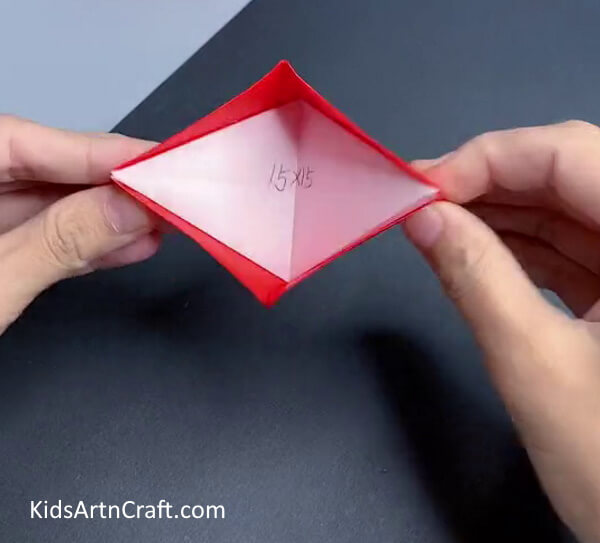
  • 15×15 Red-White Origami Sheet
  • Sketch Pens (Red And Black)

Procedure

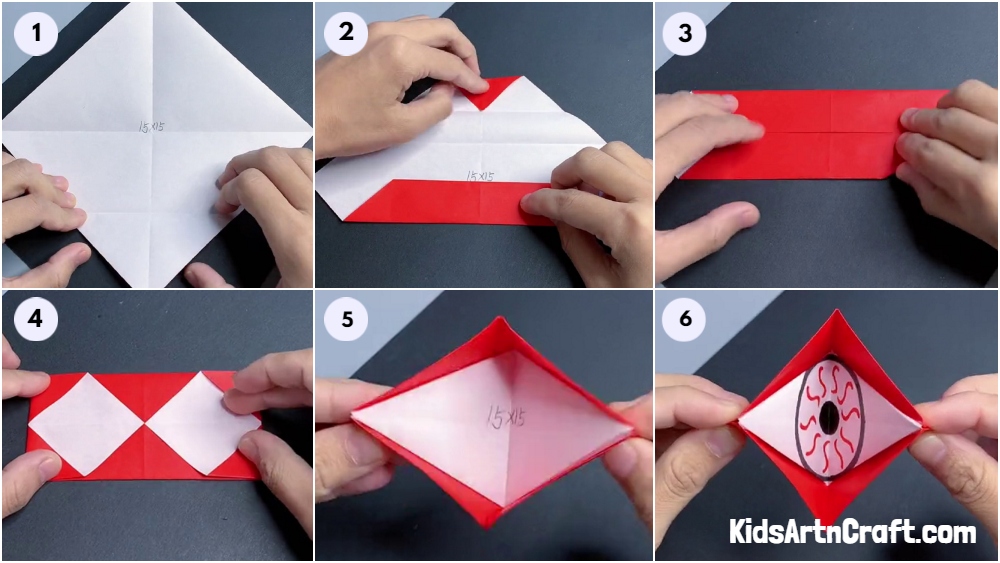
Step 1: Making ‘+’ Creases

Prepare the Origami Sheet-Creating a Paper Eye for Children in the Home

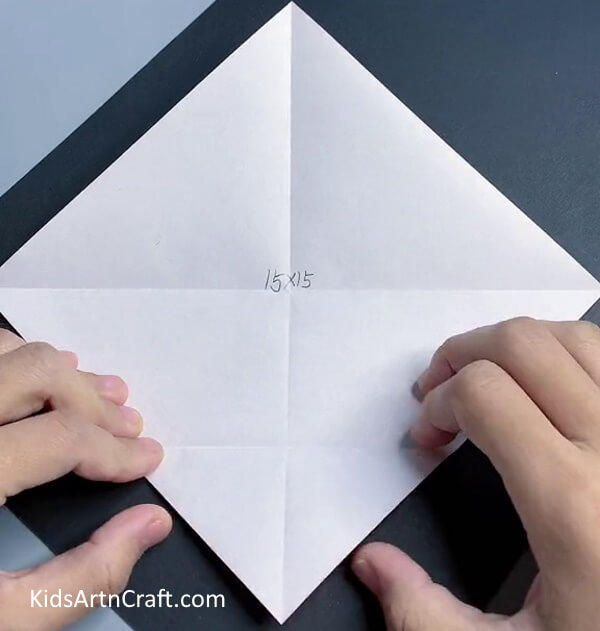
Begin this craft by taking a 15×15 origami paper which has dual colors from both sides i.e. one side red and the other side white. Place your paper on the white side and turn it into a diamond shape (i.e. keeping the corners on the top, bottom, left, and right side). Fold the corners over the opposite ones to form ‘+’ creases over the paper.

Step 2: Forming 3-3 Creases Above And Below The Horizontal ‘+’ Crease

Fold and Flatten-Constructing a Paper Eye at Home for Kids

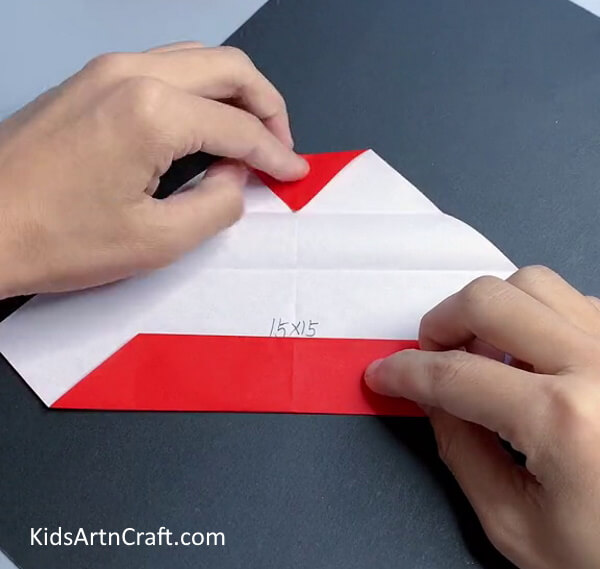
Take the below corner of the diamond and fold it into the center to make a 1/4th crease again fold the paper to the horizontal ‘+’ crease to form 2 creases, one at the corner and one juts below the horizontal ‘+’ crease, in total you have formed 3 creases below the horizontal crease.

Follow the same from the top corner of the diamond and make 3 creases above the horizontal ‘+’ crease.

Then fold the top and bottom ends along the very cornered creases, over the paper.

Step 3: Folding Along The Creases

Folding the Sides- Home-made Paper Eye for Kids

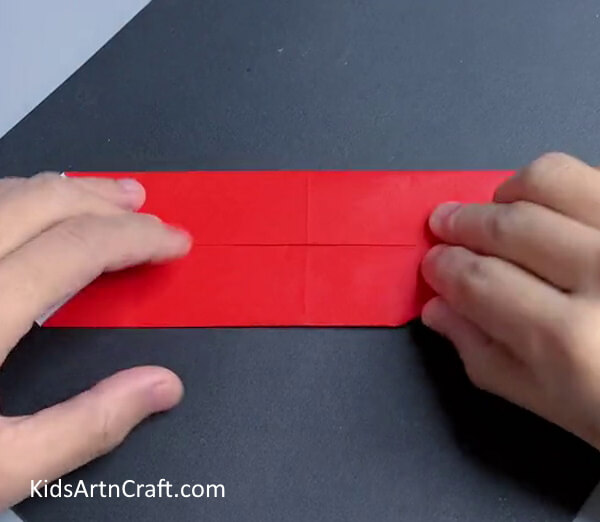
Now, fold the paper from top and bottom along the remaining 2 formed creases to the horizontal ‘+’ crease. You will form a long diamond shape with a partition.

Step 4: Flipping And Folding The Side Corners

Turning and Folding-Crafting a Paper Eye at Home for Youngsters

Flip your paper to the other side and fold the side corners (i.e. right and left) to the middle i.e. intersection of the ‘+’ creases.

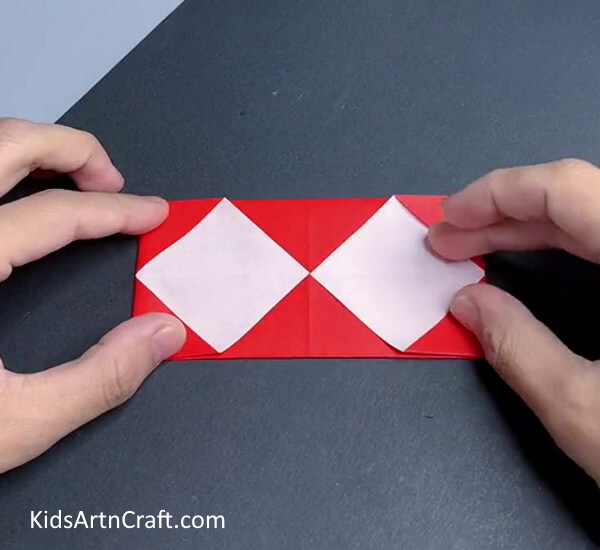
Step 5: Folding The Corners Diagonally

The Tricky Fold- Building a Paper Eye at Home for Little Ones

Now, fold the right top corner of the paper in a way that you fold from the end of the vertical ‘+’ crease and the end of the horizontal ‘+’ crease in the right top section of the paper divided by the ‘+’ crease. You will form a diagonal crease on the top right side.
Following the same, make the diagonal creases on the corners of all remaining 3 sections of the paper.

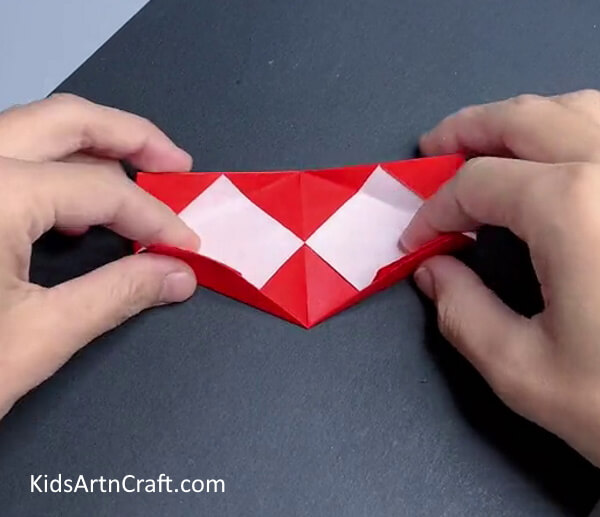
Step 6: Flipping And Opening The Partition

Tuck In and Observe-Making a Paper Eye at Home for Children

Flip your paper to the other side and stretch to open the middle partition.

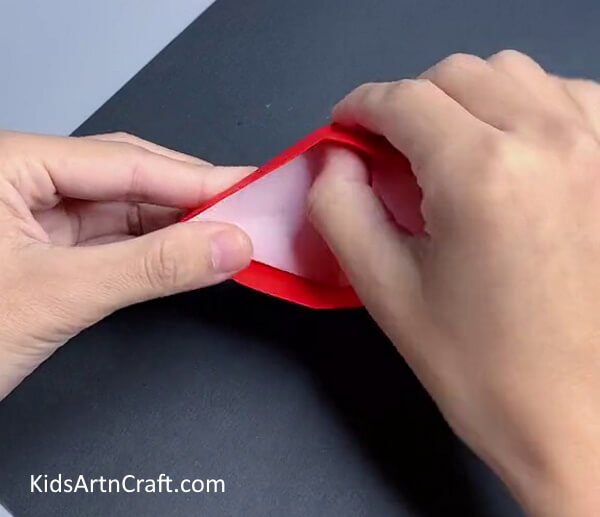
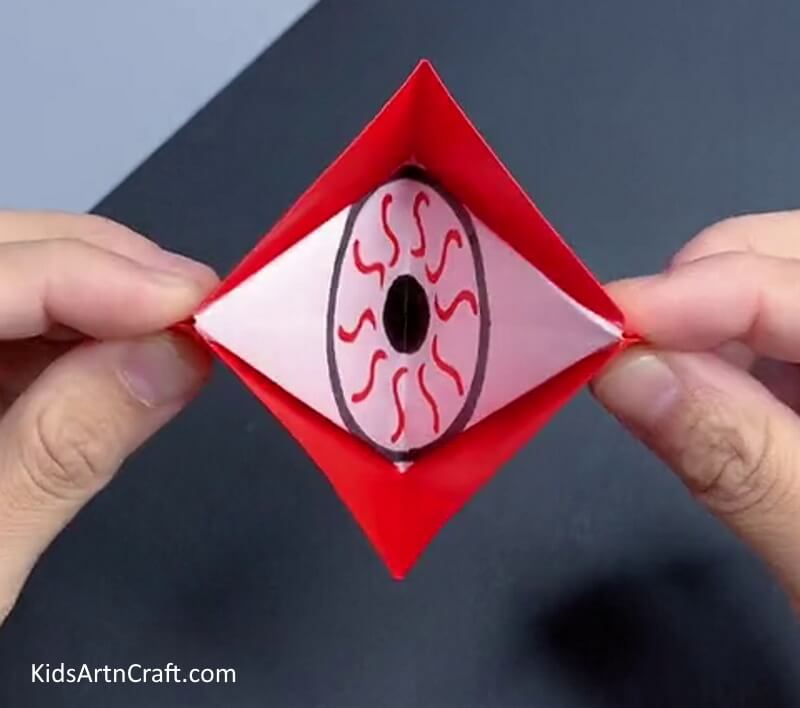
Step 7: Moving The Paper

Folding the Corners-Fabricating a Paper Eye for Children at Home

This will be the eye of yor craft, hold it from the behind folded flaps of the paper. Pull apart to blink your eye and push in to open it.

Step 8: Making The Eye Ball

Add the Eyeball-Developing a Paper Eye for Kids in the House

Take a black sketch pen and a red sketch pen. Using the black one make the eyeball circle over the white part of your eye in the center and make a smaller circle in the eyeball circle and color it wholely. Using the red sketch pen, make wavy lines around the eyeball to make its iris. See the image for reference.
 
Congratulations! You have successfully made a paper eye through origami!
It can be used for various crafts and creative projects. Enjoy experimenting with different colors and shapes to create unique paper eyes! Make different types of eyes as you like! If you are a fan of ‘Naruto’ then create a Sharingan! Use your creativity to make it as unique as you are! 

Follow us on YouTube for art and craft tutorials and much more.

More Articles from Kids Art & Craft

Activities for Kids
Continue Reading

More in Kids Activities

Like us on Facebook

Advertisement

Recent Post

DIY and Crafts

DIY Fun To Make Cardstock Paper Crafts

By April 27, 2024
Easy & Simple Art & Craft Ideas to Keep Your Kids Busy and Entertained

DIY and Crafts

Button Crafts For Toddlers

By April 27, 2024

DIY and Crafts

Crochet Dishcloth Patterns For Cleaning

By April 27, 2024

Kids Fashion

Bunny Costume DIY Ideas for Kids

By April 26, 2024

Kids Activities

Acrylic Leaf Painting Art Ideas

By April 26, 2024
Advertisement

Popular Tags

To Top
Get Free Worksheets & PrintablesDownload
+