Clay Crafts
How To Make Clay Chick Craft Step by Step Tutorial

Create cute chicks using clay! This tutorial involves a guide for making this clay chicks craft which will be a wonderful addition to your craft collection!
This easy DIY clay chick craft is a fun learning activity for kids of all ages! Kids love to play with clay so we emerged the playing process to make something beautiful out of it! This is also a fun sensory activity craft for the younger ones to drive their motor skills! Let the kids get inspired by nature so that they can create anything using their innovation skills! Unleash the creativity in this craft making using up only some basic craft supplies that you already have at home or are budget-friendly! Get ready to enjoy the creative process and fun learning time while creating this chick craft!
DIY Clay Chick Craft Tutorial For Kids

Read More: How to Make Clay Flowers Artwork for Beginners
Materials Required
- Colored Clay (Yellow, Red, And White)
- Black Marker
- Sketch Pens (Light Green, Dark Green, And Red)
- Googly Eyes
- Clay Shaping Tool
- White Circular Paper Sheet
Procedure
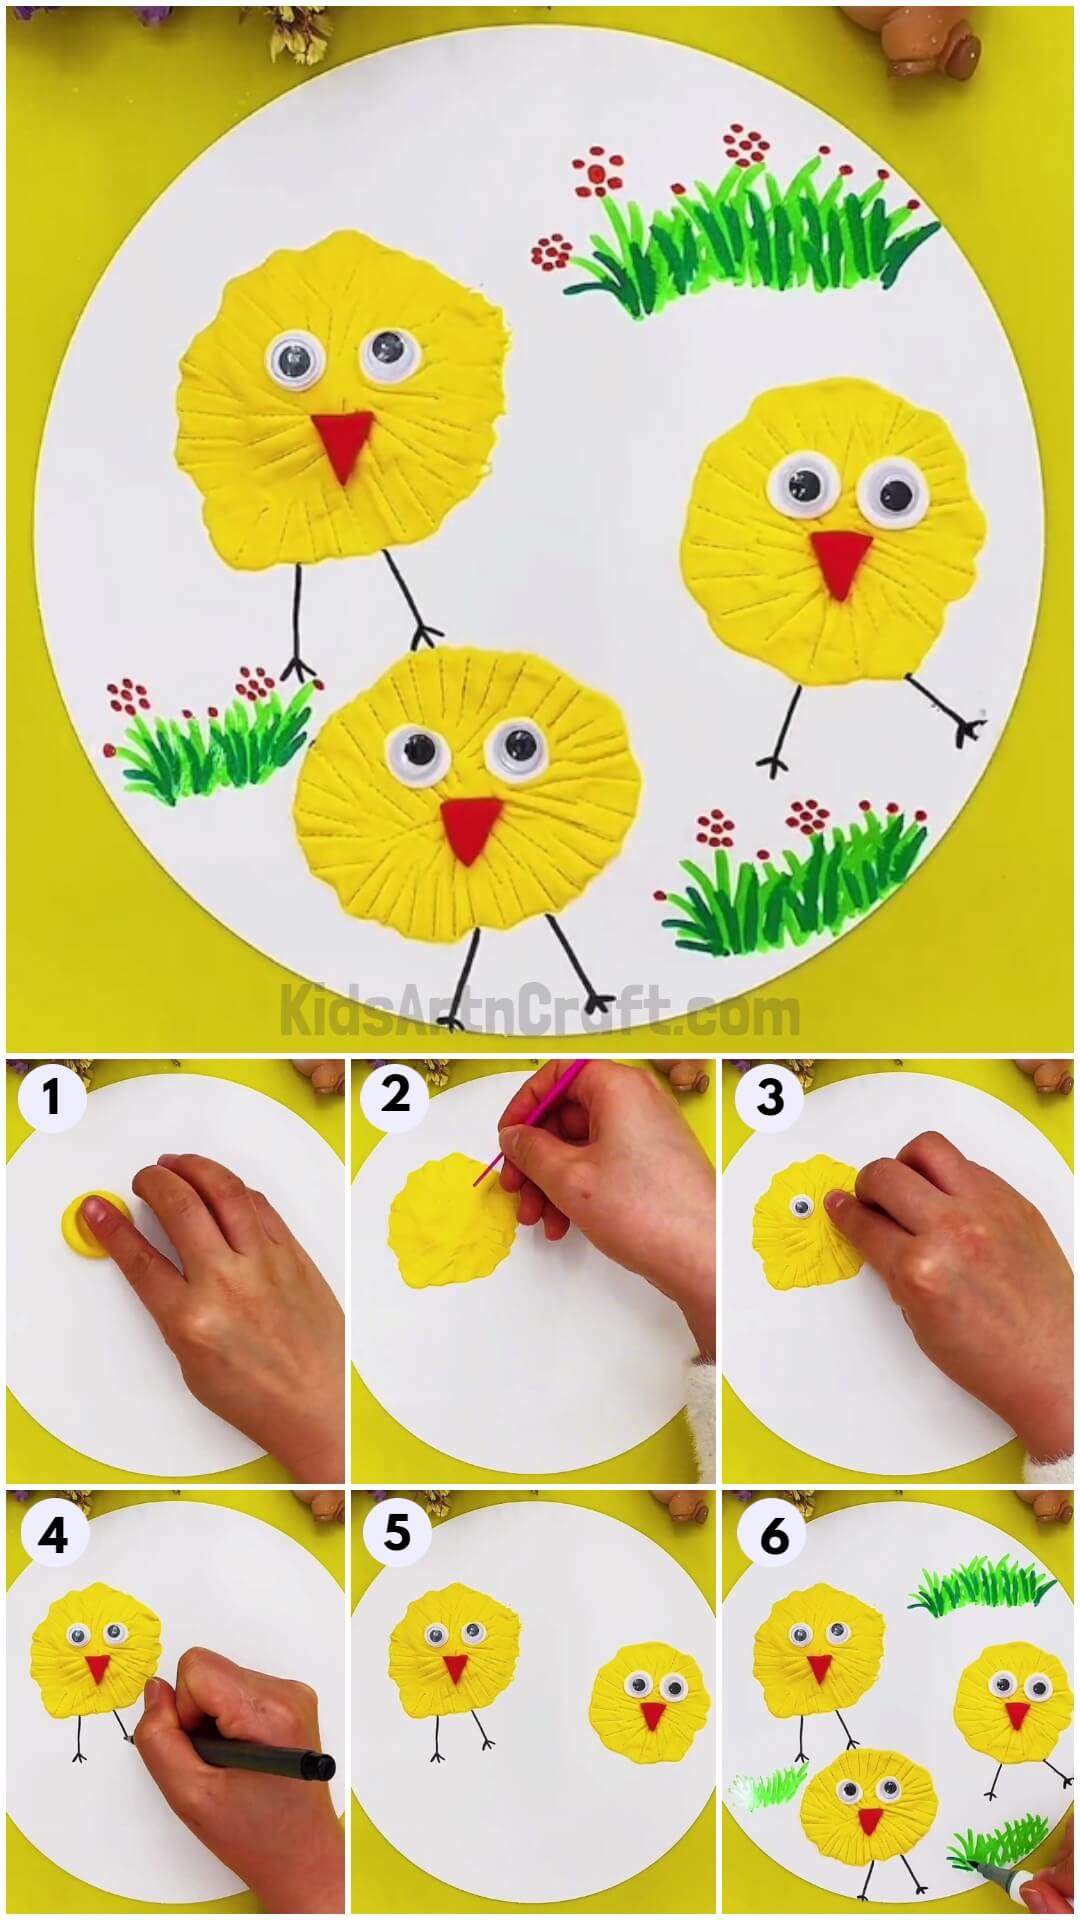
Step 1: Pressing A Yellow Clay Ball
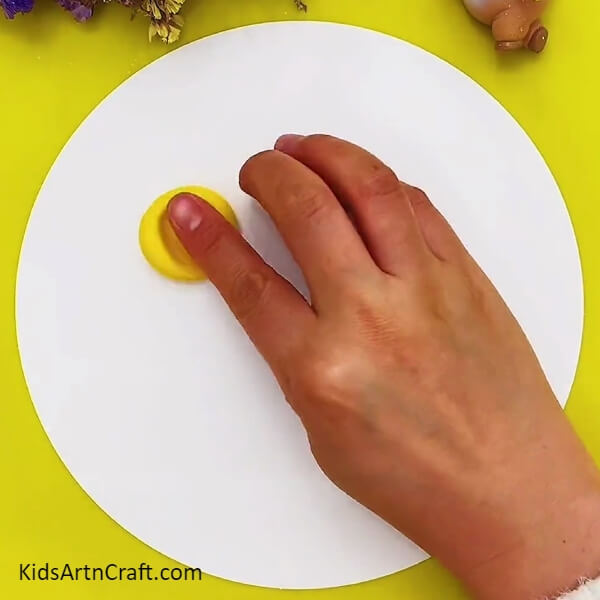

Let’s begin the craft by taking a white circular paper sheet as the base for the craft and yellow clay. Dough the yellow clay into a clay ball, place it over the right top of the base, and press it using the fingers to completely flatten it over the base. This will be the body of the chick.
Step 2: Making Some Irregular Lines
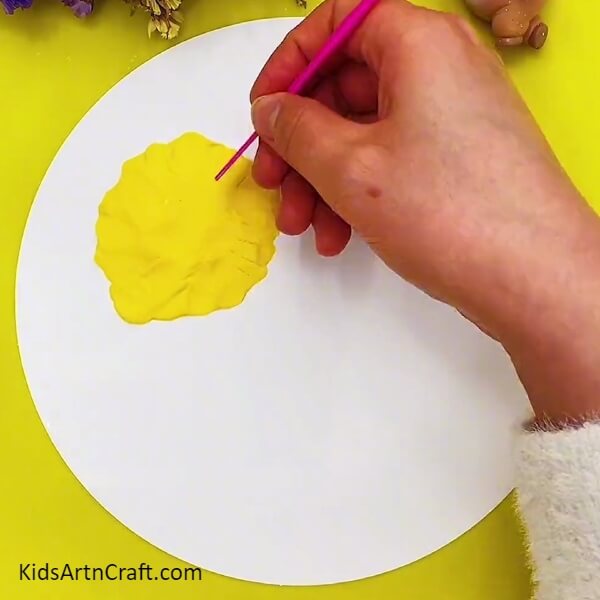
Using a clay shaping tool, make random small lines all over the yellow body of the chick.
Step 3: Making White Clay Eyes

Dough 2 small white clay balls, place them over the body side-by-side and press them to make eyes of the chick.
Step 4: Sticking Googly Eyes
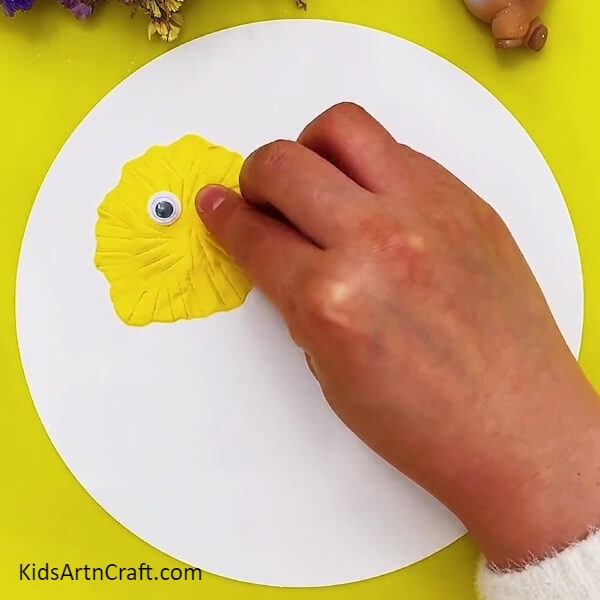
Stick googly eyes over the clay eyes by pressing eyes over them.
Step 5: Making Chick’s Nose
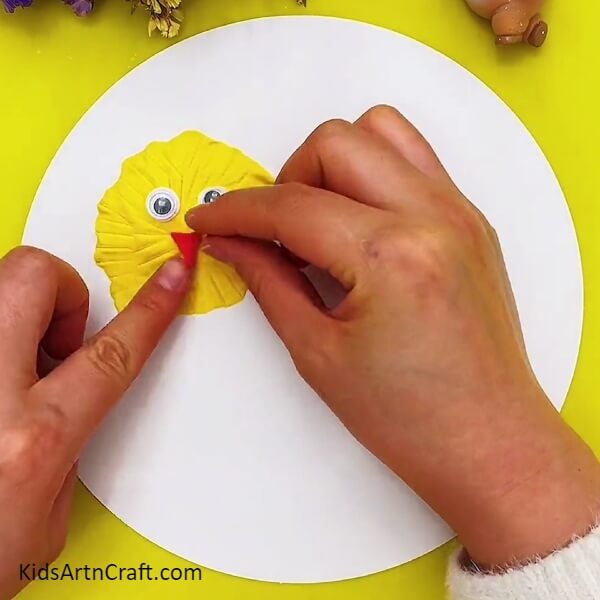
Shape red clay into a triangle then place and press it below and between the eyes of the chick.
Step 6: Making Legs Of The Chick
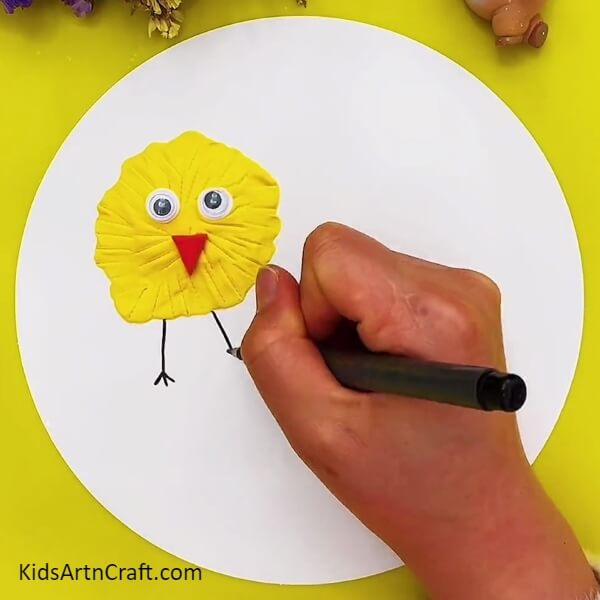
Using a black marker, draw the classic stick legs beneath the chick.
Step 7: Making Another Chick’s Body

Again follow the same using yellow clay and clay shaping tool to make another body of the chick on the right side of the base.
Step 8: Making Clay Eyes Of The Other Chick
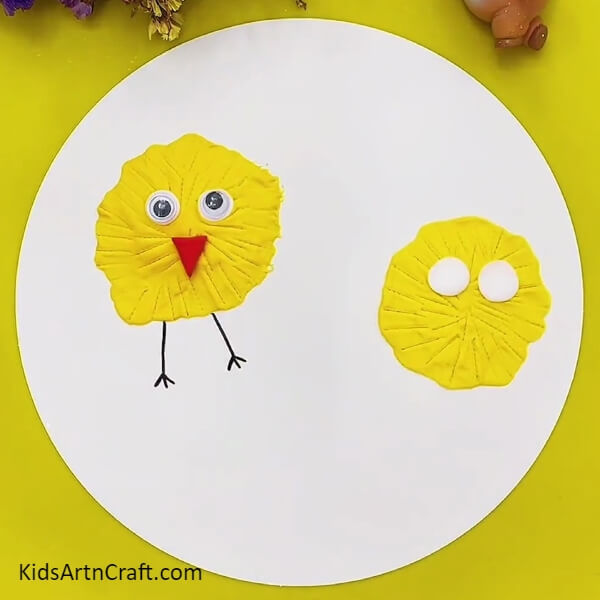
Again, using white clay make and stick 2 clay eyes over the other chick.
Step 9: Sticking Googly Eyes And Nose
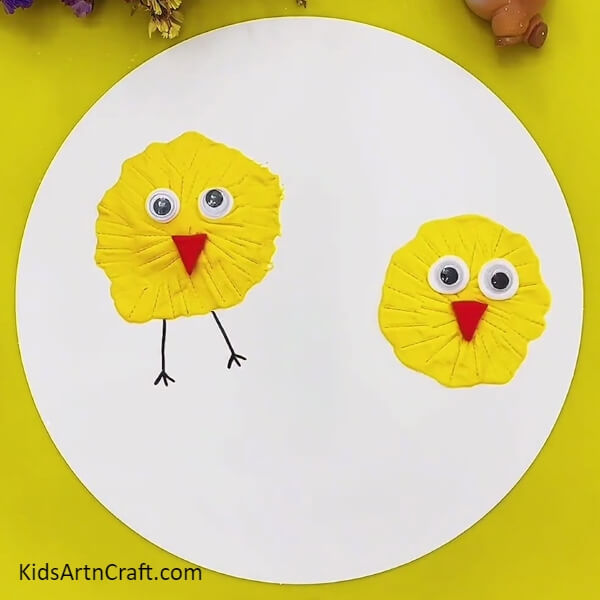
Stick the googly eyes over the clay eyes and again make a triangular nose from he red clay and stick it in between below the eyes of the other chick.
Step 10: Making Third Chick
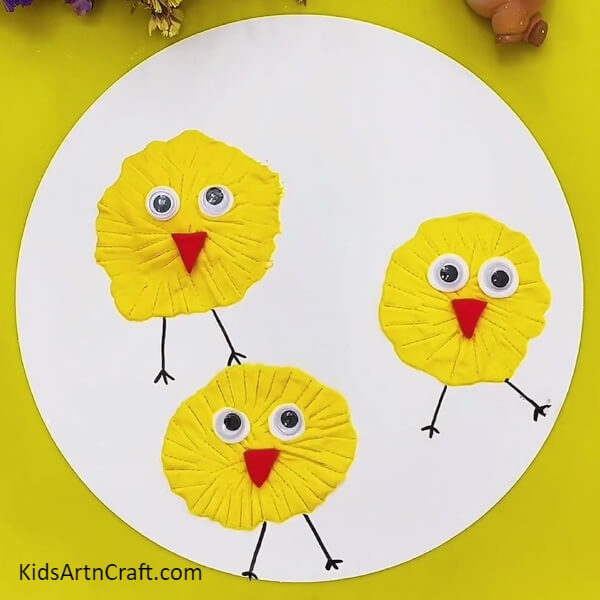
Repeat all the steps again to form another chick below and in between the 2 chicks, also make the stick legs of them using the black marker.
Step 11: Making Grass
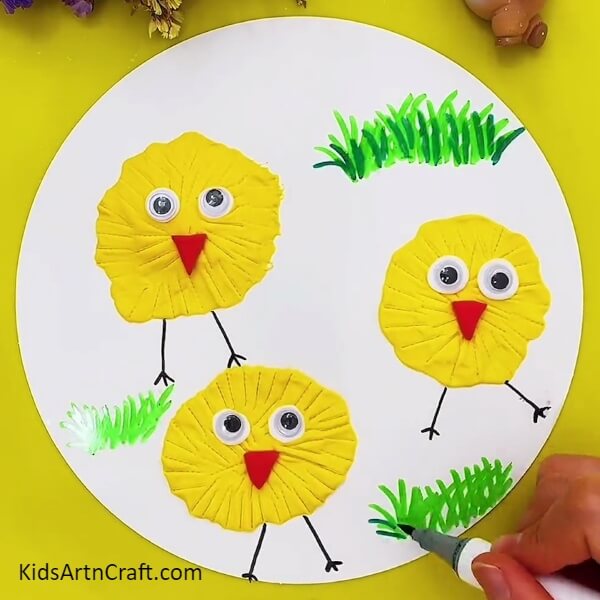
Using a light green and dark green sketch pen, make random collective strokes over the base to make the grass over it.
Step 12: Making Flowers Over The Grass
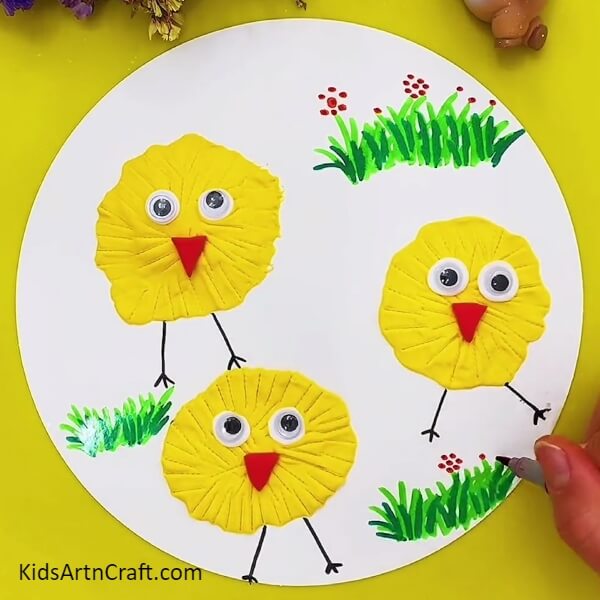
Using a red sketch pen, make dotted flowers over the grass as shown in the image.
Finally !!Your Cute Chick Craft Is Ready!!
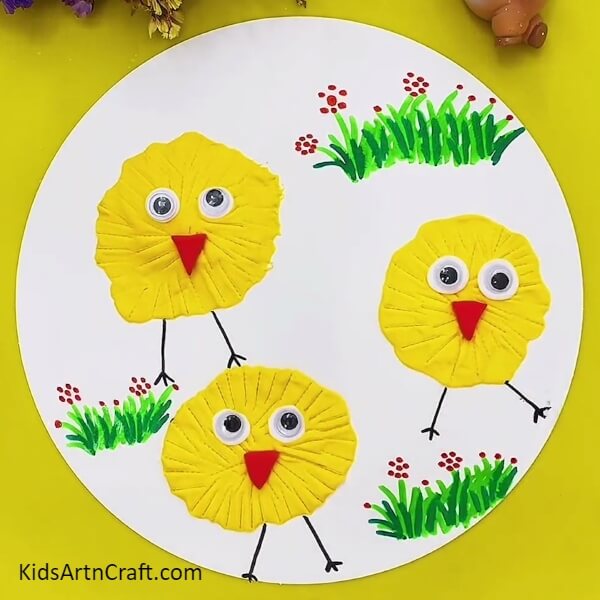
Woohoo! Look at the final results of your clay chick craft!
With you! You can now show off your creation to everyone and can even flaunt your crafting skills through clay to your friends and family! You can also use this craft as a school project to let the teacher be stunned by your creation and creativity! Decorate it over your room’s wall so that everyone catches eye on it!
Follow us on Youtube for art and craft tutorials and much more.
More Articles from Kids Art & Craft
- How to Make Clay Flower Easy Tutorial for Kids
- How to Make Worm Using Clay For Kids
- DIY Clay Giraffe Step by Step Tutorial For Kids
- How To Make Caterpillar Eating Apple Using Clay
- Simple & Tasty Ice-Cream Craft Using Clay – Step by Step Tutorial