


Clay Crafts
How to Make Clay Flowers Artwork for Beginners

Learn how to make beautiful clay flower artwork with this easy step-by-step guide. Perfect for beginners, this tutorial will teach you the basics of creating clay flowers and the techniques to make them look stunning.
Clay is the favourite part of everyone’s childhood. The soft dough from which you could make everything you imagined and wished for, that too in different colours. So, today we are going to make something out of your favourite material and relive our childhood memories. Let’s begin!
Easy Clay Flowers Artwork For Beginners
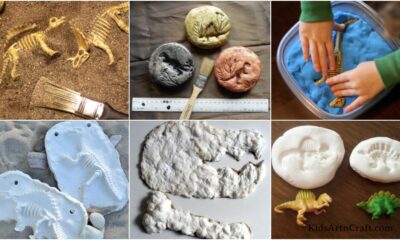
Read More: DIY Clay Giraffe Step-by-Step Tutorial For Kids
Materials Required
- White cardboard
- Green marker/sketch pen
- Glass apparatus
- Toothpick
- Clay (Different colours)
- Bamboo stick (2)
- Glue gun
- Glue
- Ribbon
Procedure
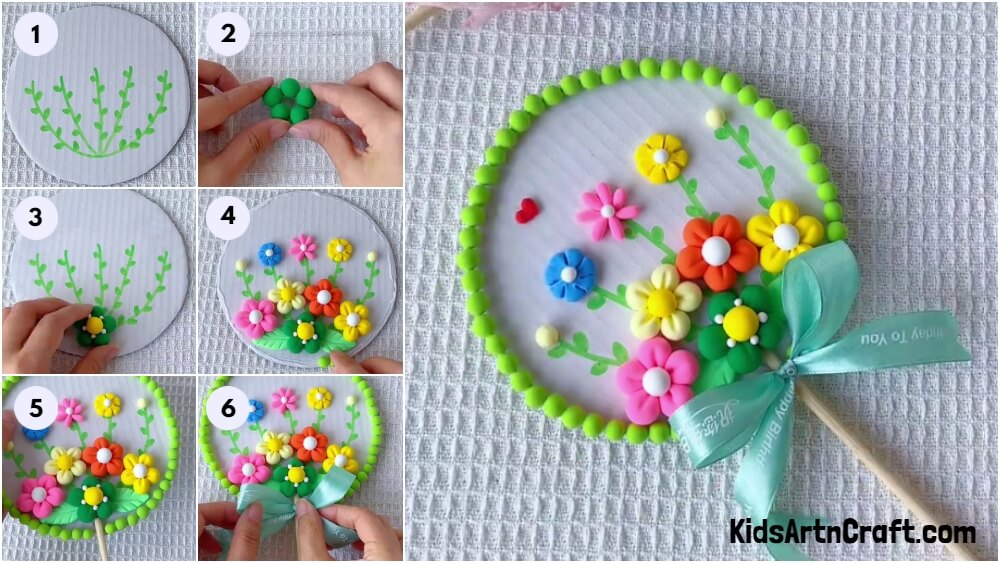
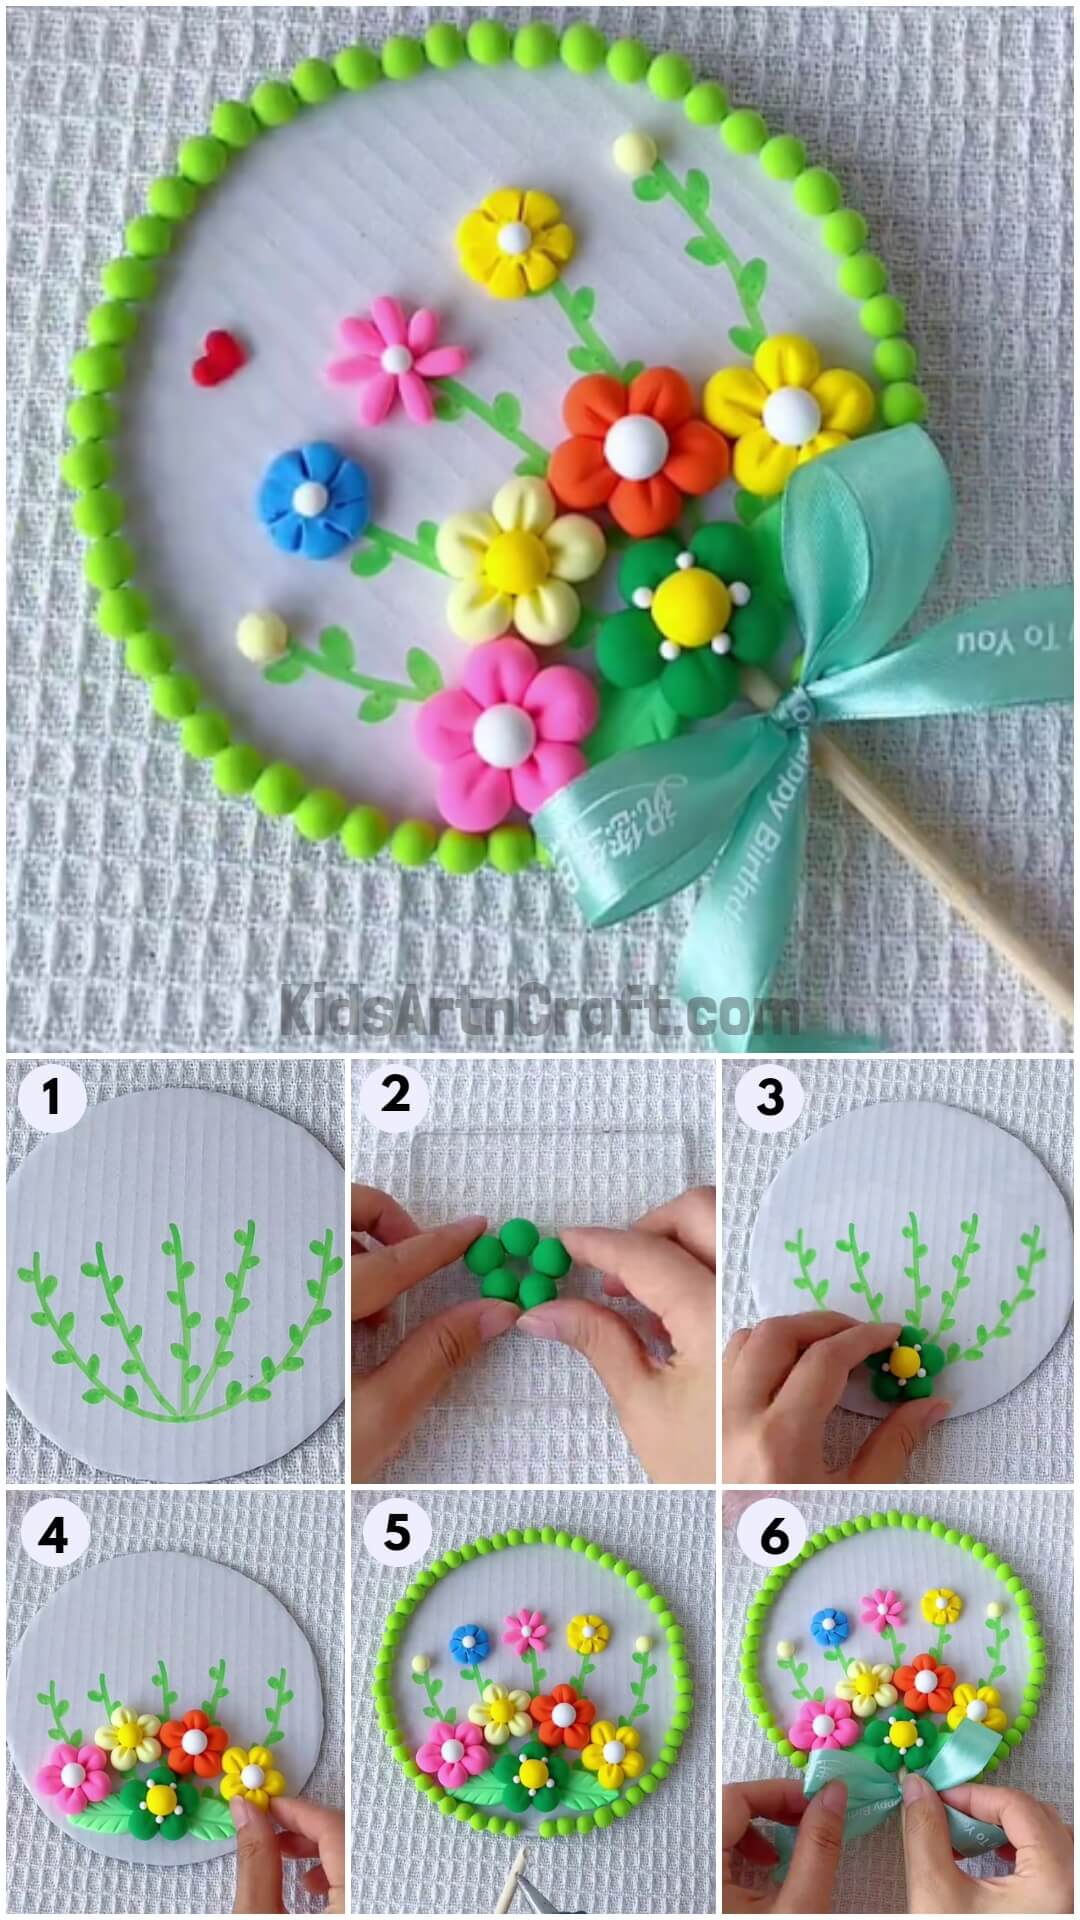
Step 1: Take A White Cardboard
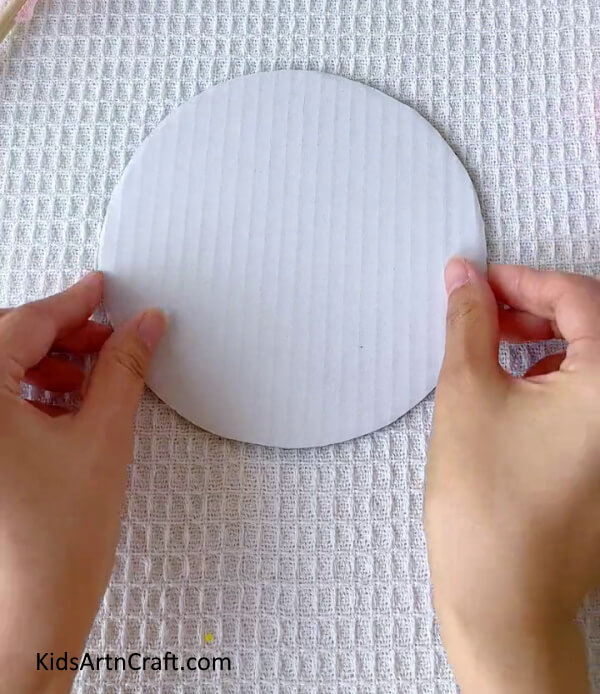
Your first step is to take a white coloured thin cardboard. The cardboard should be circular in shape.
Step 2: Make Leaves From Green Marker/sketch pen

Now, take a green marker/sketch pen and make a stem and leaves in a climber form on the white-coloured thin cardboard as shown in the picture.
Step 3: Make Small Balls From Green Clay
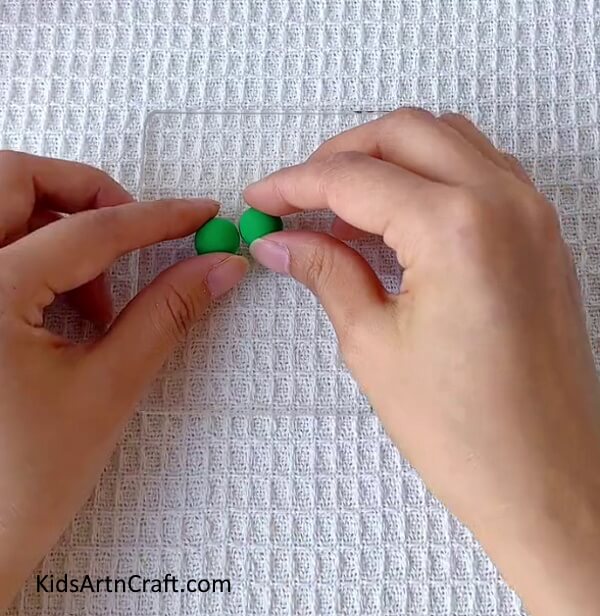
With the help of green-coloured clay, make small balls. After making the green-coloured balls from green-coloured clay, keep them on the glass apparatus as shown.
Step 4: Make a Total of Five Small Balls From Green Clay

Keep repeating the same step of making small balls with the help of green-coloured clay. You have to repeat this step till you get a total of five small green-coloured balls. After making five green-coloured balls from the green-colour clay, arrange the green-coloured balls on a glass apparatus in a circular manner.
Step 5: Make Lines On Green Clay From Toothpick
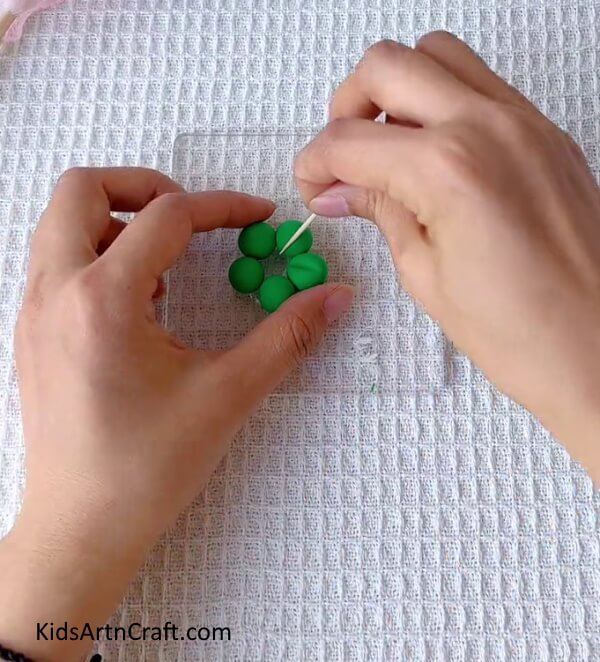
Now, with the help of a toothpick, make lines in the middle of all the five green coloured balls which you made above. Keep the green balls on the glass apparatus and then make the lines with a toothpick on the green-coloured balls.
Step 6: Make A Yellow Ball From Yellow Clay
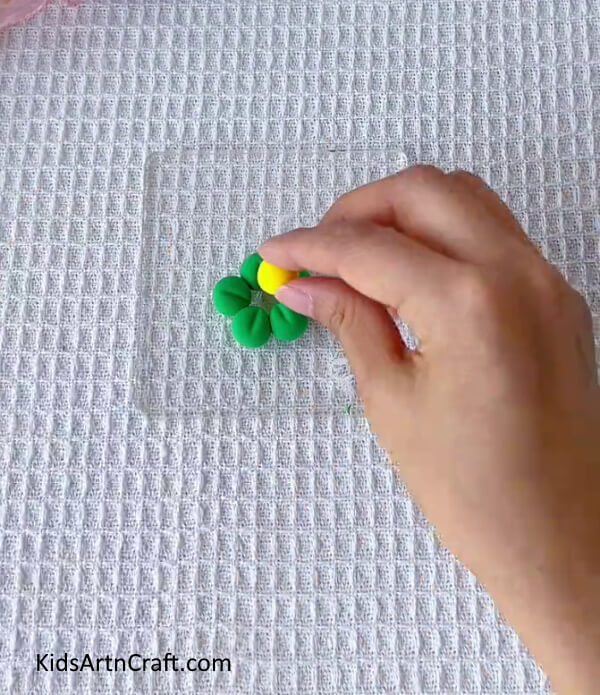
Take yellow-coloured clay. After taking a yellow coloured clay, make one yellow coloured ball with the help of yellow coloured clay.
After making one yellow-coloured ball with the help of yellow clay, place it in the middle of the five green-coloured circles as shown.
Step 7: Make Five Small Balls From White Clay
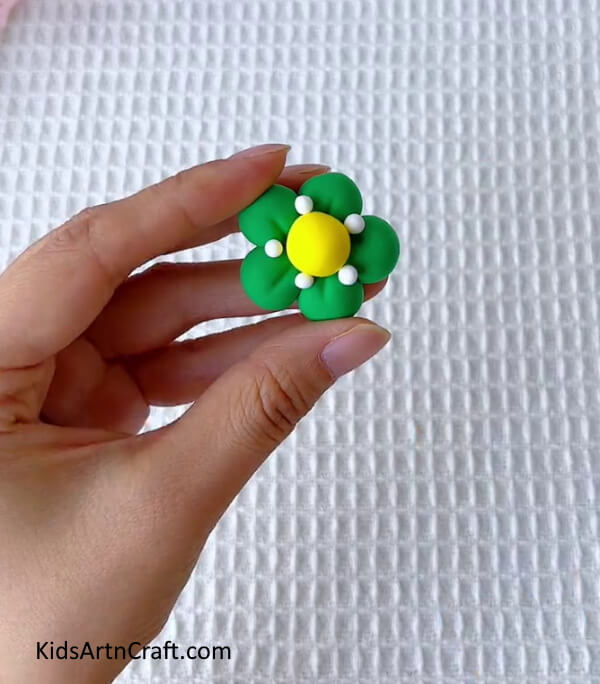
Now, with the help of white-coloured clay, make five small white-coloured balls.
Then, place the white coloured small balls, between each curve of the green-coloured clay as shown in the picture.
Step 8: Stick The Green Flower On The White Cardboard With Glue
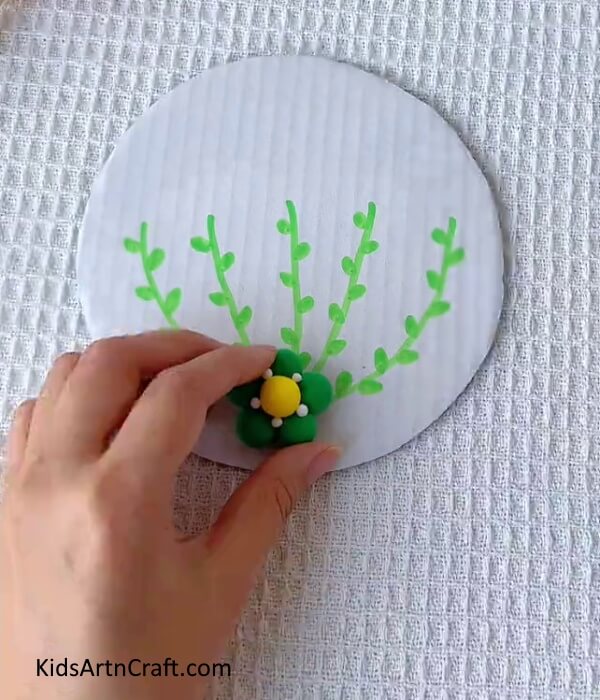
With the help of the glue, stick the green colour clay flower which you made from green, yellow and white coloured clay on the thin white cardboard. Remember to stick the green colour clay flower on the bottom part of the stem and leaf where all the stems are joining.
Step 9: Make More Flowers With Different Colour Clays
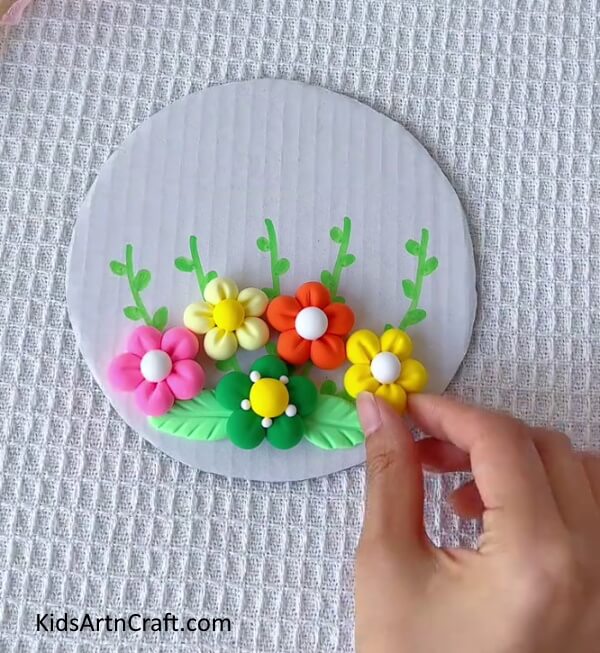
By repeating the same step from above, make more pretty clay flowers with different colour clays. Then, with the help of light green-coloured clay, you even have to make two leaves. You have to make four more clay flowers by repeating the same steps from above.
After making the clay flowers from different colours, stick the clay flowers on each stem and leaf climber with the help of glue as shown. Then, after making the leaves, stick the leaves on both sides of the first green colour clay flower which you made.
Step 10: Make More Clay Balls And Stick It On The Cardboard Paper
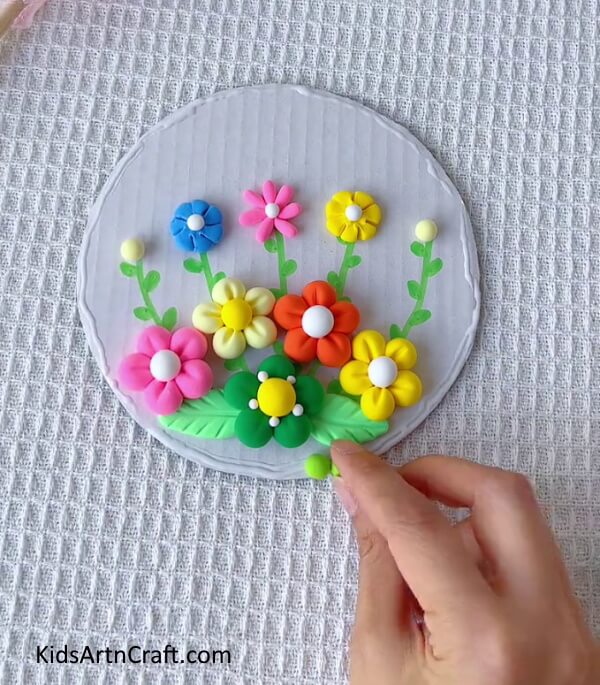
Firstly, make two white-coloured balls with the help of white clay. Stick the two white-coloured clay balls on the thin white cardboard on the top side of the extreme opposite leaf and stem climbers with the help of glue.
Then, make two clay flowers of similar shape but different from the previous clay flower and also a little smaller in size than the previous clay flowers which you have stuck on the thin white cardboard. After making two similar flowers, stick the clay flowers on the top of the leaf and stem climber with the help of glue.
Then, make one more clay flower which had different shapes. After making the clay flower, stick the clay flower on the top middle of the leaf and stem climber with the help of glue as shown in the picture.
Step 11: Make Small Small Green Balls With Green Clay
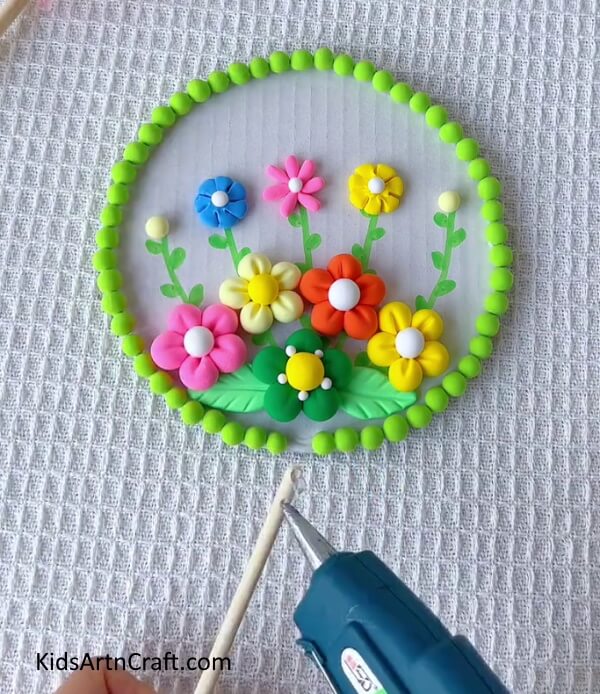
Now, with the help of light green coloured clay, make small light green coloured balls and stick the light green coloured balls on the whole circumference of the thin white cardboard with the help of glue. Leave some space at the bottom of the thin white cardboard by not sticking the light green coloured balls.
Step 12: Stick The Bamboo Stick With Glue

Now, take a bamboo stick and a glue gun. Apply the glue gun on the bottom of the thin white cardboard where you have left space. After applying the glue gun, stick the bamboo stick on the glue gun. (If kid, use glue gun under the guidance of an adult).
Step 13: Stick One More Bamboo Stick Behind The White Cardboard
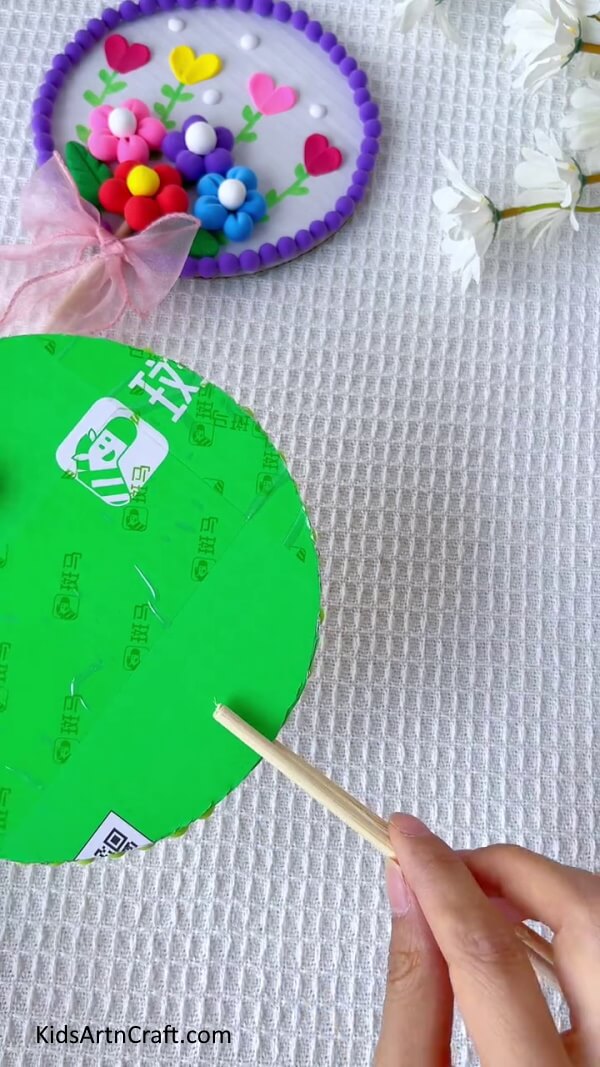
Take one more bamboo stick and a glue gun. This time apply the glue gun behind the thin white cardboard. After applying the glue gun, stick the bamboo stick on the glue gun. Stick the bamboo stick just parallel to the bamboo stick which you have stuck on the front part.
Step 14: Tie A Ribbon On The Bamboo Stick
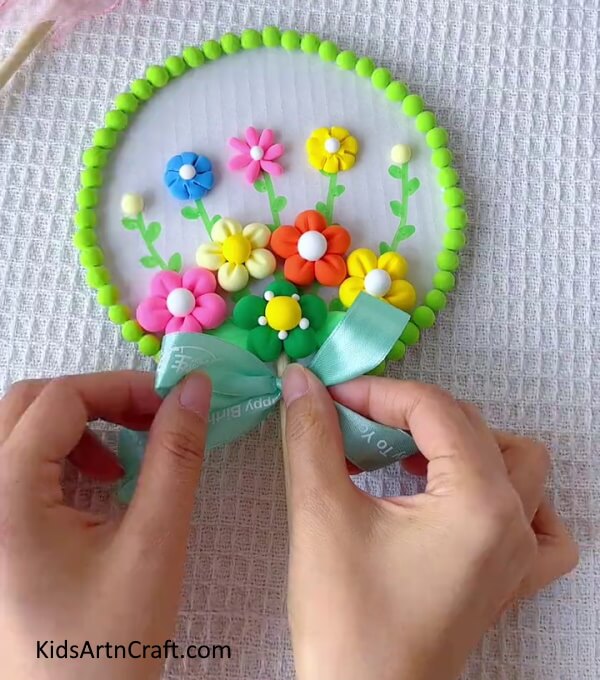
Now, take a ribbon and tie it to the bamboo stick which you have stuck on the front side. Tie the ribbon in a bow shape as shown in the picture.
Step 15: Hold Your Creativity With a Bamboo Stick
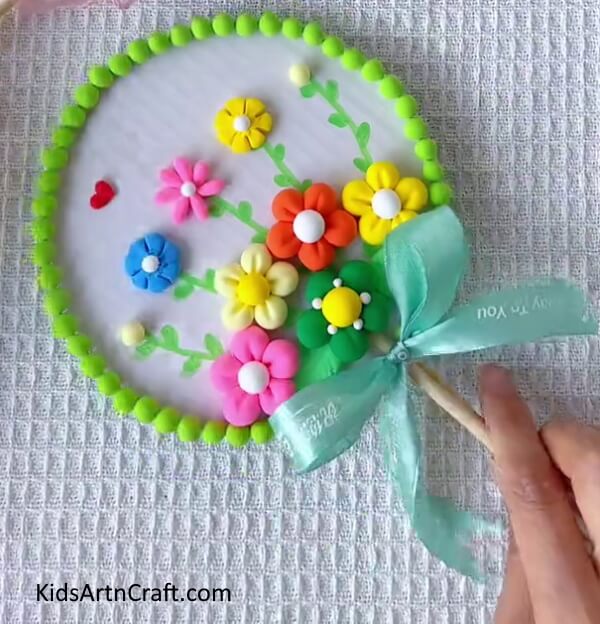
Now, you can finally hold your creativity in your hands by holding the bamboo stick which you have stuck with the help of a glue gun on the front side.
Finally, Your Craft Is Ready To Show!
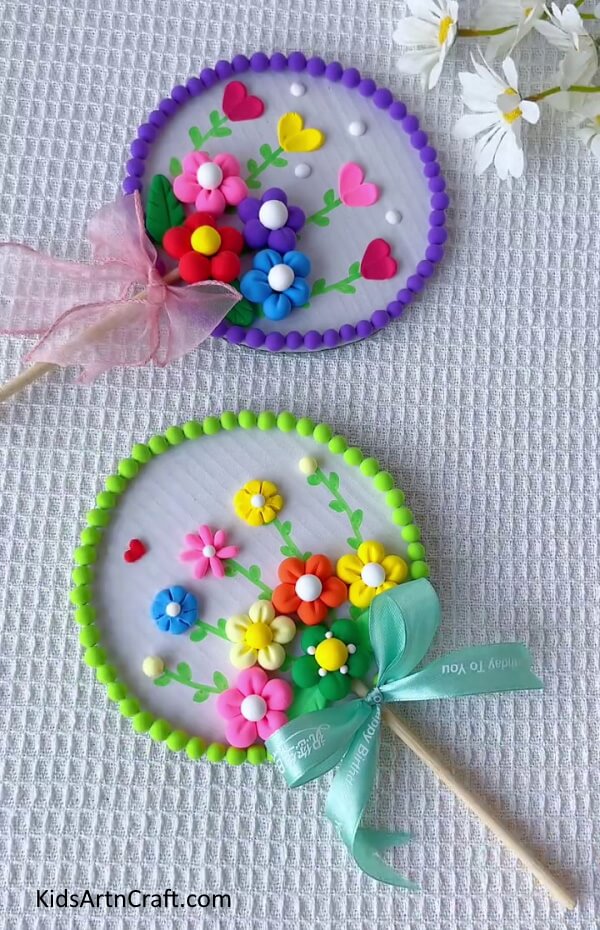
Your clay flower artwork is finally ready to show the world what a great clay worker you are. Seriously this clay art looks amazing and I’m sure whoever sees it will definitely be left in awe of your creativity. So, finally, your imagination turns into reality and the reality is looking gorgeous in front of the eyes right now. This is really simple and easy to make. From this kids can learn how to be creative and they can even learn how to work with clay. You can even use this creativity for decor purposes.
I would definitely recommend you try this clay creativity, otherwise, you will regret it. Go and try this clay art now and enjoy.
Follow us on Youtube for art and craft tutorials and much more.
More Articles from Kids Art & Craft
- How to Make Clay Flower Easy Tutorial for Kids
- Best of Waste Flower Pot Craft Using Orange Peel & Paper Cup – Step-by-Step Instructions
- DIY Miniature Clay Cake Craft Activities for Kids
- How to Make Worms Using Clay For Kids
- Paper Cutting Shapes Crafts