


Clay Crafts
How To make Flower Basket Using Clay and Bottle Cap

Wait, wait! You have to check out this article to make a tiny pretty flower basket filled with roses! This is a step-by-step tutorial for it!
Hey craft lover! We are glad you came by! Today, we brought you craftwork on making a tiny little flower basket filled with ravishing roses over a bottle cap that you will love! These flowers you will be making with colorful clay and the basket will be as tiny as a bottle cap! Playing with clay is so much fun for the kiddos and we will be a guide for them to involve this fun in making a pretty flower basket! This craft is full of motor skills and creativity, so this makes it a learning activity as well! To grab onto the benefits, make it now with us!
Easy to make Flower Basket Using Clay and Bottle Cap
Read More: Pretty Clay Flower Tree Branches Artwork Step by Step Tutorial
Materials Required
- Green Colored Bottle Cap With Its Neck
- Colored Clay (Green And Red)
- Scissors
- Glue
- Clay Pressing Tool
- Clay Knife
Procedure
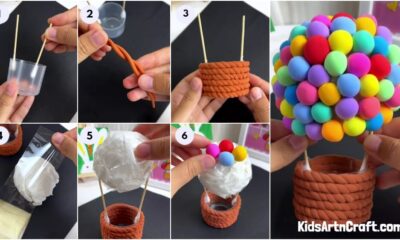
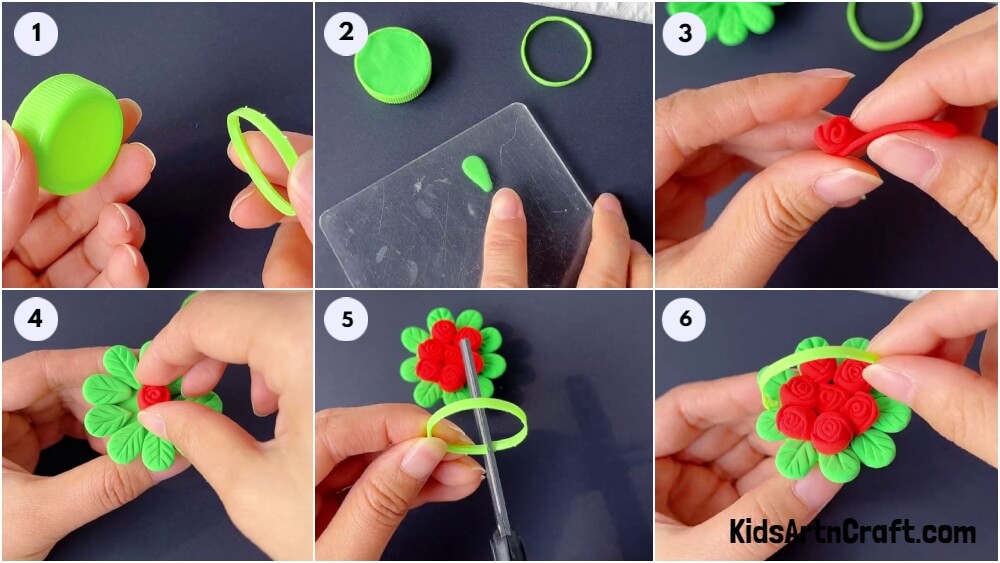
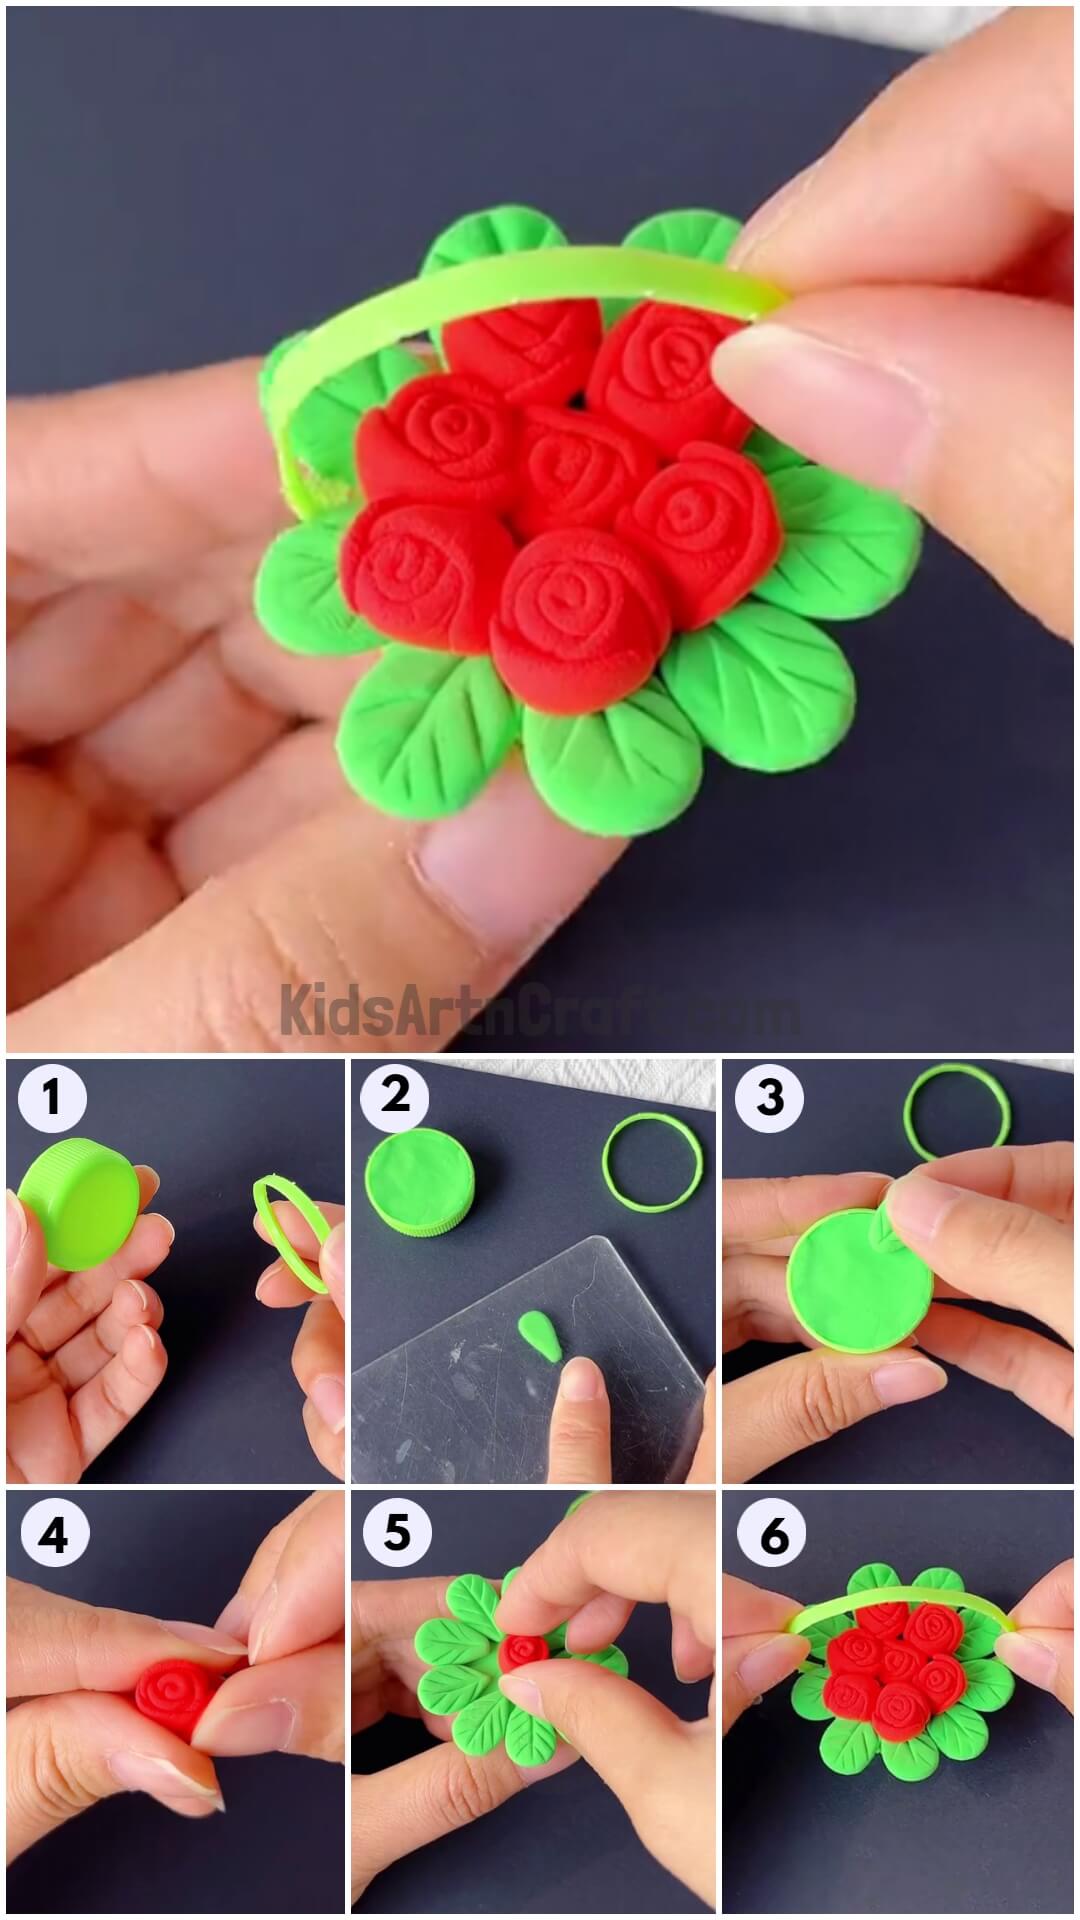
Step 1: Taking A Bottle Cap With Its Neck
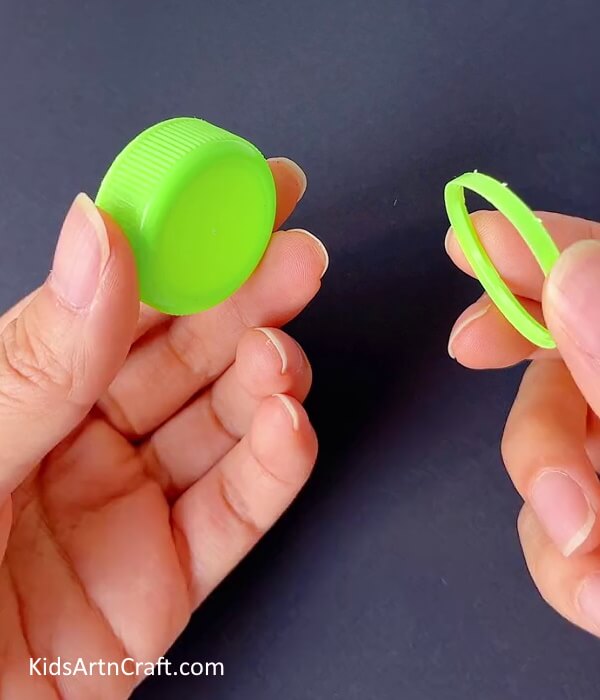
To begin this craft, take a green-colored bottle cap with its neck from a bottle.
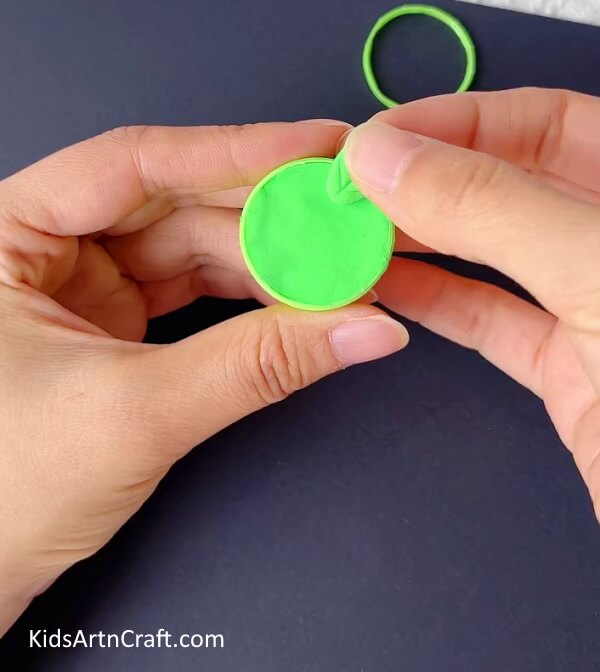
Step 2: Filling The Cap With Clay
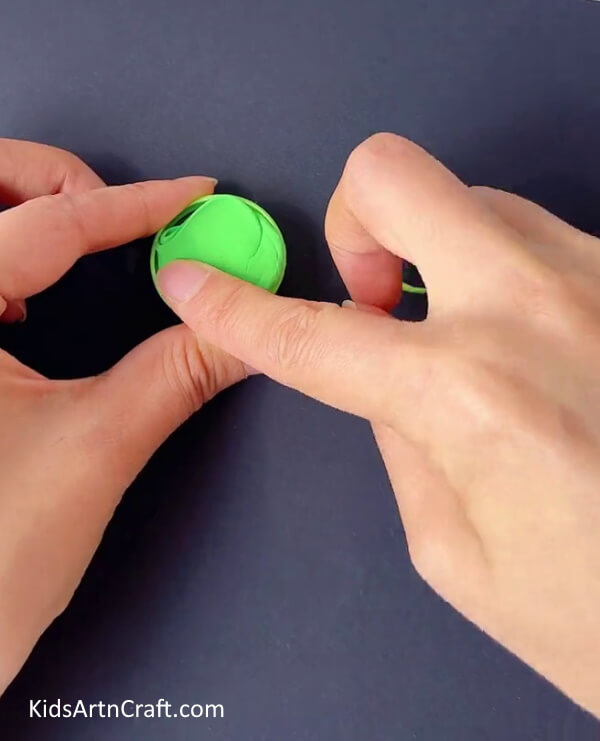
Take green-colored clay and put it inside the bottle cap to fill it.
Step 3: Making A Leaf
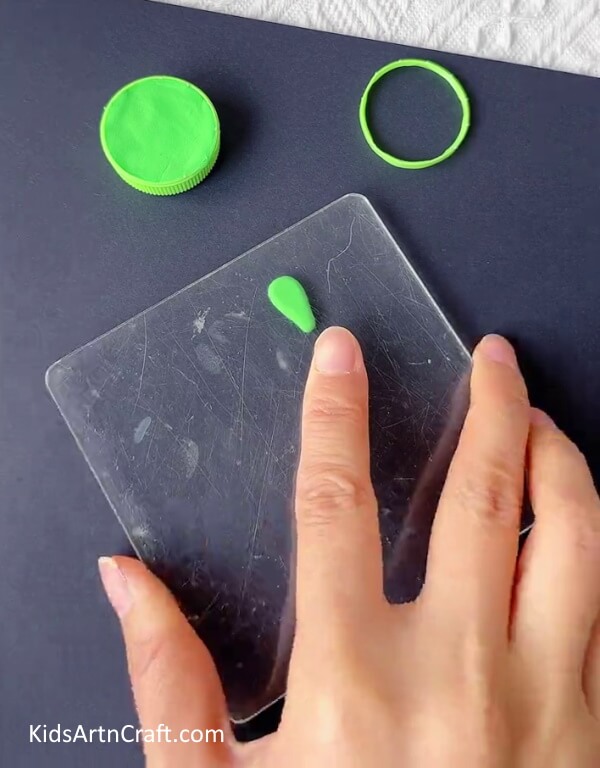
From green clay make a drop shape and using a clay pressing tool, press it to flatten it into a leaf shape.
Step 4: Detailing The Leaf
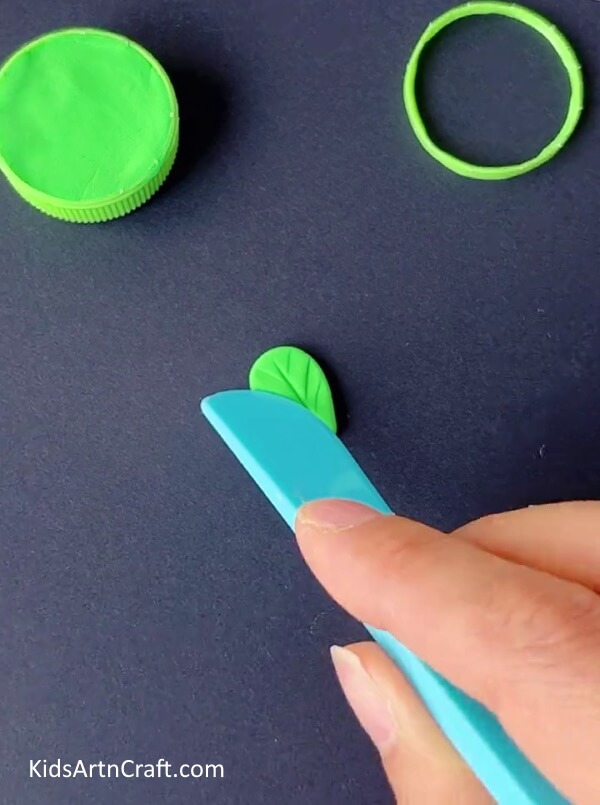
Using a clay knife, make the veins over the leaf to detail it.
Step 5: Sticking The Leaf Over Cap
Stick the leaf over the boundary of the bottle cap as shown in the image.
Step 6: Making A Red Clay Strip
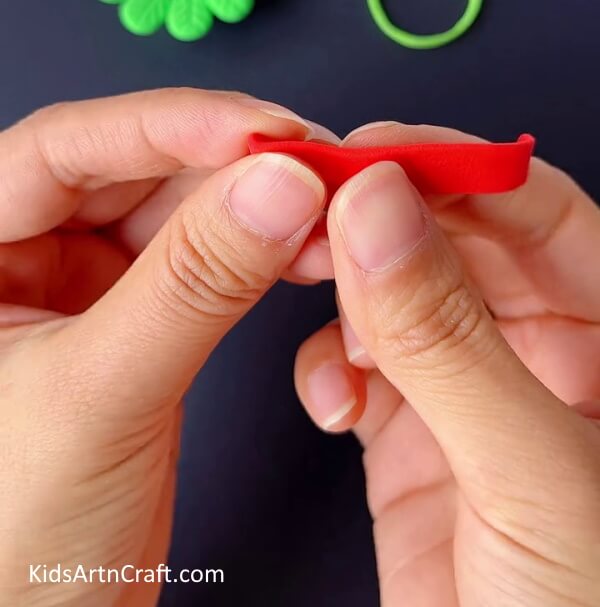
Make a ball of red clay and flatten it using the clay pressing tool. Now, using the clay knife, cut out a thin strip from the flat clay.
Step 7: Making A Rose
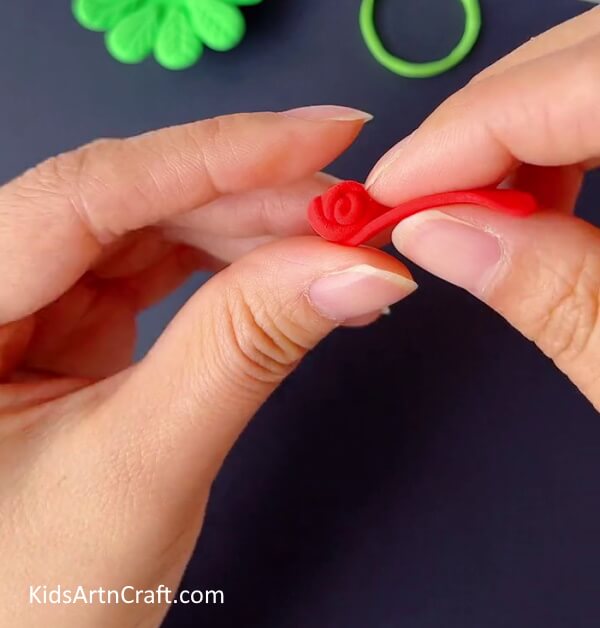
Roll the red clay strip into a wavy form to make a rose from it.
Step 8: Completing Making The Rose
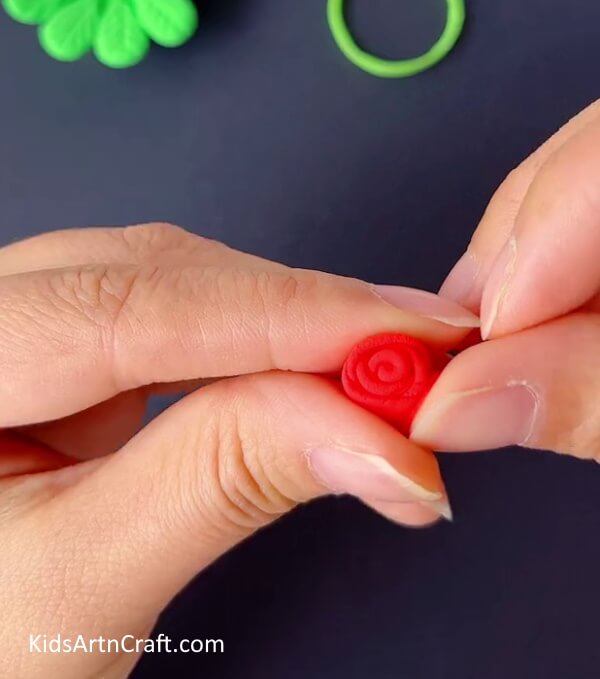
Complete rolling the whole strip into a rose and secure the end by sticking it over the rose.
Step 9: Making More Leaves Into The Basket And Stick Rose
Following the same procedure as before, make more leaves and stick them onto the boundary of the bottle cap. Then, stick your rose in the center of the bottle cap.
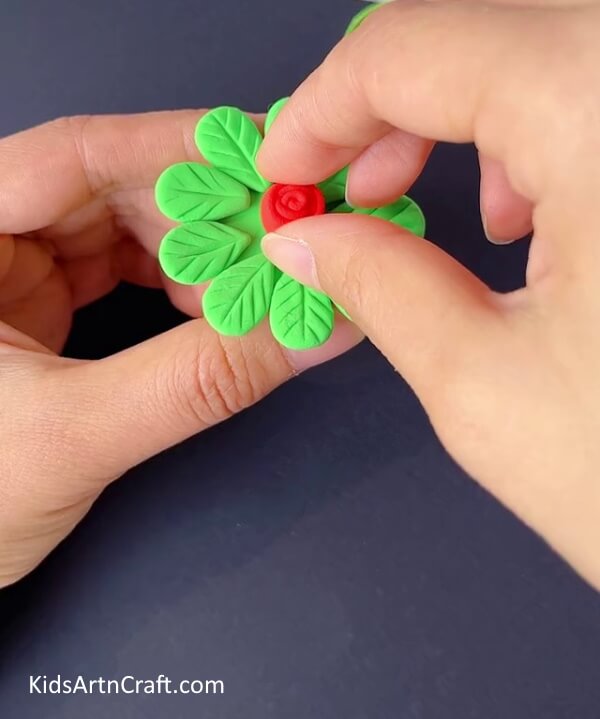
Step 10: Sticking More Roses
Make 6 more roses in the same way before and stick them around the already stuck rose in the center.
Step 11: Cutting Open The Neck Of The Bottle Cap
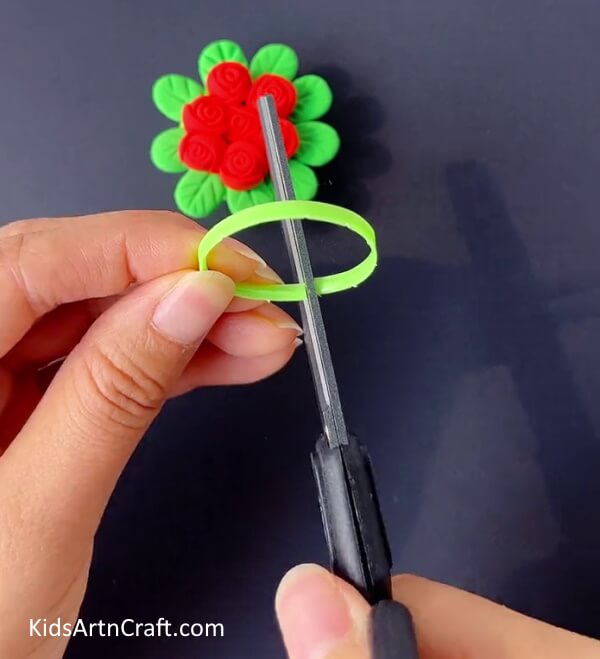
Using scissors, cut open the circular neck of the bottle cap. This will be the handle of your flower basket.
Step 12: Placing The Handle Over the Basket
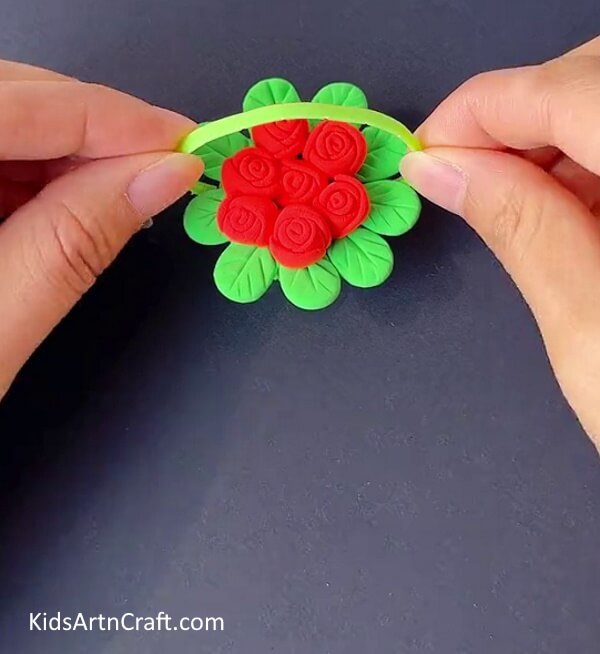
Place the handle over the basket (bottle cap) from the gaps in the leaves.
Step 13: Sticking The Handle To the Basket
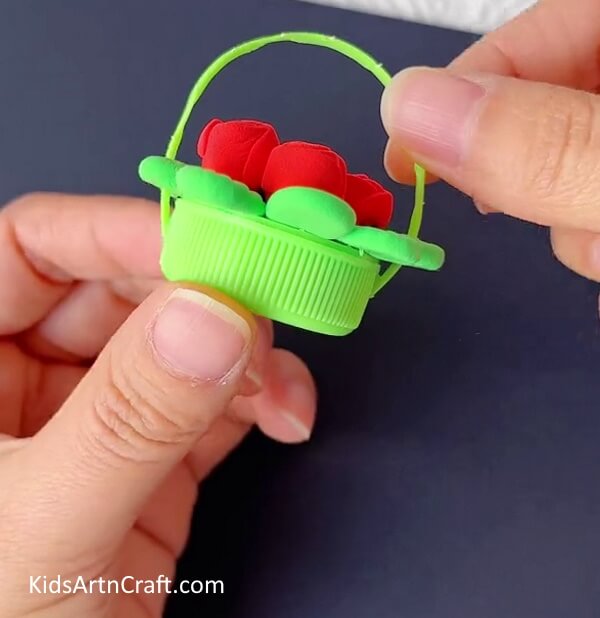
Stick the ends of the handle to the cap (basket) using glue.
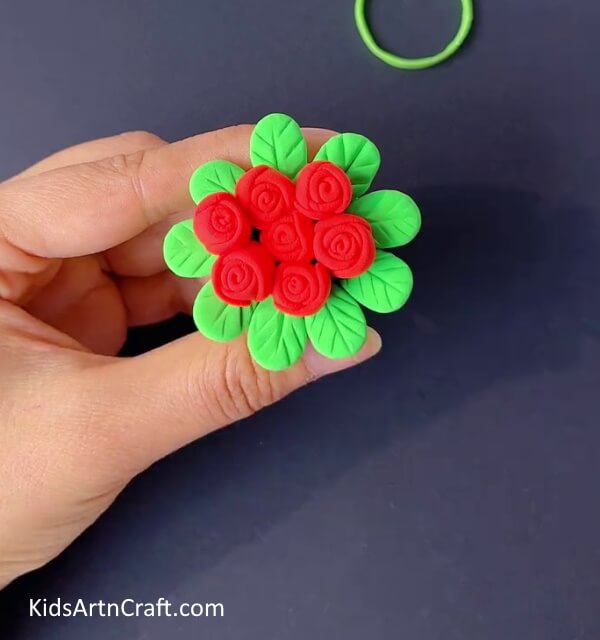
This Is The Final Look Of Your Rose Flower Basket!
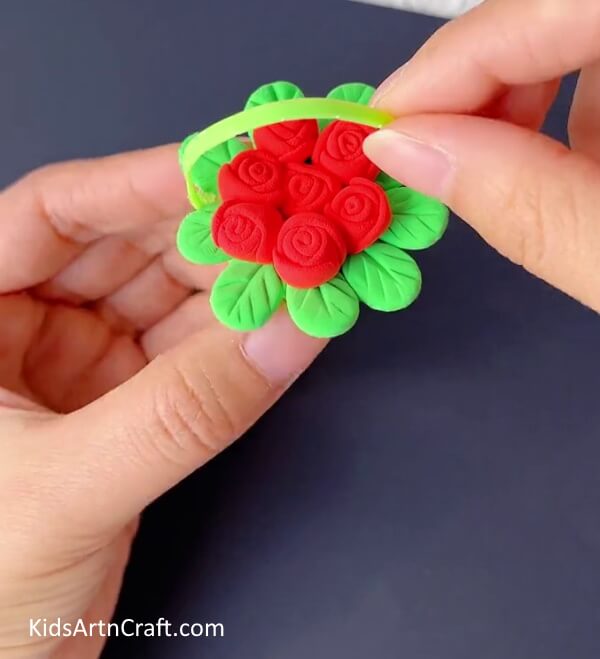
Finally! You have successfully completed making your pretty rose flower basket!
I literally adore this creation and I know you do too! This craft will definitely be a hit addition to your craft collection! Tiny things are always trendy and this rose basket will serve the same! You can even make tiny baskets of various different flowers, make a collection of them! The idea itself is so fascinating! Then you can hang up them in your room, they will look stunning! If not made yet, it is a sign to make it now and have a cute little decor for your room!
We wish you loved the article and craft idea! Don’t forget to give it a like and share as much as possible! Also, tell us your experience and feedback in the comments section!
Follow us on Youtube for art and craft tutorials and much more.
More Articles from Kids Art & Craft
- Bee Flowers Clay Craft Tutorial For Beginners
- Beautiful Clay Cherries Craft Step-by-step Tutorial For Kids
- DIY bottle Cap and Clay Snail Craft for kids
- DIY Clay Modelling Tree Artwork Easy Tutorial For Kids
- How To Make Caterpillar Eating Apple Using Clay