Cardboard Craft
Cardboard Tube Penguin Craft Tutorial for Preschoolers

Do you adore penguins? If yes, then this craft is for you! This step-by-step tutorial is on making a penguin from a cardboard roll!
We welcome you to this amazing step-by-step tutorial. Today we will learn to make an easy and adorable penguin craft using up the waste toilet paper roll or cardboard roll you definitely have at home! Just make sure to not throw them away, instead use them up in making this penguin! This craft is a perfect example of a recycled craft and throughout this craft, you can teach the kiddos importance and benefits of recycling, they will be keen to listen them up! Let’s begin!
DIY Cardboard Penguin Craft for Preschoolers
Read More: How To Make Paper Fish Aquarium Craft For Preschoolers
Materials Required
- Cardboard/Toilet Paper Roll
- Scissors
- Glue
- Colored Paper Sheets (Black, White, Red, Pink, And Orange)
Procedure
Step 1: Covering A Cardboard Roll With Black Paper
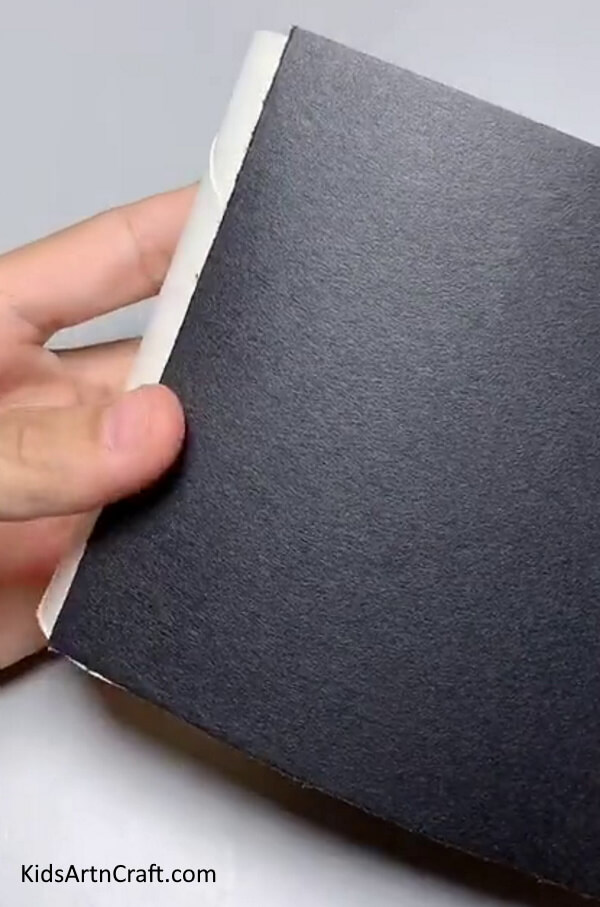
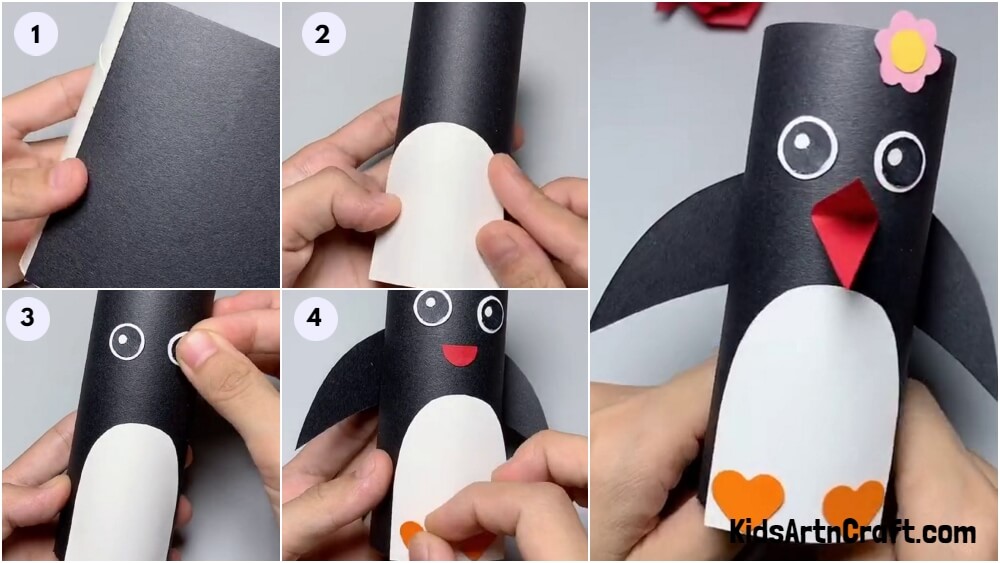
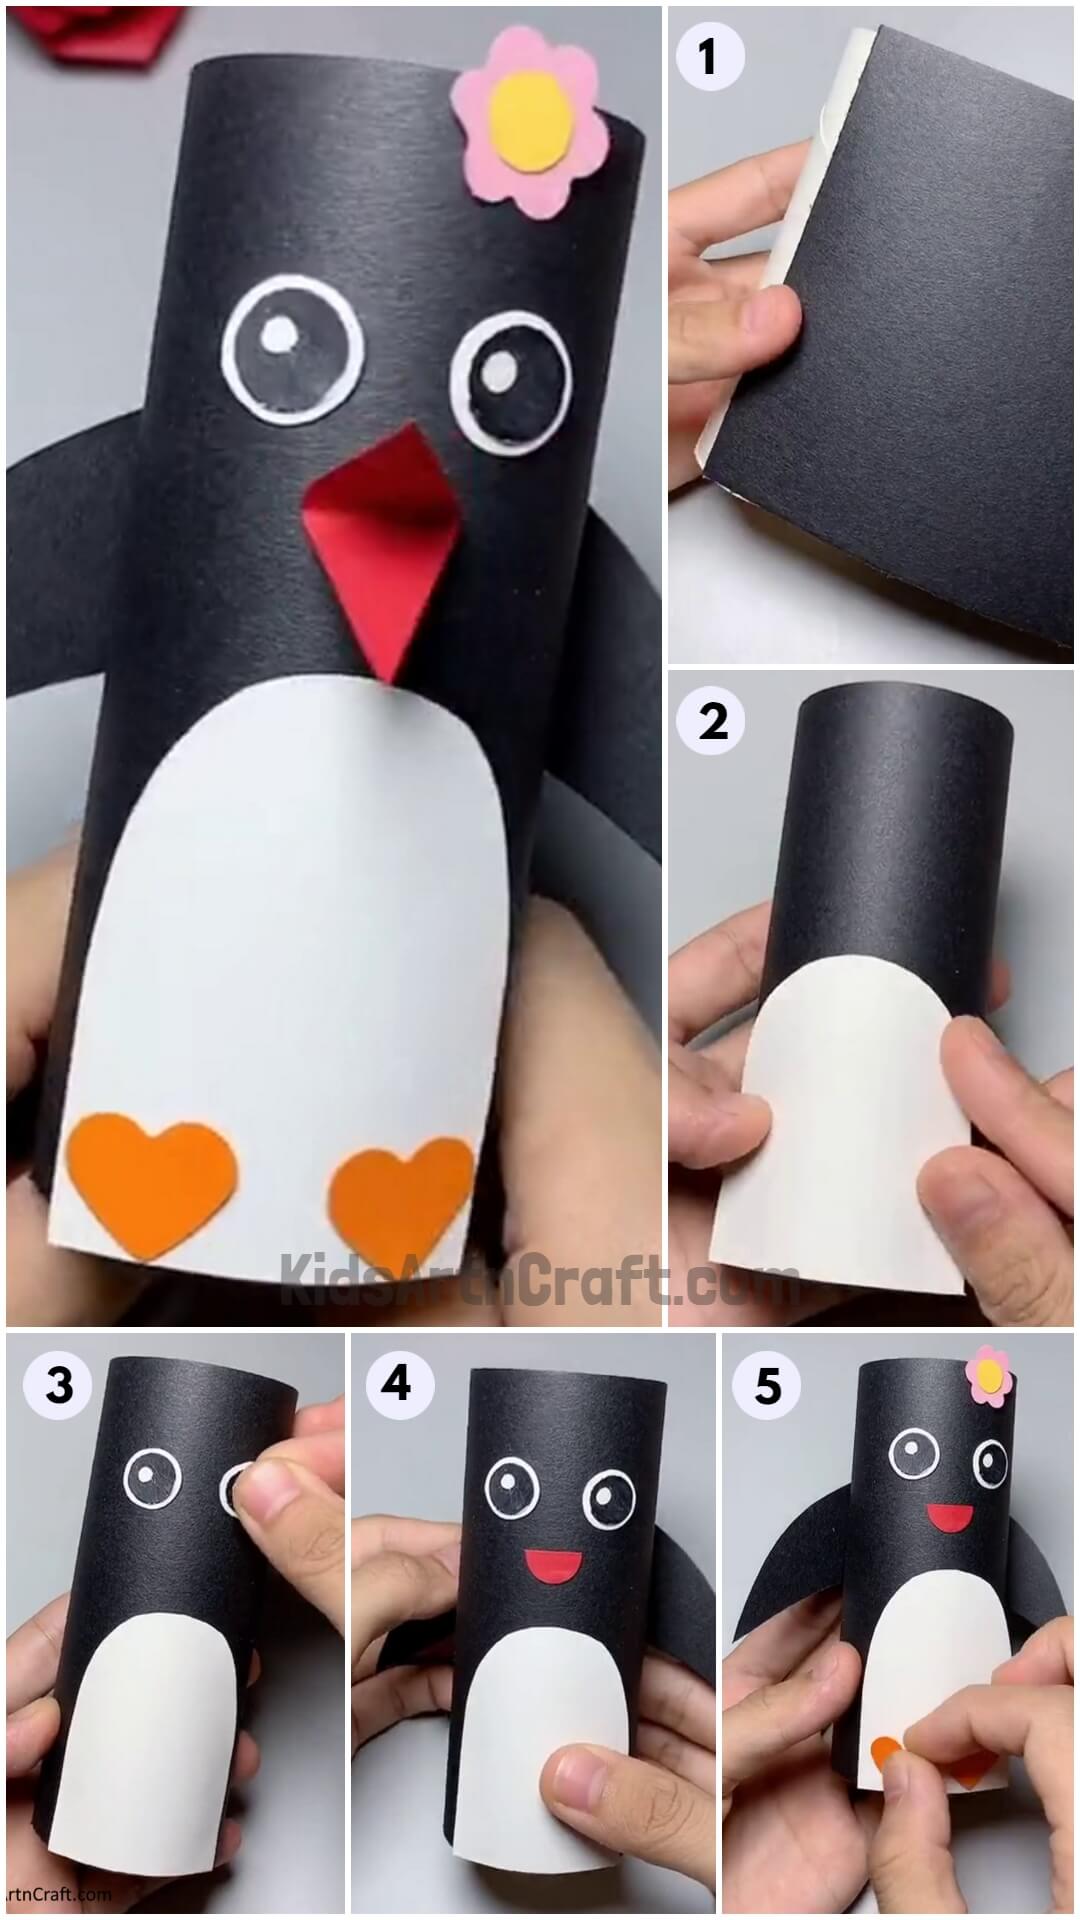
To start this craft, take a toilet paper roll or cardboard roll as the base for your penguin craft and a black paper sheet. Using glue, cover and stick the black paper sheet over the roll, and using scissors, cut out the extra sheet coming out of the roll. This will be the body of the penguin.
Step 2: Making The Belly Of The Penguin
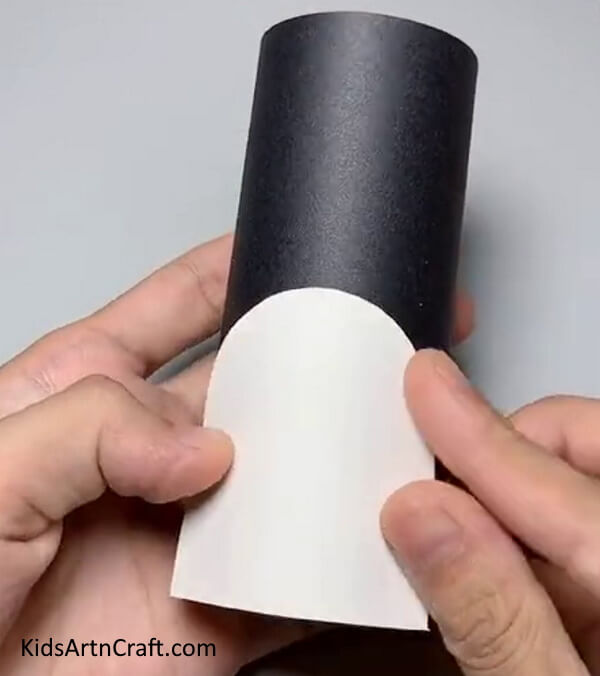
From a white paper sheet, cut out a long semi-circle using scissors and paste it at the below end of the body using glue to make its belly as shown in the image.
Step 3: Making Facial Features And Hands
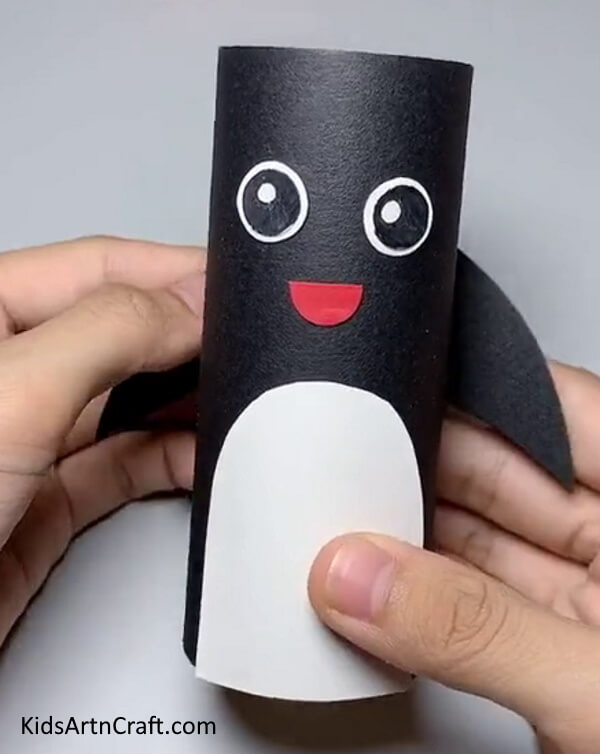
Cut out 2 circles from the white sheet and further smaller circles from the black sheet using scissors. Now, cut out 2 very tiny circles from the black circles to make holes in them. Paste the black-holed circles over the white circles using glue to make the eyes of the penguin. Paste the eyes on the top above the belly side by side using glue. Also, cut out a semi-circle from a red sheet for the mouth and paste it below and between the eyes of the penguin.
From the black sheet, cut out 2 wing-like curvy hands and bend their broad ends to make creases. Using glue paste the hands on the sides of the penguin above the belly from the bent part to make them look straight coming out of the figure.
Step 4: Adding A Flower And Making Feet
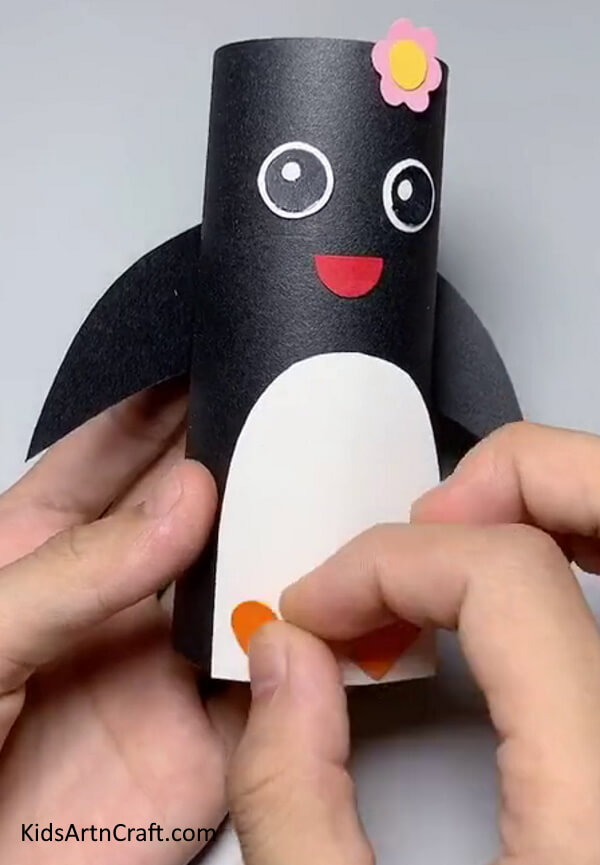
Cut out a 7-petaled flower from pink paper and a circle from yellow paper. Paste the circle over the flower to make its center using glue. Now, paste this flower over the top-right of the penguin, keeping half of it over the body and half outward.
Now, for the feet, cut out 2 heart shapes from orange paper and paste them side by side at the bottom over the belly using glue.
Your Cardboard Roll Penguin Is Ready!
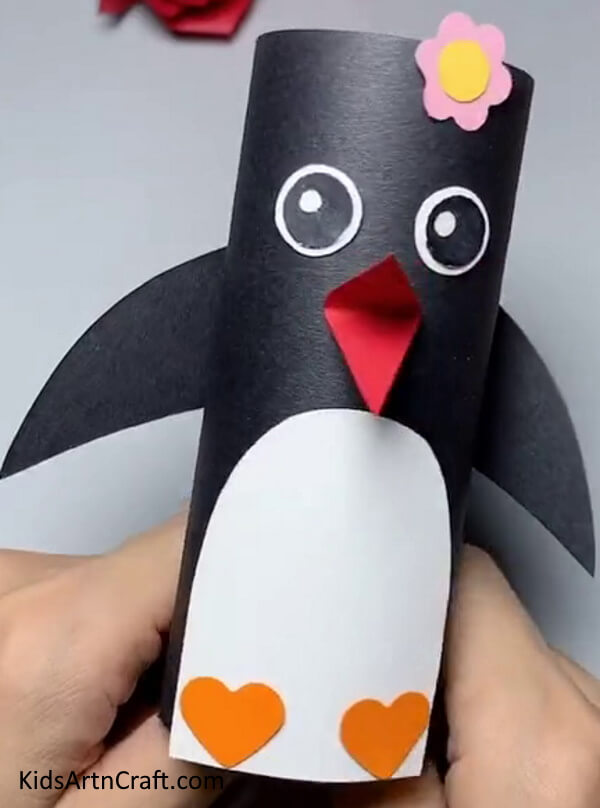
For the last step, cut out a diamond shape from red paper and fold it in half to make a crease. Paste this diamond shape over the mouth from the crease to give a 3D mouth to your penguin using glue.
Congratulations! Your easy and pretty penguin cardboard roll craft is ready to be displayed!
You can now decorate your pretty penguin model craft in your room to add a fantastic craft to your craft collection! This craft can also be a classroom activity to do which will help the kiddos to have a fun learning class as it will help them drive their motor skills, creativity, and imagination! This craft will not cost you a single penny the materials are basically the ones you already have! Kiddos will also be keen to learn about penguins with this craftwork! Encourage them to decorate their penguin in a unique way as they are!
We are hoping you loved this article and the craft idea! If so, give it a like and share it with your buddies to create it all together! Also, give your feedback in the comments section below!
Follow us on Youtube for art and craft tutorials and much more.
More Articles from Kids Art & Craft
- Christmas Santa Face Paper Craft Step-by-step Tutorial For Beginners
- Easy To Learn Ladybug Craft Tutorial For Kindergartners
- Cute Origami Paper Slippers Craft tutorial For Kids
- Beautiful Kimono Japanese Dress Craft Ideas For Kids
- DIY Easy Yellow Paper Fish Craft Tutorial For Kids


