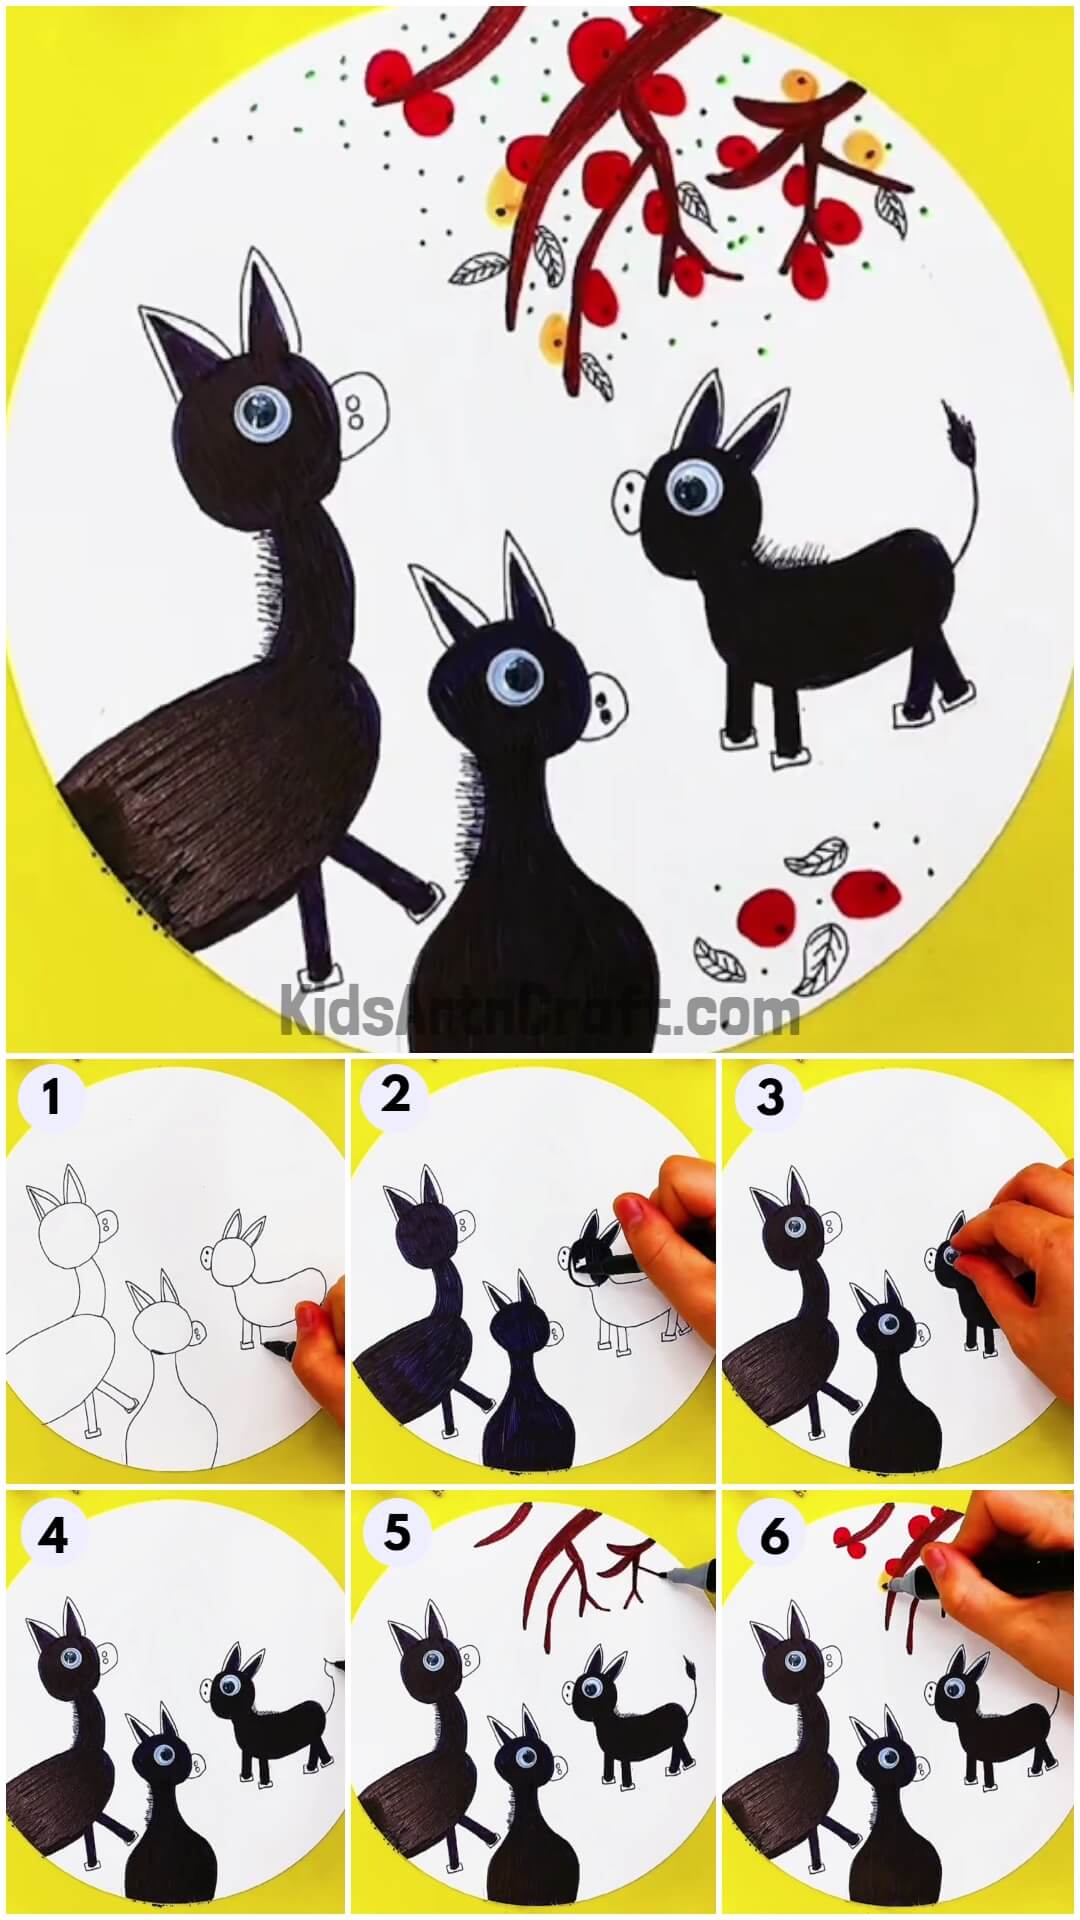
Drawing
DIY Donkey Painting Art Tutorial For Kids

This tutorial is great for children who want to make their own donkey painting. We’ll show you how to do it in a few simple steps, so even those who have never painted before can make a beautiful piece of art.
As we all know donkeys are so hard-working and determined, so let’s take some inspiration from them and do some hard work and fun to create a DIY donkey craft. It requires no special skills and can easily be made in about 15 to 20 minutes with the materials that are already present in your house. The materials used in this tutorial are mostly water-based, free from toxins and harmless but should be used with proper supervision and guidance. Art and crafts can be started at an early age but if you still haven’t tried these cool crafts then trust me it’s never too late. Without any further delay let’s begin
Easy Donkey Painting Art For Kids

Read More: Make Tortoise Leaf Art Easy Tutorial For Kids
Materials Required
- A Plain sheet
- A Black marker
- Eyes
- Pencil
- Glue
- Sketch pens
Procedure
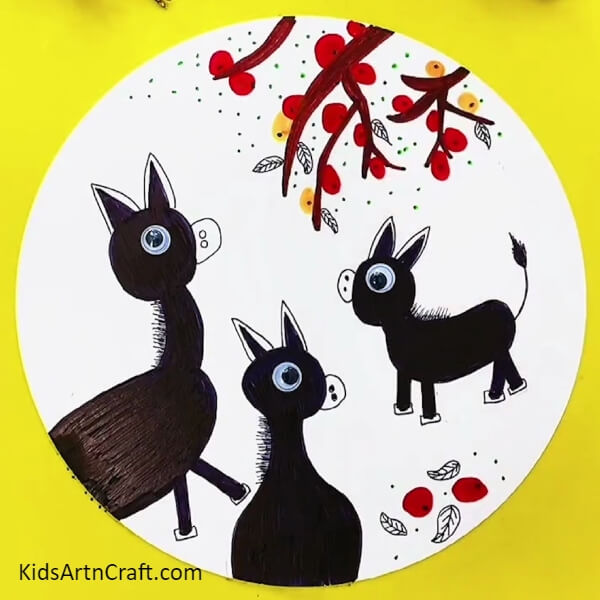
Step 1: Taking A Pencil And Draw A Donkey With It. Outline The Donkey With A Black Marker
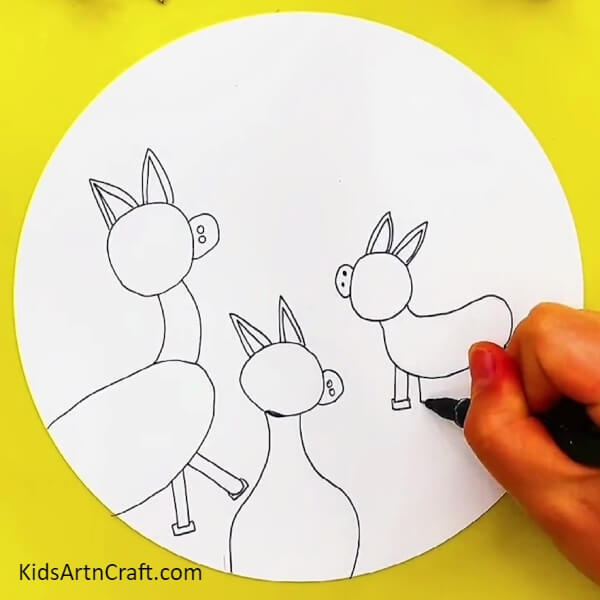

Take a pencil and draw donkeys with it. Outline the donkeys with a black marker neatly.
Step 2: Colouring The Donkeys With A Black Marker
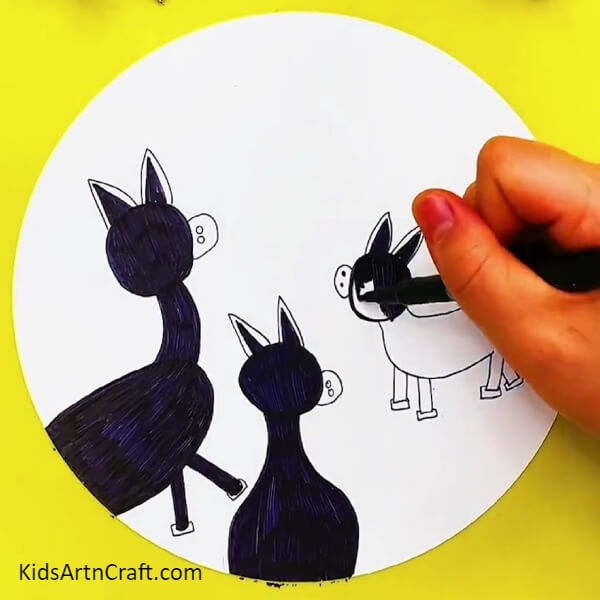
Colour the donkeys with a black sketch pen.
Step 3: Sticking Eyes On The Donkeys With The Help Of Glue
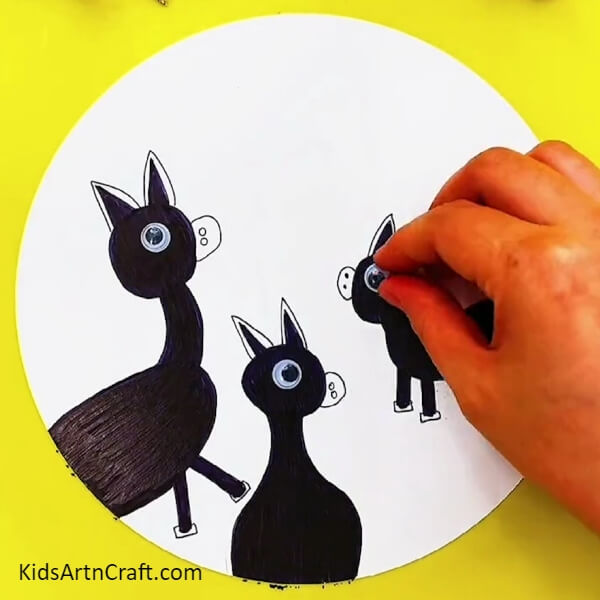
Stick the eyes of the donkeys with the help of glue. Wait for a few seconds until the glue dries up.
Step 4: Making The Tail And Hair Of The Donkey
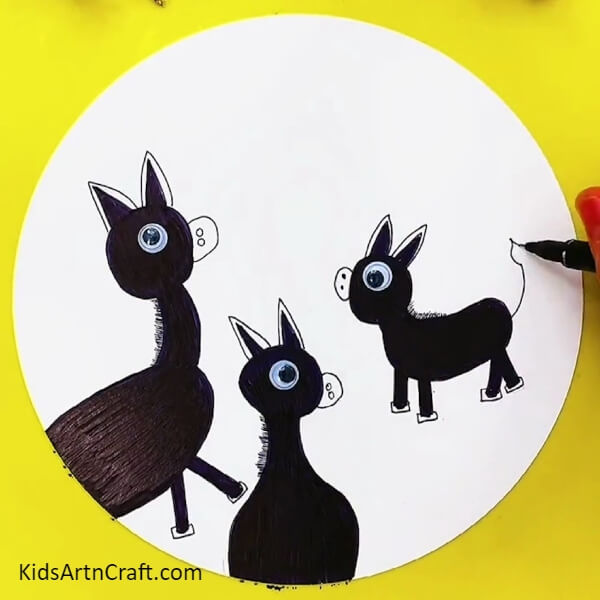
Take a black marker and make the tail and hair of donkeys with it.
Step 5: Making Branches Of The Tree Using A Brown Sketch Pen
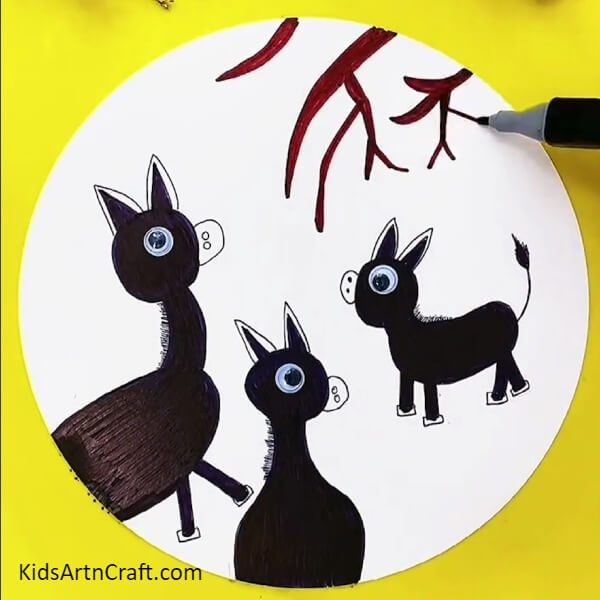
Take a brown sketch pen and make branches with it. Colour the branches of the tree with the brown sketch pen.
Step 6: Making Fruits With Red And Yellow Sketch Pens
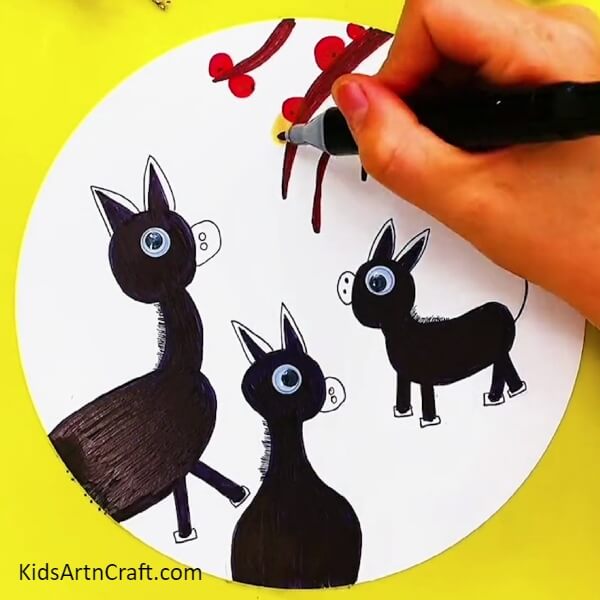
Take a red and yellow sketch pen and draw fruits using it beside the branches of the tree.
Step 7: Making Some Leaves And Fruits On The Lower Portion Of The Sheet
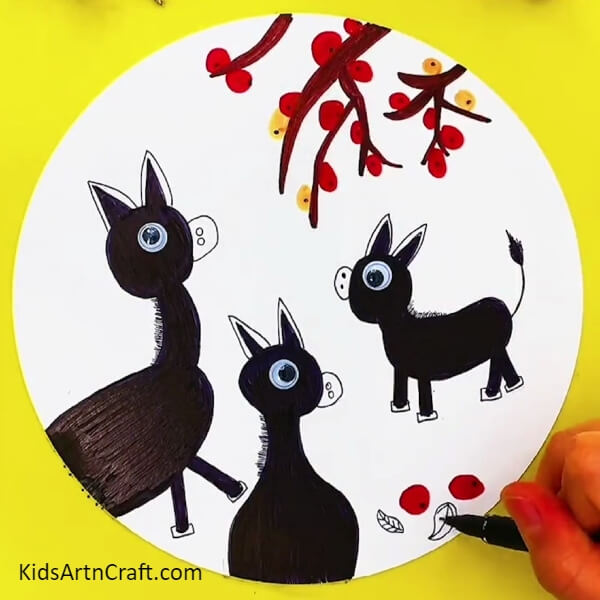
Using a black marker draw leaves on the lower portion of the sheet. Make fruits beside the leaves with a red sketch pen.
Step 8: Making Small Dots Using A Black Marker

Make small dots using a black marker as shown in a similar pattern displayed in the image above.
Woohoo With This We Have Successfully Completed Our Painting In No Time!
With some hard work and a little bit of patience, we have finally completed our artwork.
I hope you have had fun and created some long-lasting memories while making this artistry. Share your experience with us in the comments and opinions with us in the comments section. For more such easy-peasy step-by-step tutorials visit our website.
Follow us on Youtube for art and craft tutorials and much more.
More Articles from Kids Art & Craft
- DIY Bird Nest Paper Craft For Kids
- Heart Shaped Paper Mouse Craft Step by Step Tutorial
- Paper Mug With Straw Craft Easy Tutorial
- DIY Paper Butterfly Easy Craft For Kids
- DIY Easy Paper Flower Craft For Kids