Home Decor
Handmade Flower Basket Decor Craft Tutorial For Kids

This activity is great for children! They can make a flower basket decoration using easy materials. This guide will provide instructions so that kids can make a lovely and vibrant decoration for their home.
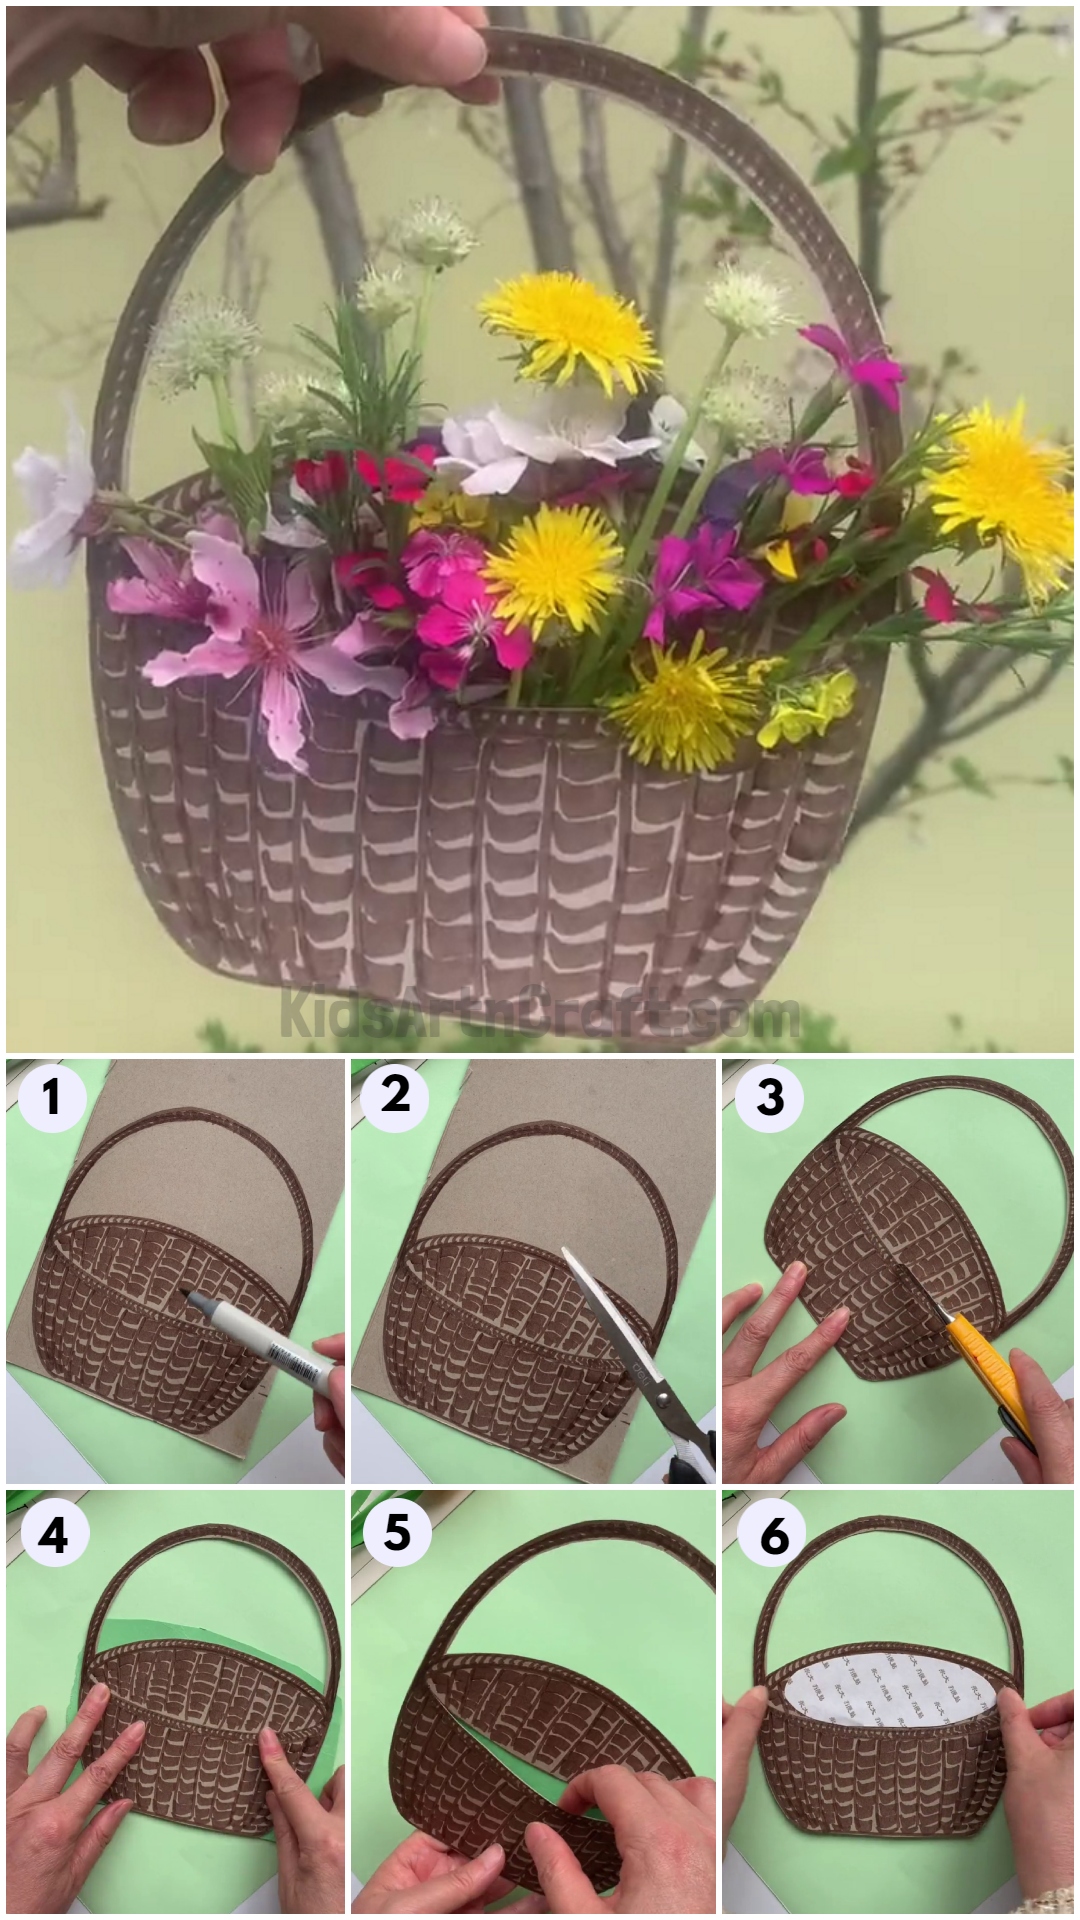
This tutorial will teach you to make a handmade flower basket holding small original flowers. This basket will be entirely handmade using a cardboard sheet. We all love a beautiful flower basket with pretty little, colorful flowers in it. The craft is extremely simple and easy to make and the results are just amazing. It will hardly take ten to fifteen minutes to complete and is great for even a six-year-old kid. Gather fallen flowers from the ground instead of plucking them. Collect all the other material required and let’s start making the craft.
Beautiful Flower Basket Decoration Craft For Home

Read More: Easy Christmas Crafts for Kids to make at home
Materials Required
- A cardboard sheet
- Brown marker
- A pair of scissors
- A broad double-sided tape
- Small colorful flowers
- A cutter
Procedure
Step 1: Painting The Basket
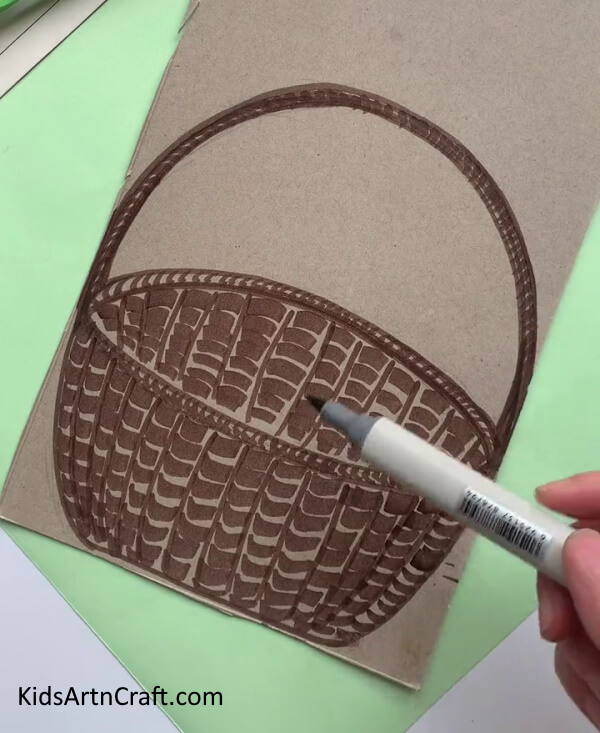

Take a big and wide cardboard strip and using a brown marker, draw the outline of a small basket on it. The drawing needs to display the inner side if the basket as well. Make basket patterns on the basket, inside out even on the handle. The pattern should have thick horizontal lines drawn as bridges between long vertical lines. Observe the picture below closely to understand the woven pattern.
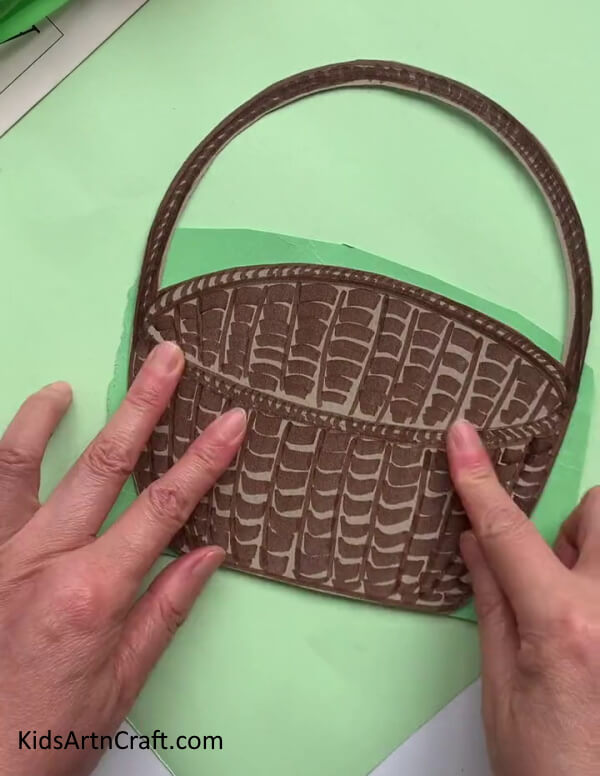
Step 2: Cutting The Basket Out


Using a pair of scissors, cut the shape out. Work on the outer basket first shaping the whole thing properly. Cut the inside section of the holder by first making a small cut using a cutter. Cut the rest with a pair of scissors. Make clean cuts to shape the whole thing properly as shown in the picture below.
Step 3: Making More Cuts On The Basket
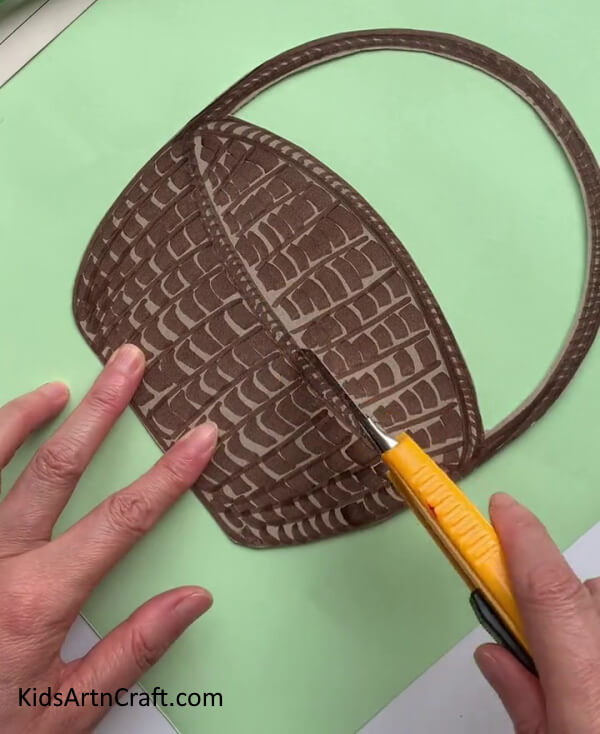

Using the same cutter, make a small cut on the curved line separating the inner basket from the outer one. Make a clean cut to separate the two properly. Have a look at the picture below to understand more about the step.
Step 4: Pressing On The Cut

Press hard on the cut to prepare the basket for the scissors. See the picture below for reference.
Step 5: Cutting The Insides Of The Basket

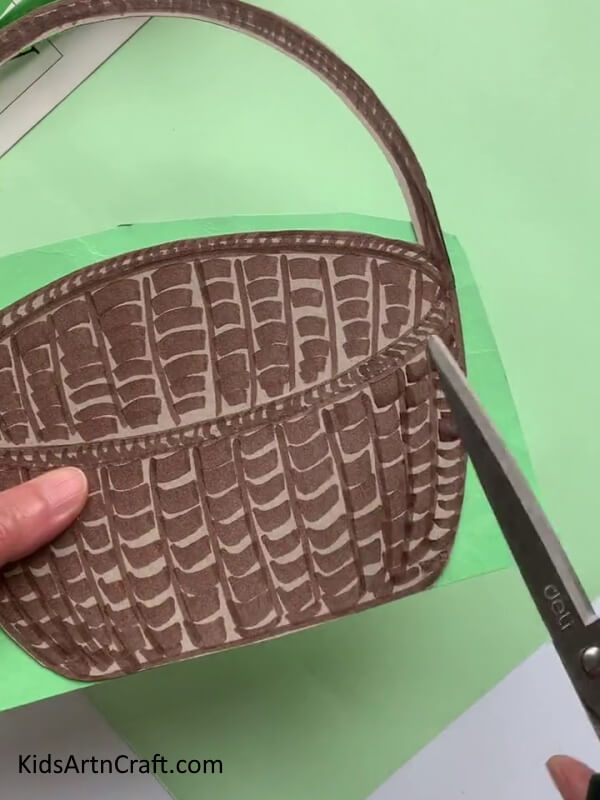
Take a pair of scissors and cut the entire line separating the inside of the basket from its outside. Be careful with the cutting and keep the rest of the basket safe from the scissors. Be careful while using the scissors and the cutter. See the image below for reference to know more about the step.
Step 6: Opening The Basket Up

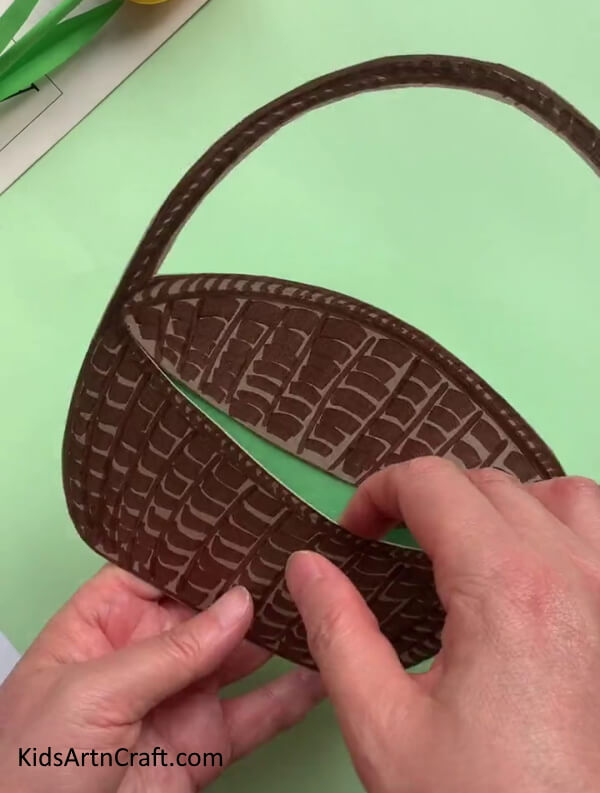
Put your fingers in the opening that you just made to the basket. Open it up to make a good opening and enough space for the flowers. Check the picture below for a good reference.
Step 7: Using The Broad Double-sided Tape

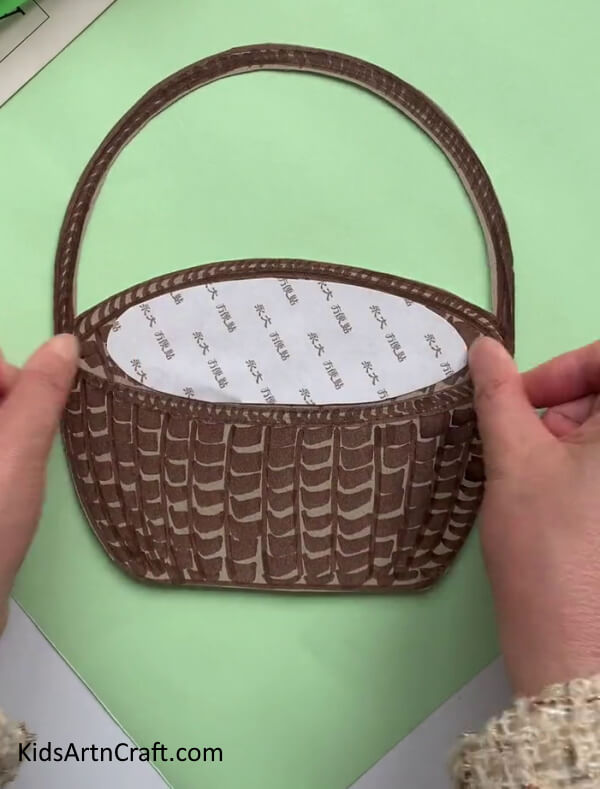
Take a strip of broad double-sided tape and stick it on the inner parts of the basket. Cover the entire insides of the basket with the tape. Stick it properly and peel the top layer off.
Fitting The Flowers In The Basket


Take the colorful flowers that you collected earlier and paste the flowers on the tape. Place the flowers properly without messing up with the flowers or ripping them apart. Stuff the entire basket with flowers to decorate it. Adjust the stems in the bottom section of the basket. Observe the picture below for a good, thorough reference.
There you have it, a flower basket made with your own little hands. You learned great cutting, drawing, and shaping skills in this tutorial. Gift this to someone on their birthday or gift it to your mother on Mother’s Day or you can simply use it as decoration. Use these techniques in making more original crafts Follow more tutorials to learn making such amazing and useful crafts. See you in the next tutorial. Good luck and goodbye.
Thank you for visiting the website.
Follow us on Youtube for art and craft tutorials and much more.
More Articles from Kids Art & Craft
- DIY Christmas Ornament Craft For Home Decorations
- Easy to Make Handmade Bee Craft Tutorial for Kids
- Easy chicken family Decor craft for kids
- Beautiful Paper Flower Step-by-Step Tutorial
- DIY Paper Flower Hanging Craft Step-by-Step Tutorials