Painting
Fun to Make Beautiful Flower Painting Art With Flower Pot

Make your own beautiful flower painting art with your own flower pot! This easy and fun DIY activity is perfect for all ages and requires minimal supplies. Learn how to create your own unique piece of art with this step-by-step guide.
Welcome to the wonderful world of flower pot painting art! This is a great way to bring some color and creativity into your home. With some simple supplies and a bit of imagination, you can create a beautiful flower painting that will bring a smile to your face. Whether you are a beginner or an experienced artist, you will find the process of painting a flower pot enjoyable and rewarding. With a few simple steps, you can have a unique and beautiful piece of art to compliment your home decor. So, let’s get started!
Beautiful To Make Flower Painting Art Idea Using Flower Pot

Read More: DIY Easy Tomato Paper Craft For Kids – Step-by-Step Tutorial
Material Required:
- Brown craft paper
- Scissors
- Marker Pen
- Paint Brushes
- Water Colors
- Wooden stick with spherical sponge
- White A4 paper
- Glue
- Cotton ear buds
Instructions:-
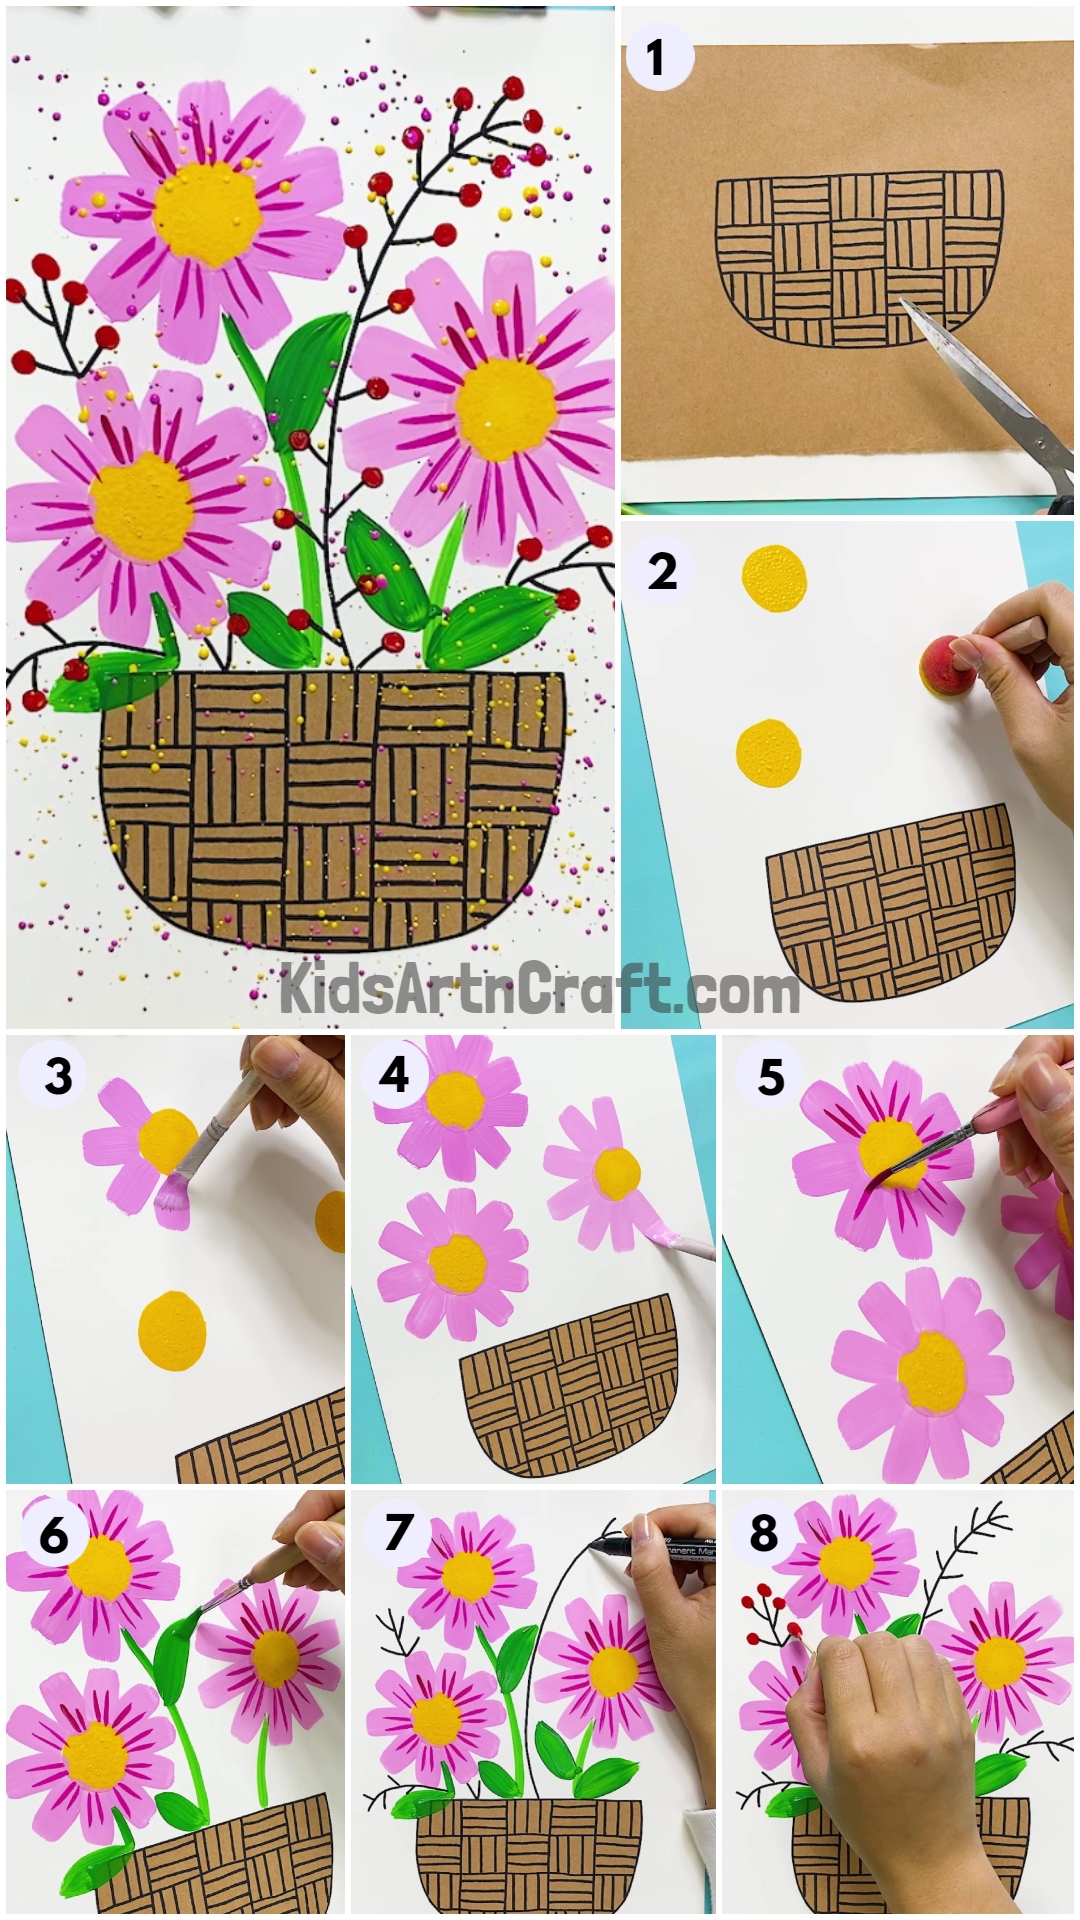
Making a Flower Pot Craft with Brown Paper – Step 1

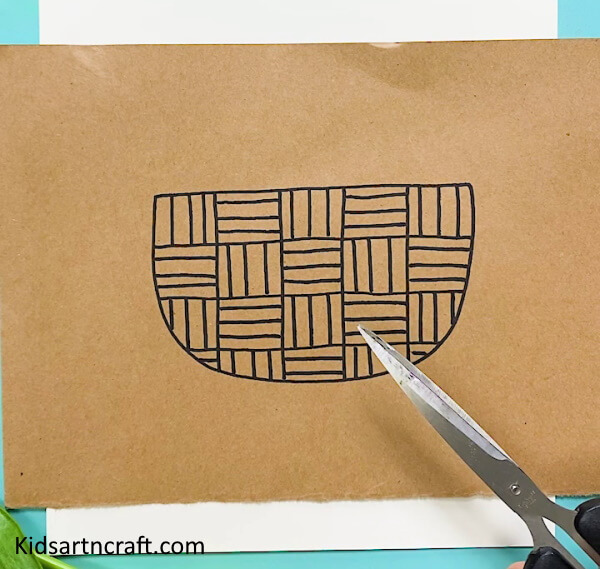
Let’s start this adorable flower and flower pot craft by taking brown paper. Draw a flower pot shape as shown in the above image using a black marker pen. Fill that shape with alternate vertical and horizontal lines as shown above.
Next, cut that flower pot shape using scissors.
Creating a Flower Pot Design with Watercolour – Step 2

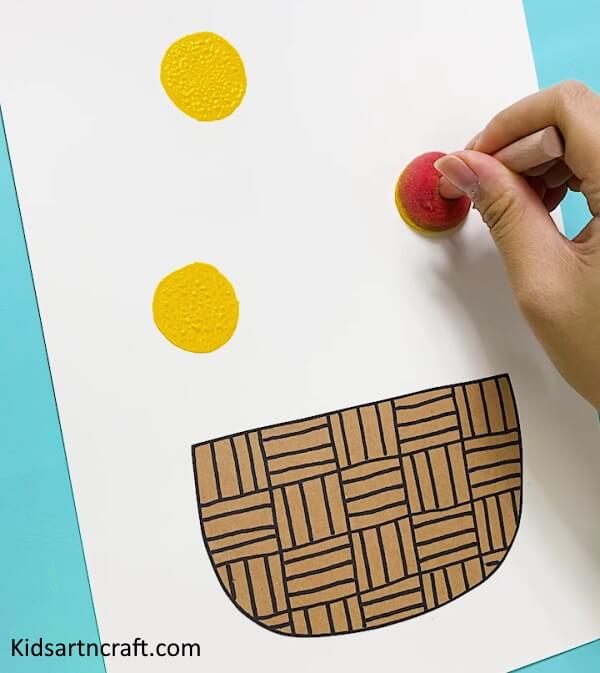
Next, take a white A4 sheet and stick that flower pot on the paper using glue. After this, take a wooden stick with a spherical sponge at its end and dip it in yellow watercolor.
Make 3 yellow circles on the paper with that stick.
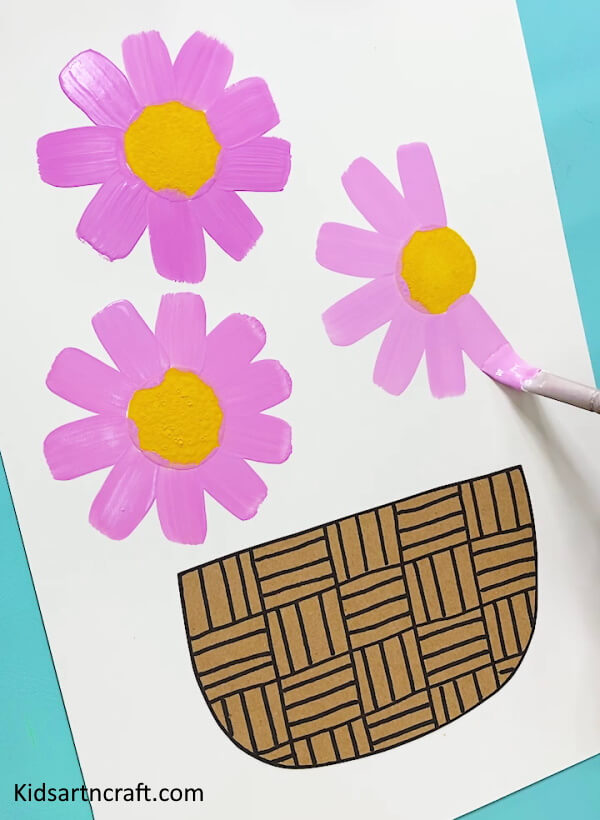
Painting the Petals of a Flower in Light Pink – Step 3

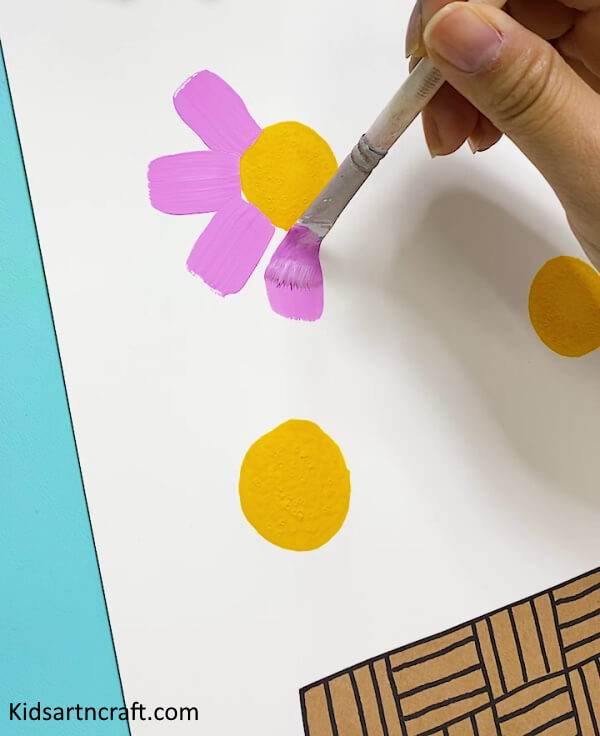
Now, dip a paintbrush in light pink color to draw the petals of the flower. Draw around 10 petals or according to the size of the circle you have made before.
Just cover the circle with pink petals without any gaps.
Creating Beautiful Flowers – Step 4

After completing the petals part of all three circles, your flowers would look something like this.
Detailing Petals with a Narrow Tip Paint Brush – Step 5

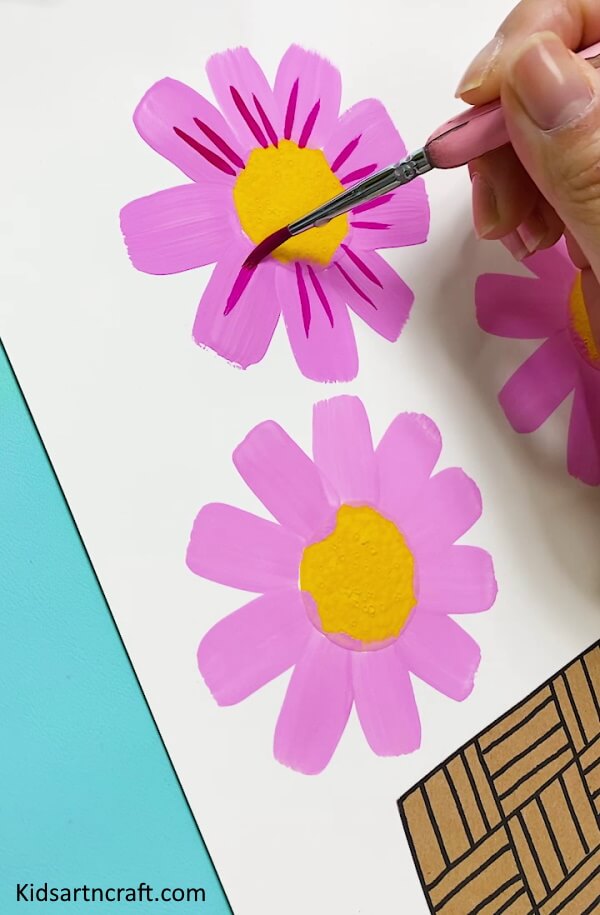
In this step, take a narrow tip paint brush and dip it a darker pink color. We will now do some detailing of the petals by painting some lines in between the petals.
Creating Flower Stems with a Paintbrush – Step 6

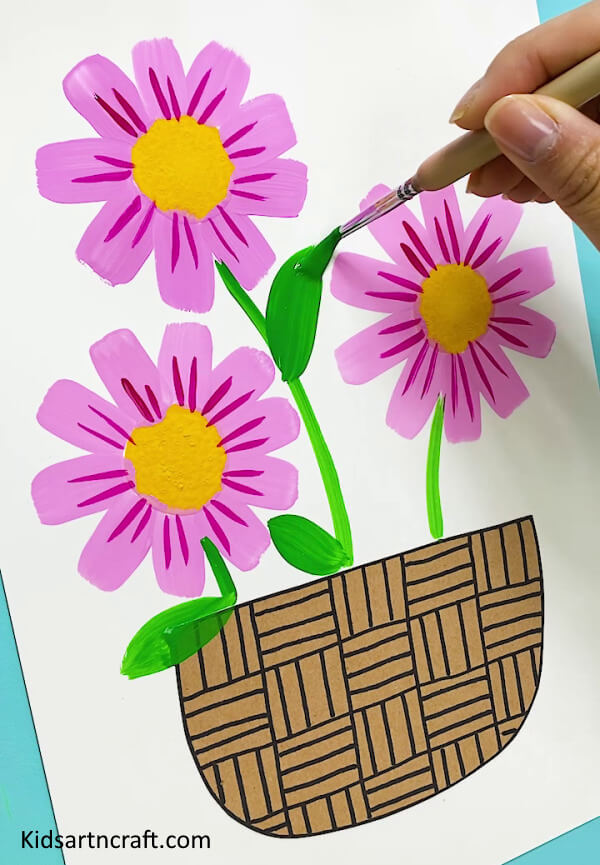
Now comes the part of drawing the stem of flowers. Take a green color-dipped paintbrush and draw the stems and leaves of all 3 flowers as shown in the above image.
You may use your own creativity for this part.
Drawing Extra Stems with a Black Marker – Step 7

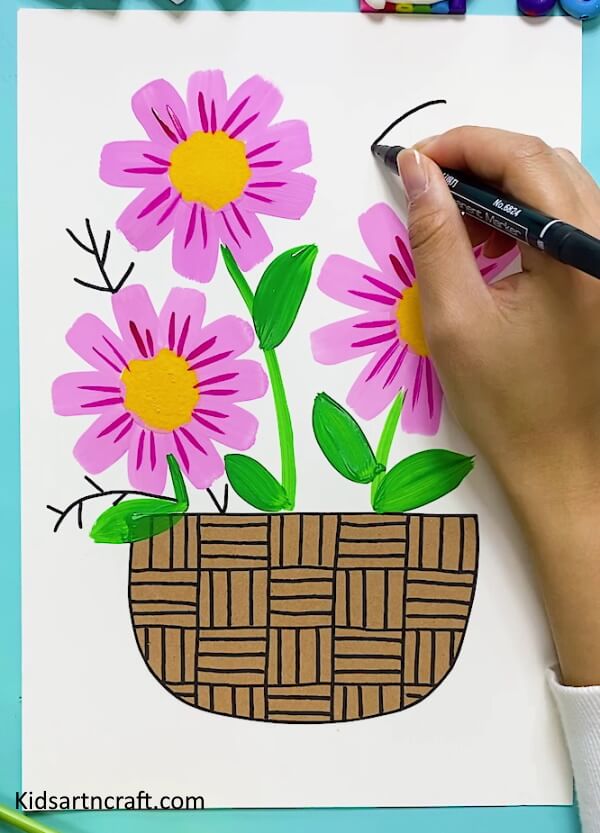
In this step, you need to draw some extra stems in between the gaps of the flowers as shown in the above image using a black marker.
Too Many Stems: Avoiding a Messy Painting – Step 8

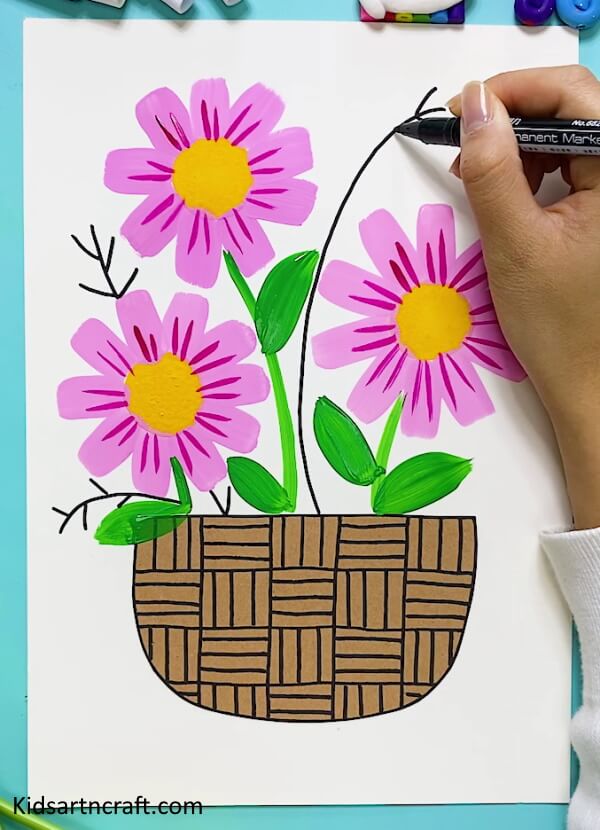
4-5 extra stems would be enough, or else your painting may look a bit messy.
Creating Red Buds with a Color-Dipped Cotton Earbud – Step 9

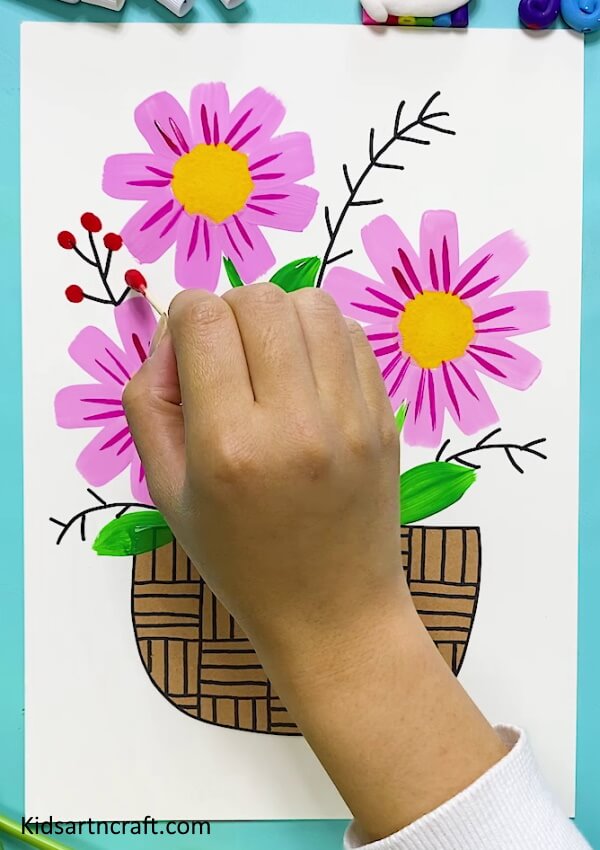
Now, take a red color-dipped cotton earbud to draw small red buds on the end of the stems you drew before. You can refer to the above image for this.
Enhancing Your Painting with Colorful Dots – Step 10

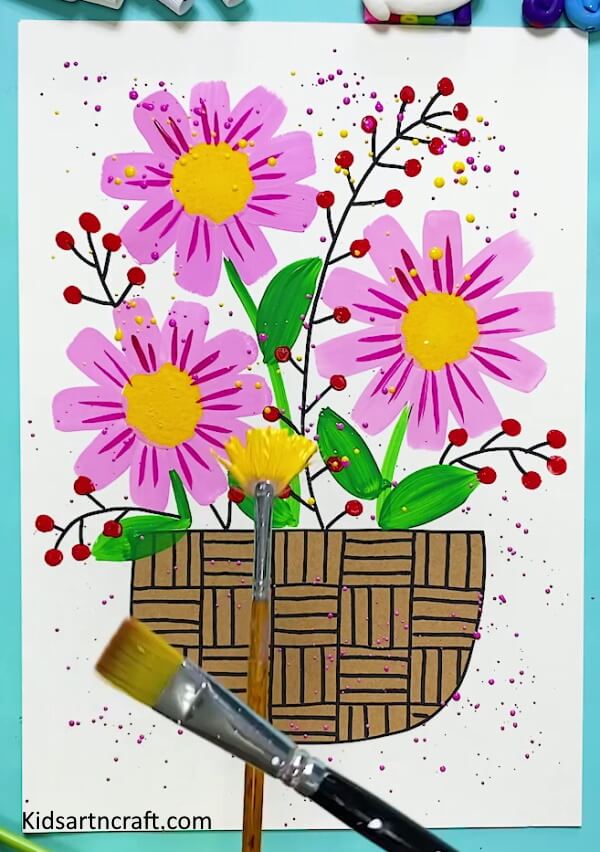
Your craft is almost ready, just a little beautification would enhance the overall look of the painting. For that, you need to dip a wide-tip paintbrush in yellow and another in pink color (or any other bright color of your choice).
Rub your finger over the tip and sprinkle the pink and yellow color dots all over the painting, one by one, at some gaps.
Just don’t overdo the sprinkling.
Creating Beauty with DIY Flower Pot Painting – Final Steps
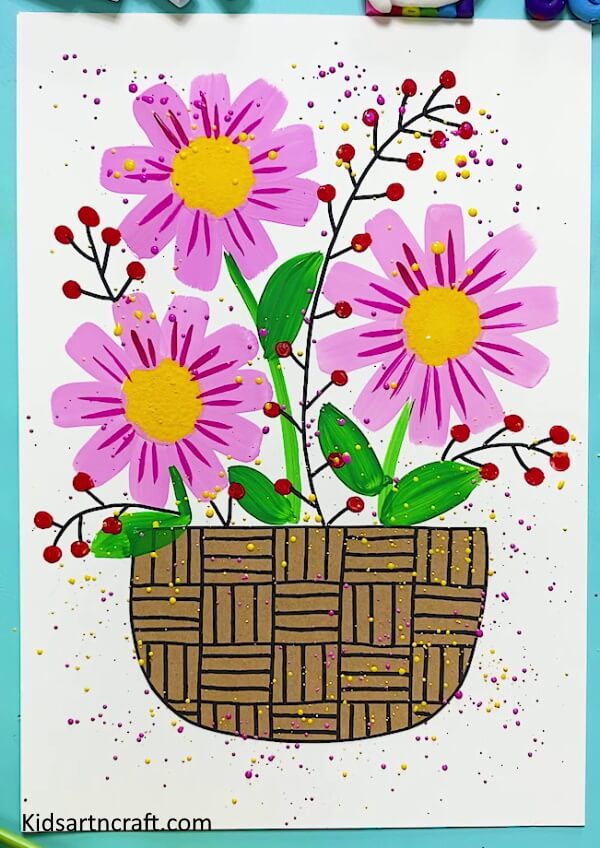

Woah! Your beautiful flower pot with flowers painting is ready in just a few minutes. It looks a bit difficult to make at first look but this step-by-step tutorial will simplify it for you and you can make this amazing craft with minimum supplies. Your DIY painting is completely ready to embrace the beauty of the blank walls of your home. Moreover, the painting will help your child become more creative and happy.
FAQs Related To Beautiful Flower Painting Arts With Flower Pot
1. What materials do I need to make a flower painting art with a flower pot?
You will need a flower pot, a selection of acrylic paints, brushes, a palette, and a few sheets of paper.
2. What kind of flower pot should I use?
Any type of flower pot will work for this project; however, it is best to use a pot that is large enough to hold all of the supplies you will be using.
3. What type of paint should I use?
Acrylic paints are the best choice for this project as they are easy to work with and can be blended easily.
4. What type of brush should I use?
You should use a small to medium-sized paintbrush with soft bristles.
5. What is painting on pots called?
Painting on pots is a form of art called pottery painting. Pottery painting is the practice of decorating ceramic or earthenware vessels by applying paint or glaze to their surfaces. Pottery painting is often done with ceramic paints and glazes, which are applied to the surface of the pottery and then heated in a kiln to create a permanent design.
Making beautiful flower painting art with flower pots is a fun and creative way to add a splash of color to your home. With just a few simple supplies and some imagination, you can easily create a unique and beautiful piece of art that you can proudly display in your home. Give it a try today and see what beautiful art you can create!
Follow us on Youtube for art and craft tutorials and much more.
More Articles from Kids Art & Craft
- Simple Crochet Gnome Patterns
- Simple Watercolor Art Projects For School Kids
- DIY Painting Hacks for Kids – Flower Making Step-by-Step Tutorial
- Bouquet Painting Step-by-Step Tutorial for Kids
- Watercolor Painting Ideas For Toddlers