Fall & Autumn
Leaf Landscape Scenery Craft Tutorial For Kids

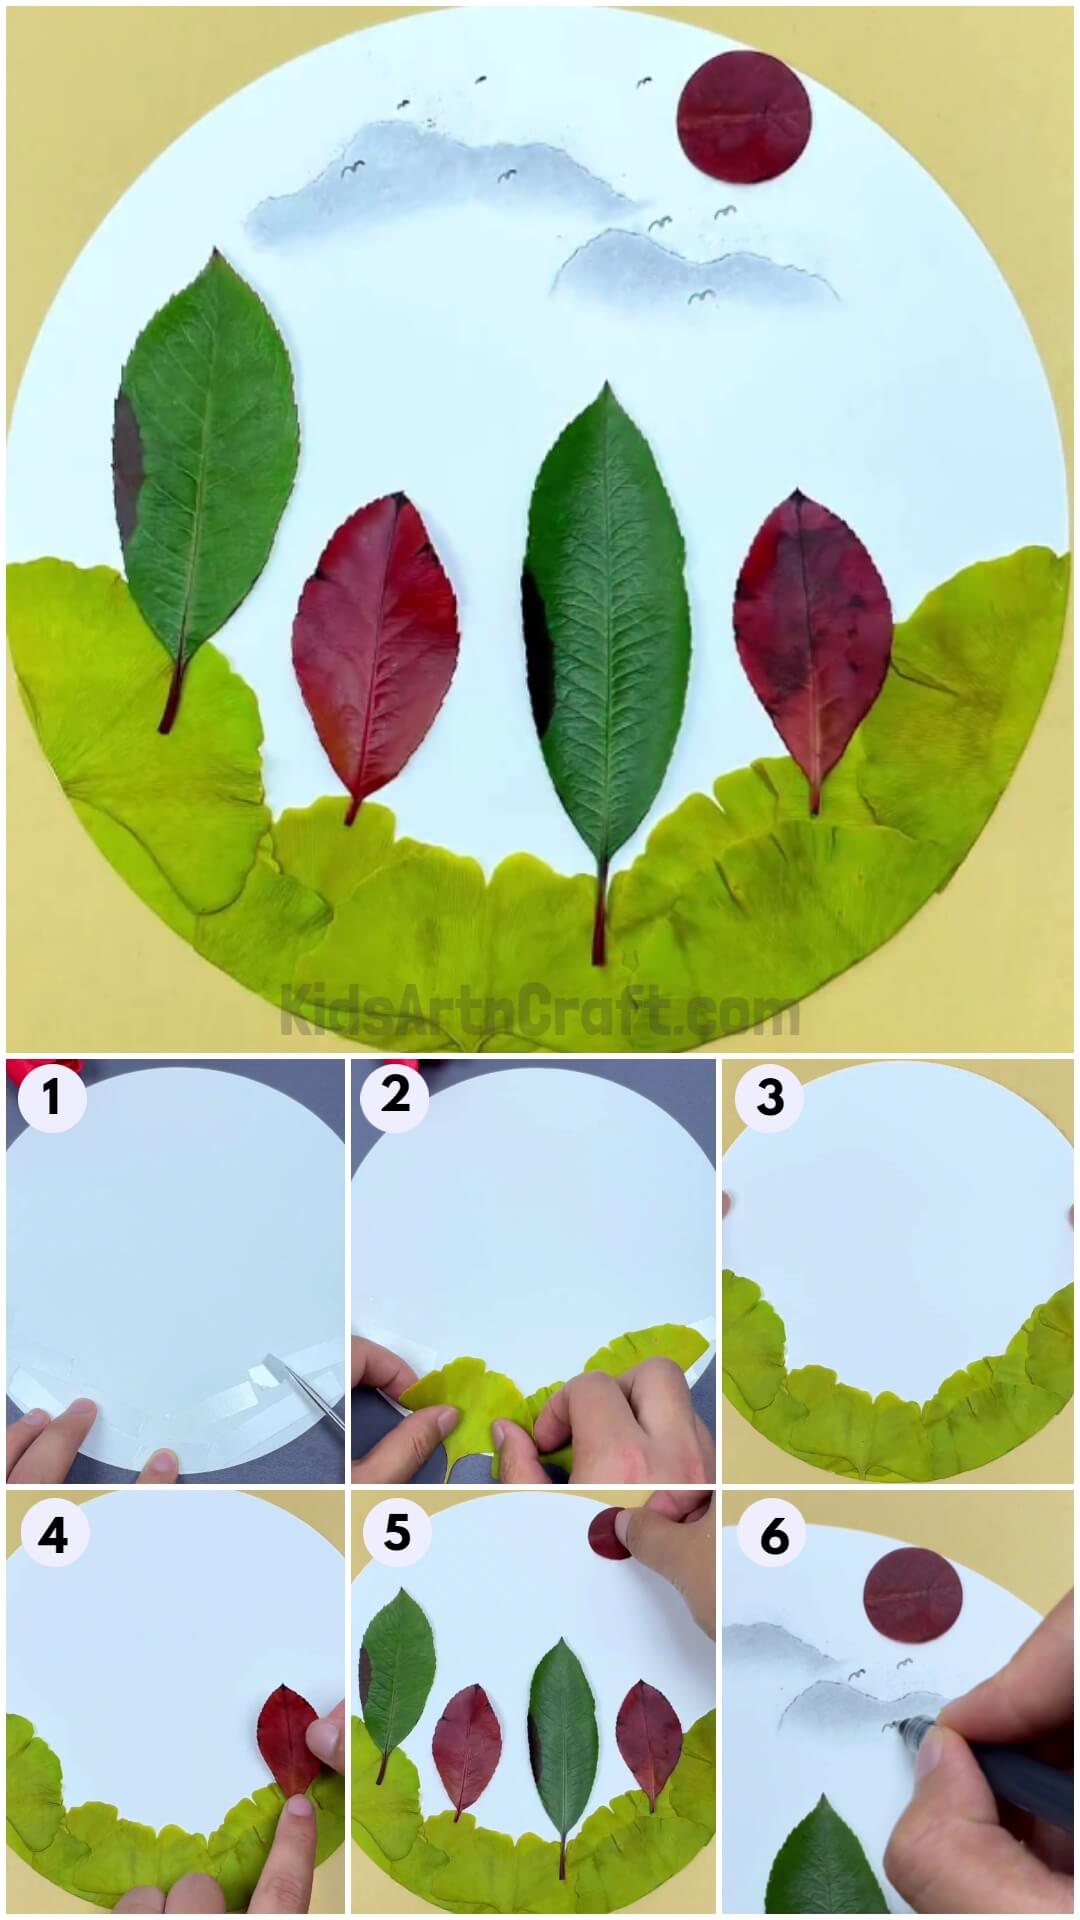
Create a nature landscape with nature leaves! This step-by-step tutorial will guide you to make a landscape that will take you to peace!
We love to watch the greenery around us, don’t we? But getting a peaceful view in these metropolitan cities can be difficult. That’s why we are here! Today, we brought you an amazing craft that will take you straight to the pretty sunset in the green landscape! You will love to create this craft, not only is it a landscape view but also is made majorly of green leaves with you can find in our garden! Unleash your creativity by making this craft with the help of this step-by-step tutorial! Let’s begin this beautiful journey!
DIY Leaf Landscape Scenery Craft Tutorial

Read More: Easy Leaf Insect Craft Tutorial For Kids
Materials Required
- Blue Circular Paper Sheet
- Leaves (Broad, Red, And Green)
- Double-sided Tape
- Scissors
- Pencil
- Craft Cutter
- White Paper
- Pen
Procedure
Step 1: Applying Double-sided Tape
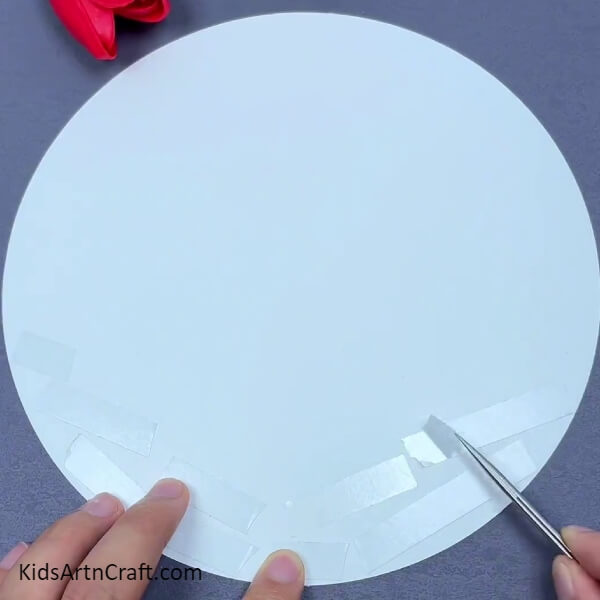

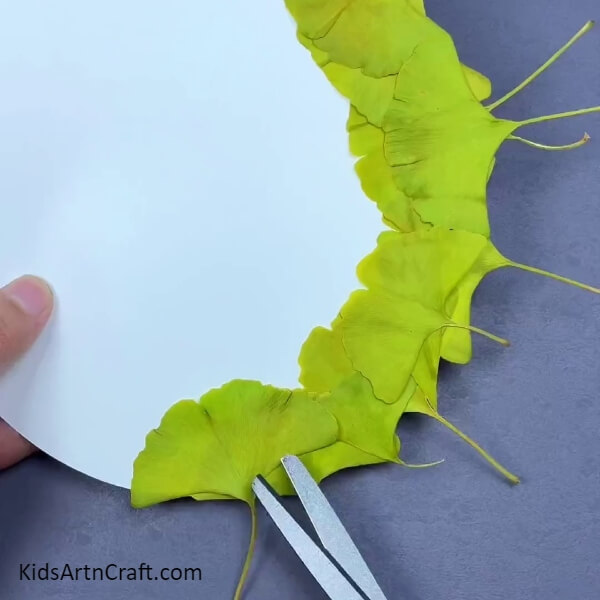
To begin this craft, take a blue circular paper sheet and double-sided tape. Apply double-sided tape on the lower end of the sheet as shown in the image and using craft tweezers remove the layer of the tape.
Step 2: Pasting A Broad Leaf
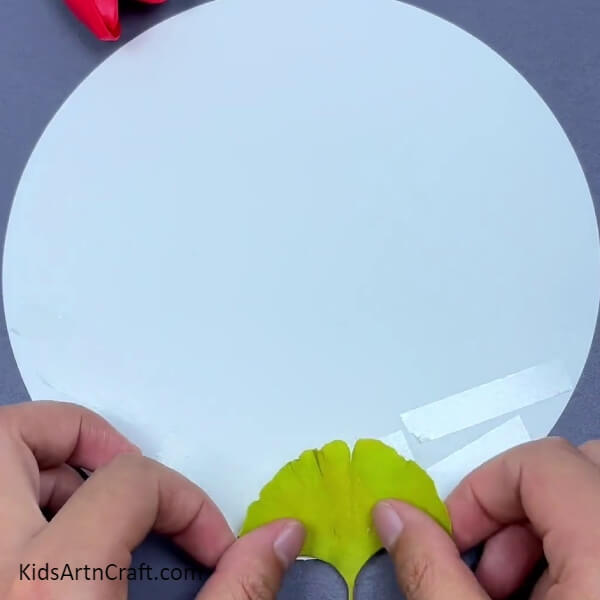
Start to paste a broad leaf over the tape at the bottom.
Step 3: Sticking More Broad Leaves
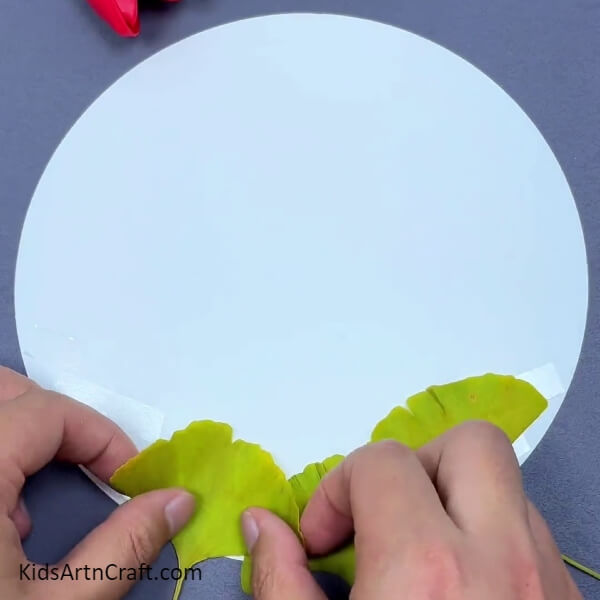
Stick more broad leaves on the bottom to cover the base properly to make ground. Stick the leaves slightly over one another to totally cover the base.
Step 4: Sticking All The Broad Leaves
Stick all the broad leaves on the bottom of the base to make the ground of your landscape.
Step 5: Cutting The Leaves Stems
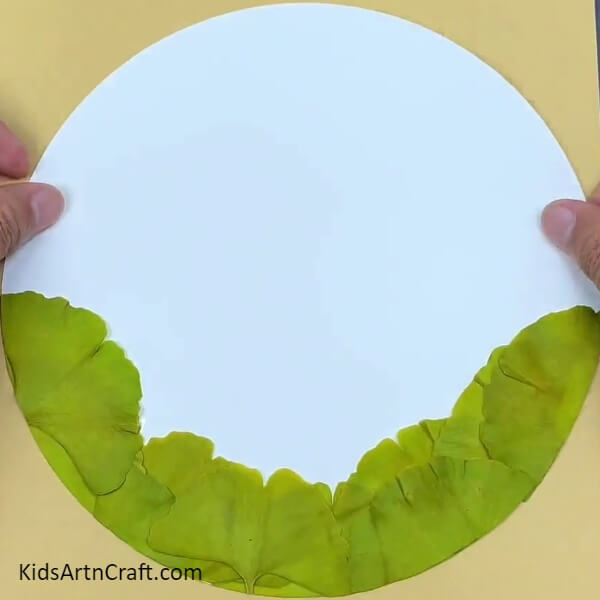
Using scissors, cut out all the stems of the leaves and also shape the leaves to keep them inside the circular base.
Step 6: Pasting A Red Leaf
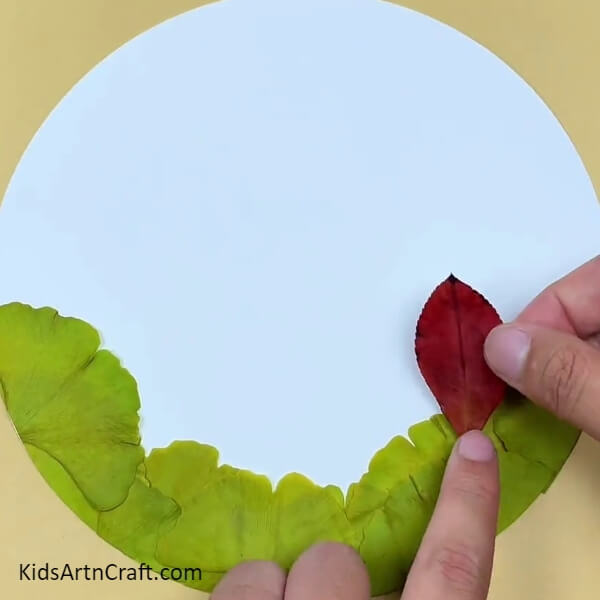
Paste a red leaf over the top of the ground straight, to make it look like a tree using double-sided tape.
Step 7: Making More Trees
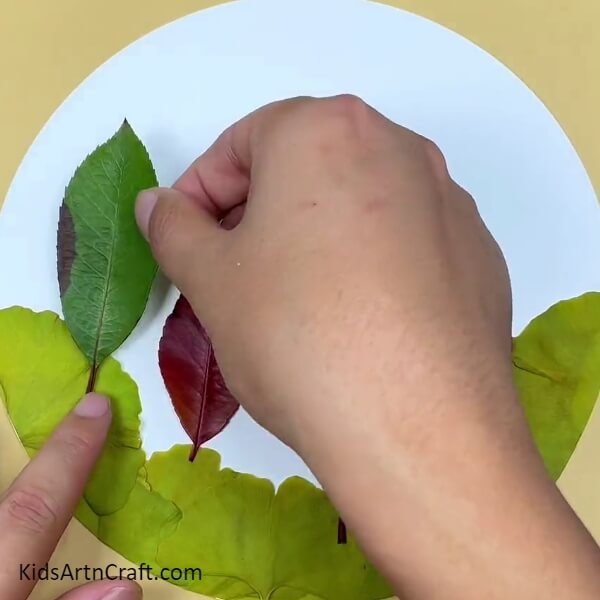
Paste red and green leaves alternatively on the ground to make red and green trees.
Step 8: Adding A Sun
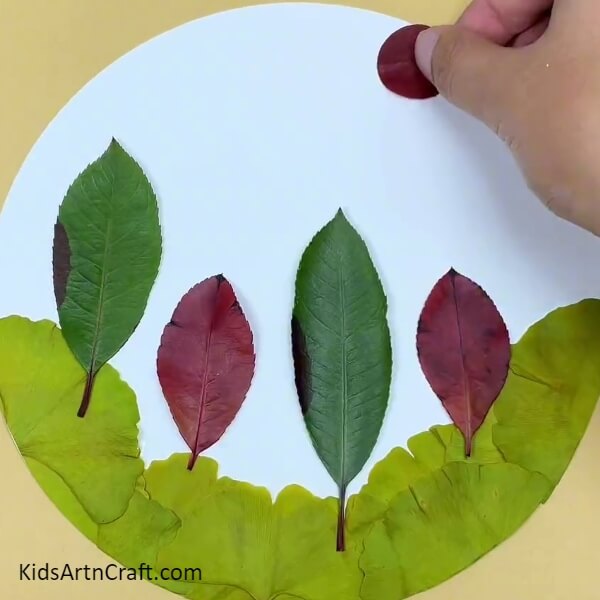
From a red leaf cut out a circle using scissors and paste it on the top right of the base to make it look like a sun using double-sided tape.
Step 9: Tearing Out Out A Piece From Paper
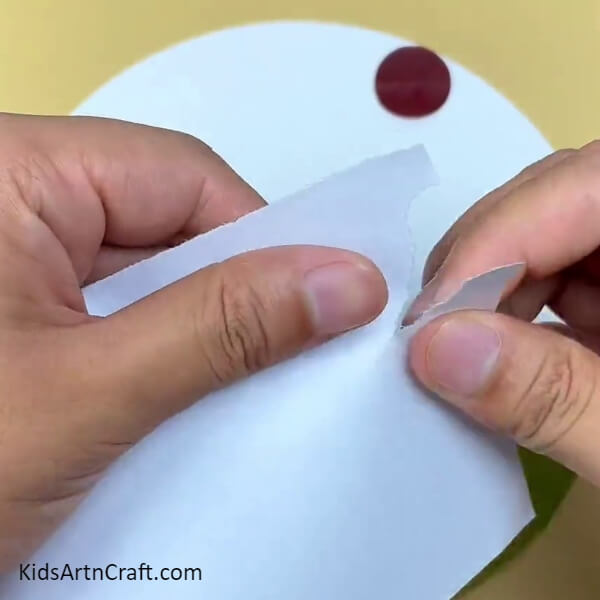
Take a white sheet and roughly tear out a piece to make it look like a cloud top. This will be the cloud stencil.
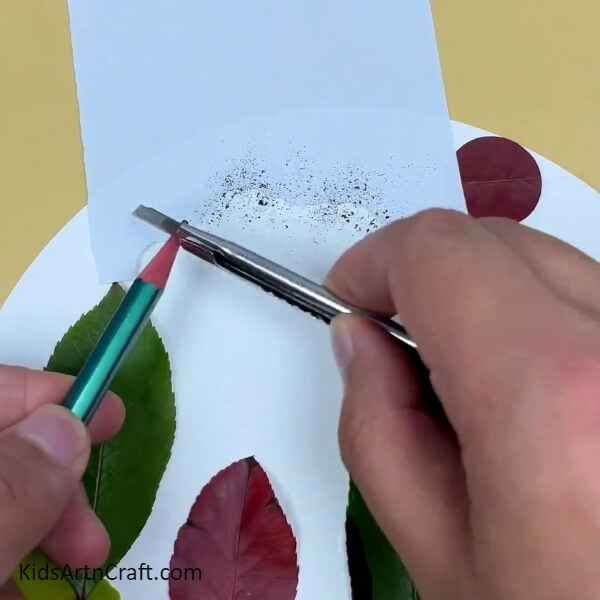
Step 10: Scraping Pencil
Place the cloud stencil over the top of the base in the sky of your landscape and using a craft cutter, scrape the pencil over the stencil and now using the finger rub over the stencil to create a cloud.
Step 11: Making Another Cloud
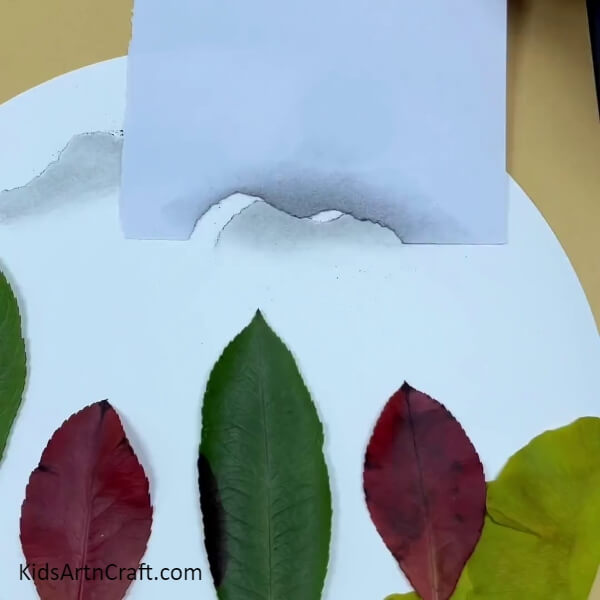
Make another cloud stencil from the sheet and do the same to make another cloud beside the first one below the sun.
Step 12: Drawing Birds
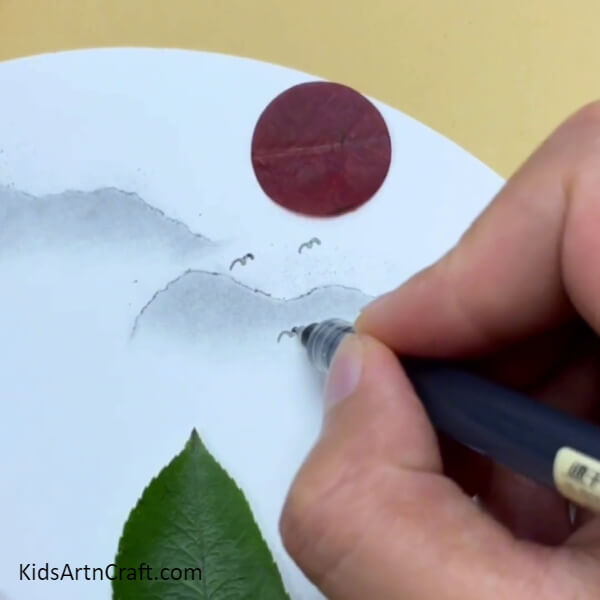
Using a pen draw tiny classic curvy birds in the sky randomly near the clouds.
The Leaf Scenery Landscape Is Ready!
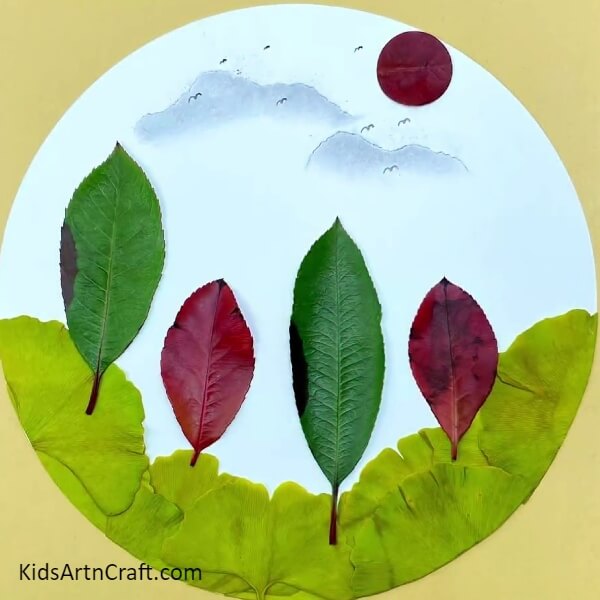
Voila! You have finally completed your leaf landscape craft! This brings an end to the tutorial!
Some More Leaf Craft Tutorial
Handmade Fall Leaves Craft For Children

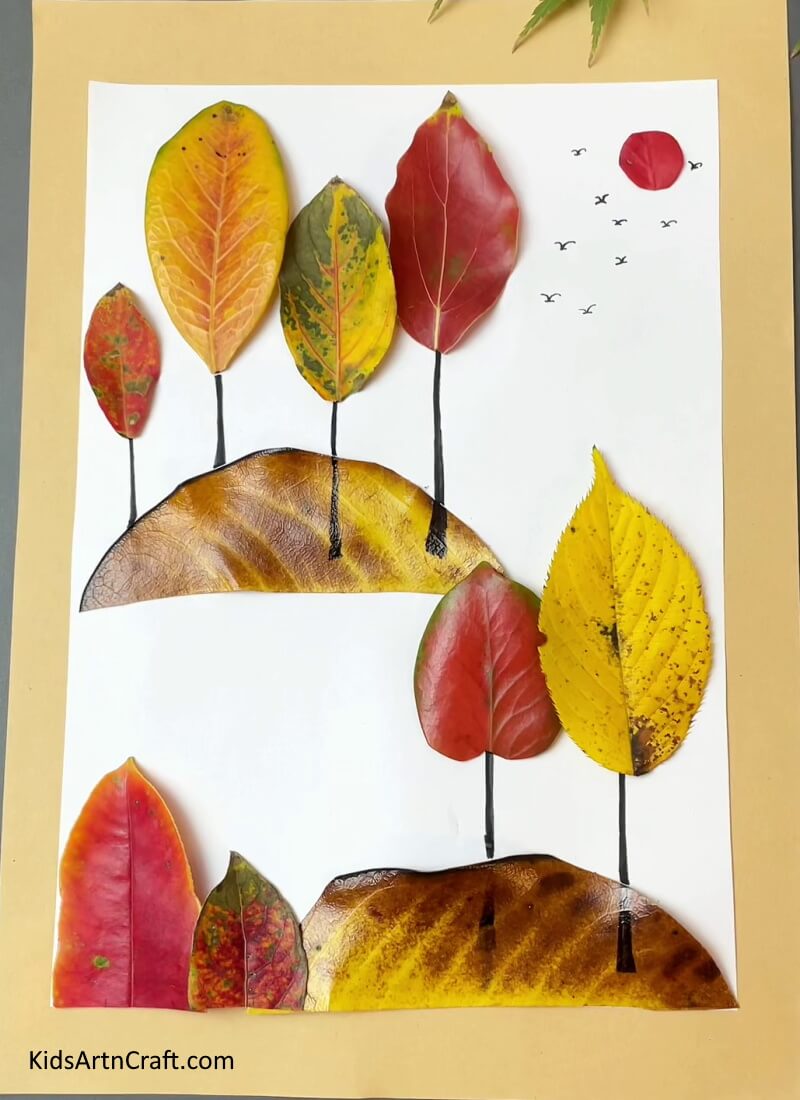
Image Source/Tutorial: Kids Art & Craft
This fun and easy craft is perfect for children of all ages. It involves gathering fallen leaves from outside and using them to create beautiful decorations for the home. It is a great way for children to explore nature and express their creativity.
This craft is a perfect way to let the kids explore the world of crafting! Decorate this craft on your room’s wall and get peaceful vibes every time you look at it! This craft is full of creativity as it represents nature by nature! What a wonderful idea! You can also customize this craft by adding some flowers in it and also some textures and colors with paint! Your imagination is the limit!
Follow us on Youtube for art and craft tutorials and much more.
More Articles from Kids Art & Craft
- DIY Flying House Using Leaves – Up Movie Inspo
- Easy Fall Leaf Craft Step by Step For Kids
- Easy Leaf Fall Artwork And Craft for Kids
- Simple Fall Leaf Boy Craft Tutorial For Kids
- Handmade Fall Leaves Bird Craft Step-by-step Tutorial For Kids