Paper Crafts
Easy Origami Cat Folding Craft for Preschool Kids – Step By Step Tutorial

This fun origami craft is perfect for preschoolers! Learn how to fold an easy origami cat with simple instructions and step-by-step pictures. Great for a rainy day or just to have some creative fun!
Origami is a fun and creative way for kids to express their artistic side! It’s also a great way to teach them about the basics of geometry, physics, and engineering. This easy origami cat folding craft for preschool kids is a simple way to get them started with this fascinating art form. With just a few simple steps, your little ones can proudly display their own origami cat in no time! Read on to find out how!
How To Make Origami Cat Folding Craft for Preschool Kids

Read More: How To Make Sunflower Clock Craft Using Paper
Material Used:
- A Coloured Sheet Of Paper
- Marker
Having a hard time finding easy origami crafts for your kid? don’t worry we got you covered!
Procedure
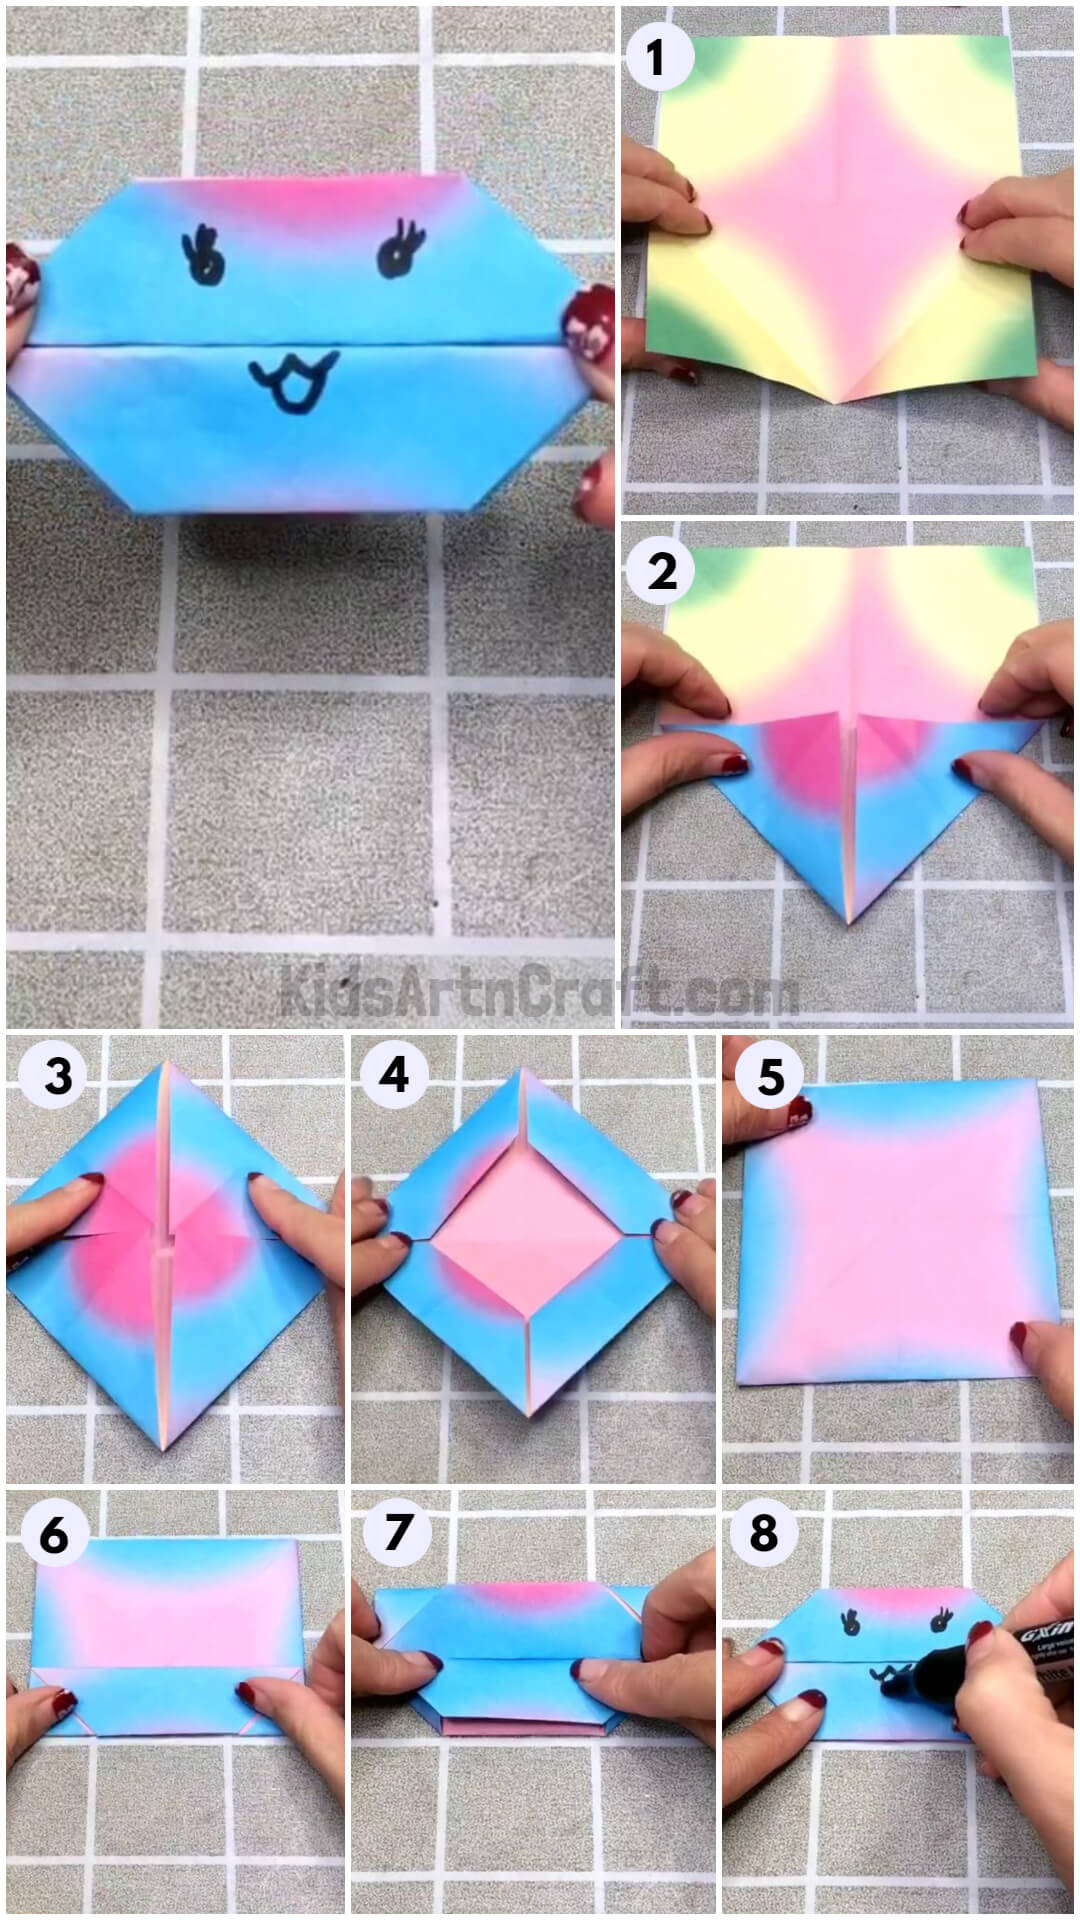
Step- 1: Folding The Square

Firstly take any colored or printed sheet of paper as per your preference and then cut it into a proper square shape of the desired length.
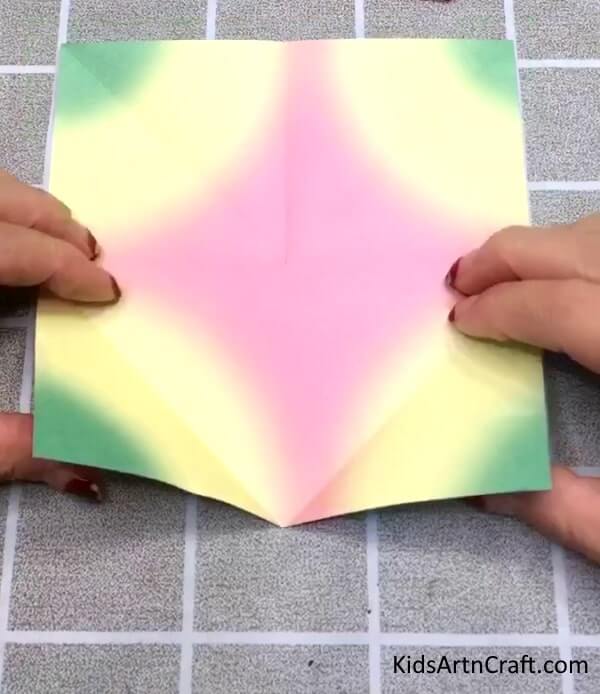
Step- 2:Folding The Bottom Side

Now, proceed to fold the bottom part, i.e. take both edges and fold the inwards making two triangles.
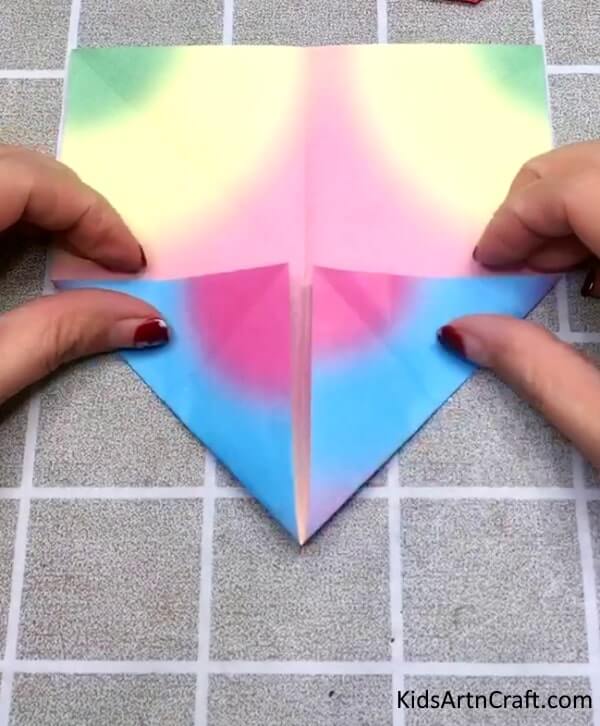
Step- 3: Folding Into a Kite-Like Shape

Here, repeat the same step as above, for the upper edges of the square, we get a kite-like shape at the end of this step.
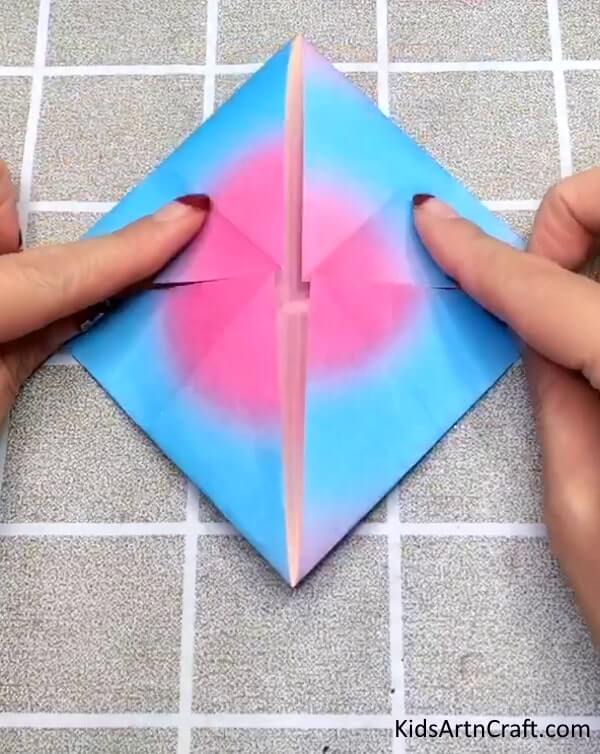
Step- 4: Folding Bottom Into Smaller Parts

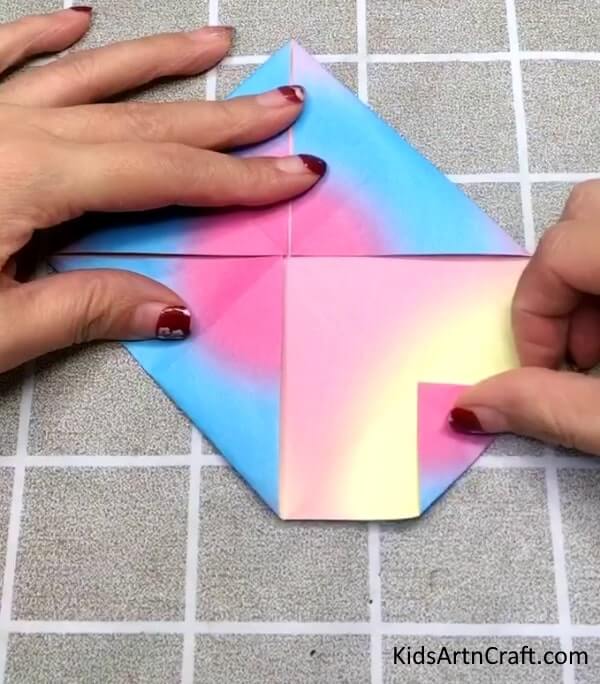
Now unfold the right bottom edge and make a smaller triangle by folding the edge to the crease of the previous fold.
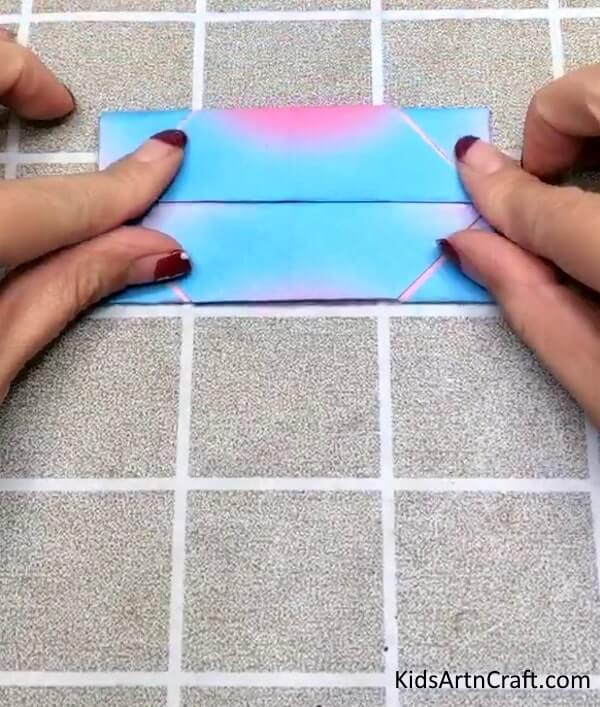
Step- 5: Folding Inwards


Now, fold the previously made triangle inwards, hiding it from the lower part of the paper, the shape obtained would look like the one that is given in the picture.
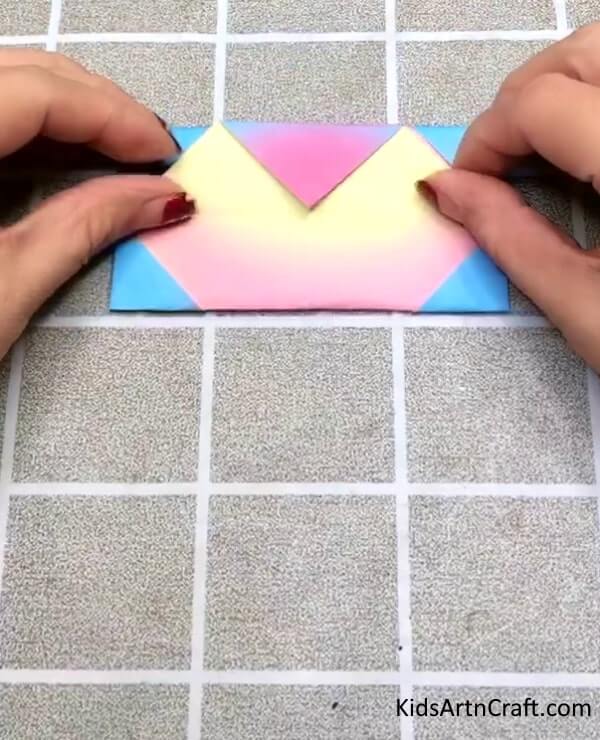
Step- 6: Folding All The Individual Triangles Inwards

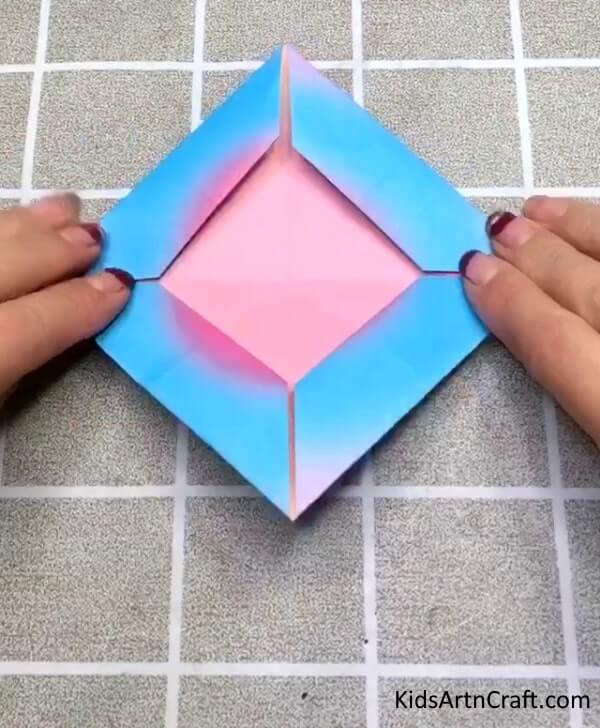
Now, you are supposed to follow the previous step and fold all the small triangles inwards.
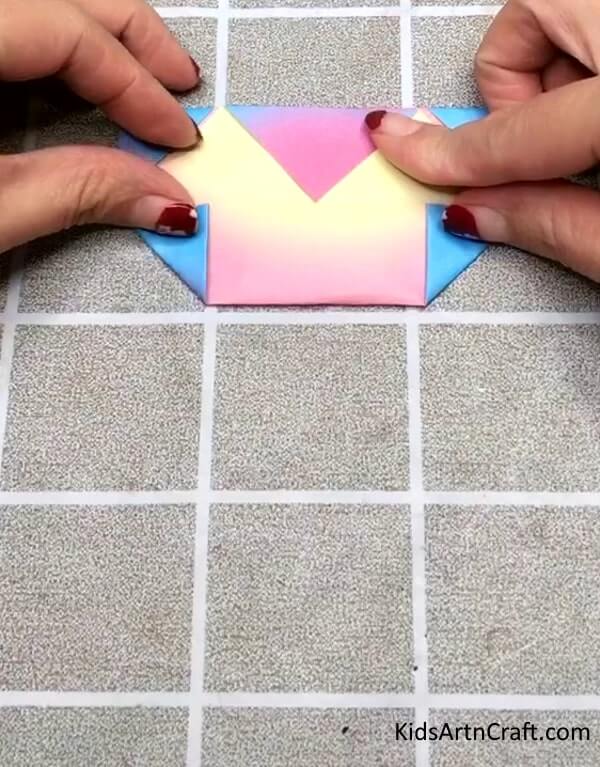
Step- 7:Turning The Paper Backwards

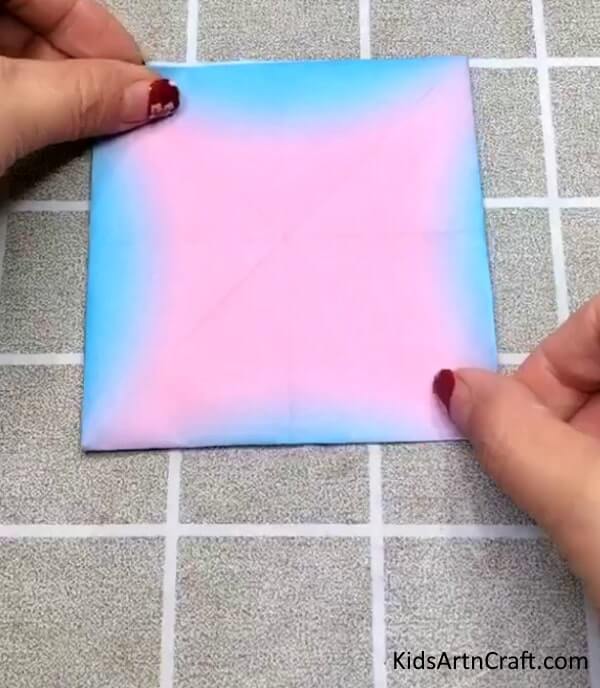
Now flip the paper and turn it to the other side, where you will see a square as shown in the picture below.
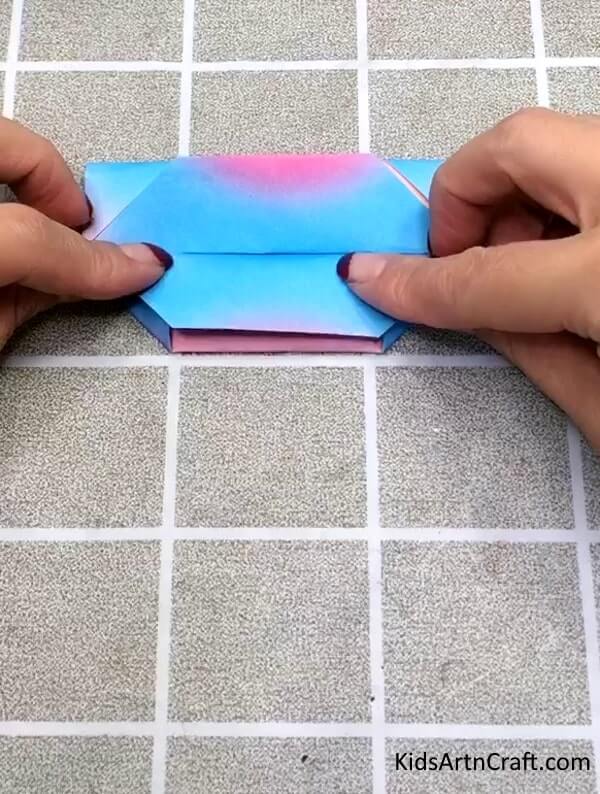
Step- 8: Folding The Lower Part Of The Paper

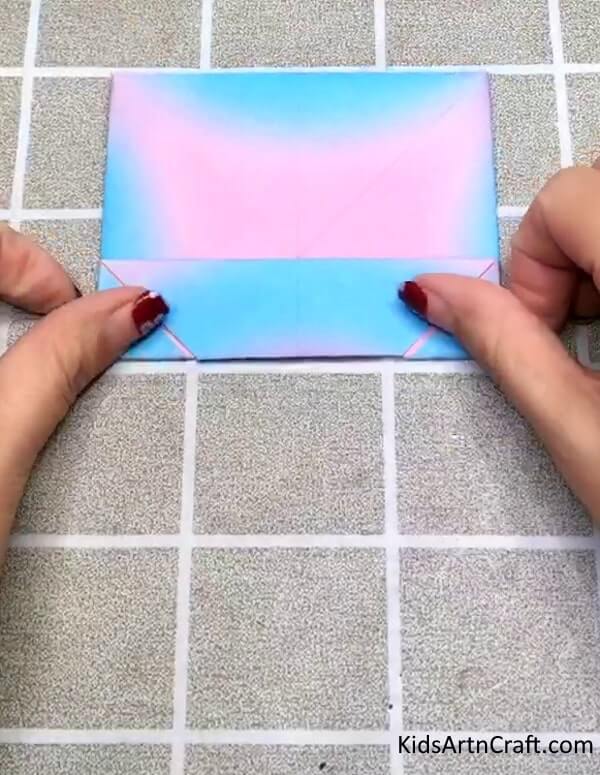
In this step, fold the lower part of the square obtained.
Step- 9: Similarly Folding The Upper Part

Now, following the same step as the previous one, fold the upper part of the paper as shown in the picture given below. Make sure the ends of the folds lie in the middle of the whole square and touch each other but do not overlap.
Step- 10: Turning To The Initial Side Again

Now, flip the paper again to the initial side again, and you will observe the below-given shape.
Step- 11: Make Smaller Folds On Both Edges At The Bottom

In this step, make smaller folds on both edges of the paper. These will appear like small triangles on both sides of the paper.
Step- 12: Finally, Flip The Side

Now, you are supposed to flip the side for one last time (I promise!).
Step- 13: Drawing Eyes And Mouth

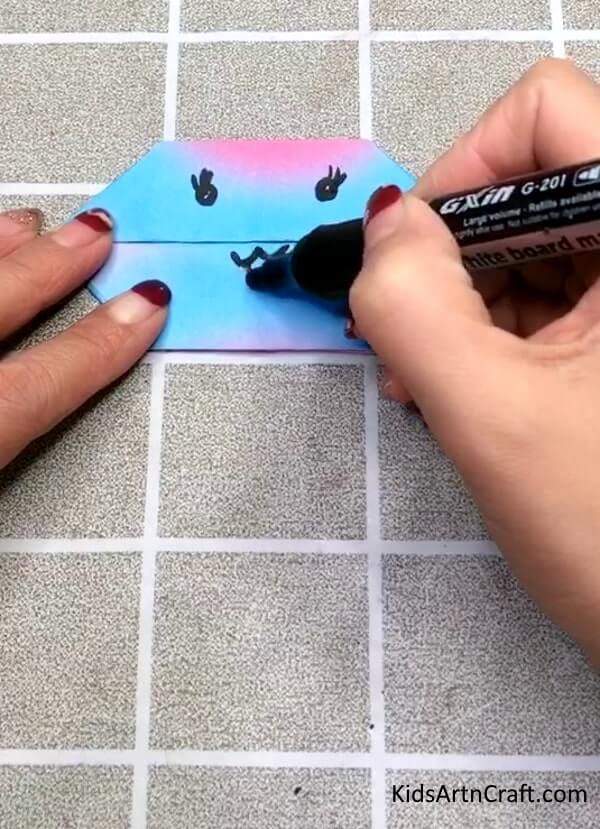
Finally, take a marker or sketch pen of your favorite color to draw the eyes and mouth of the cat, here we have used black color for the same.
Final Step: Enjoy Your Craft !!!

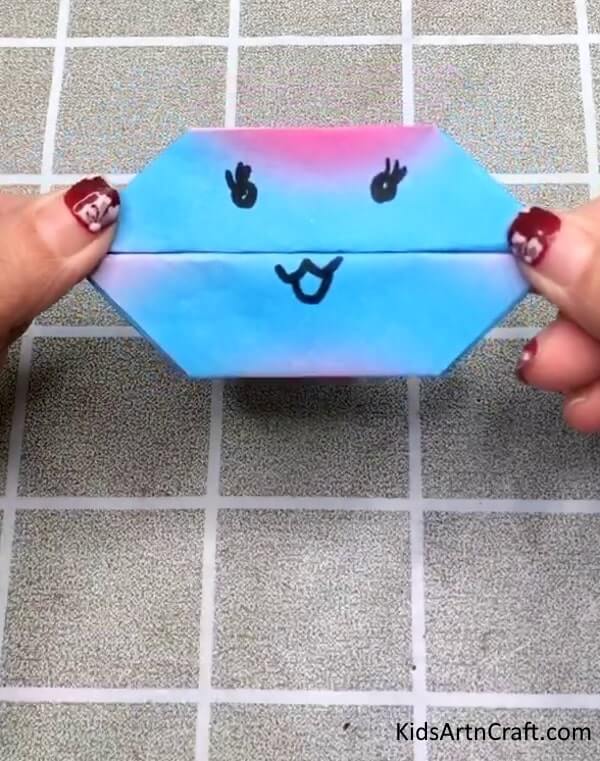
Your kiddo’s easy cat origami craft is ready now! I admit this one is great for those scholars who are curious about origami but still need an easier craft relevant to their age. This craft is for those days when you want to keep your kiddos busy and have some time for yourself! So, what are you waiting for? grab the paper and let them create this fun and step-based origami craft!
FAQs
What materials do I need to make an origami cat?
You will need a rectangular piece of paper, scissors, glue, and markers.
How do I fold the paper to make an origami cat?
Begin by folding the paper in half lengthwise, then unfold and fold the top two corners in towards the center. Next, fold the bottom two corners in towards the center and unfold. Finally, fold the paper in half again and unfold it.
What other shapes do I need to make the origami cat?
You will need to cut out two triangle shapes to create the ears, two oval shapes to create the eyes, and a heart shape to create the nose.
How do I assemble the origami cat?
Glue the triangle shapes to the top of the folded paper to form the ears, then glue the oval shapes to the front of the folded paper to create the eyes. Finally, glue the heart shape to the center of the folded paper to create the nose.
How do I make the tail for the origami cat?
Cut a thin strip of paper and fold it in half lengthwise. Glue the folded strip to the back of the origami cat.
This easy origami cat folding craft is a great way to introduce preschool kids to the fun and creative world of origami!
Follow us on Youtube for art and craft tutorials and much more.
More Articles from Kids Art & Craft
- 3D Cactus Paper Craft Tutorial for Kids
- Paper Lollipop Craft – Learn to Make Origami Paper Candy with Step-By-Step Tutorial
- Fun To Make Paper Flower Bucket Craft – Step-by-Step Tutorial
- DIY Paper Flower Craft – Step-By-Step Tutorial
- Make DIY Origami Paper Envelop Craft For Kids