Paper Crafts
Origami Paper Dragonfly easy Craft tutorial for kids

Easy to Make Origami Dragonfly Handwork with a Step-by-Step Tutorial for both Kids as well as Adults. Learn the art of paper folding by following a simple procedure.
Greetings Kiddos! This craft work is done using an origami paper folding technique to create a super cool green dragonfly. Origami is a type of art with significant meaning that can be peaceful, calming, and a source of creative expression. This enables the learning of geometry in math more fun for the children. As this craft work requires hands-on learning therefore it improves the spatial visualization skill of the kids. Without any delay let’s dive into action!
How To Make An Dragonfly Using Origami Paper

Read more: Animal Decoration & Flying Paper Craft Video Tutorial for All
Materials Required
- A single green origami sheet
- Scissor
- Toothpick
Procedure
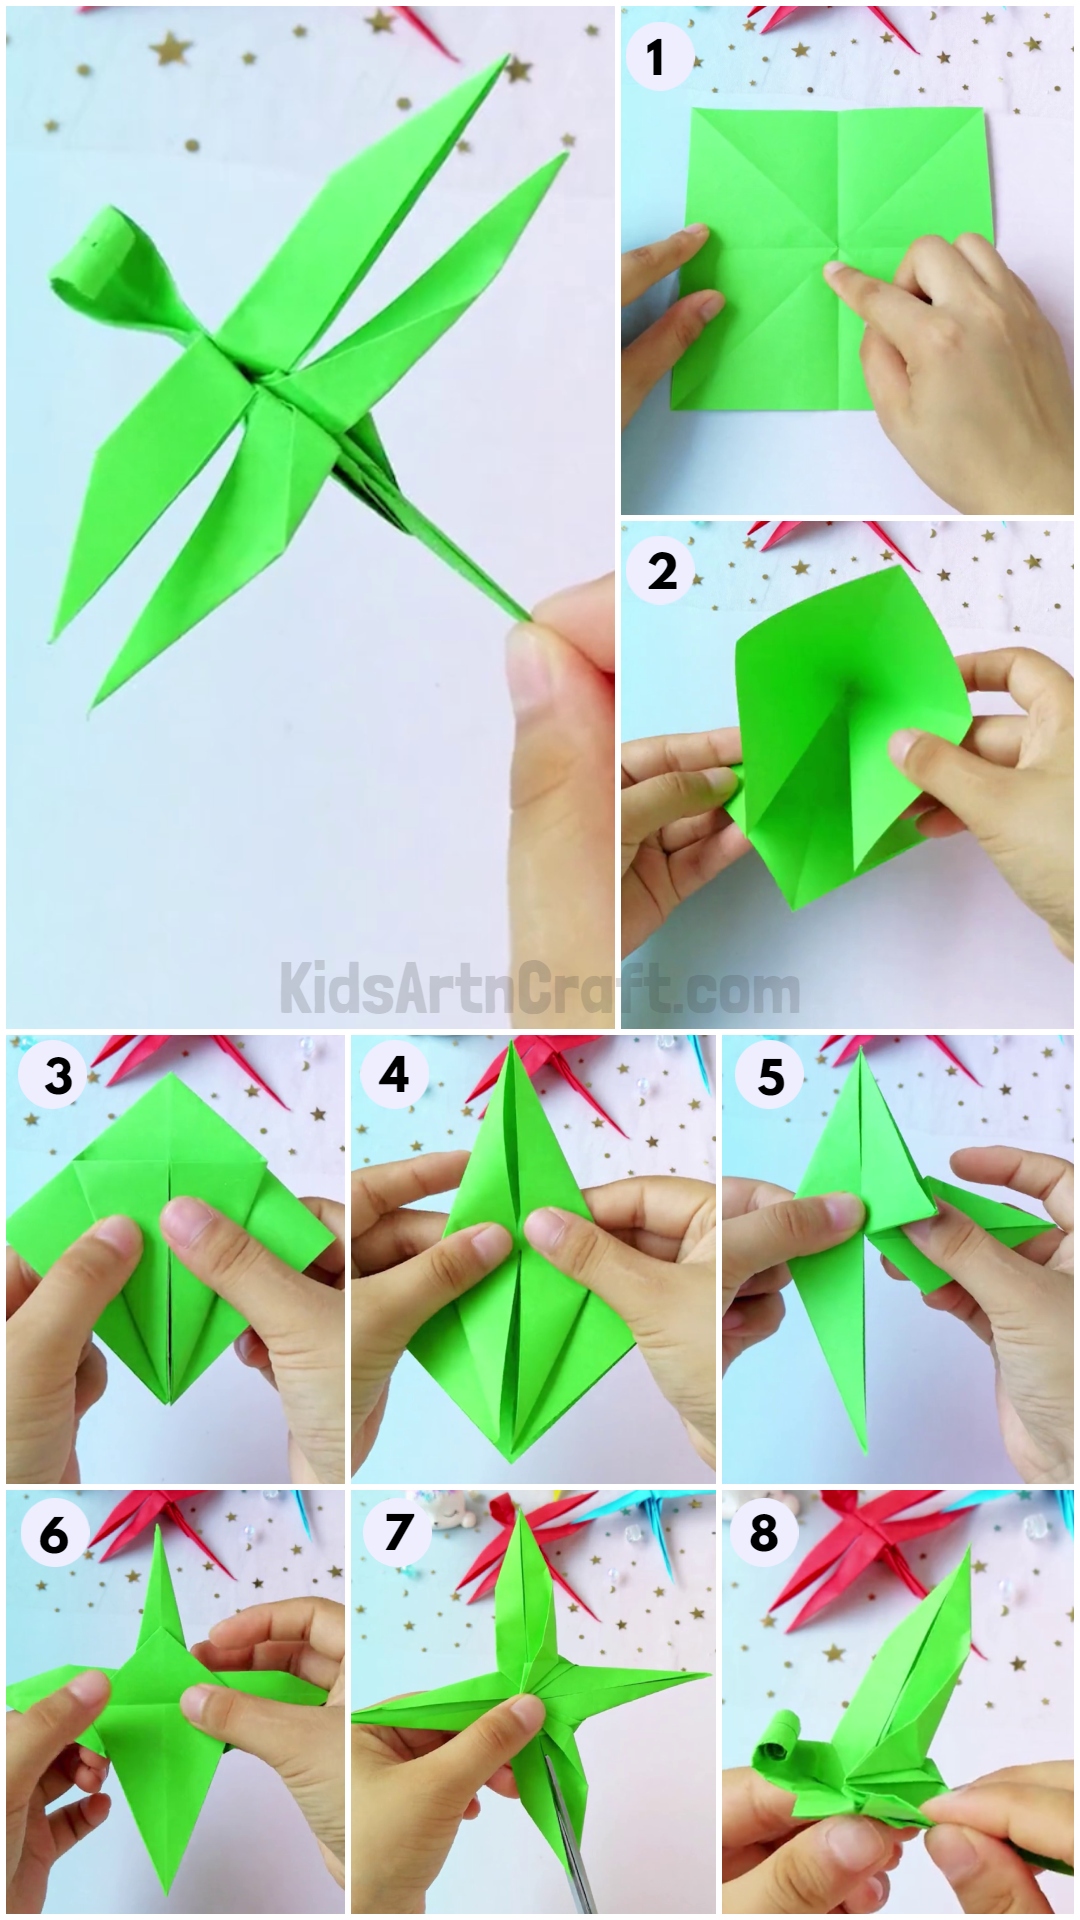
Step 1: Creasing A Green Origami Paper
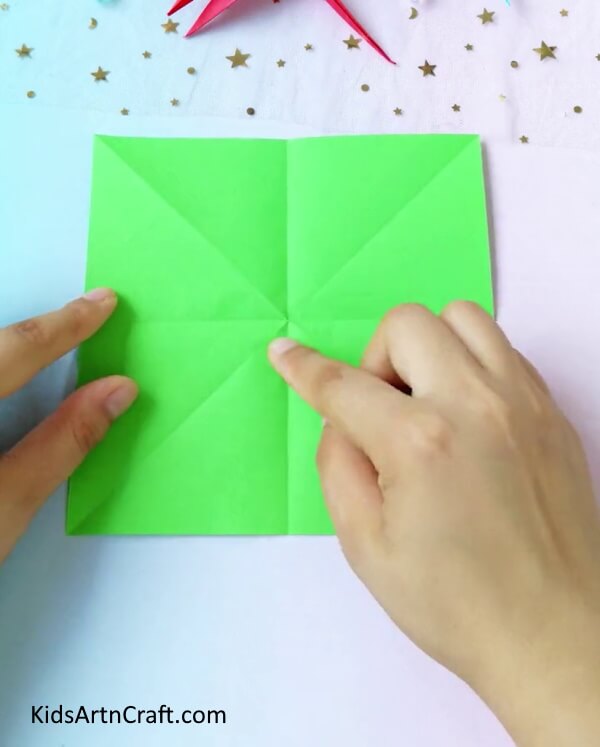

Let’s begin this craft by taking green origami paper, folding and creasing the paper in diagonal halves then turning the paper to the other side and again folding and creasing the paper into halves.
Step 2: Folding The Paper To Form A Diamond Shape
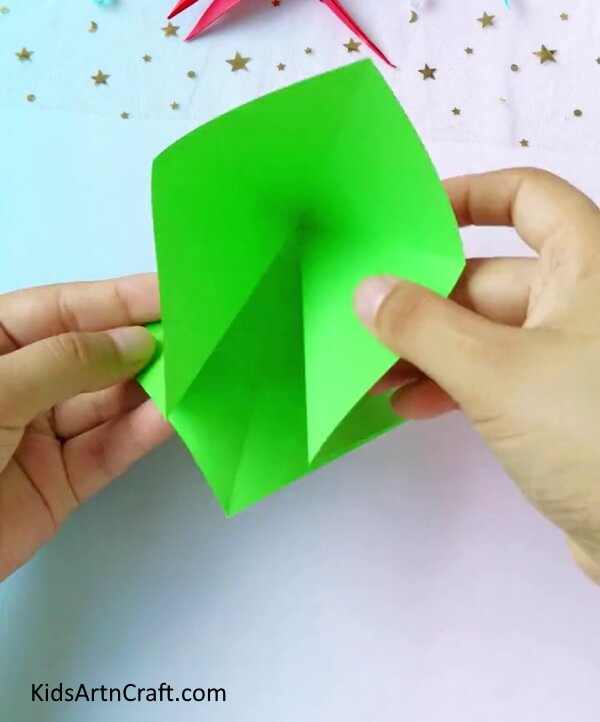

From the horizontal diagonal crease push the ends of the crease inwards to form a diamond shape and overlap the paper to the diamond.
Step 3: Folding The Paper To Form A Kite Shape
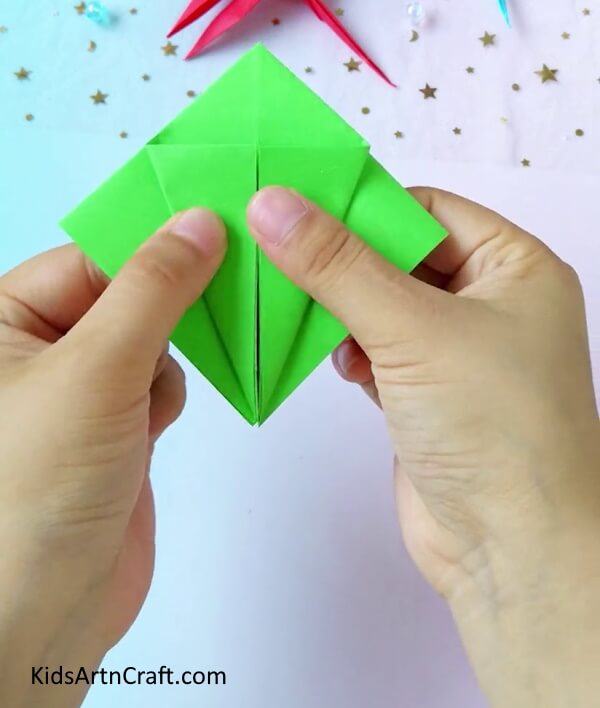

Fold the left and right corners of the diamond shape to the middle crease of the diamond and again form creases, You will see a triangle in the middle. Follow the same step after flipping the diamond to the other side. The diamond will be changed into a kite shape. Fold the small triangle of the kite on both sides and make creases from both.
Step 4: Folding The Kite To Form Rhombus Shape
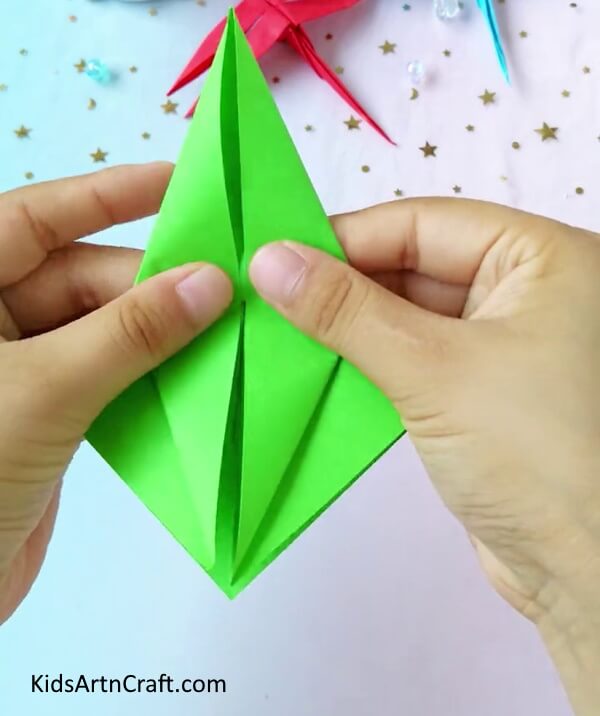

Unfold the triangle of the kite to again form a diamond shape. Then open up the diamond from the unfolded corner along the triangle crease to form a rhombus and push and crease the paper from the sides of it.
Step 5: Again Making A Rhombus From The Other Side
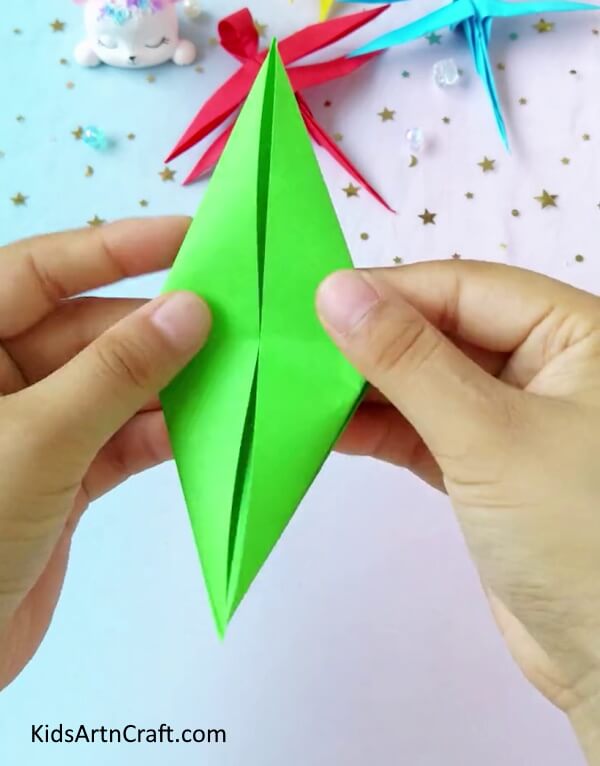

Flip the paper to the other side and follow step-4 again to form a rhombus on the other side.
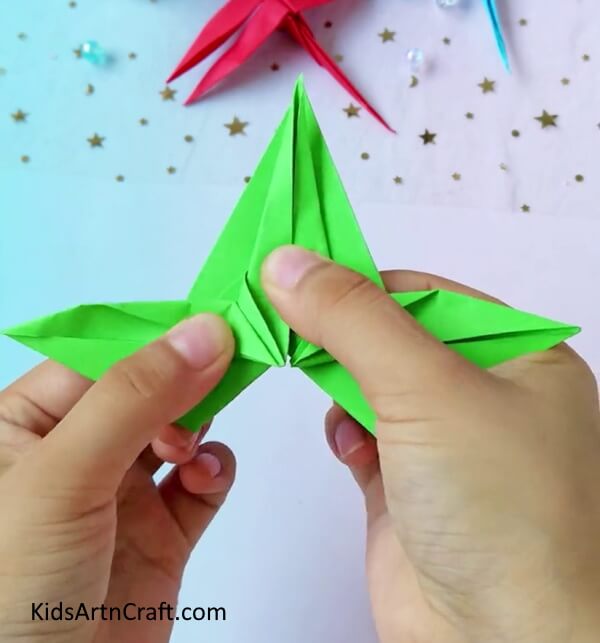
Step 6: Folding To Create Wings Of The Dragonfly
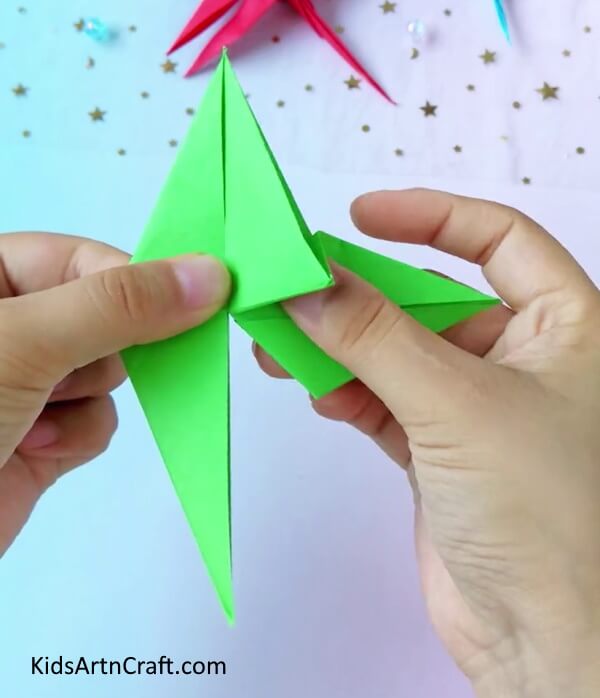

Now fold the lower right quarter of the diamond shape up and backward. Between the two diamond shapes i.e. Front and back there is a folded part in which the folded quarter should be tucked and twisted slightly until it appears as shown in the above image. Make sure the center triangle’s bottom line aligns with the center lines of the other leaves on both sides.
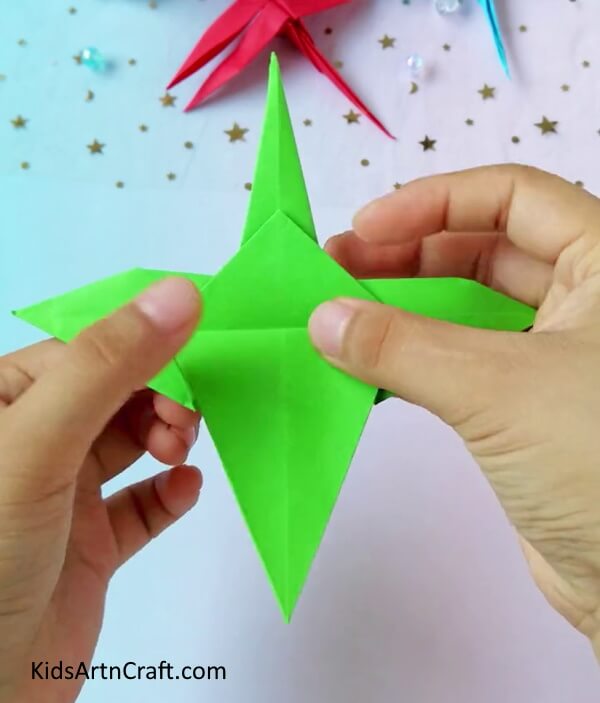
Step 7: More Creasing To Obtain The Desired Shape
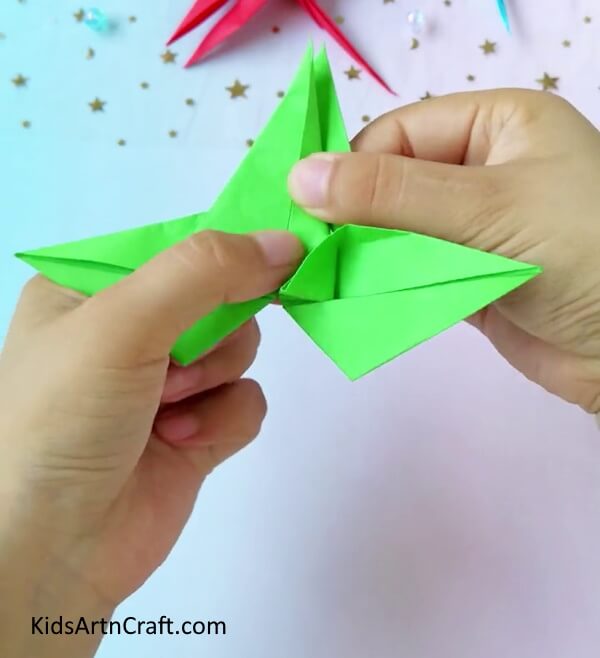

Repeat the same process on the lower left quarter of the diamond shape. Upon folding both the lower quarters you will get a three-leafed shape figure. Now take the center leaf piece and crease both sides of that leaf making the folded parts meet at the center line of that leaf. While folding the right half of the center leaf the upper part of the right leaf will slightly move upwards. This upper part is then pressed upon the leaf itself as displayed above.
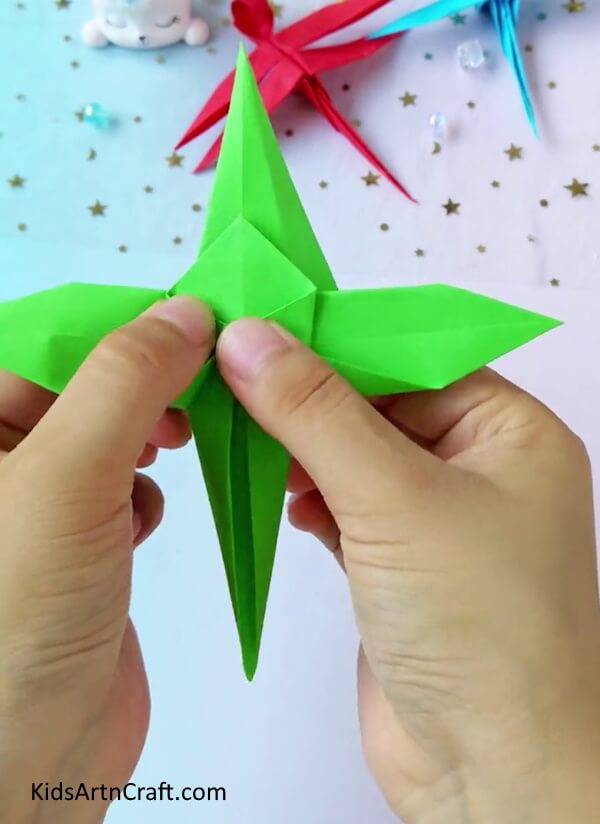
Step 8: Fold And Hold It Tightly

Do the same on the other side of the center leaf as well as the left leaf neatly and more carefully until it appears as shown above.
Step 9: Flip The Folded Paper And Fold A Diamond Shape For The Dragonfly’s Body

Next, turn the folded paper and unfold the center triangle by pressing it down to shape it like a diamond.
Step 10: Continue To Fold The Diamond’s Both Sides

Crease both sides of the diamond to make it meet at the center then press down at the center.
Step 11: Cutting At The Center To Create Wings
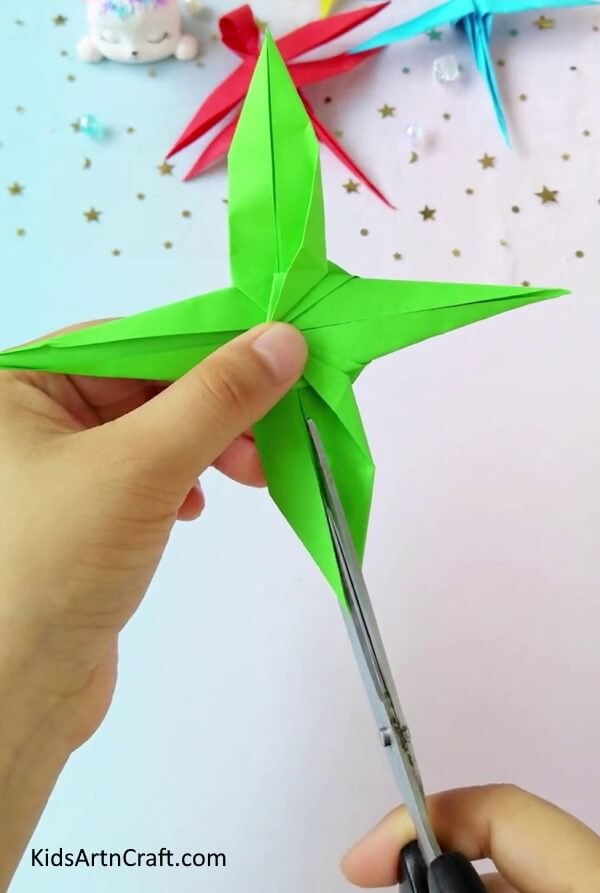

Flip the folded origami paper which now has four leaves on four sides. Regarding the leaf with two folds as the center part, cut in the middle of the leaves on both sides as shown.
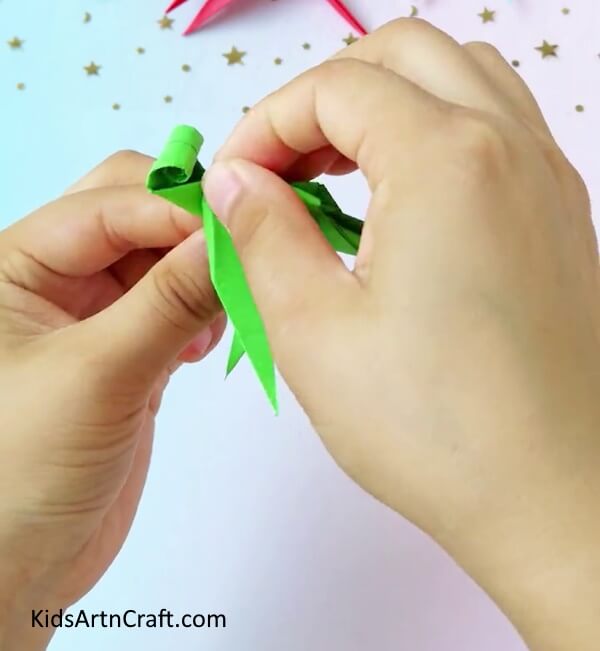
Step 12: Roll And Twist To Form Perfect Double Wings


Further using a toothpick or with a thin stick roll the lower center triangle as displayed in the image. This is the head of the dragonfly. Then press the upper center triangle together to represent it as a flat and thin tail of a dragonfly.
Step 13: Pressing Together To Complete The Origami Dragonfly

In the end press the joint below the rolled paper head of the dragonfly to produce the appearance of the neck. If you want you can use a small amount of glue to stick the joints together more firmly.
Finally Origami Paper Dragonfly Is Ready


Tadda!! Here is our greeny origami dragonfly who is ready to join its other origami creatures collection. Check out our page frequently for more unique and amazing origami craft ideas. Thanks for your time! Visit again!
Follow us on Youtube for art and craft tutorials and much more.
More Articles from Kids Art & Craft
- Easy Paper Folding Crafts Video Tutorial for Kids
- Easy to Make Paper Crafts Video Tutorial for Kids
- Easy Origami Cat Folding Craft for Preschool Kids – Step By Step Tutorial
- How to Make Origami Paper Frog Step-by-Step Instructions
- How To Make Cardboard Tube Swan Craft Tutorial For Kids