


Kids Activities
How to Make Origami Paper Frog Step-by-Step Instructions

Learn how to make an origami paper frog with this easy-to-follow step-by-step guide. These instructions are perfect for beginners and require no special tools. Make your own origami frog today!
Welcome to this step-by-step guide on how to make an origami paper frog! Origami is a fun and creative way to make unique pieces of art. Making an origami paper frog is an ideal project for both children and adults alike.
This fun and easy-to-follow instructional guide will take you through the process of folding a frog out of a single sheet of paper. With just a few simple folds, you’ll be able to make a frog that you can show off to your friends and family. Whether you are a beginner looking to learn a new craft or an experienced origami master looking for a new challenge, this guide is perfect for you! So let’s get started and learn how to make an origami paper frog!
Materials Required:
- Green Craft Paper
- Scissors
- Glue
Handmade Origami Paper Frog Craft Tutorial With Step By Step Instructions
Read More: Super Easy Craft Activities Video Tutorial At Home
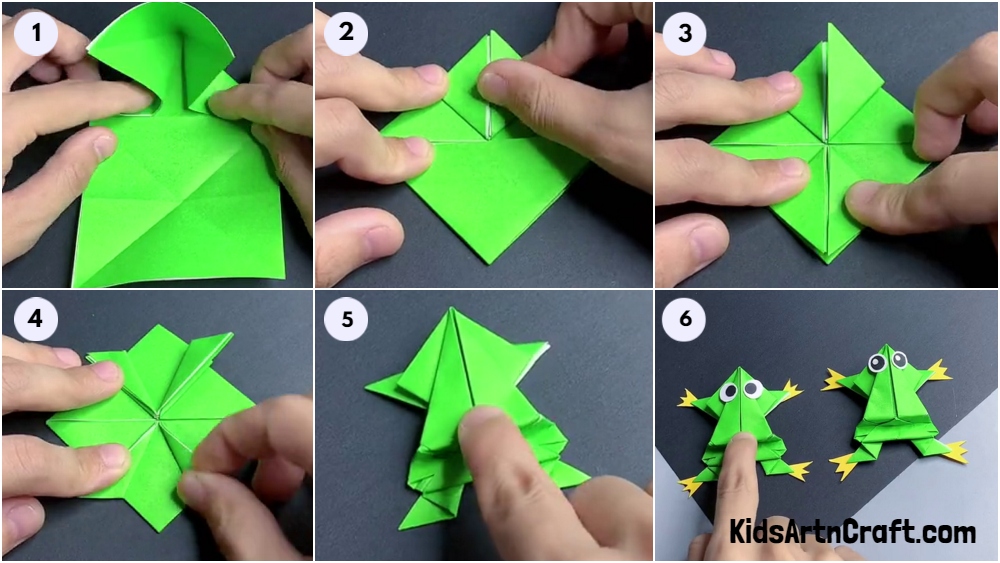
Step -1 Getting Ready With Paper and Creasing It
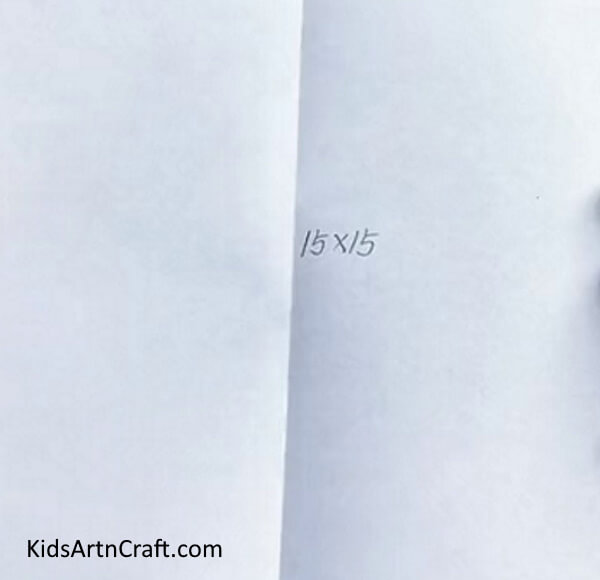
Let’s make a jumping frog using paper. To make a paper frog, you need one side green color craft paper 15*15cm in size. Fold the paper in half.
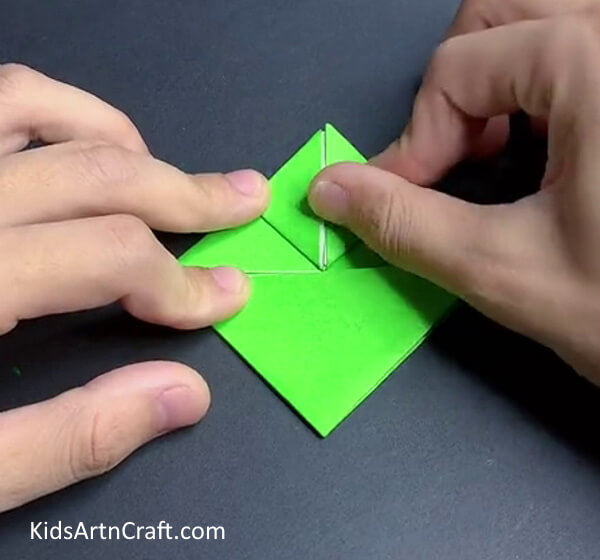
Also, fold the square from top to bottom and make a crease.
Step -2 Folding Paper

Diagonally fold the top left corner to crease it, and repeat it with the top right corner. Fold the bottom right corner to the left to make a diagonal crease, and repeat the same with the bottom left corner.
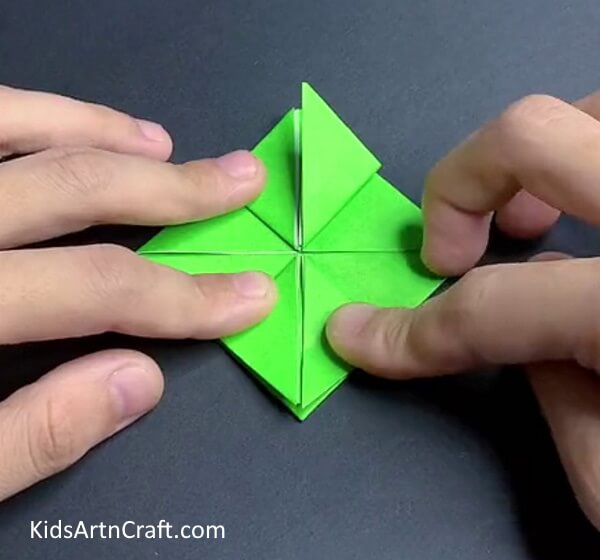
Now, make the waterbomb base. To make waterbomb base, fold both sides of the diagonal and horizontal together. Gently, push in and fold the paper in half, it will give you a triangle shape as shown in the above image.
Repeat the process in the bottom square to get a diamond shape.
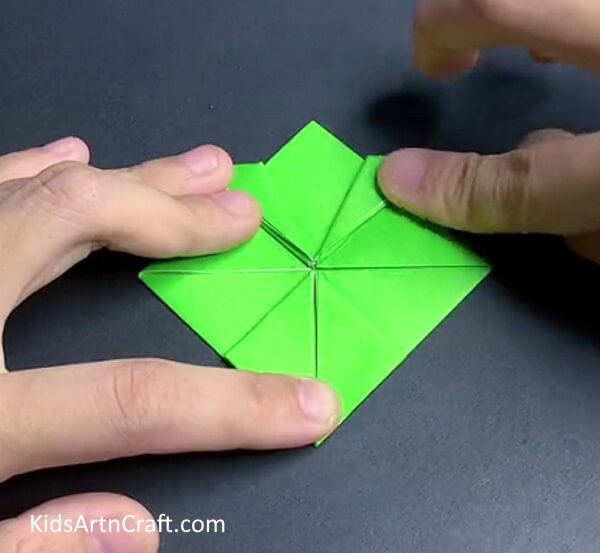
Step -3 Folding Paper
Now, take the upper triangle. and fold the corners in the upper direction to meet.
Step -4 Making Folds
Repeat the same process in the bottom triangle.
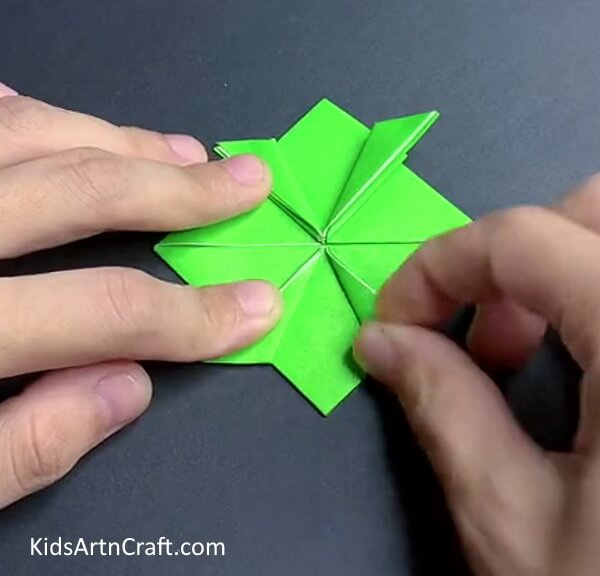
Step -5 Making Legs
In the upper triangle, fold both corners in the outward direction.
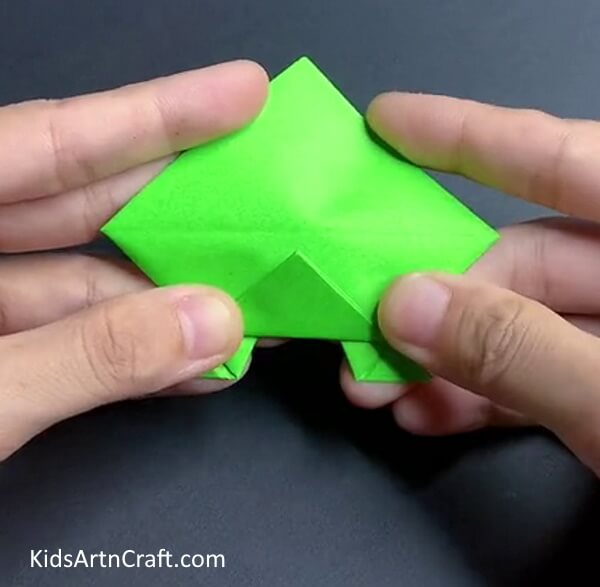
Step -6 Making Legs
Repeat the previous step in the bottom triangle too.
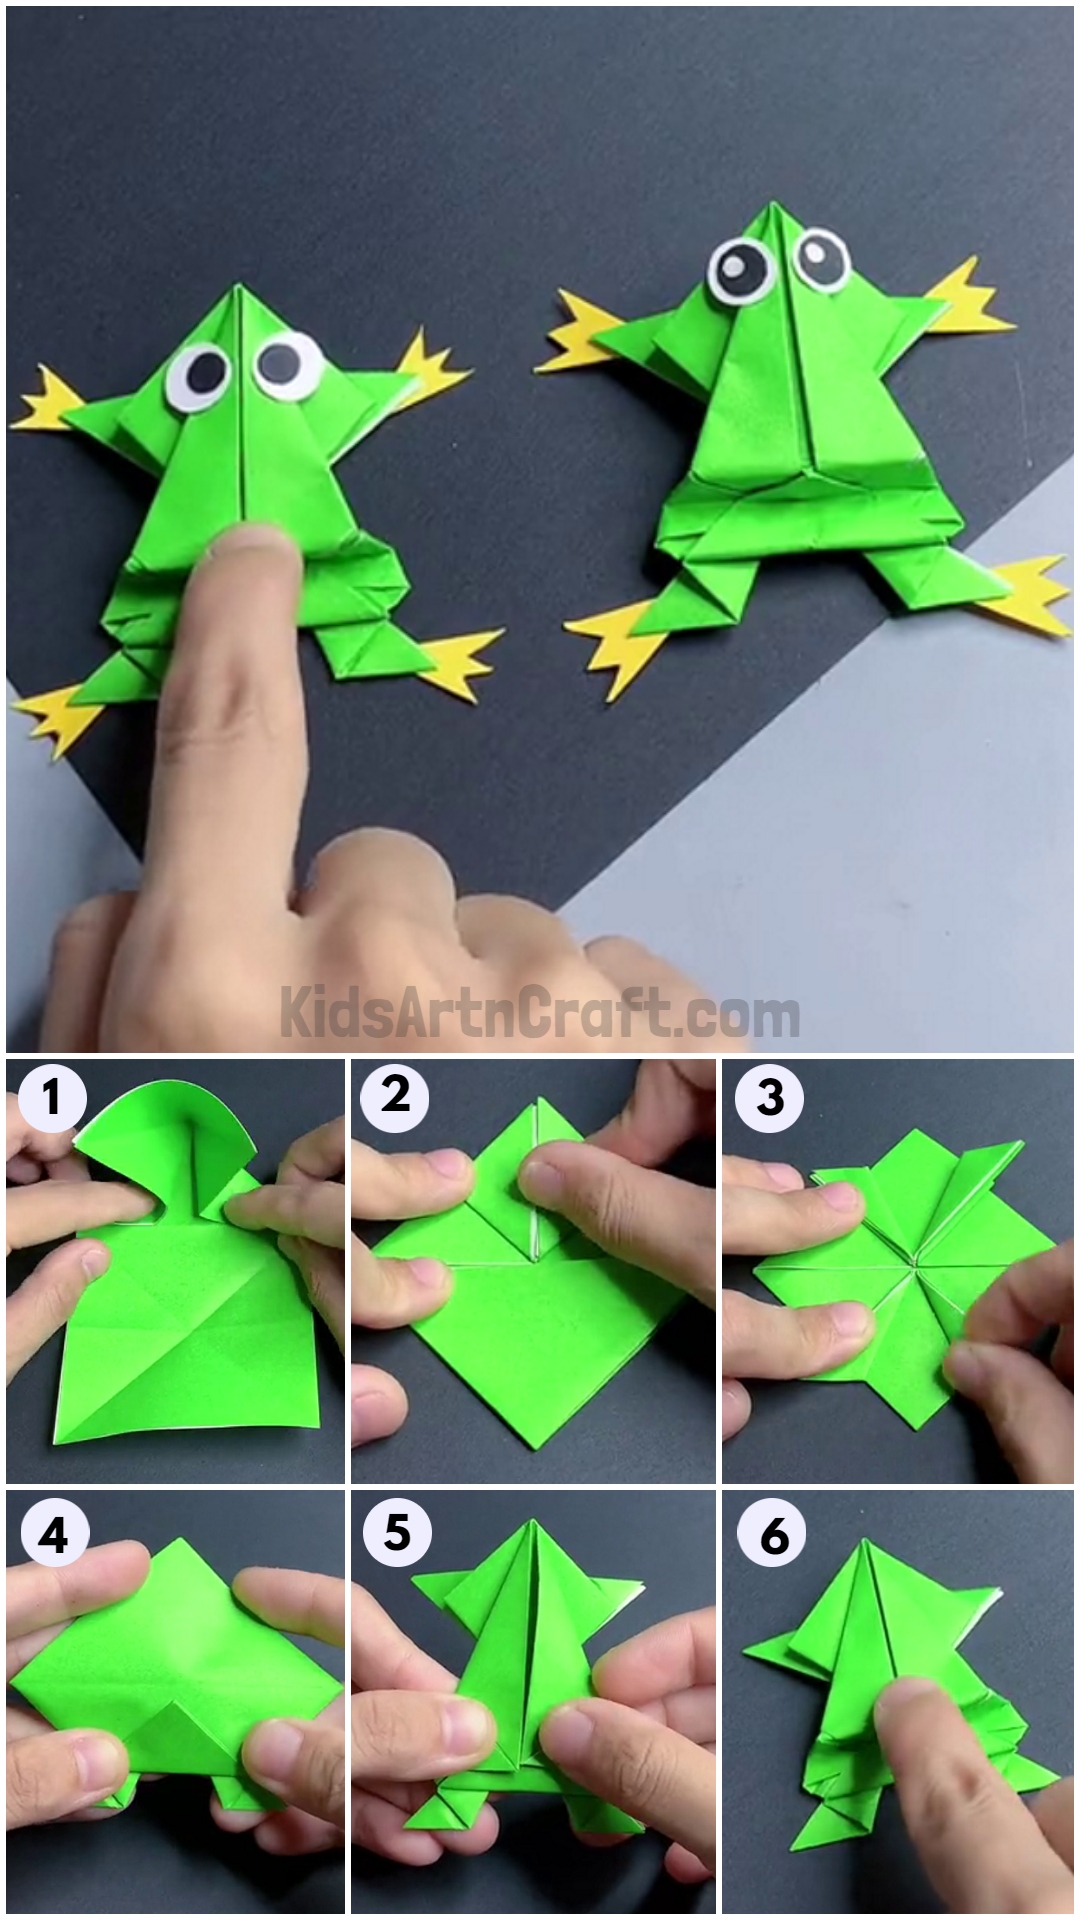
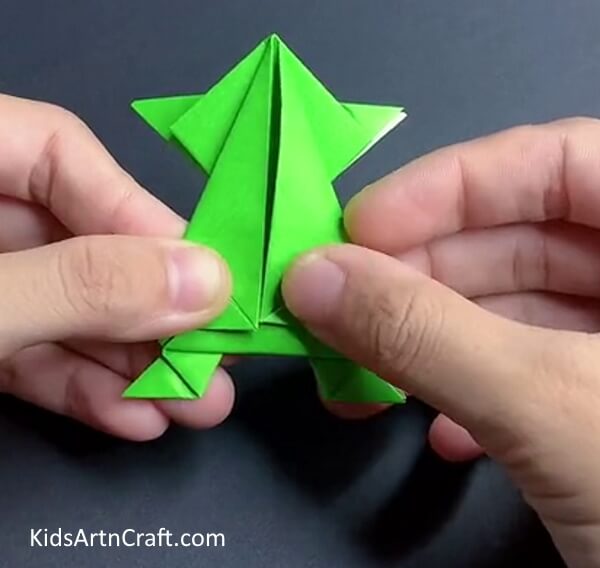
Step -7 Turning Paper and Folding Corner
Now, turn the paper frog and fold the bottom corner in the upward direction as shown in the above image.
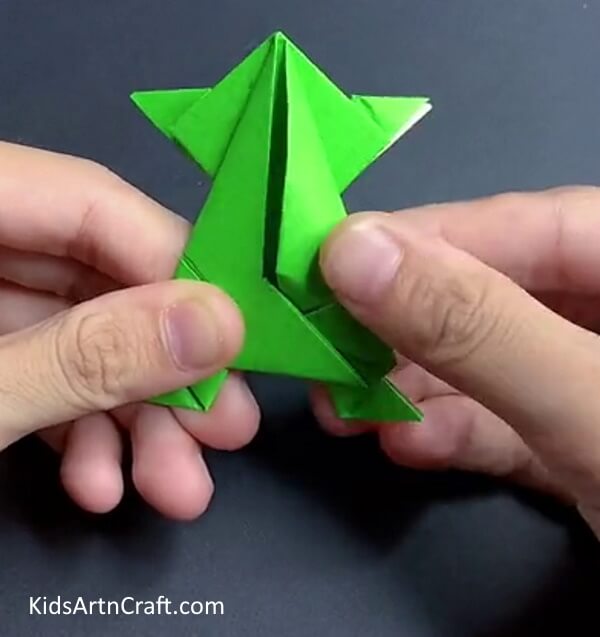
Step -8 Folding Body of Frog
Now, fold the right vertex and left vertex to the mid of the body.
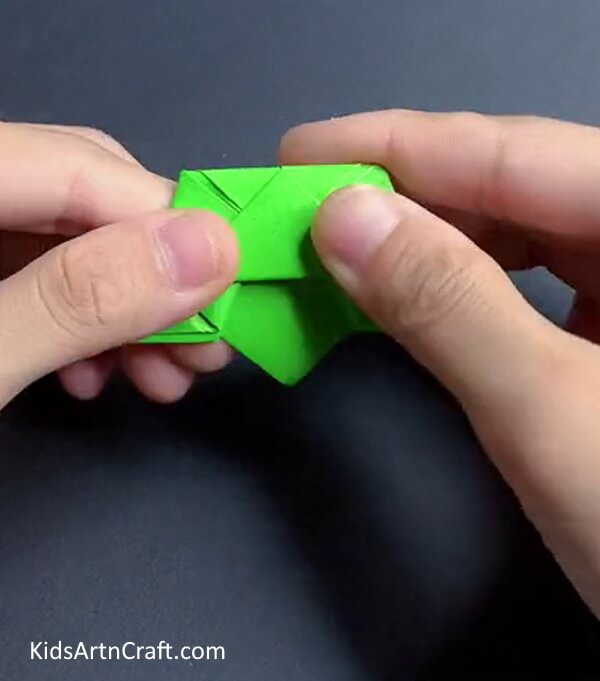
Step -9 Tucking Corners
Now tuck the left and right corner of vertex we made earlier in the bottom pocket fold.
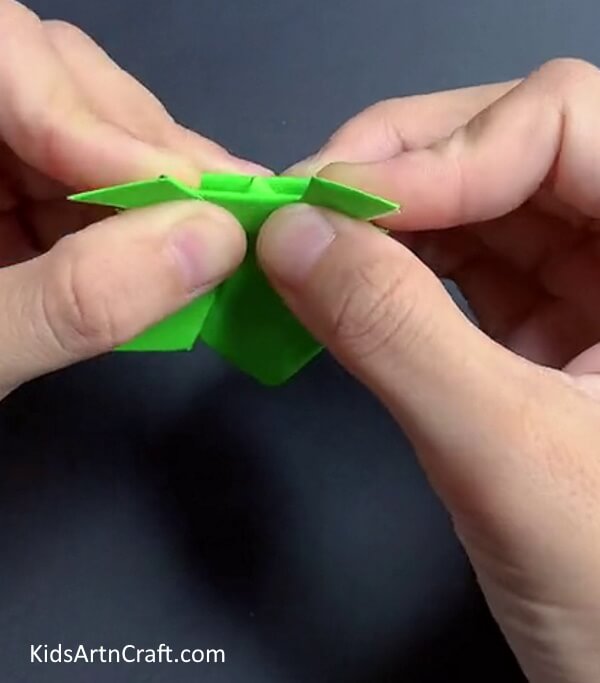
Step -10 Making Fold to Make Frog Jump
Turn the face of the frog to the backside and fold the bottom side and press it.
Step -11 Folding Again
Fold the folded side again in the opposite direction.
Step -12 Jumping Frog
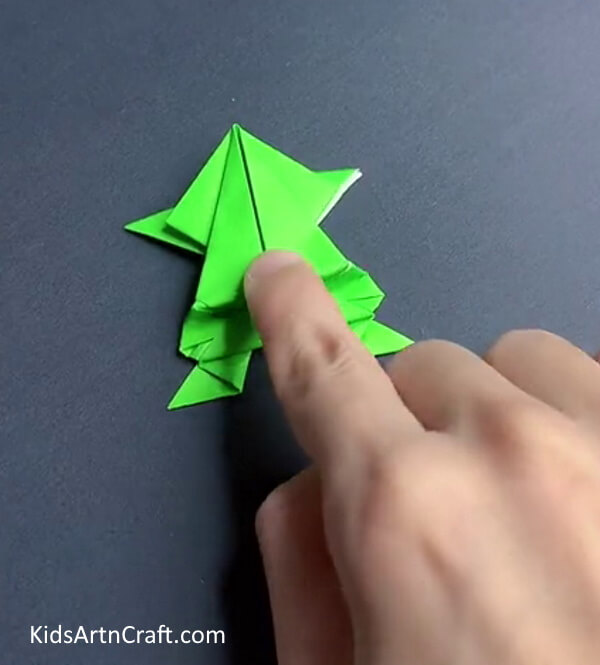
Your frog is ready to jump. You can add googly eyes and claws to it.
Final Image – Jumping Paper Frog Is Ready!
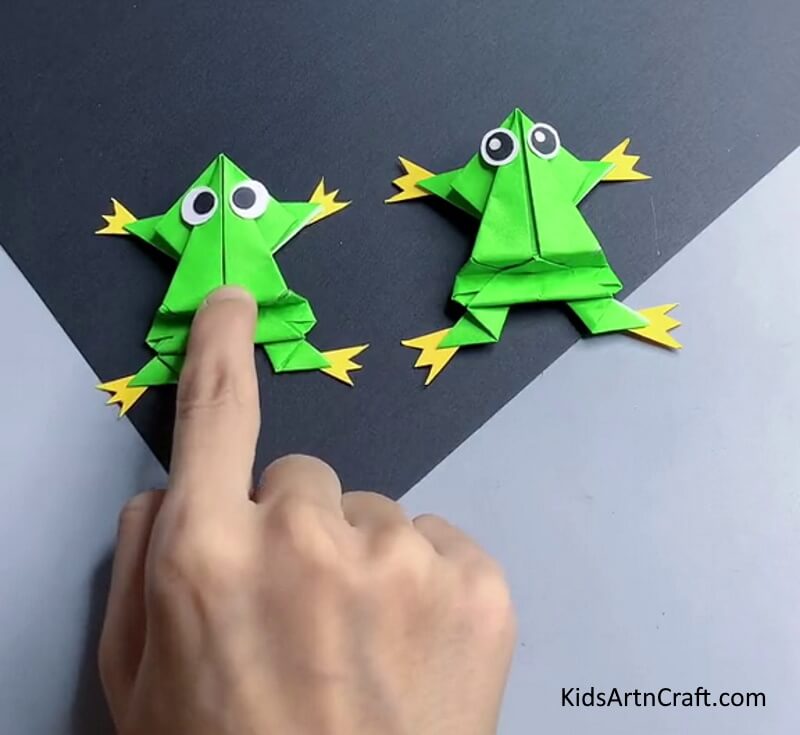
Making an origami paper frog is a fun and easy way to bring some creativity into your day! With a little bit of paper and some simple folding instructions, you can make a fun and creative origami paper frog in no time! Now you have a Jumping Paper Frog to show off and enjoy!
Some More Frog Craft Tutorial
Easy Frog Craft For Kids Using Paper
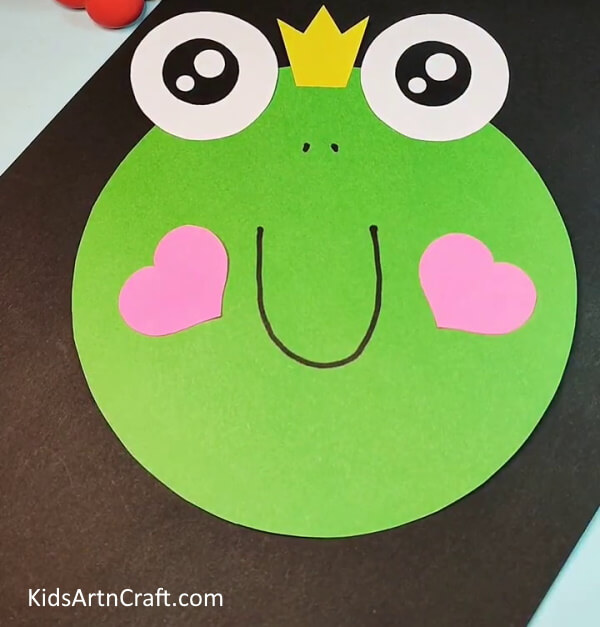
Image Source/Tutorial: Kids Art & Craft
This easy frog craft for kids using paper is a great way to keep the little ones busy and entertained. It is simple to make and requires minimal materials. Kids will have a blast creating this fun and colorful frog!
Follow us on Youtube for art and craft tutorials and much more.
FAQ’s Origami Paper Frog Step-by-Step Instructions
1. What is origami?
Origami is the art of folding paper into shapes and figures to create decorative objects or art pieces.
2. What tools do I need to make an origami paper frog?
You will need a single sheet of square paper, scissors, and a pen or marker.
3. How do I fold the paper?
Fold the paper in half diagonally, then unfold. Fold the paper in half again, but this time horizontally, then unfold. You will now have four equal sections.
4. How do I make the origami paper frog’s body?
Fold the paper in half so that the two halves meet along the vertical line. This will create a triangle shape. Fold the top corners of the triangle down and inwards to create the body of the frog.
5. How do I make the origami paper frog’s legs?
Fold the bottom edges of the triangle up and inwards to create the frog’s legs.
6. How do I make the origami paper frog’s head?
Fold the top corners of the triangle up and inwards to create the head of the frog.
7. How do I make the origami paper frog’s eyes?
Use the pen or marker to draw eyes onto the head of the frog.
8. How do I make the origami paper frog’s mouth?
Use the scissors to cut a small triangle out of the bottom corner of the frog’s head to create the mouth.
9. How do I make the origami paper frog’s back?
Fold the bottom corners of the triangle down and inwards to create the back of the frog.
10. How do I finish the origami paper frog?
You can leave the frog as is, or draw decorative patterns on it for extra flair. You have now finished your origami paper frog!
More Articles from Kids Art & Craft
- DIY Paper Crafts Video Tutorial for All
- Cool Paper Craft Video Tutorial for Kids
- To Make Origami and Crafts Video Tutorial for Kids
- Easy Paper Crafts DIY Video Tutorial for All
- Easy Craft Ideas Make At-Home Video Tutorial


