DIY and Crafts
DIY Paper Flower Pot Craft with Seeds – Step by Step Tutorial

Create a beautiful, eco-friendly paper flower pot with this step by step tutorial! This easy DIY craft is perfect for gardeners and crafters of all skill levels and comes with a free set of seeds to get you started.
Welcome to this step-by-step tutorial on how to create a unique and beautiful DIY paper flower pot craft with seeds! This fun craft is perfect for anyone looking to add a bit of extra decoration to their home or garden. Not only is it easy to make, but it’s also a great way to show your love for nature. With this tutorial, you’ll learn how to make your own paper flower pot and how to use seeds to create a beautiful, sustainable decoration. So get ready to get your hands dirty and start crafting!
Easy To Make DIY & Craft Paper Flower Pot with Seeds


Read More: Super Simple Pine Cone Crafts For Kids
Materials Required:
- Drawing Sheet
- Pen and pencil
- Sunflower seeds
- Scissors
- Floral print craft paper
- Paint and paintbrush
- Glue
Instructions:
Step 1: Drawing the Base
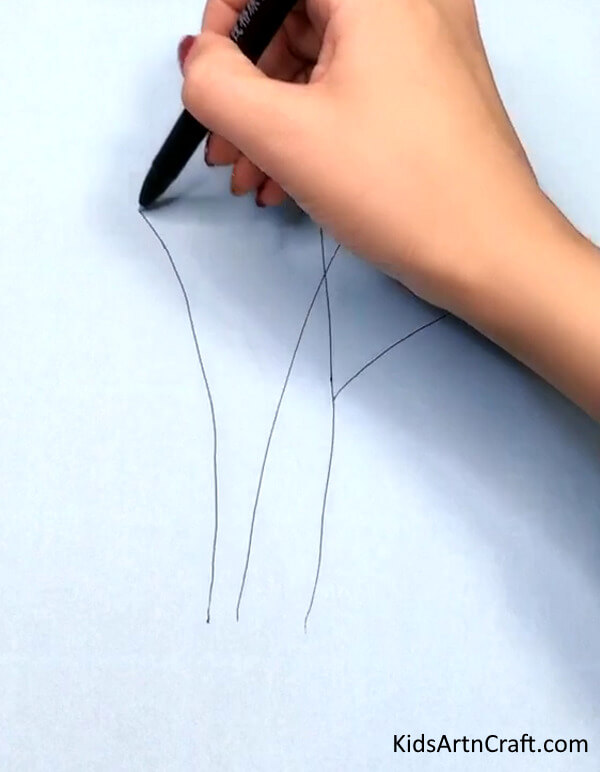

Draw the stems of the flower on a drawing sheet with a pen or pencil
Make as many or fewer stem branches as you want
Step 2: Collect the Sunflower Seeds


Collect the sunflower seeds and put them inside the paper for your convenience
Step 3: Arranging the Sunflower Seeds


Start arranging the sunflower seeds in the shape of flowers on the stems
Arrange them in a batch of five as shown in the image above
Step 4: Stick Them Together
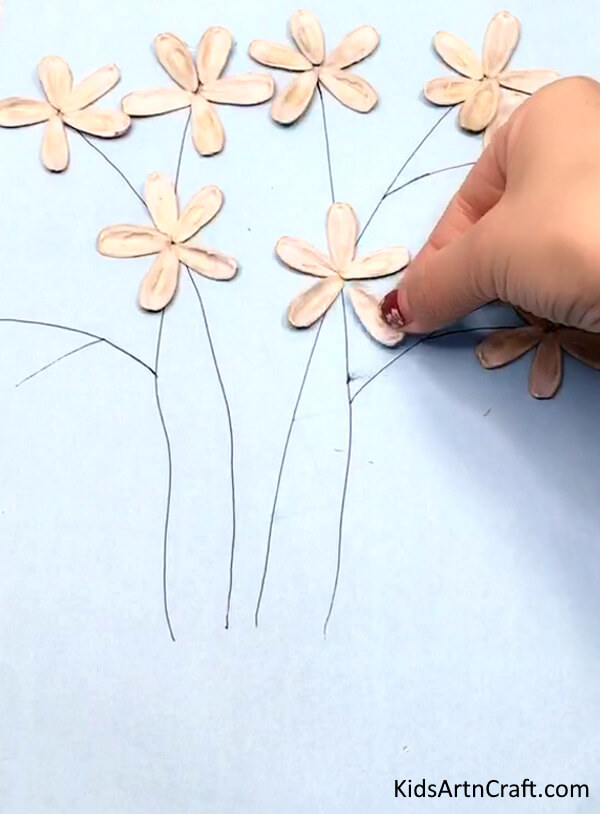

After Arranging them glue them to places arranged before
Step 5: Cutting Out the Flower Pot
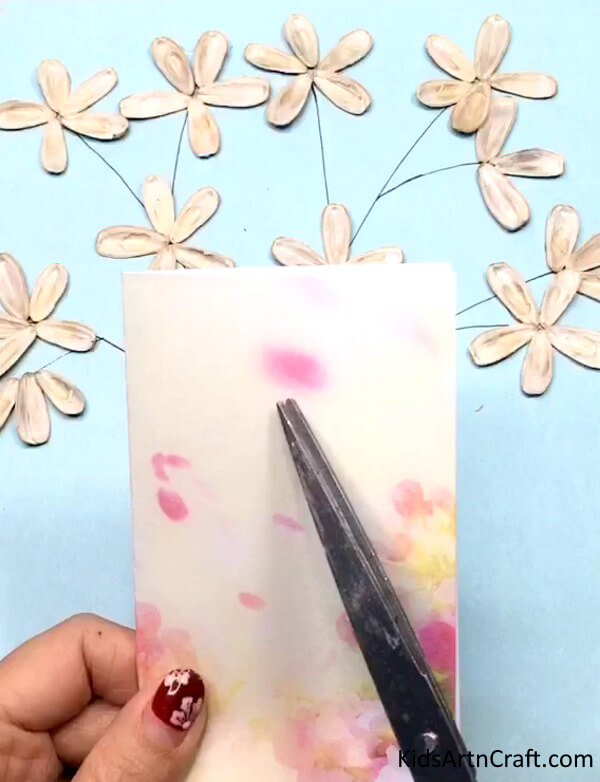

Take the floral print square craft paper, fold it in half in a rectangle
Take the scissors Cut out the shape of the pot with an arc and angular shape
Step 6: Arranging the Flower Pot
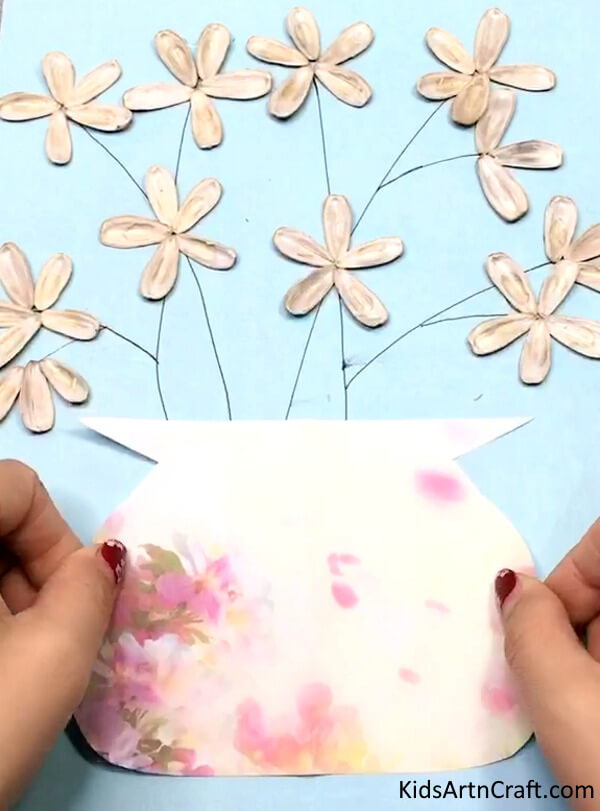

Open the fold, the paper will be in the shape of a flower pot
Put it below the stems and paste it with the glue
Step 7: Painting the Flower Petals
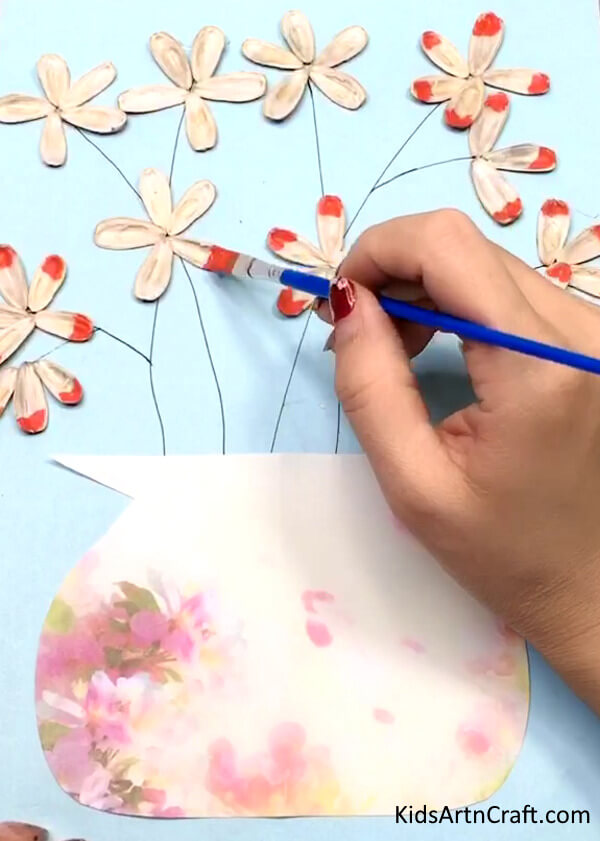

Take the paintbrush and red color and start painting the edges of the flower petals,
Remember to only paint the edges
Step 8: Painting the Flower Seed
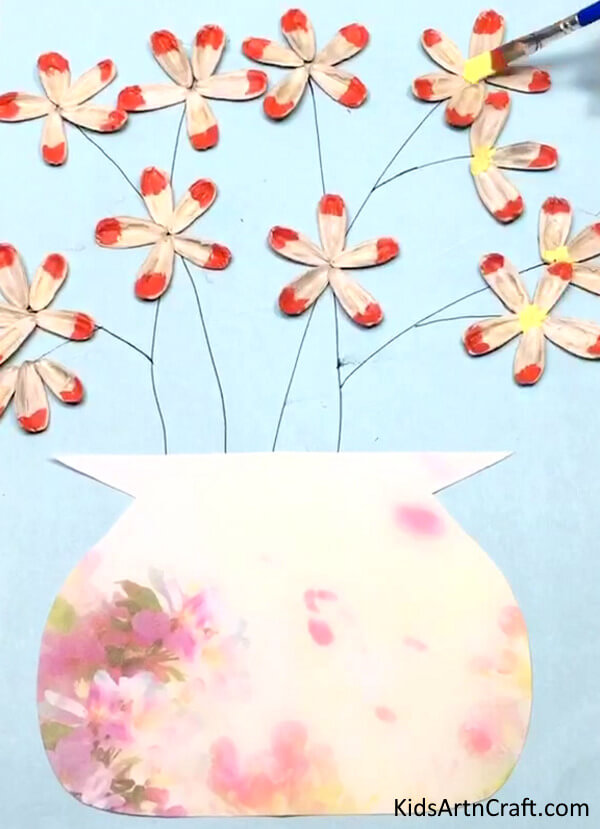

Take the paintbrush again and the yellow color
Paint the middle of the flowers to make it look like the seed of the flower
Final Step: Your DIY Flower Pot Craft With Sunflower Seeds is Ready
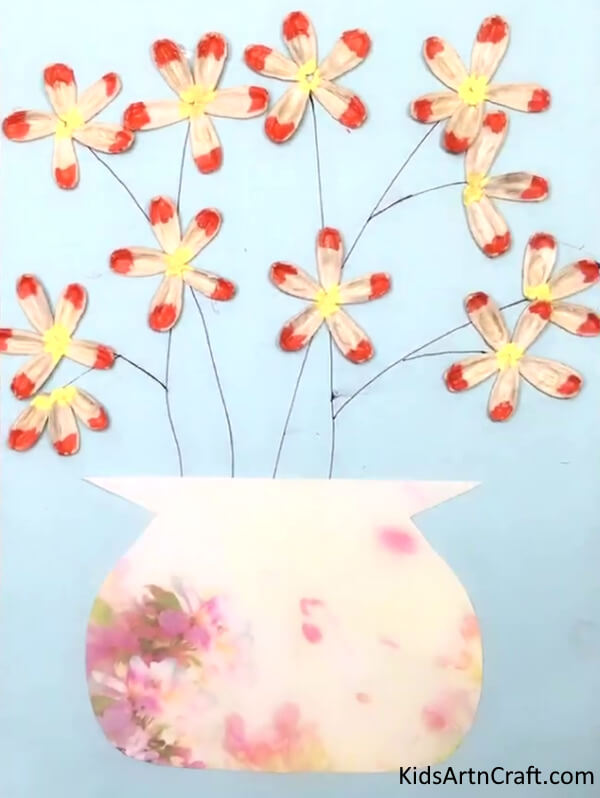

And Your sunflower seeds Flower Craft is ready, with only 8 simple steps!! This was such an easy tutorial that any kid can find it fun to make, You can add more details by painting flowers of different colors, or by adding leaves with sunflower seeds, or decorating the flower pot of your choice, you can do anything out of your imagination, this craft would be liked by all.
So why not give it a try and show it to everyone!!
FAQs
What supplies do I need to make a paper flower pot?
To make a paper flower pot, you will need paper, scissors, glue, a pencil, and some seeds.
How do I make the flower pot?
To make the flower pot, start by drawing a circle on the paper. Then, cut out the circle. Next, make four slits at equal distances around the edge of the circle. Then, glue the four sides together to form a cone shape. Finally, glue the last side of the cone to create the flower pot.
How do I add the seeds?
To add the seeds, use a spoon or your finger to fill the flower pot with soil. Then, sprinkle the seeds on top of the soil.
How do I water the seeds?
To water the seeds, simply use a watering can or a spray bottle to lightly mist the top of the soil.
How long do the seeds take to germinate?
Depending on the type of seed, germination can take anywhere from a few days to a few weeks.
This DIY paper flower pot craft with seeds is an easy and fun way to add some greenery to your home. With just a few simple materials, you can make a beautiful flower pot that can be planted with any type of flower or seed.
Follow us on Youtube for art and craft tutorials and much more.
More Articles from Kids Art & Craft
- World Parrot Day Coloring Pages For Kids – Free Printables
- Poppy Coloring Pages For Kids – Free Printables
- Lion Drawing & Sketches for Kids
- Crumpled Paper Animal Crafts for Kids
- Meditation Coloring Pages For Kids – Free Printables