Painting
Birds Over Tree Branch Painting Step by Step Tutorial

DIY Birds On A Tree Branch Painting

Read More: Colorful Tree Painting with Earbuds
Materials Required
- Brown, blue, yellow, orange, and green paint
- White craft paper
- Red and yellow clay
- Googly eyes
- Black sketch pen
- Paint brushes
Procedure
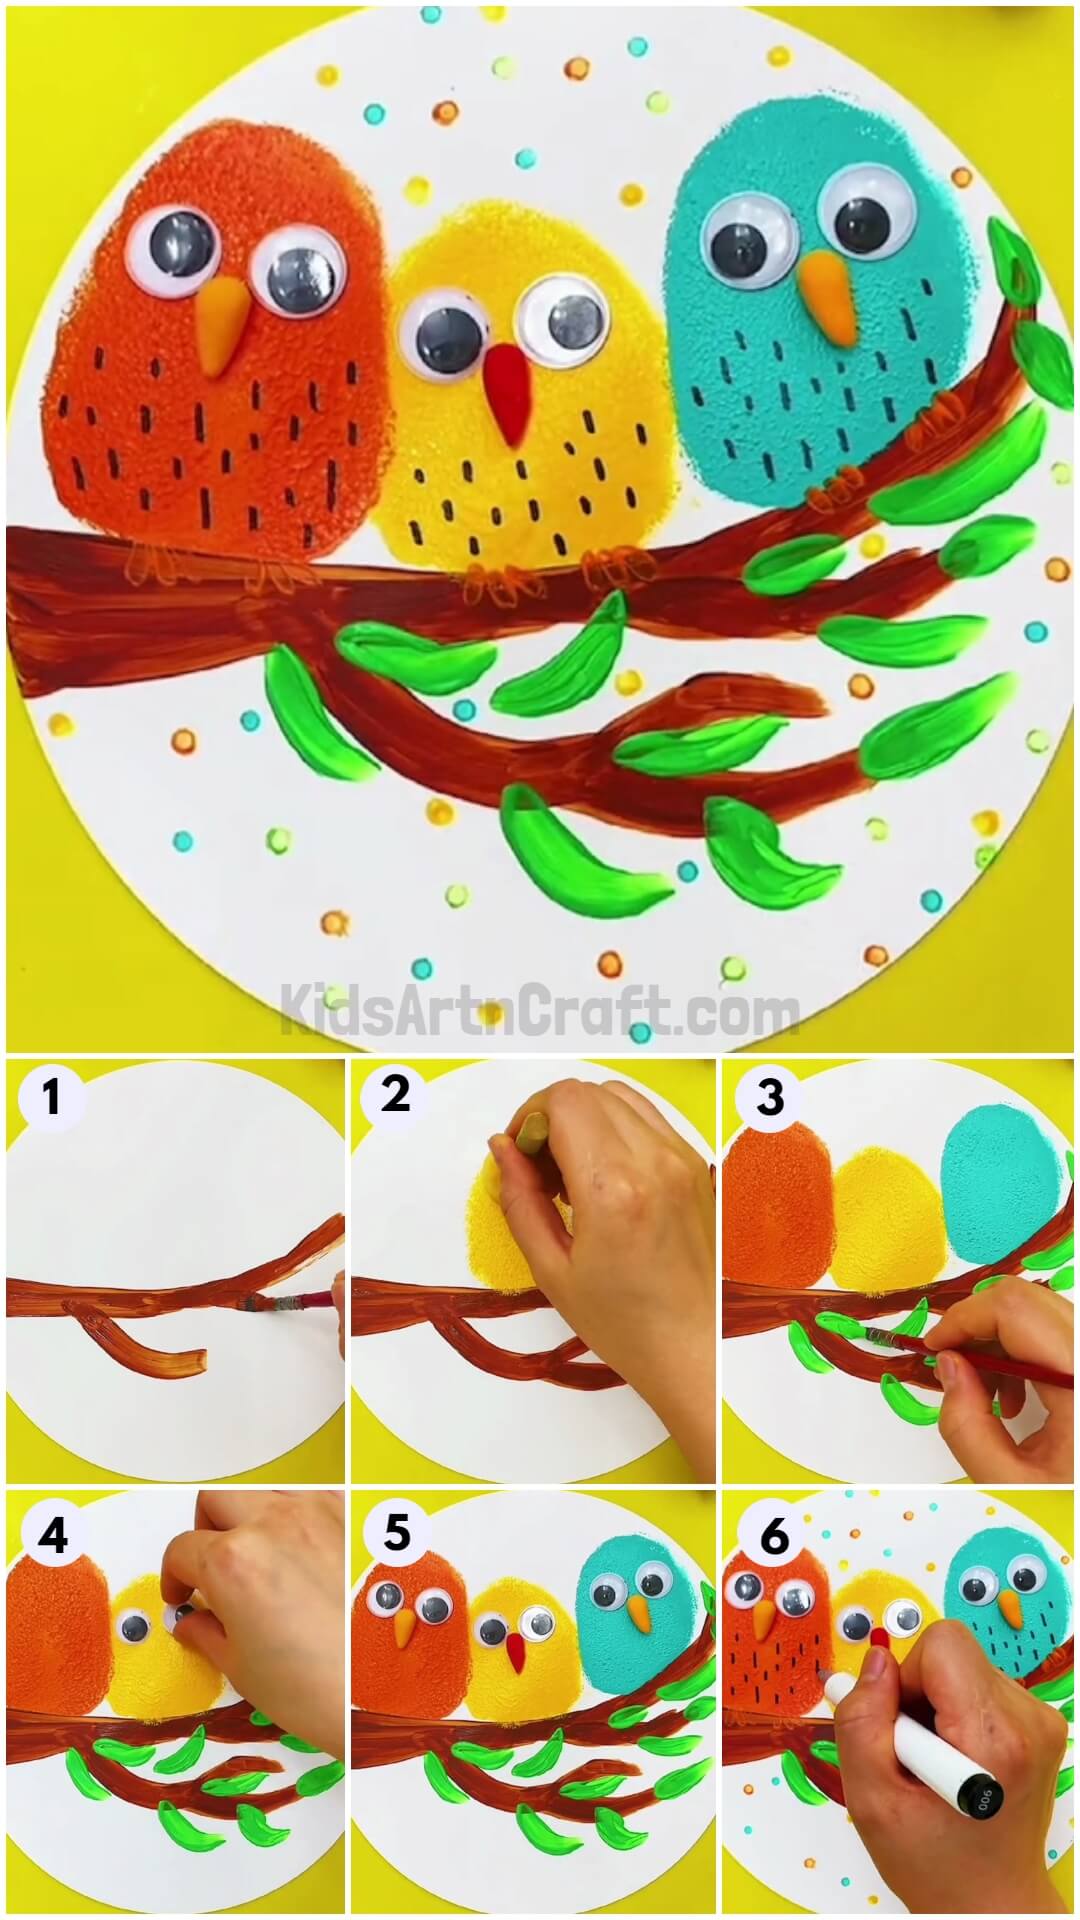
Step 1: Painting The Tree Branch Onto White Paper

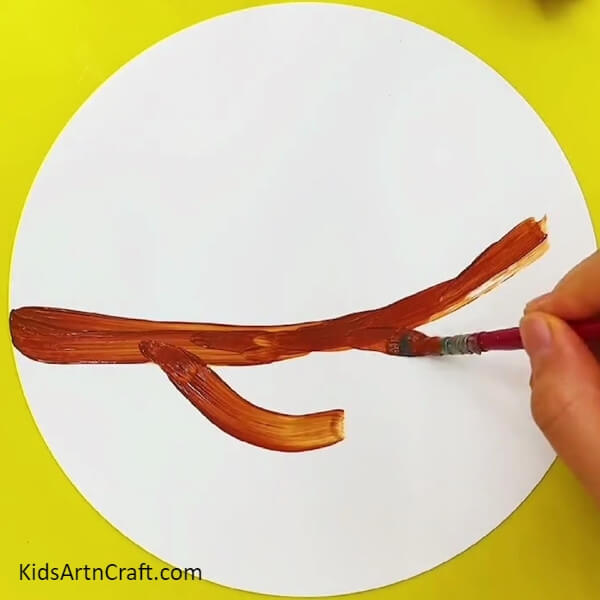
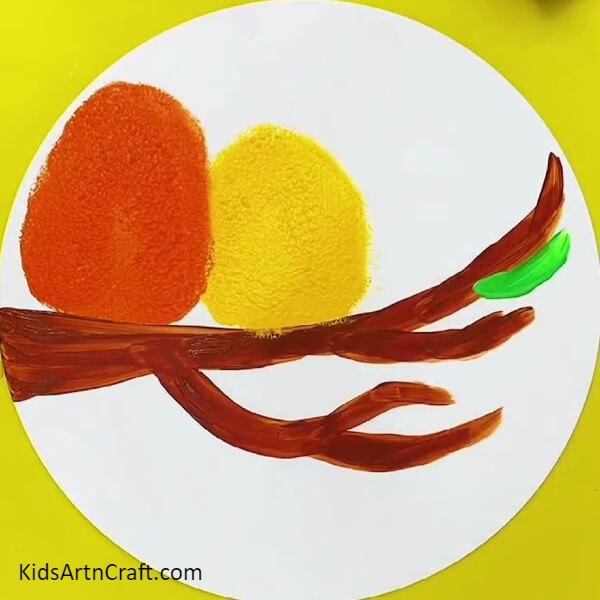
Take a big circle from white craft paper as your base for your art. On this paper, you will start by painting a brown tree branch. With a thick paintbrush, start painting from the left side of the circle to the end. Branch out the end of the tree branch into two parts. Make sure you paint evenly.
Step 2: Adding Smaller Branches To The Main Branch
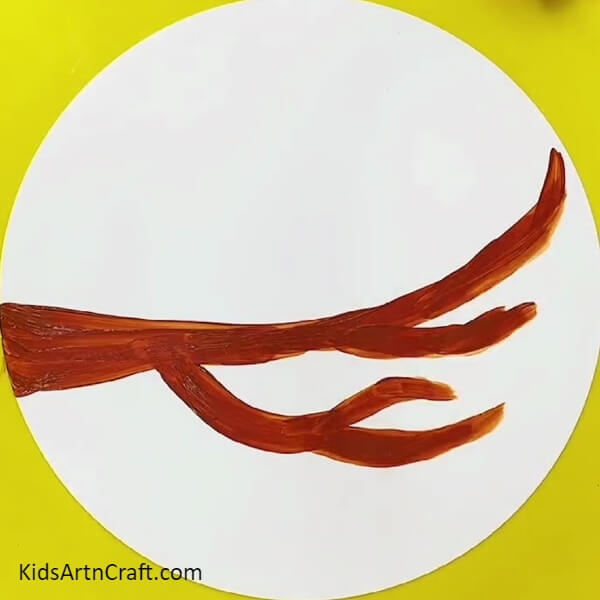
With more brown paint, add smaller branches to the main tree branch. This will give it a more realistic look.
Step 3: Painting The First Bird Onto The Tree Branch
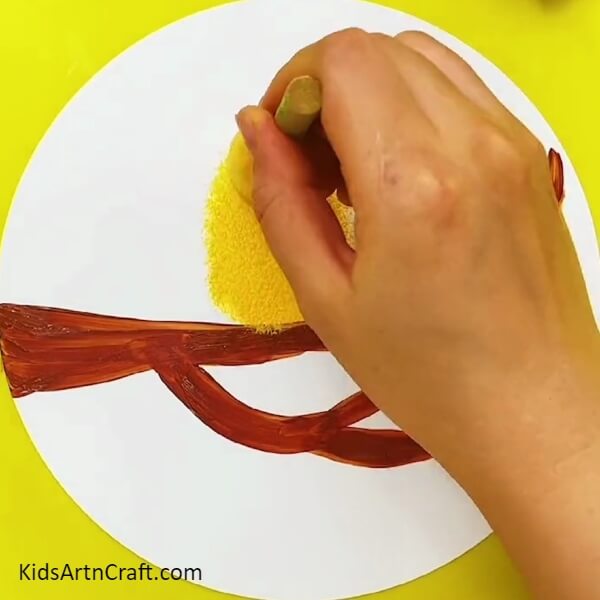
You will now dip a fat brush into some yellow paint. Take this brush onto the center of the paper and above the tree branch, dab onto the paper a big enough oval-like body of your first bird. You will not be painting normally but dabbing the brush to form a fuzzy oval. The fuzzy effect will make it look more like a bird.
Step 4: Make The Second Bird Beside The Yellow One
Just like for the yellow bird, you will add another bird next to it on the branch, but this time you will be using orange paint. You can make the body of this bird a little bit bigger than the first one.
Step 5: Making The Last Bird
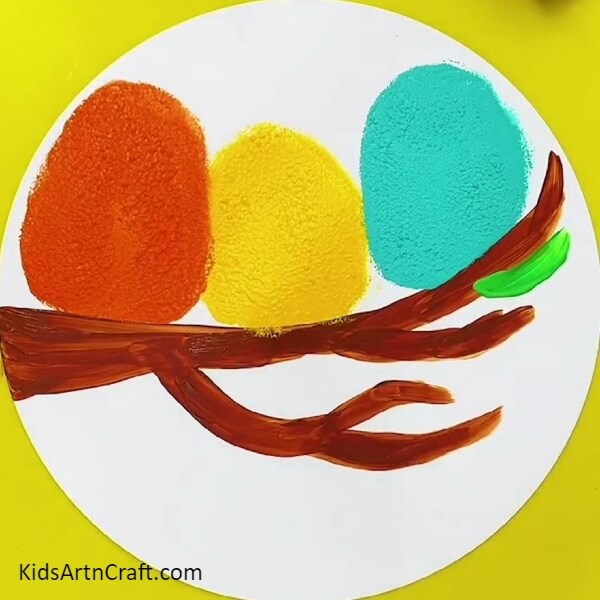
Using blue paint, you will be painting on the branch of the last bird. Dab the brush onto the paper and make another bigger oval-like body for your last bird.
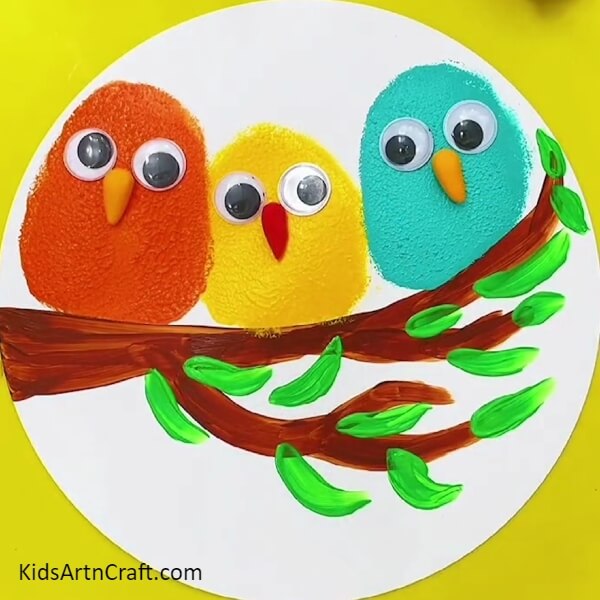
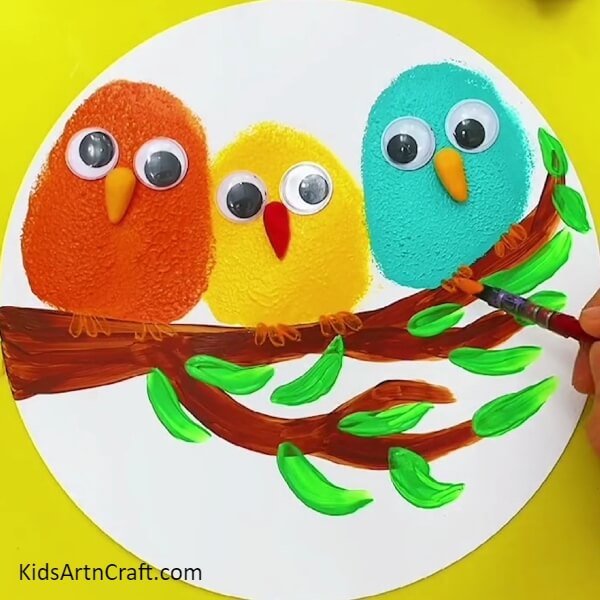
Step 6: Painting The Leaves Of The Tree Branch
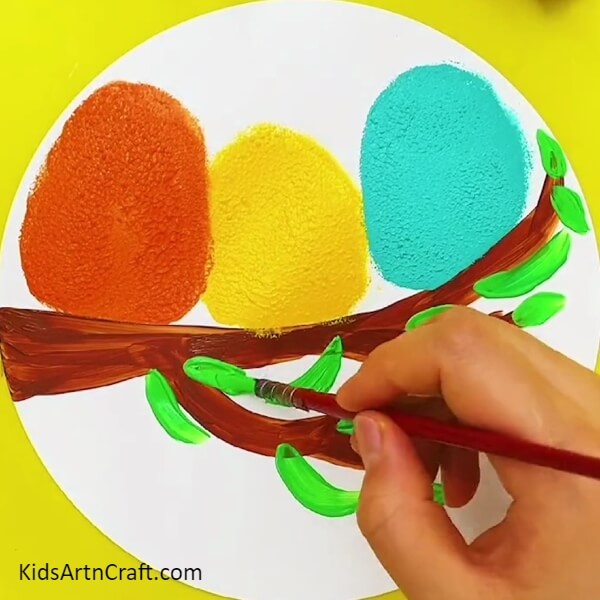
Once you are done with your birds, you will move on to the leaves of the branch. Grab a thinner brush compared to the one you used for the birds and dip it light green or dark green paint. With this make thick dabs of leaves onto the branch. Fill the underneath of the branch with these leaves and space them out properly as shown in the image.
Step 7: Adding The Eyes Of The Birds

Adding googly eyes will be your next step! Stick two googly eyes on each bird. Start off with the yellow and orange birds.
Step 8: Adding The Beaks Of The Birds Using Clay
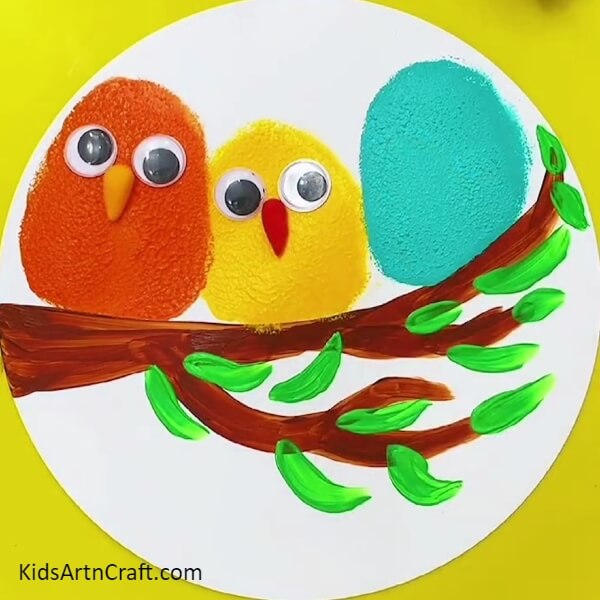
From red and yellow clay respectively, break out tiny pieces. Roll these tiny pieces into small, cone, beak-like structures. Attach the red beak to the yellow bird, just below the eyes, and the yellow beak to the orange bird.
Step 9: Adding The Beak And The Eyes On The Bluebird
Just like you did for the other two birds, attach the googly eyes and a yellow clay beak on the bluebird as well, to complete the face of your birds.
Step 10: Painting The Feet Of The Birds
With some yellow-orange paint, you will now paint the feet of the birds. Take a thin brush and draw three pairs of feet on the birds, two feet on each bird. Paint three claws on each foot.
Step 11: Drawing On The Feathers Of The Birds With A Black Sketch Pen
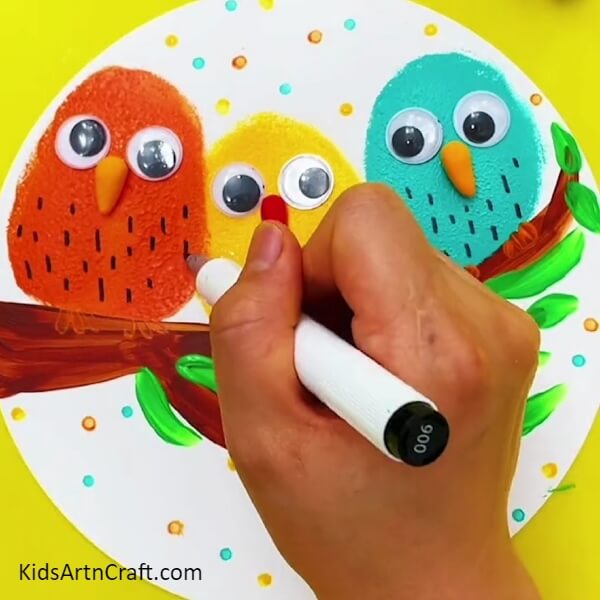
Your last step would be to draw the feathers of the birds. Take a black sketch pen and draw small lines on the bodies of the birds. Space the tiny lines out so as to not make it look messy. Once you are done with all three of the birds, you can add small dots of blue, yellow, green, and orange paint around the birds and the branch, to give more color to your art piece.
Finally, Our Birds On A Tree Branch Painting Is Ready
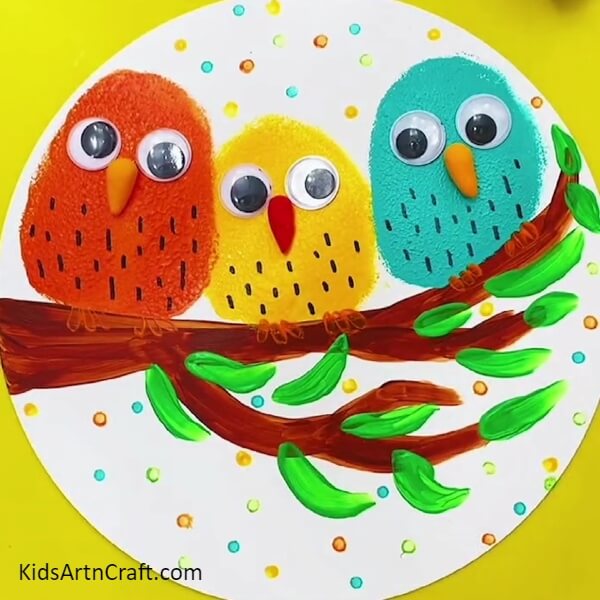
And there you have it! Your own art piece!! Your Birds On A Tree Branch Painting is all ready for you to show the world!!!
Some More Bird Drawing Ideas
Adorable Group Of Owls Drawing Artistry For Children

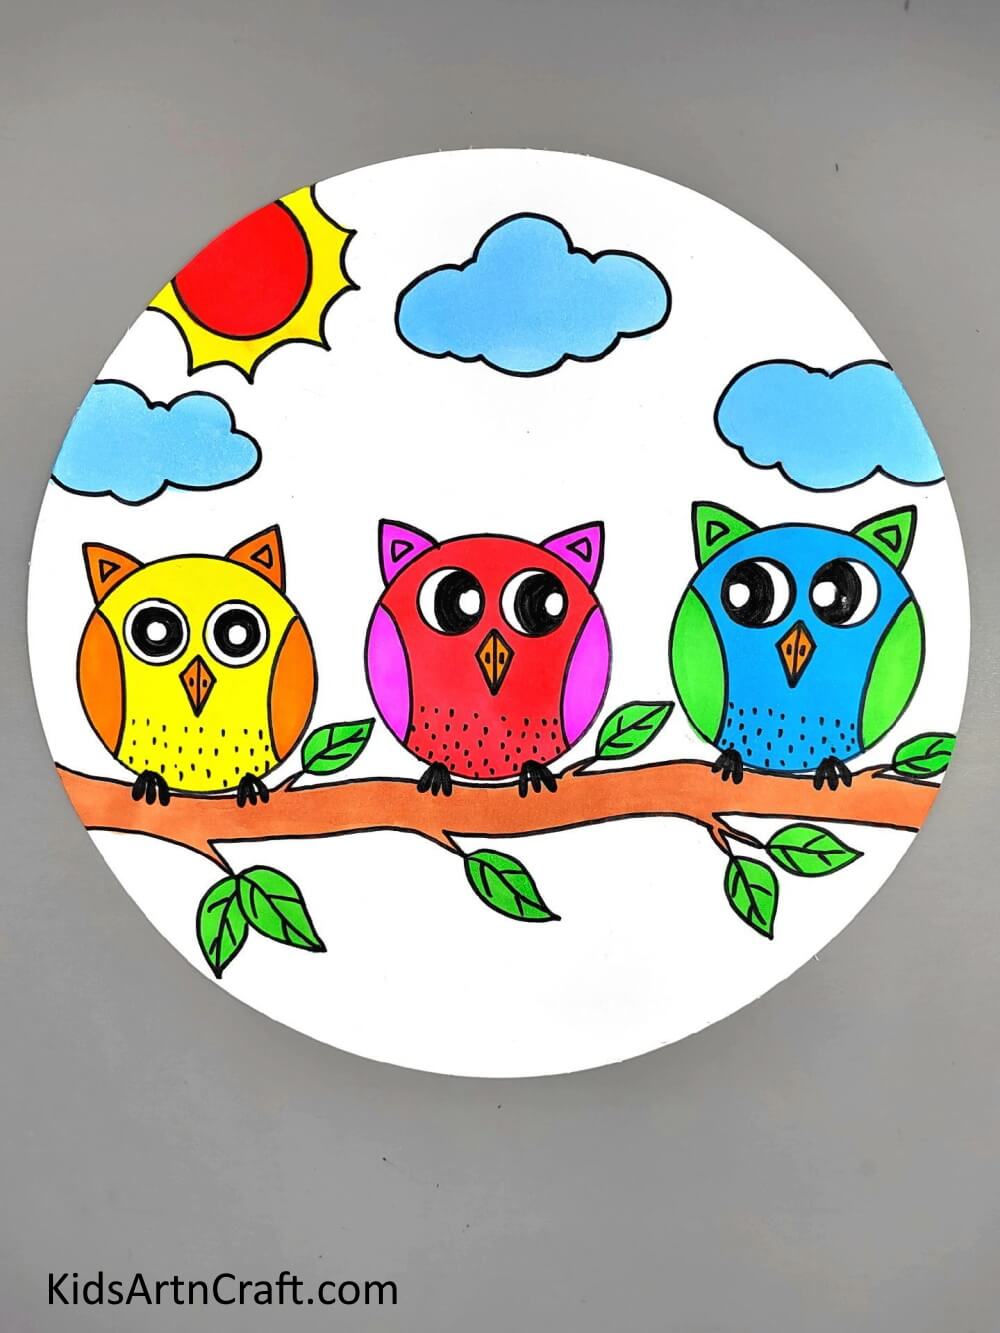
Image Source/Tutorial: Kids Art & Craft
This adorable group of owls’ drawing artistry is perfect for children to learn and explore the beauty of art. It is a great way for them to express themselves creatively and have fun while doing it.
By following this step-by-step tutorial, anyone and everyone can easily learn to make this fun and creative art. They will learn a new way of painting using the dabbing effect of a brush and use it two support their creativity. This art is perfect for art assignments and projects and decorations. It is super easy and engaging and will keep you interested and attentive throughout the process. This art is easy to learn and make and adults and children alike can easily catch on to the steps with this tutorial. So give it a try and engage your kids and yourself in a fun craft-learning activity!
Hope you like this artistic Birds On A Tree Branch step-by-step tutorial! We hope that it helped you and your kids learn something new. We would love to hear your thoughts in the comment section below.
Be sure to visit our other articles for more craft and DIY ideas!
Thank You for visiting our website!
Follow us on Youtube for art and craft tutorials and much more.
More Articles from Kids Art & Craft
- Creative Owl Painting Idea For Kids Step-by-step Tutorial
- Learn To Make Duck Artwork For Kids Using Watercolor & Toilet Paper Roll
- Realistic Tree Landscape Stamp Painting Using Fruit foam
- Colorful Trees Painting – Step-by-Step Tutorial
- Easy Flower Stump Painting Art Tutorial for Kids