


Step By Step
Colorful Trees Painting – Step by Step Tutorial

Create a beautiful, colorful tree painting using acrylic paints and canvas. Learn how to mix colors and use various techniques to achieve a unique and vibrant painting. Follow the step-by-step tutorial to create your own stunning art piece.
This is a painting tutorial for kids on how to paint colorful trees. First, you will need to gather your supplies. You will need a piece of paper, a paintbrush, and some paint. Once you have your supplies, you will need to paint out your tree. Start by drawing a trunk and then add leaves. Use whatever colors you like for your tree. You can make it as colorful as you want. Just have fun with it.
Easy Colorful Trees Painting With Step by Step Tutorial

Read More: Bouquet Painting Step-by-Step Tutorial for Kids
Materials Required:
- Cotton Ear Buds
- A4 Size Sheet
- Tooth Brush
- Different Water Colors
- Wooden stick with circular top
- Paint Brush
Procedure:
Creating a Lovely Painting with Green Lines – Step 1
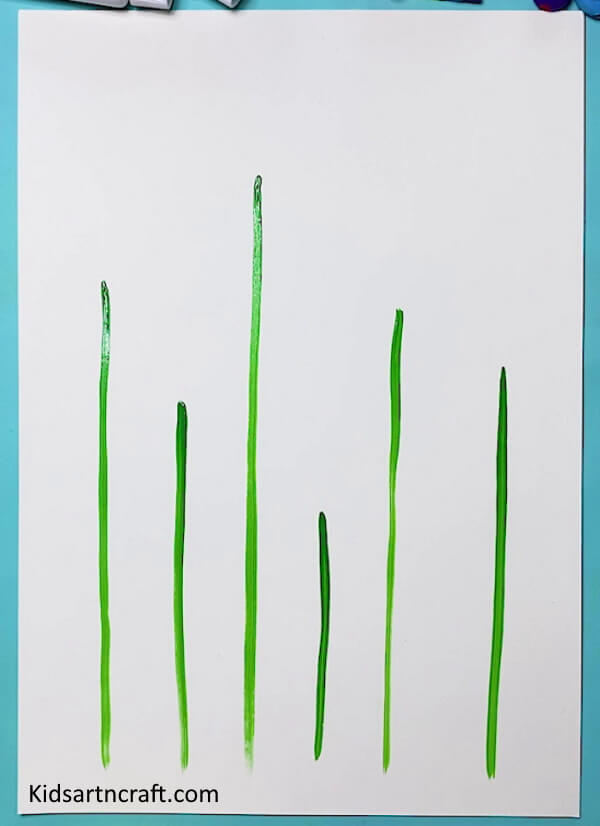
Let’s start making this lovely painting by taking a white A4 sheet and drawing some green lines of different lengths using a paintbrush for the stem of the trees. Make sure you draw these lines with a free hand and in one go.
Creating a Floral Tree with Watercolor Dots – Step 2
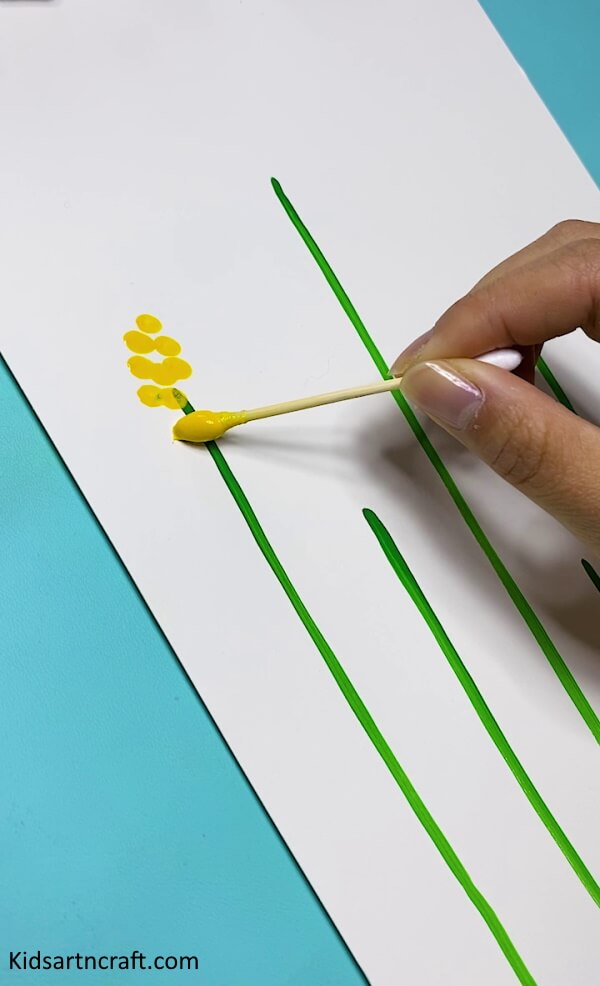
Next, Dip the cotton bud into the diluted watercolor and start painting dots, one by one, for the leaves/flowers of the tree.
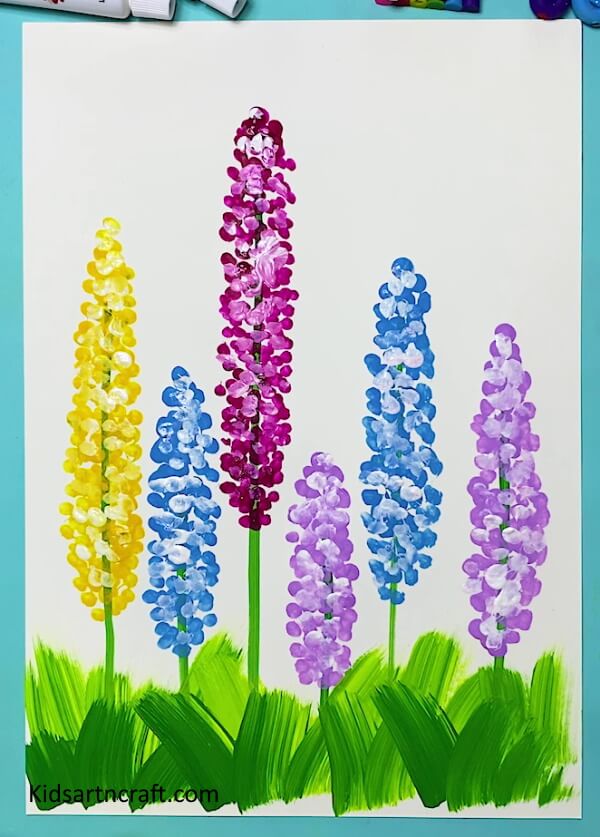
Creating Vibrant Trees with Watercolors – Step 3
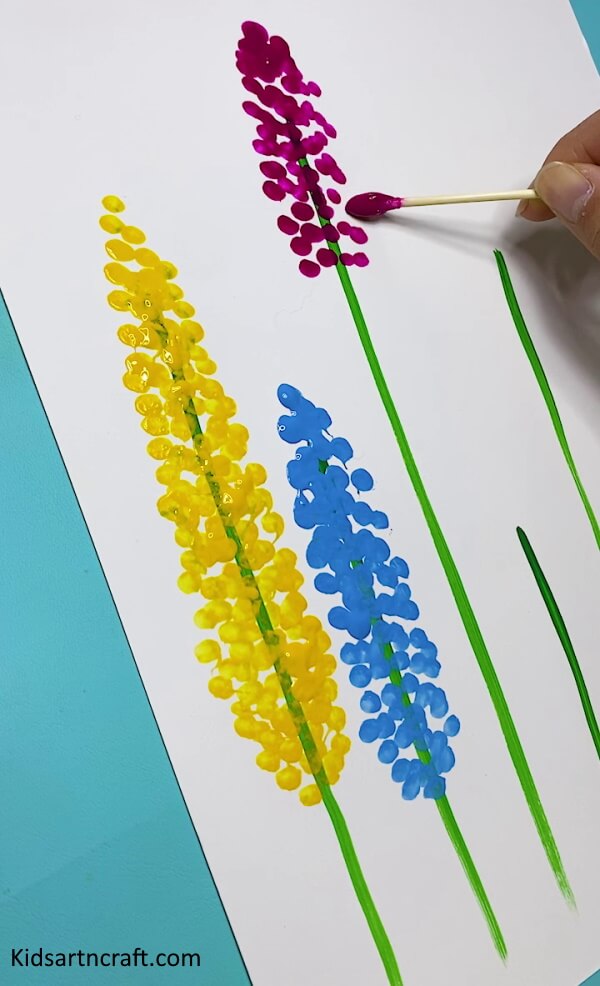
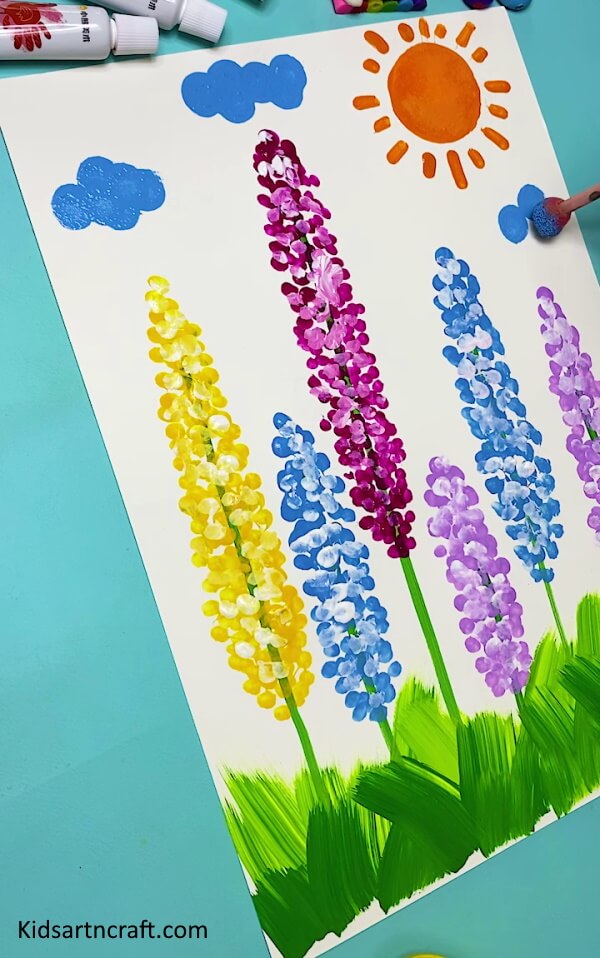
Now, repeat the previous step using different watercolors and a fresh cotton bud for the next tree, as shown above in the picture. Paint other trees as well using a similar technique and using vibrant colors such as blue, pink, etc
Creating a Pretty Landscape with Paint and a Toothbrush – Step 4
After completing the leaves and flowers part, let the paint dry. Later, take a white color-dipped cotton bud and do some shading over the leaves to create a pretty-looking effect. Now comes the ground part, take a toothbrush and dip it into green watercolor and start brushing it from bottom to top to draw grass.
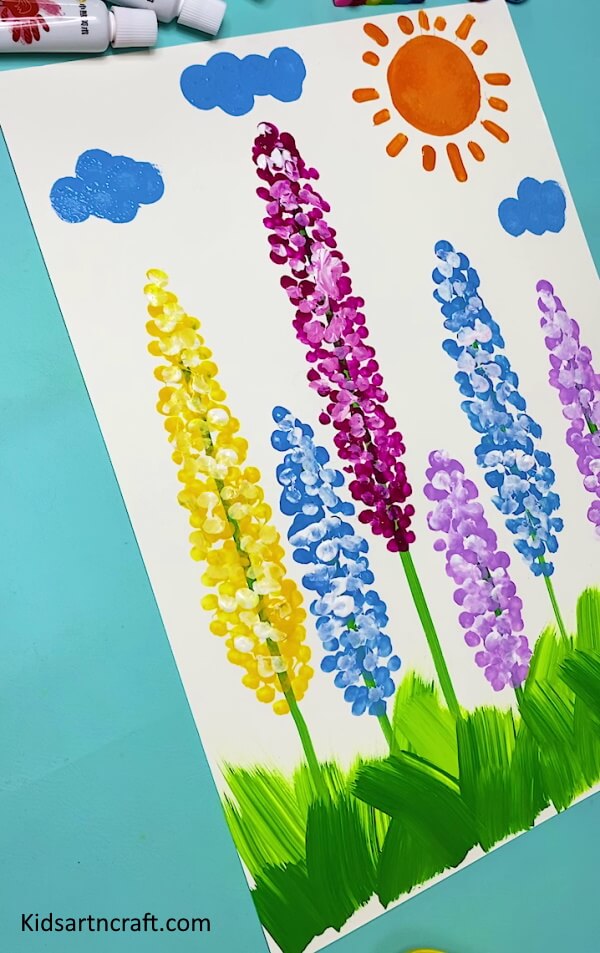
Gentle Shading of the Grass with a Dark Green Color – Step 5
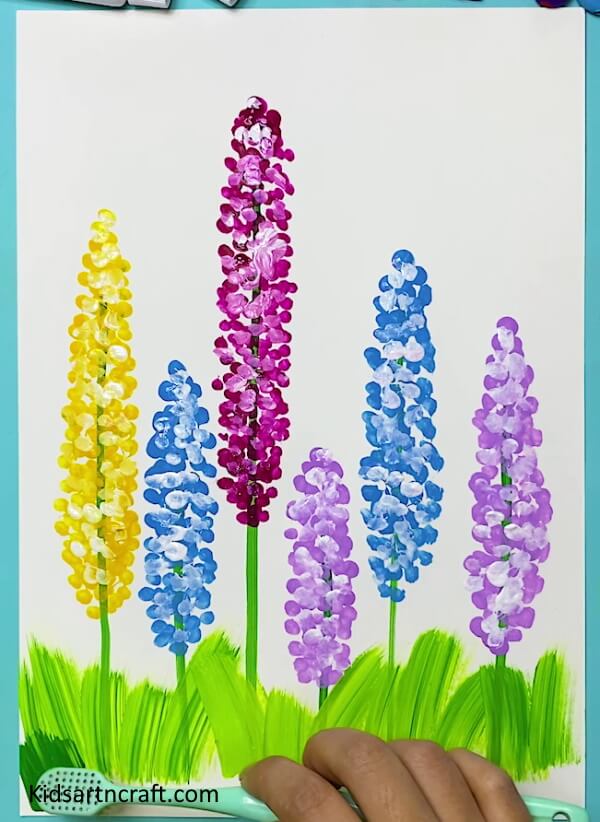
Continue the shading of the grass with the toothbrush using a dark green color. Do it very gently, as you wouldn’t want the color to spread over.
Brushing Grass from Bottom to Top: Step-by-Step Guide – Step 6
Complete the grass part carefully by brushing from bottom to top as shown in the above image.
Creating Clouds with a Wooden Stick and Blue Paint – Step 7
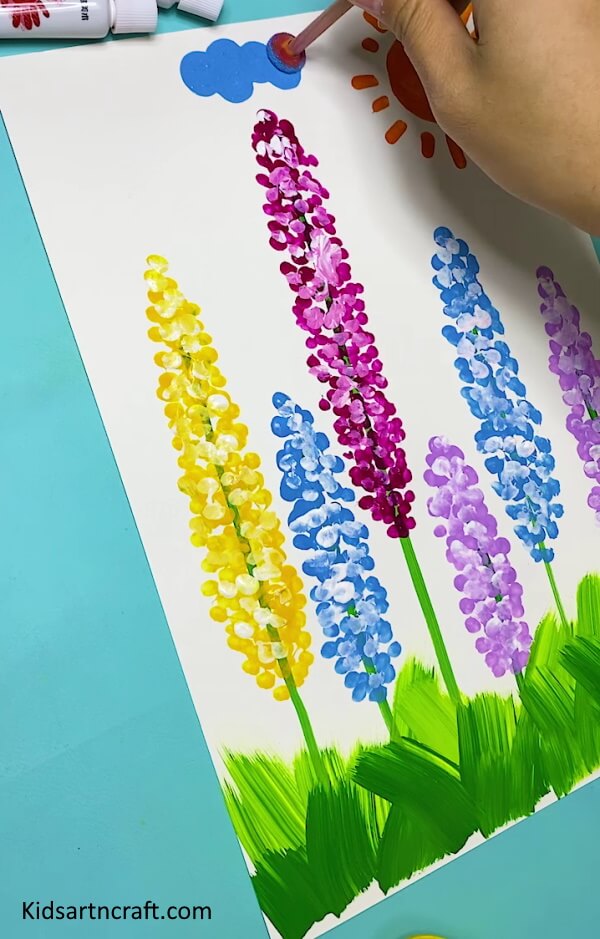
Now, take a wooden stick with a rounded top and dip it in blue color for creating clouds.
Painting a Sky and Sun – Step 8
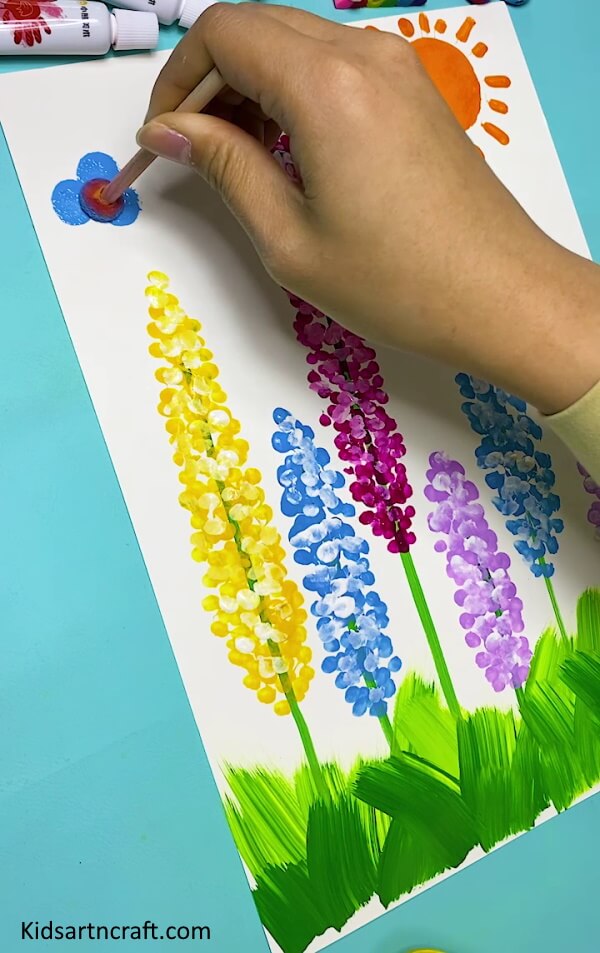
Complete the sky part similarly and draw a sun in the corner using orange watercolor and a paintbrush.
Improving Cloud Detailing – Step 9
Add some more clouds to fill the gaps and better detailing.
Drying Paint: The Fastest Way – Step 10
Let the paint dry properly. You can make it dry faster by either blowing air by your mouth or by keeping the paper under a fan.
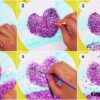
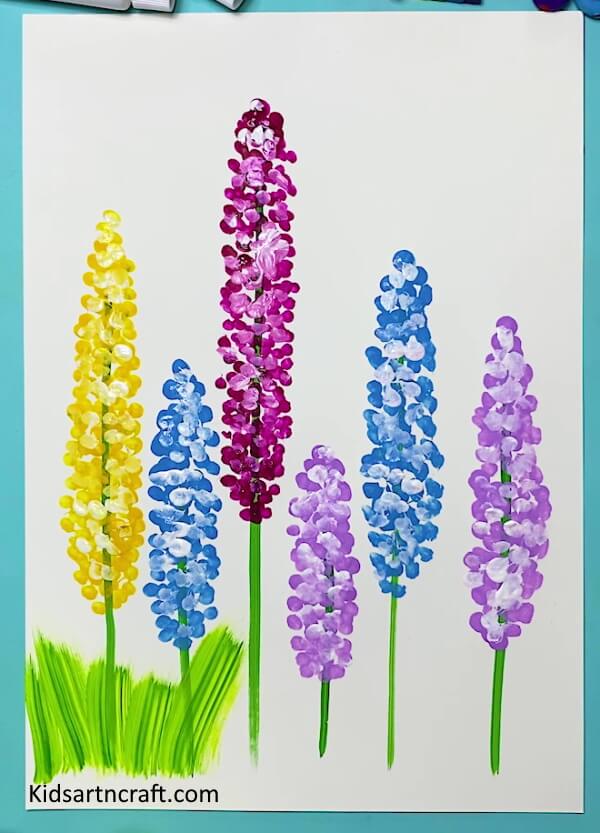
Adding Finishing Touches: Decorating with Pink Dots – Step 11
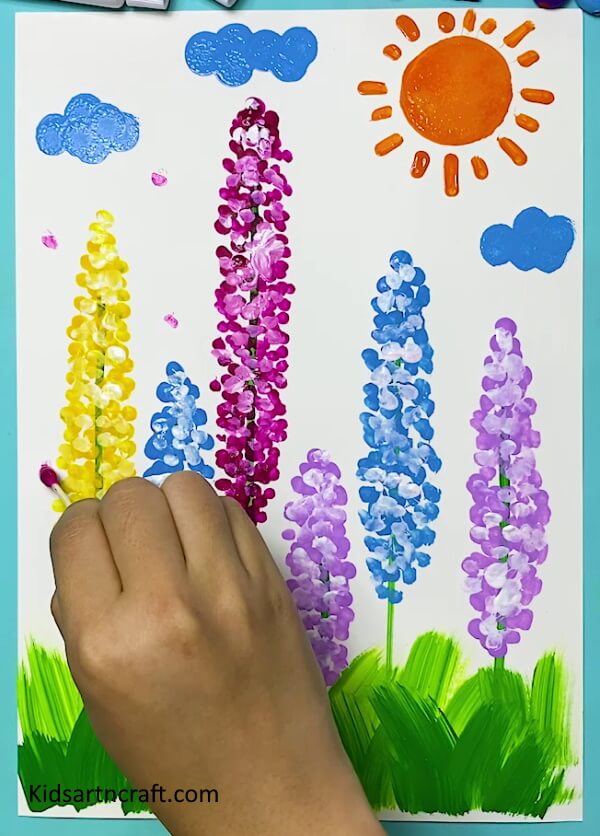
Next, for some extra detailing, take a fresh cotton bud and dip it in pink color and start making some dots around the trees and make sure that there are gaps among the dots so that there is enough space for other color dots.
Creating a Pretty Effect: Filling in the Gaps with Pink Dots – Step 12
Fill in the gaps across the trees with the pink dots. This will create a pretty effect and enhance the overall look of the painting.
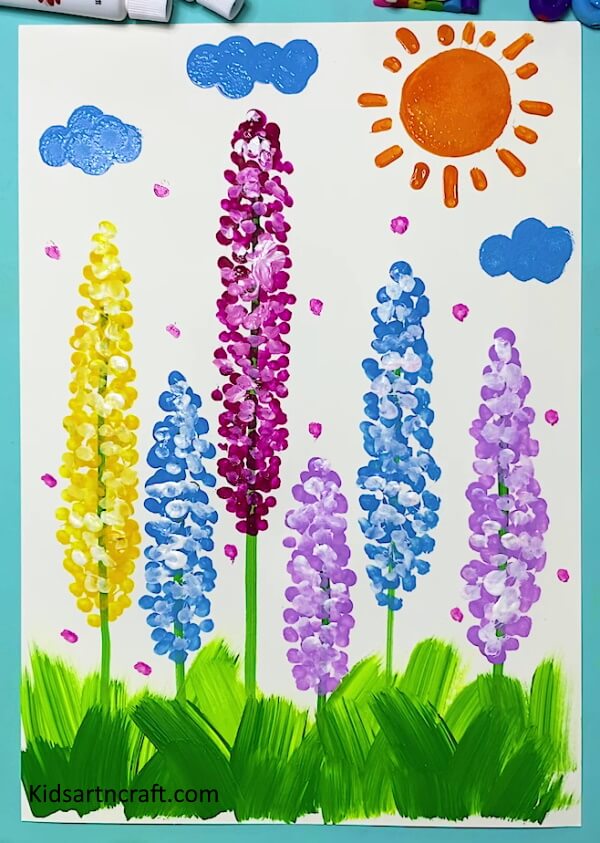
Creating a Balanced Design with Yellow and Pink Dots – Step 13

At last, take a yellow color-dipped cotton bud and make yellow dots around the pink dots. Just don’t overdo the dots to ensure that the painting doesn’t get messy.
Celebrate Your Artwork: A Colorful Tree Painting – Step 14

Bingo!! Your colorful tree painting is now ready to be showcased. You can either frame it or laminate it. This art looks so exceptionally delightful that you can utilize it to make your empty walls look wonderful and intriguing. This art is exceptionally intended for kids in preschool and kindergarten. This is one of the basic yet fascinating exercises that will enhance the beauty of your room.
Some More Tree Craft Tutorial
Handmade Tree Painting Using EarBuds For Kids
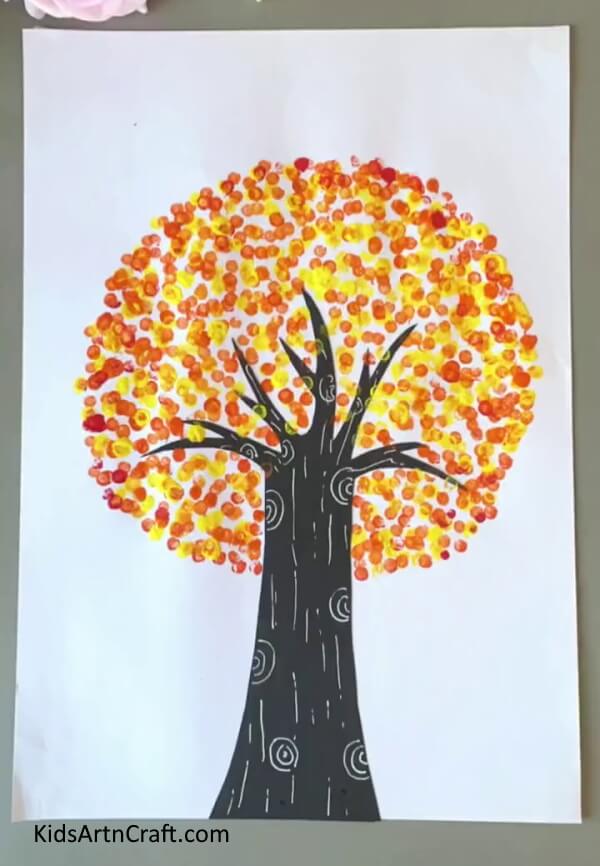
Image Source/Tutorial: Kids Art & Craft
This activity is ideal for kids! It involves creating a beautiful tree painting using earbuds. It is a fun and creative way to help kids explore their artistic side while having a great time.
Simple Leaf Stamping Tree Artwork For Kids
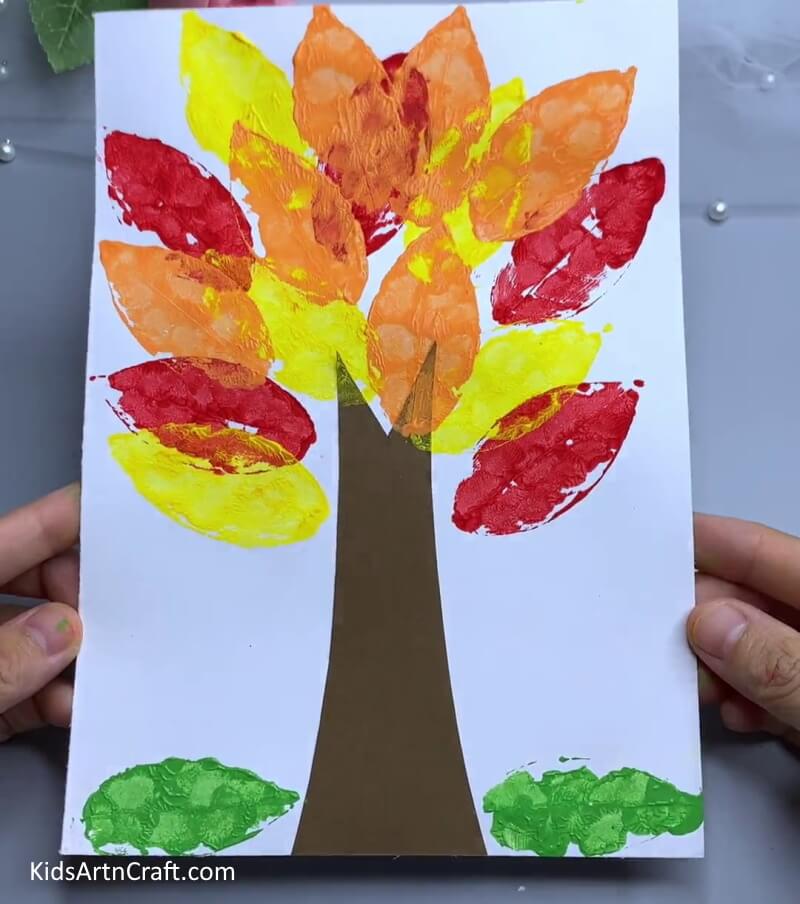
Image Source/Tutorial: Kids Art & Craft
This Simple Leaf Stamping Tree Artwork is a great way to add some fun and creative flair to any room. It is easy to do and requires minimal materials. Perfect for a DIY project!
FAQs Related To Colorful Trees Painting – Step-by-Step Tutorial
1. What materials do I need to create a colorful tree painting?
You will need a canvas, paint, paintbrushes, and other materials such as a palette, paper towels, and a cup of water.
2. What type of paint do I need to use for this project?
You can use acrylic paint or oil paint for this project.
3. How many colors do I need to use for this project?
You can use as many colors as you like for this project, however, you should aim for a minimum of five colors.
4. What type of paintbrush should I use?
You can use a variety of brushes, such as round, flat, fan, and angle brushes.
5. How long does it take to complete this project?
The time required to complete this project will depend on your skill level and the complexity of the painting. However, a beginner should be able to complete this project in a few hours.
This tutorial is a great way to learn how to paint a colorful and unique tree painting. With the help of this tutorial, you can make a unique artwork that will be a great addition to any home. Thanks for reading and happy painting!
Follow us on Youtube for art and craft tutorials and much more.
More Articles from Kids Art & Craft
- Dough Flower Bouquet Art for Kids – Step-by-Step Tutorial
- DIY How to Make A Palm Tree Art and Craft for Kids Step-by-Step Tutorial
- DIY Easy Play-Doh Flamingo Decorative Art and Craft for Kids – Step-by-Step Tutorial
- 3D Flower Dough Art for Kids – Step-by-Step Tutorial
- DIY How to Make Paper Umbrella Craft for Kids – Step-by-Step Tutorial