Step By Step
DIY How to Make A Palm Tree Art and Craft for Kids Step by Step Tutorial

The best way to express imagination and creative thoughts is through art and craft. DIY crafts are something that is simple yet interesting and can help small kids to try their hands in the field of crafting. Crafting is very beneficial as it helps to develop fine and gross motor skills in young children which is very important for them. DIY Palm tree art and craft activity is one such activity that will help small kids to take the experience of making such amazing crafting activities. So let’s learn from this tutorial mentioned below to learn the procedure of making this activity. Let’s start.
Materials Required:-
To make this craft are as follows:
- A4 size sheet
- Crafting papers
- Glue
- Scissors
- Clay
- Marker pen
DIY How to Make A Palm Tree Art & Craft For Kids
Read More: 3D Flower Dough Art for Kids – Step by Step Tutorial
Procedure:
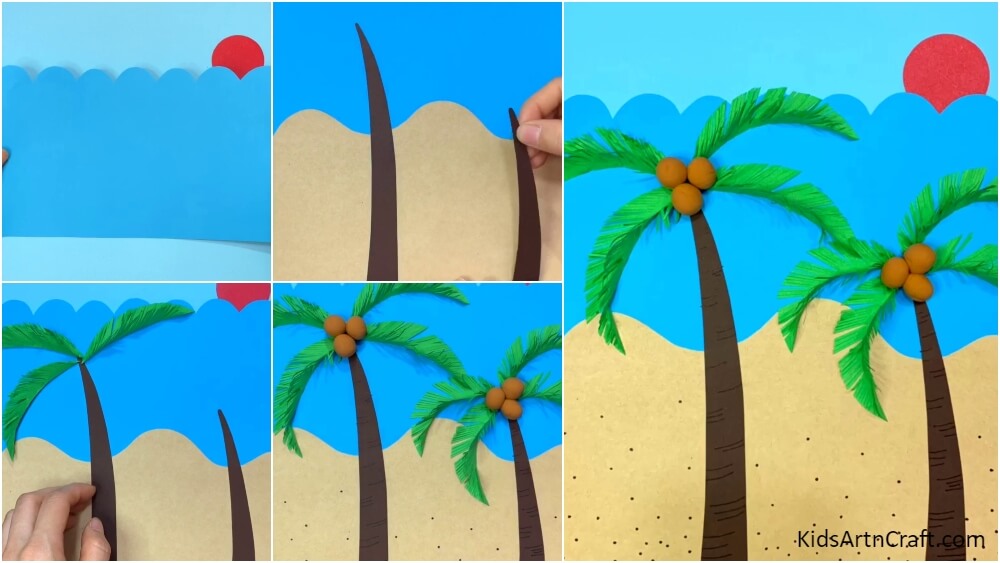
Let’s start this activity by taking a blue color A4 size sheet.
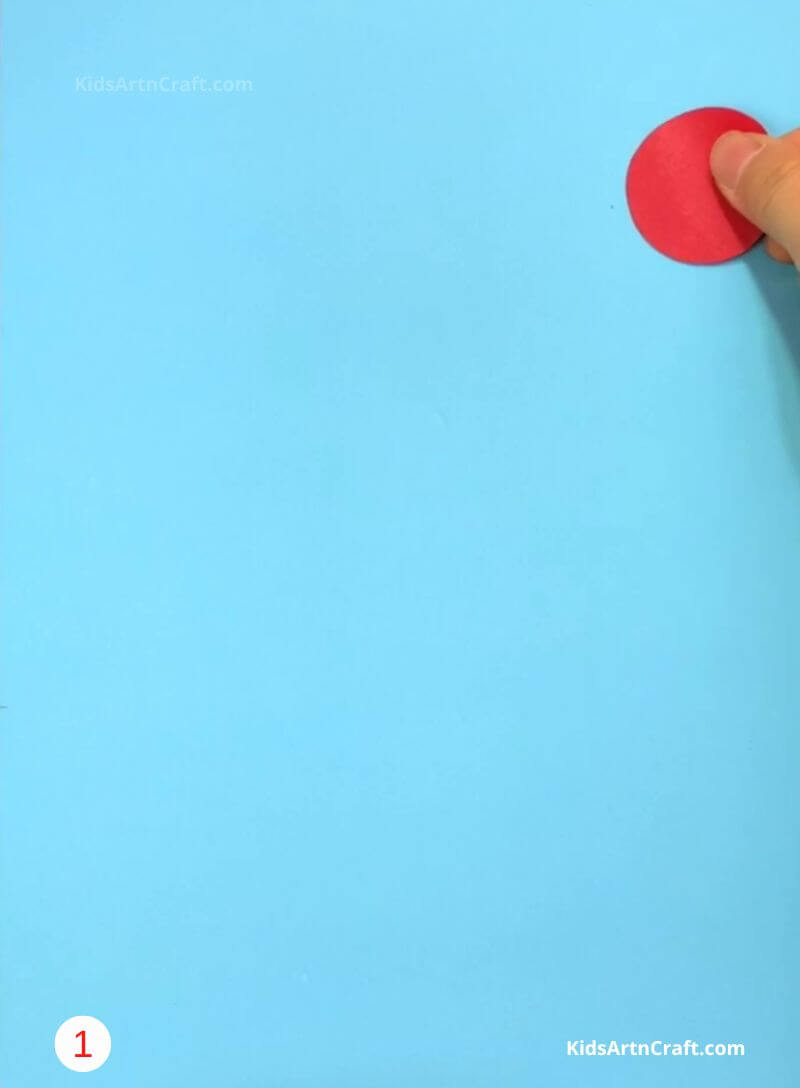
Now take a red color crafting paper and cut down a small circle out of it and paste it on the top right corner of the A4 size sheet with the help of glue.
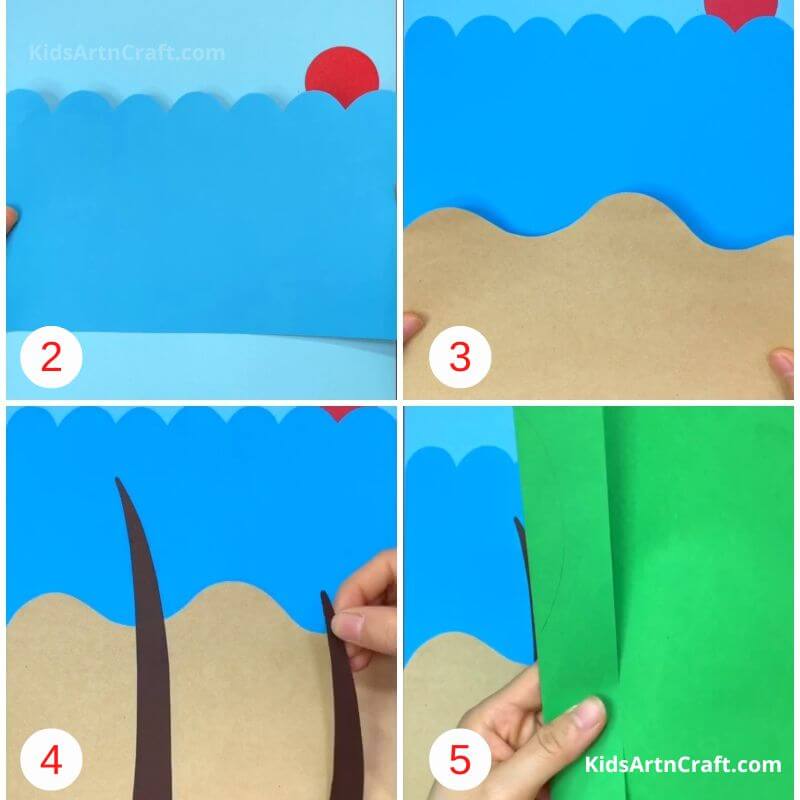
In the next step take a dark blue color crafting paper and cut it into two equal parts horizontally. Now cut its one side in the shape as mentioned in the picture.
Paste it in the middle of the sheet.
Now cut another light brown crafting sheet in a bit wavy form and paste it over the dark blue sheet so that its ends touch the border of the sheet.
To make the body of the palm tree draw the palm tree shape on a dark brown crafting paper and cut it down with the help of scissors. Repeat the process of making the body but make sure it is smaller in size as compared to the previous one.
Paste both of the palm tree bodies in between the muddy color crafting paper or dark blue paper as shown in the picture.
To make the leaves of the palm tree take green color crafting paper and fold its border from one side to make it look like a wide strip. Draw the palm tree leaf shape on the crafting paper.
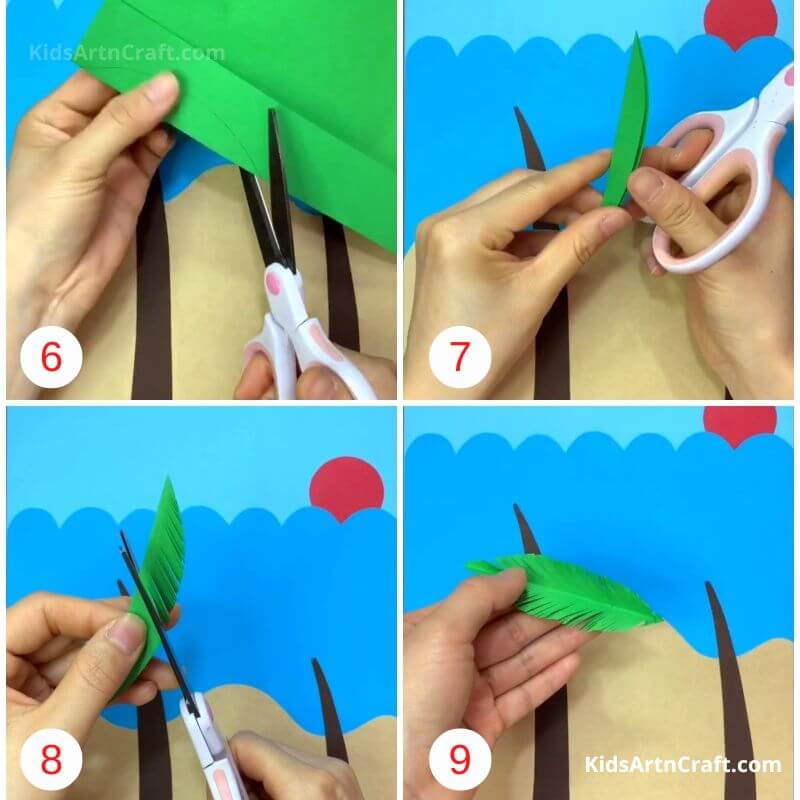
In this step cut the palm tree leaf with the help of scissors. You will get a folded tree leaf after you cut the leaf.
Now with the help of the scissors make small cuts on the open side of the folded leaves.
Make sure that there should be a very thin gap between the leaves so that it will look a little realistic.
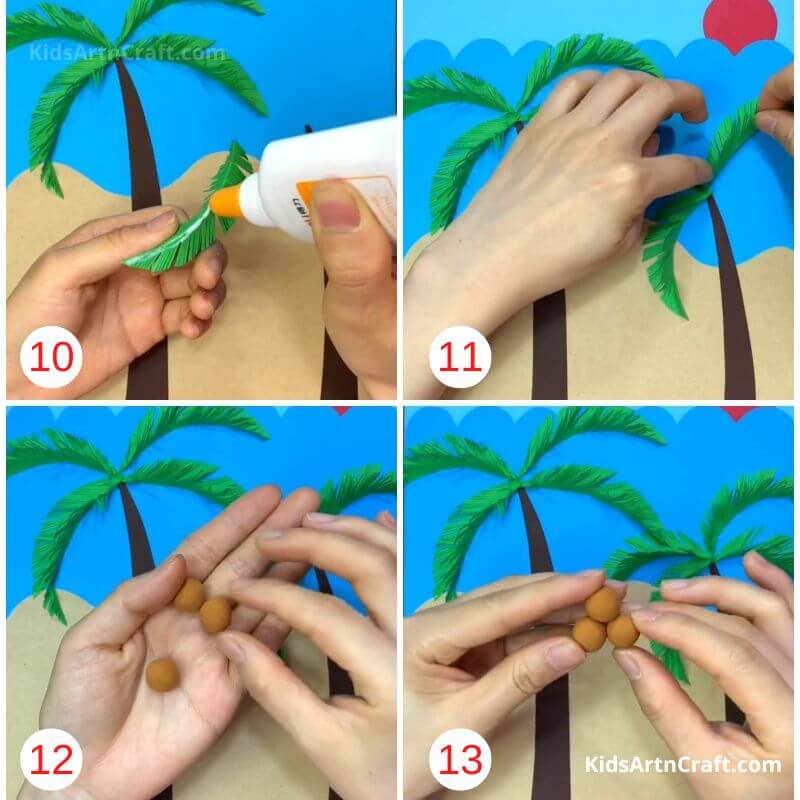
Now open the palm tree leaves and put glue on the middle of the tree leaves.
Paste the palm tree leaves accordingly with their ends attach to the top point of the palm tree.
Now make small brown balls from the clay and stick them together in the shape of a triangle and place them on the top end of the palm tree.
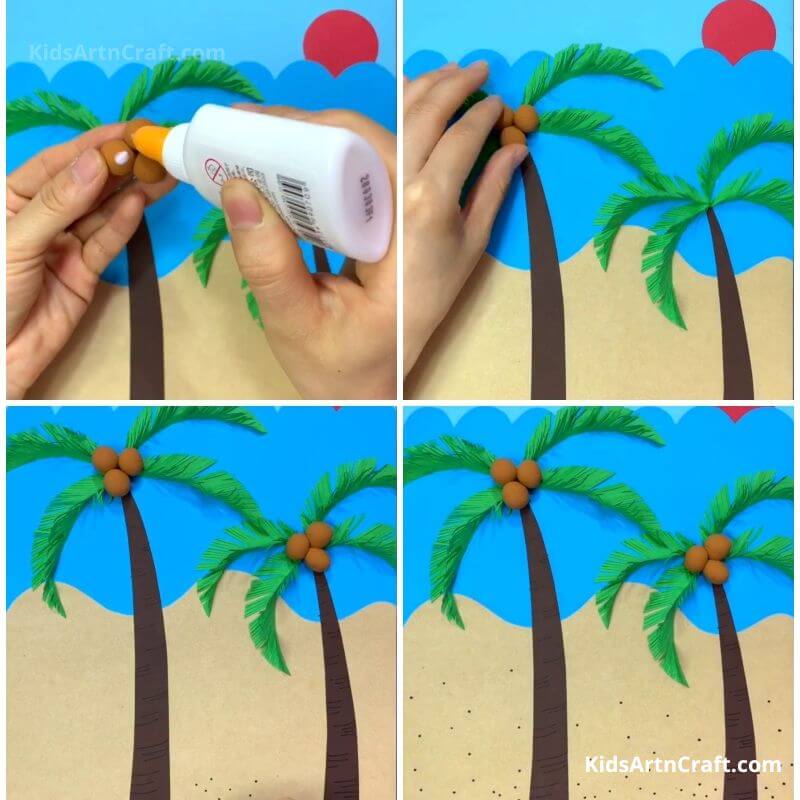
Now with the help of glue paste the clay balls or I say, mini coconuts on the top end of the palm tree.
Repeat the process with the other palm tree also but make the clay balls a little bit small as compared to the other palm tree.
Now take a black marker pen and make small dots near the ends of the palm tree and cover the whole ground to give it a look of a beach.
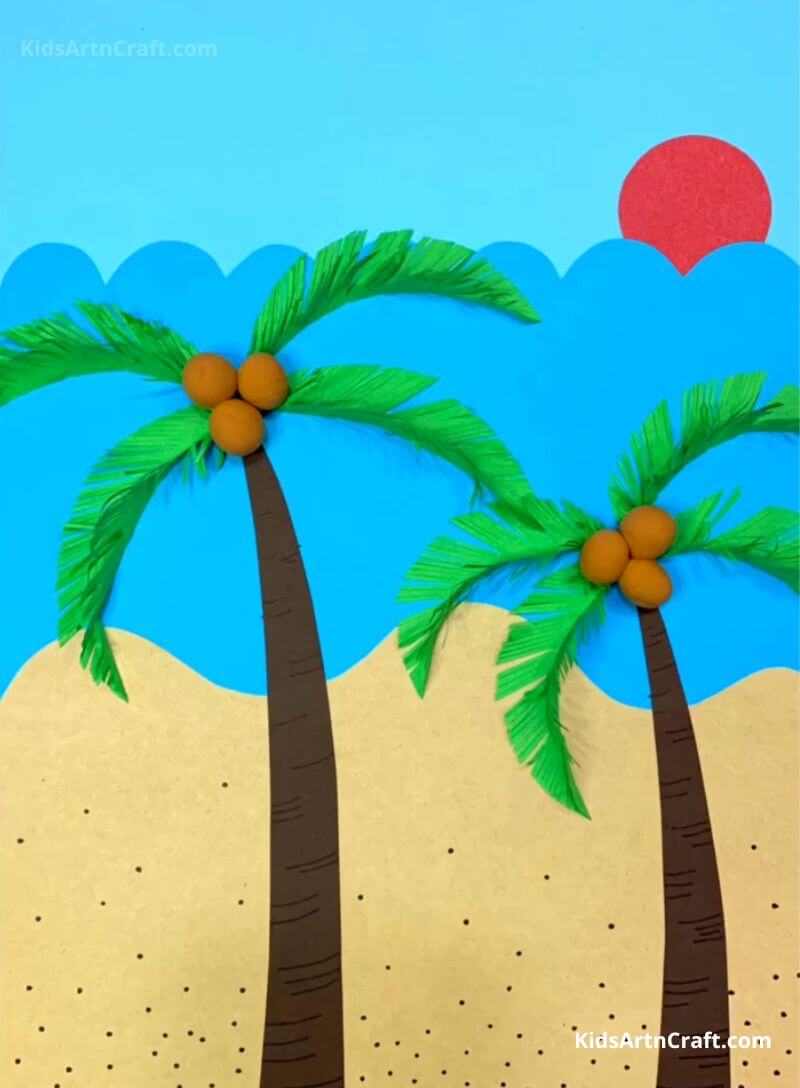
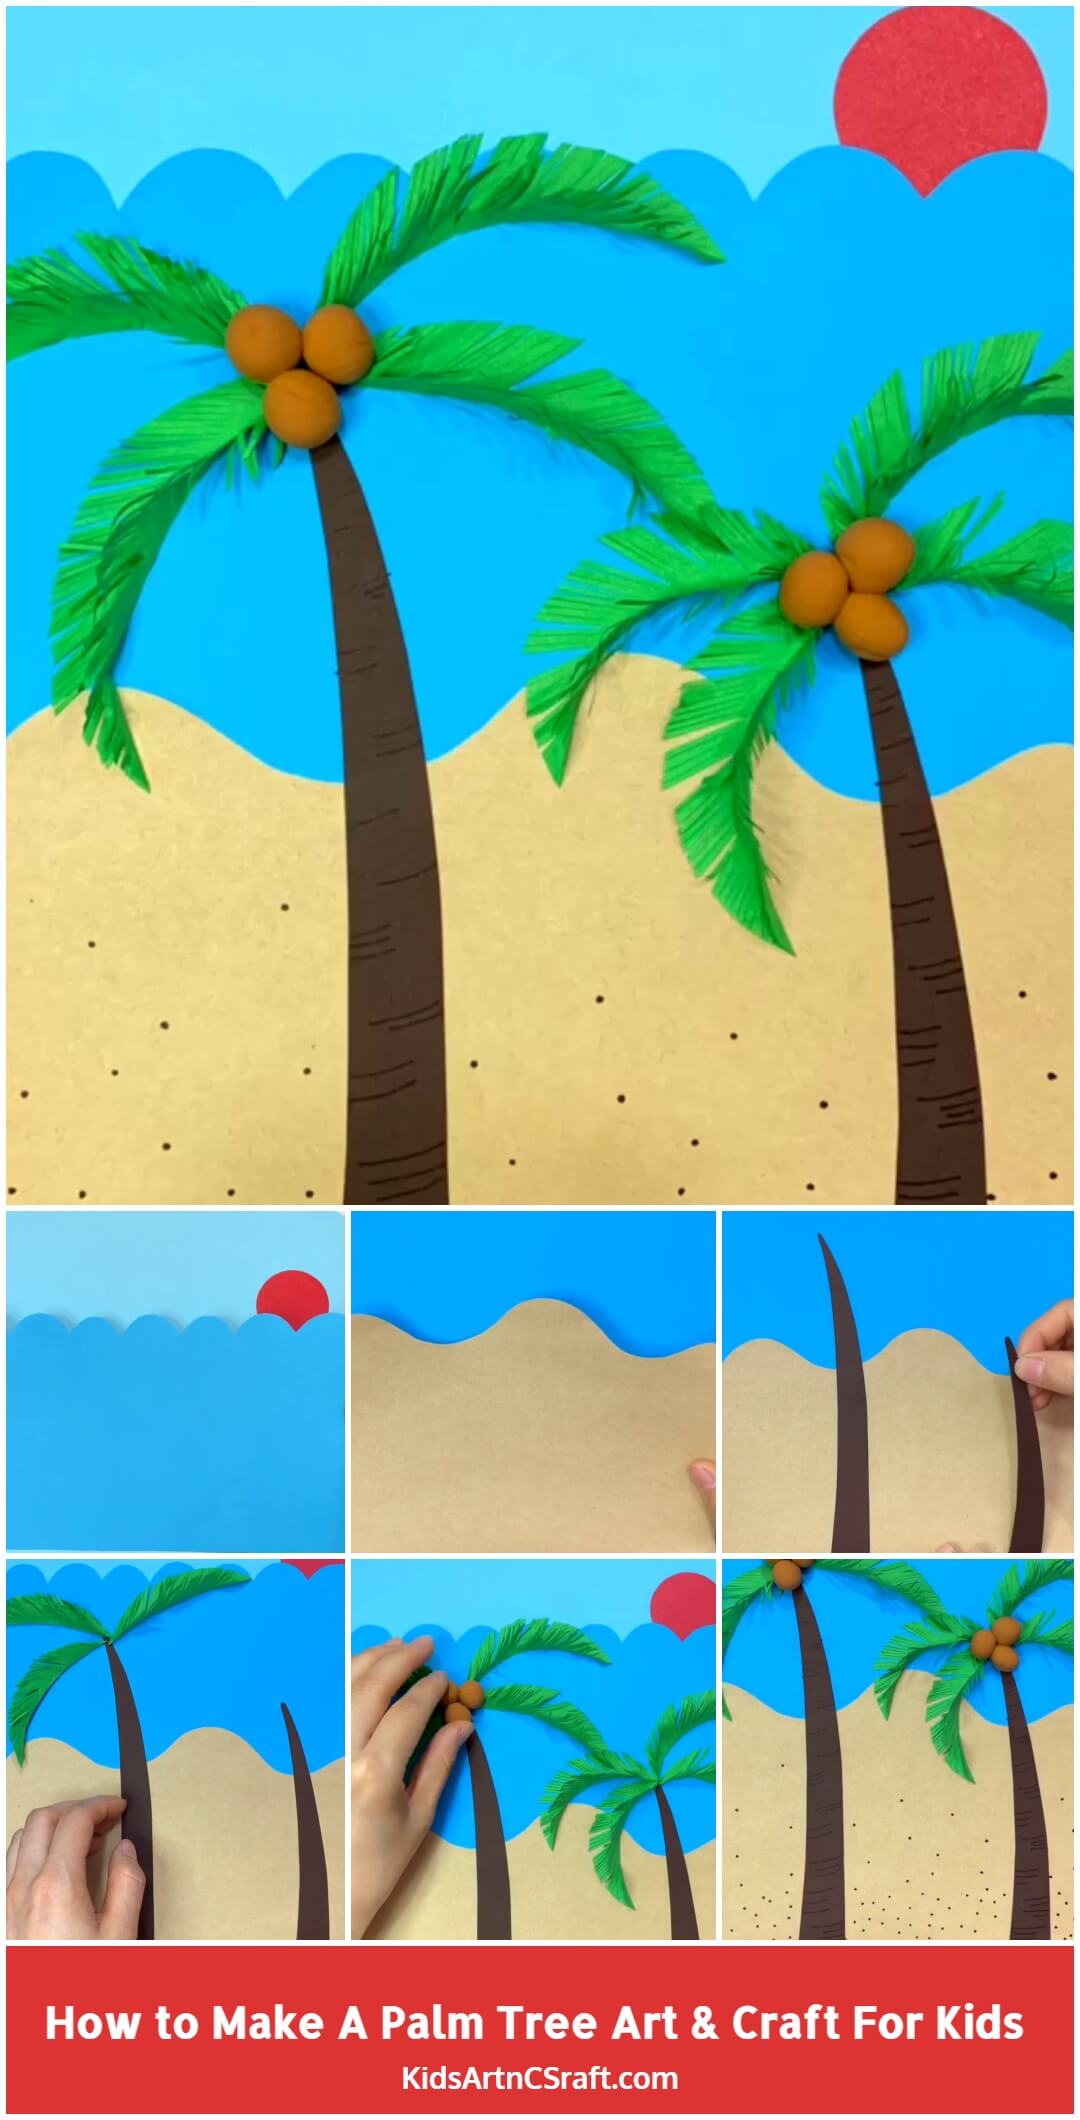
The beautiful DIY palm tree art painting is ready!! This craft looks so adorable as you can use it to make your empty walls look beautiful and interesting. This craft is specially designed for kids in pre-primary and kindergarten. This is one of the simple yet interesting activities that will spread some cool beach vibes in the room. Other than its beauty this craft has some special feature that makes it more interesting and special. Let’s see what are they.
Some of the special features of this craft are as follows:
- Making of this craft is quite pocket friendly as this craft does not include any expensive crafting materials.
- Children can also learn scissors skills from this craft.
- This craft can be easily made in less time.
- This DIY craft includes very few crafting materials.
- This craft can be made anywhere like at home or school or even at playtime
To know more about such cool and amazing DIY paper crafting activities ideas visit our website there you will find some very interesting DIY crafting activities and tutorials for small children that will help them to explore the world of art and craft in a whole new fun and interesting way. So what are you waiting for go and check out them quickly!
Some More Tree Craft Tutorial
Crafting A Paper Tree For Young Ones
Crafting a paper tree for young ones is a fun and creative activity. It allows them to explore their imaginations and be creative while learning the basics of paper crafts. The end result is a unique and beautiful tree that can be proudly displayed in any room.
Follow us on Youtube for art and craft tutorials and much more.
More Articles From Kids Art & Craft
- DIY Easy Snowman Craft for Kids – Step-by-step tutorial
- DIY Easy Tomato Paper Craft For Kids – Step-by-Step Tutorial
- DIY Easy Turtle Craft for Kids to Make -Step-by-step tutorial
- DIY Paper Crafts Ideas for Kids – Step By Step
- Dough Flower Bouquet Art for Kids – Step-by-Step Tutorial


