


Kids Activities
Easy to Make Paper Cup Bunny Craft Tutorial for Kids

This paper cup bunny craft tutorial is perfect for kids to make for Easter or any time of year! Follow the easy, step-by-step instructions to make your own bunny out of paper cups, paint, and some other craft supplies. Have fun and get creative with this easy craft!
Are you looking for a fun and easy craft to do with your kids? Look no further! This Paper Cup Bunny Craft Tutorial is perfect for kids of all ages and is sure to put a smile on their faces! With just a few simple materials, you can make a cute bunny that you can use as a decoration or even a toy. You can also get creative and make variations of the bunny with different colors and patterns. So grab your supplies and let’s get crafting!
Reuse Paper Cup Bunny Craft Tutorial To Make At Home
Materials Required:-
- Paper Cups
- Colored Papers
- Black Marker
- Glue
- Scissors
- Bottle Caps
- Rubber Band
- Tape
Read More: Easy To Make Paper Craft Activities Video Tutorial for All
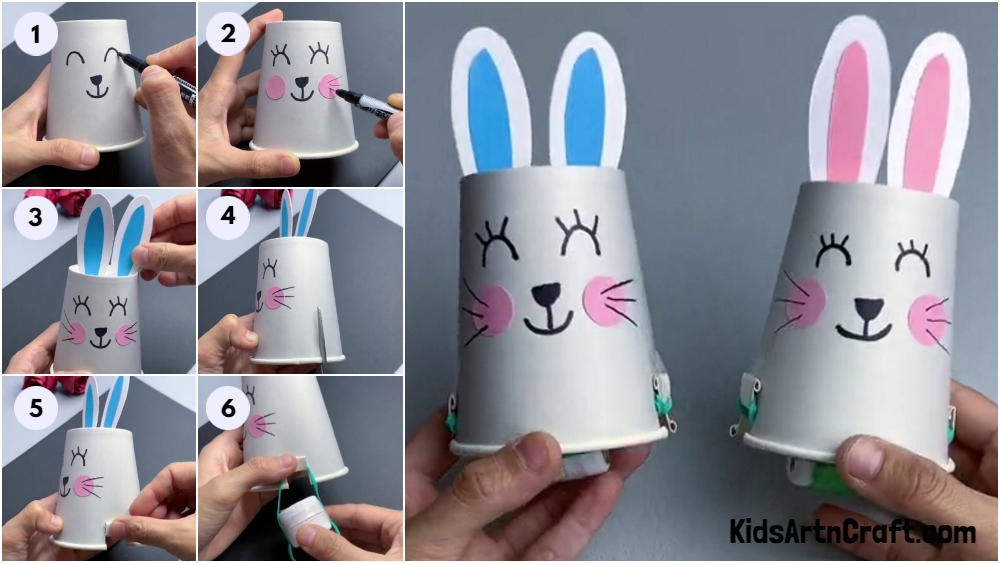
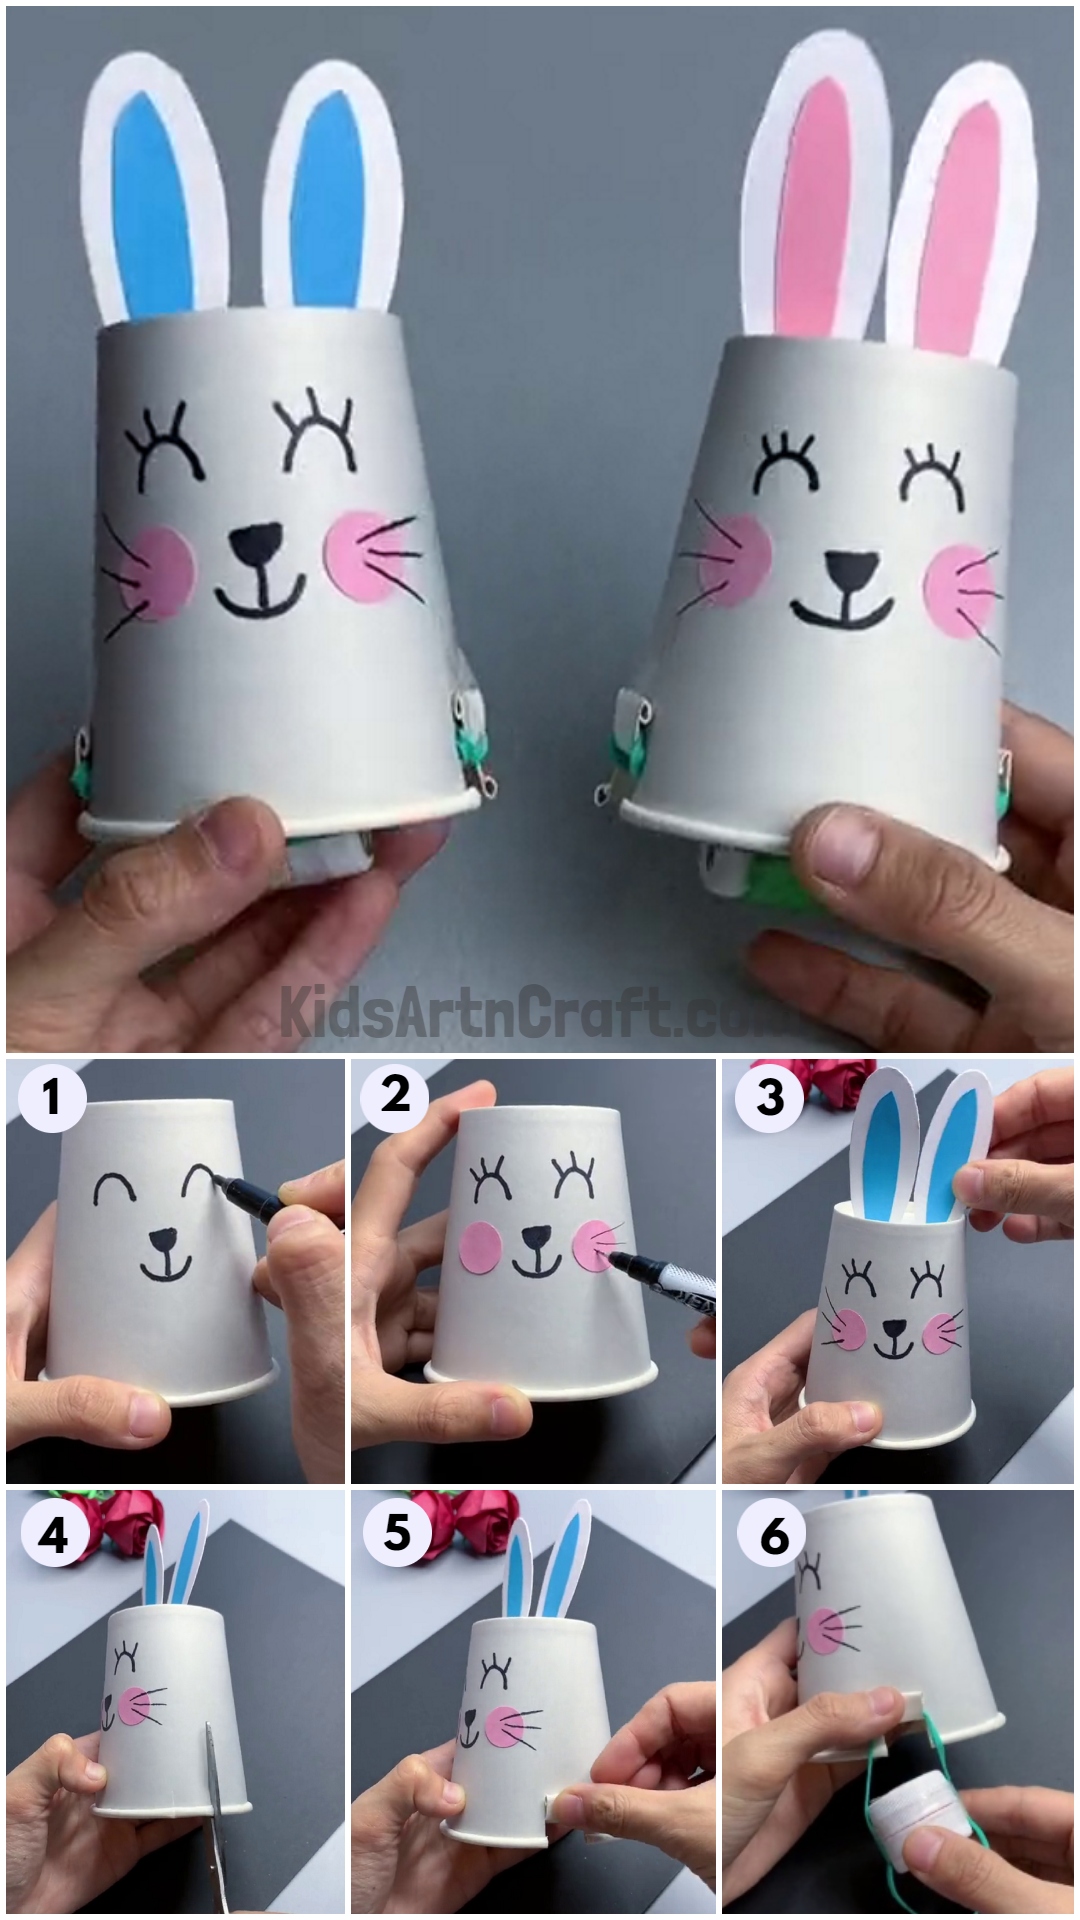
Step 1: Drawing Bunny Face On Paper Cup
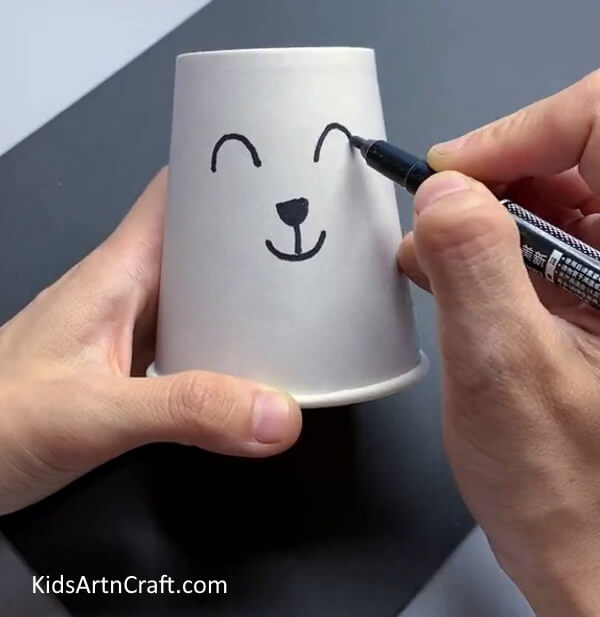
First, we need a paper cup and a black marker to make the bunny. Draw a cute bunny’s face on a paper cup using a black marker.
Step 2: Adding Cheeks
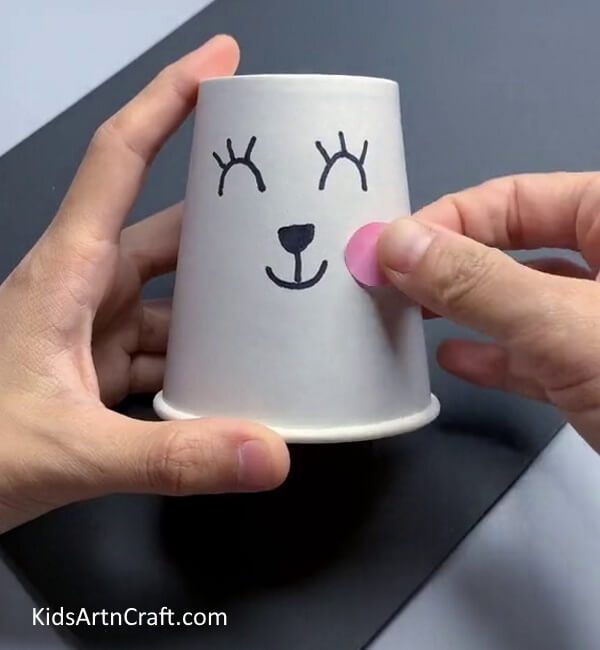
Cut two small circles from pink paper and paste them as the cheeks on the paper cup.
Step 3: Drawing Details
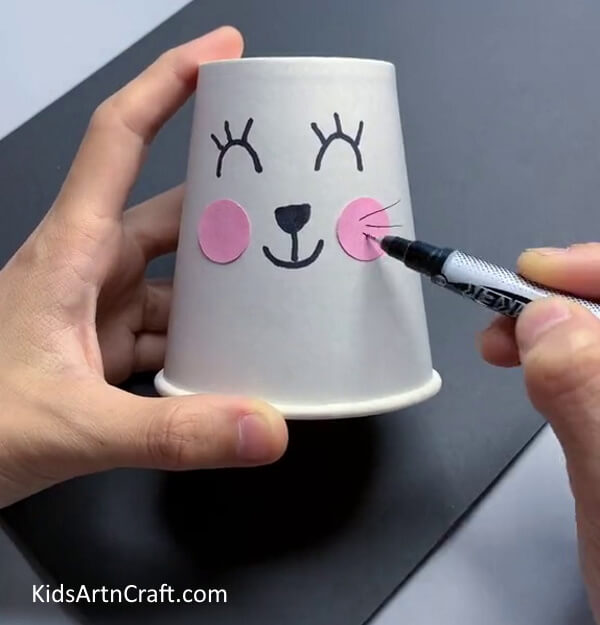
Using a black pen draw hairs on the cheeks of your cute bunny.
Step 4: Making Ears of Bunny
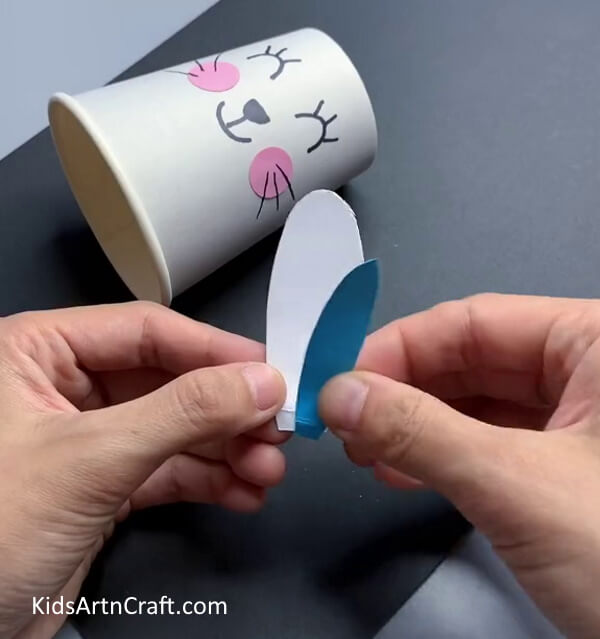
It’s time to add ears to your bunny. Cut two long ears from the white sheet and two blue ears. Paste some blue parts on the white sheet.
Step 5: Pasting Ears of Bunny
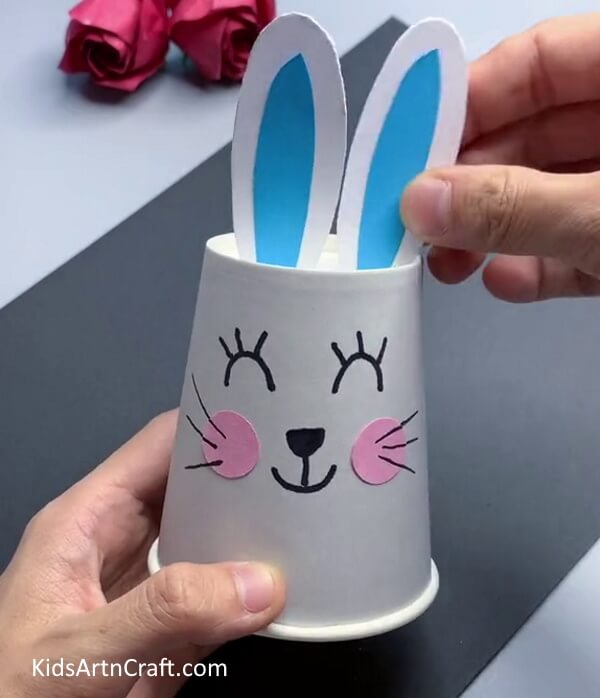
Using glue, paste the ears on the top of the paper cup.
Step 6: Cutting Cup
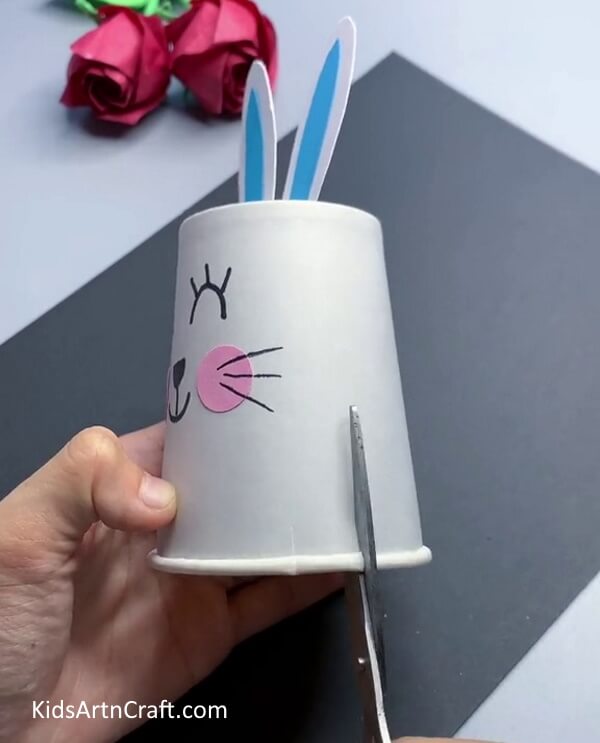
Using scissors, put two cuts on each side of the cup as shown in the above image.
Step 7: Folding The Cuts
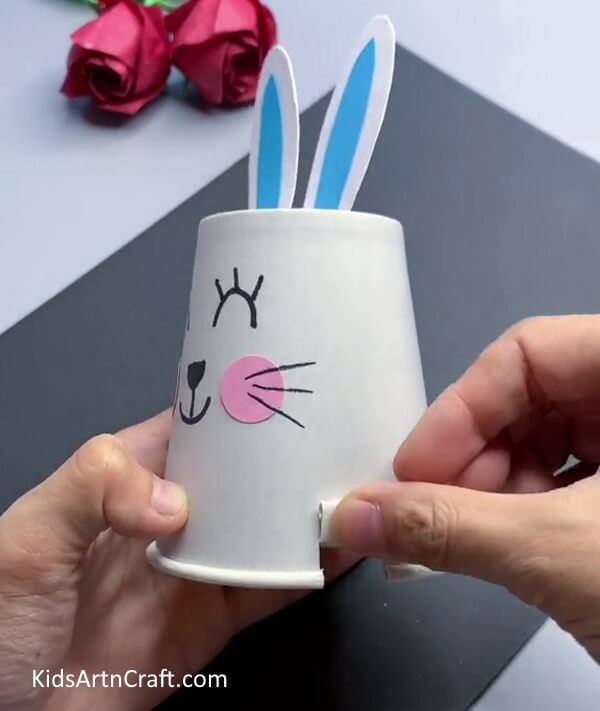
Now, fold the cuts on each side.
Step 8: Making The Bunny Bouncy
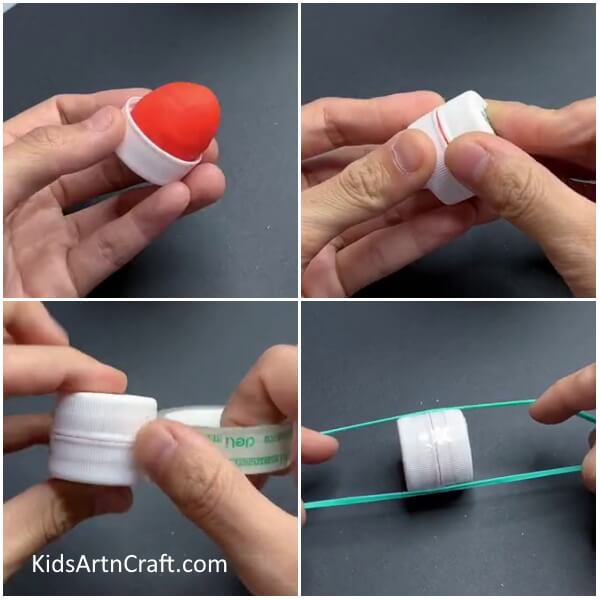
Now, to make the bunny bounce, we need two bottle caps, clay, a rubber band, and tape. Put some clay in a bottle cap and close it with another bottle cap. Wrap to tape to secure it.
Take a rubber band, and put it around the bottle caps.
Step 9: Making Bunny Bounce
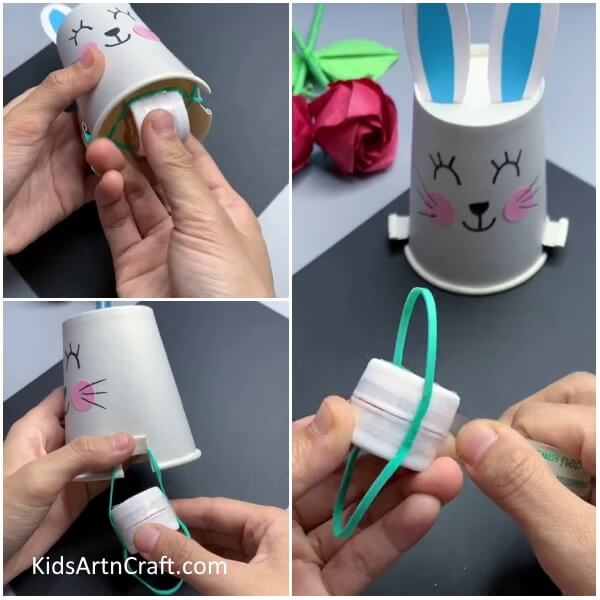
Now wrap the tape around the rubber band and caps to secure. Put the ends of the rubber band in the folds of the cup and adjust them properly.
Final Image – Your Cute Bouncy Paper Cup Bunny Is Ready!

This DIY project is great for any age and is a fun way to make a unique bunny-shaped paper cup. With just a few simple supplies and a bit of imagination, you can have a cute and bouncy bunny of your own in no time! With this simple project, you can create a fun and unique paper cup bunny in no time!
This craft is a fun and easy way to get kids into the Easter spirit! Whether you’re crafting with your own children, or helping a classroom of kids make Easter bunnies, this tutorial will provide step-by-step instructions for creating this adorable bunny craft.
Some More Bunny Craft Tutorial
Making a Bunny Craft out of Paper For Kids
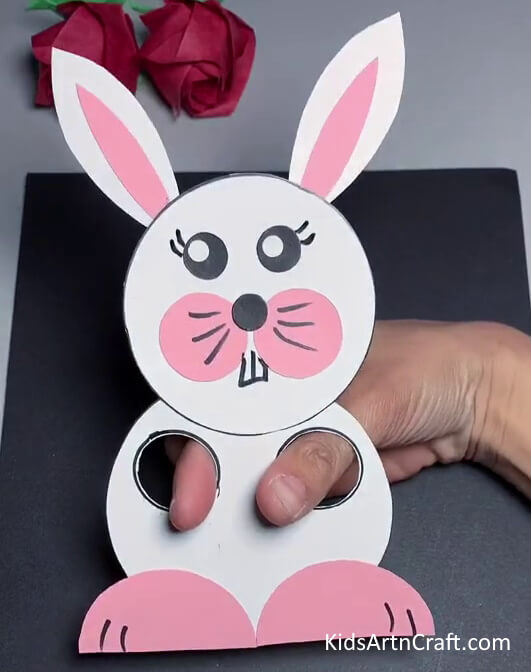
Image Source/Tutorial: Kids Art & Craft
Making a bunny craft with paper is a great activity for kids! It is a fun and easy project that requires only a few simple supplies. Kids can use their creativity to decorate their bunny however they like. This is a fun activity that the whole family can enjoy!
Easy Craft For Kindergarten To Make A Paper Bunny

Image Source/Tutorial: Kids Art & Craft
Making a paper bunny is a fun and easy craft for kindergarteners. All that is required is paper, scissors, and crayons. With a few simple steps, kids can make an adorable bunny that they can be proud of.
Cute paper Cup bunny craft for little ones
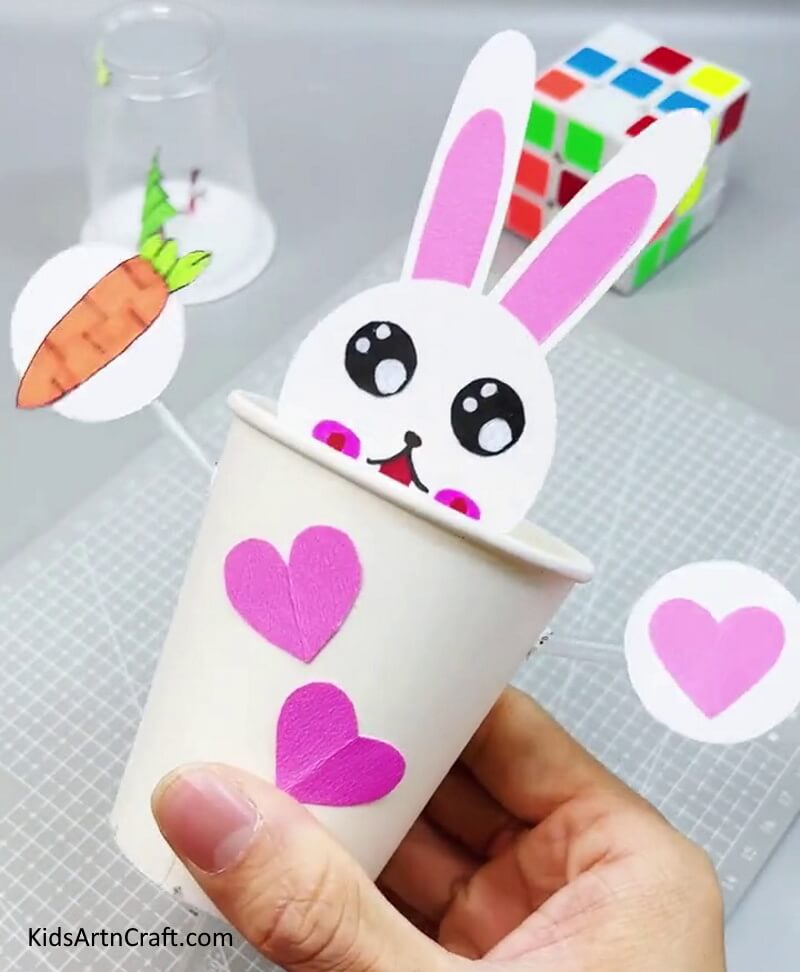
Image Source/Tutorial: Kids Art & Craft
This cute paper cup bunny craft is perfect for little ones! It’s easy to make and great for inspiring creativity and imagination. Kids will love making their own paper cup bunnies and playing with them.
Reuse Tissue Paper To Make Bunny Craft
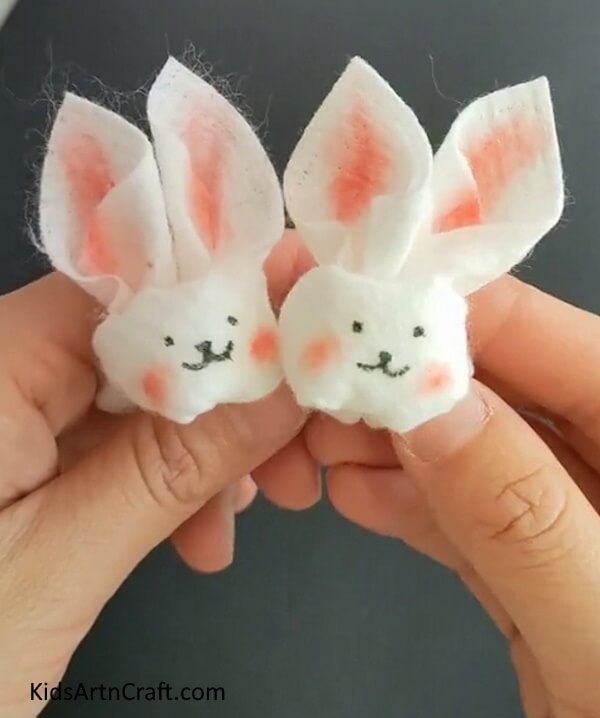
Image Source/Tutorial: Kids Art & Craft
Reusing tissue paper to make a bunny craft is a great way to reduce waste and have fun at the same time. This easy and creative project is perfect for kids and adults alike to get creative and make a fun decoration.
FAQs Related To Paper Cup Bunny Craft Tutorial for Kids
1. What kind of paper cup can I use for this craft?
For this craft, you can use any type of paper cup; it just needs to be able to hold the material you’ll be using. Make sure the cup is sturdy and thick enough to hold the material without collapsing.
2. What materials do I need to make the bunny?
To make a bunny, you’ll need a few basic materials like felt, fabric scissors, a needle and thread, stuffing, and pencils or chopsticks. With these supplies, you can create a fun, handmade bunny for yourself or a loved one.
3. How do I attach the ears and tail of the bunny?
Attach the ears and tail of the bunny by sewing them onto the body of the bunny. Secure the edges with a few stitches and you have a cute and cuddly stuffed bunny.
4. How do I finish the bunny?
To finish the bunny, stuff the body with the stuffing and use a needle and thread to securely close the opening. Then, use the yarn to embroider on the face and add a tail if desired. Finally, attach the ears to the top of the head.
5. How can I use the bunny once it’s finished?
Once your bunny is finished, you can use it for decoration. Whether it’s in your home or garden, this cute bunny will bring a little bit of joy and color to any space.
Follow us on Youtube for art and craft tutorials and much more.
More Articles from Kids Art & Craft
- Super Easy Craft Activities Video Tutorial At Home
- Easy Craft Ideas Make At-Home Video Tutorial
- Best of Waste Flower Pot Craft Using Orange Peel & Paper Cup – Step-by-Step Instructions
- Recycled Yogurt Cup Animals
- DIY Fun Craft Activities At Home Video Tutorial


