
Recycled Crafts
Tissue Paper Bunny Step-by-Step Craft Tutorial for kids


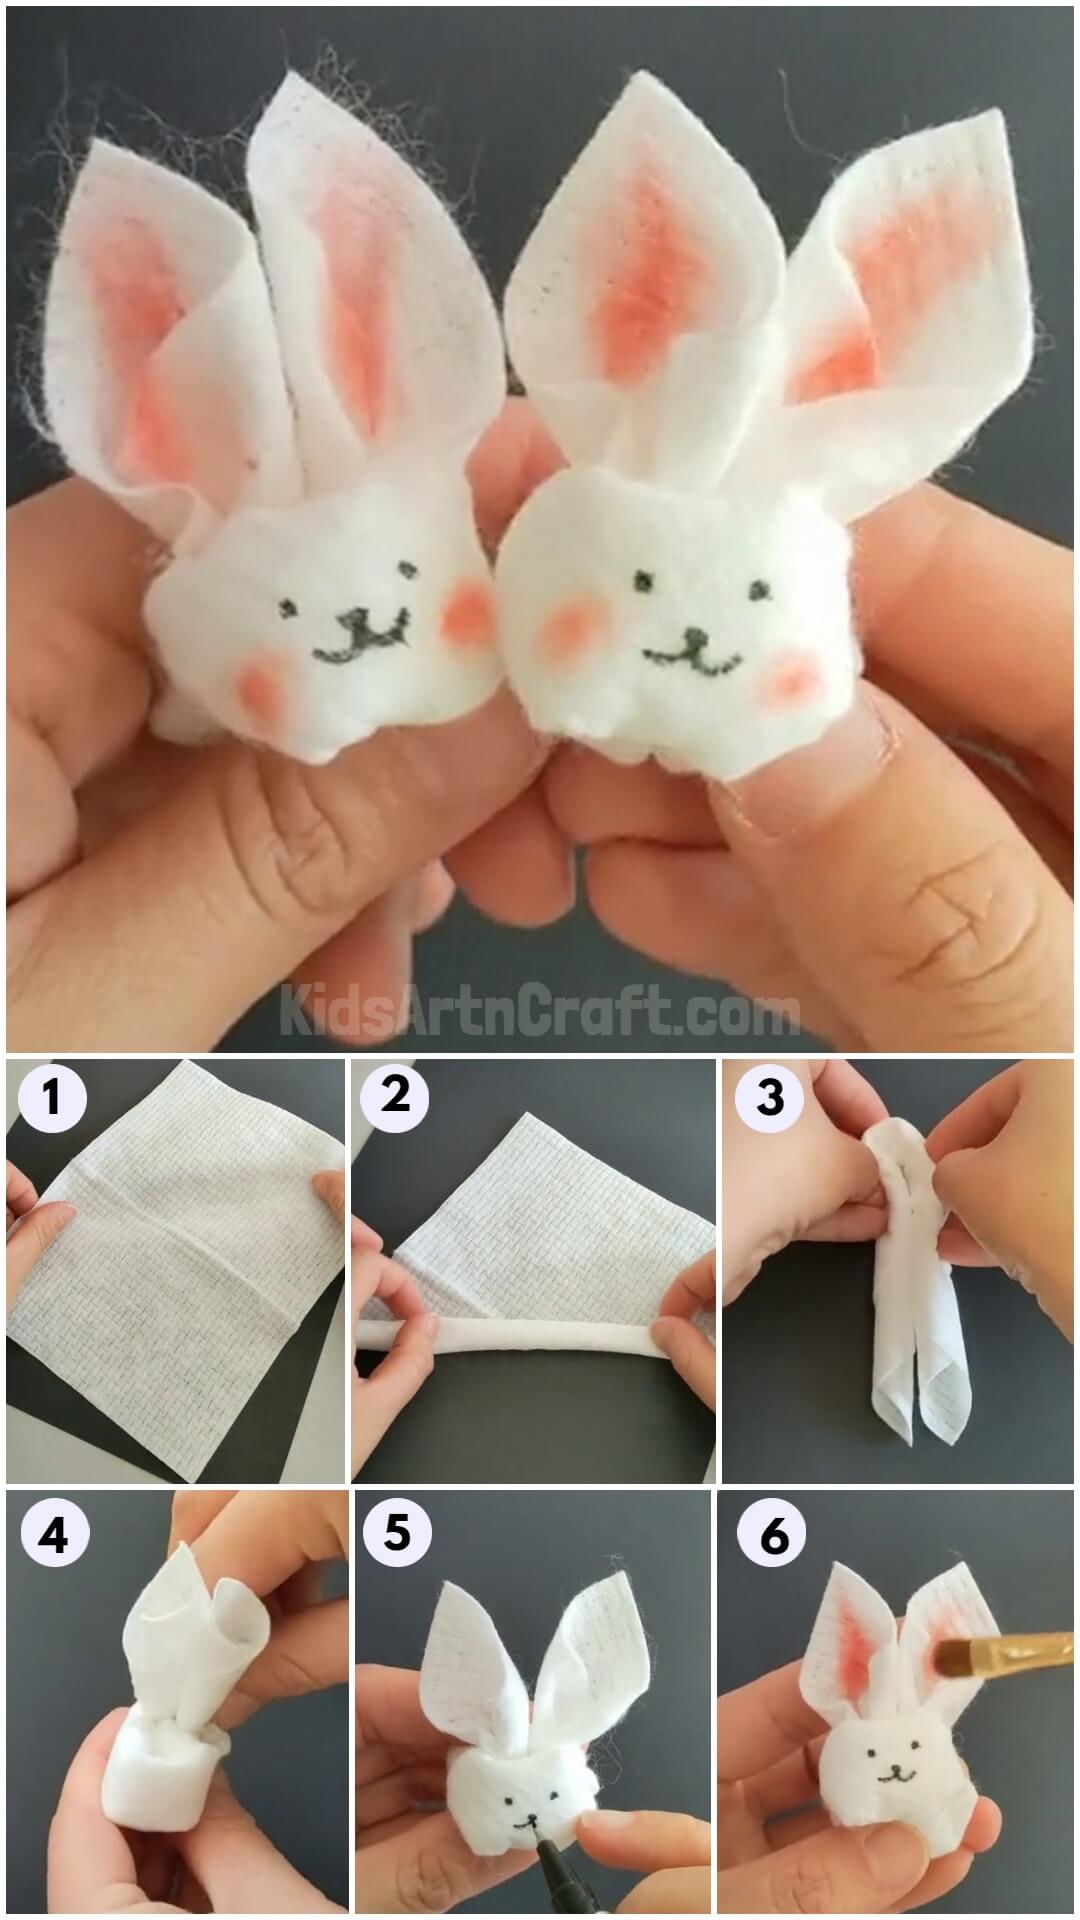
This guide teaches children how to create a cute bunny using tissue paper. It is simple to do with the materials provided, and the instructions are easy to follow. Kids can make this bunny for decoration or give it as a present!
Welcome to the world of whimsical tissue paper rabbit crafts! This step-by-step lesson is intended to inspire children of all ages to be creative and have fun. Tissue paper crafts are a fun and easy method for youngsters to explore their imaginations and fine motor abilities. In this post, we’ll walk you through the steps of making charming tissue paper bunnies, from gathering supplies to adding the finishing touches. So, let’s get started and get crafty!
Tissue Paper Bunny For Kids
Read More: Easy to Make Doll with Yarn and Tissue Paper
Materials Required
- Tissue paper
- Red poster or painting colour
- A paintbrush
- An elastic or a rubber band
Procedure
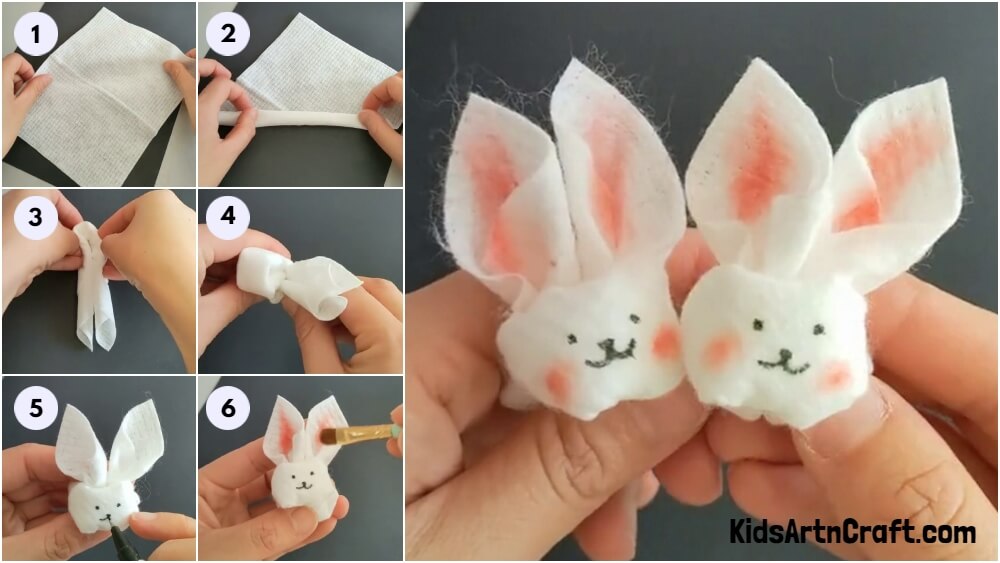
Step 1: Taking A Tissue Paper
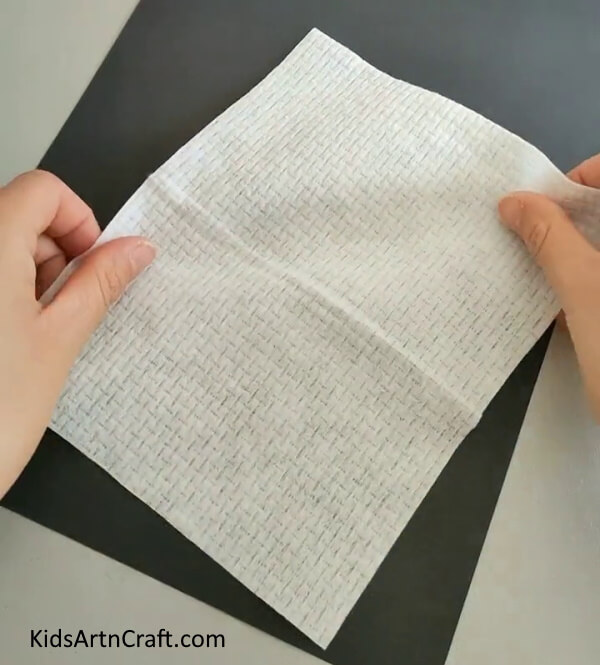
Firstly, take a tissue paper and lay it open in your work area.
Step 2: Rolling The Tissue Paper
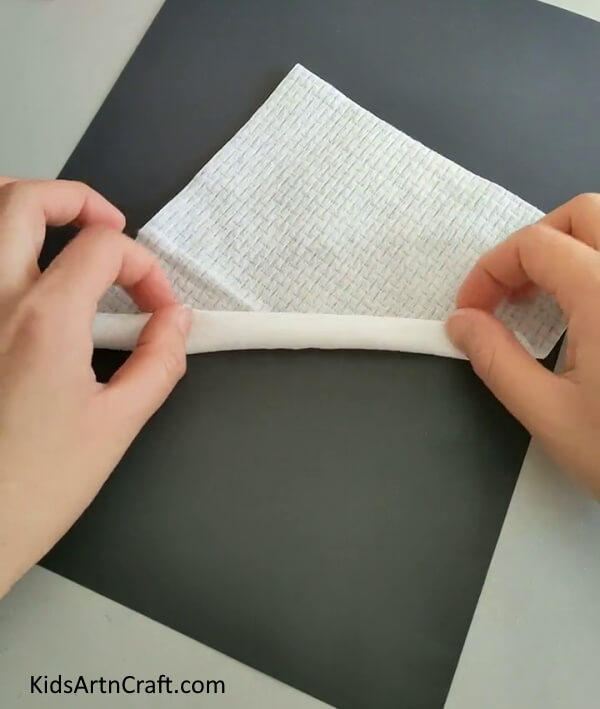
Now, roll the tissue paper from one of the edges and keep rolling till you reach the other end.
Step 3: Folding The Tissue Paper
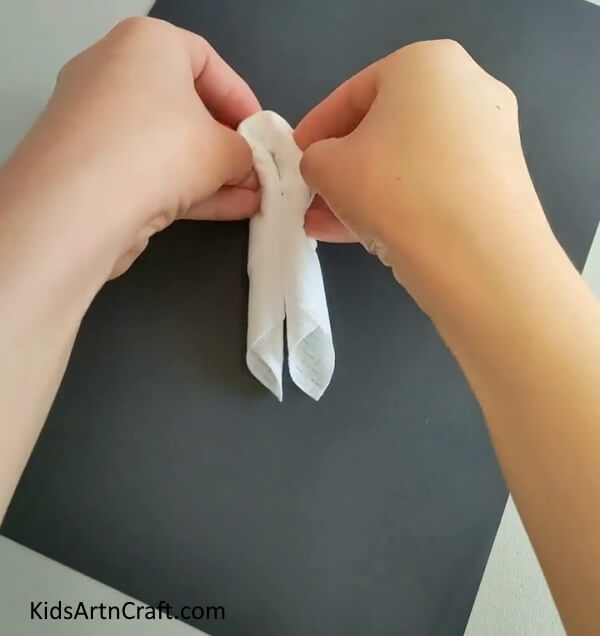
Now, bring the two sides of the rolled tissue side by side to each other as shown in the image below.
Step 4: Bringing The Folded Tissue Inwards
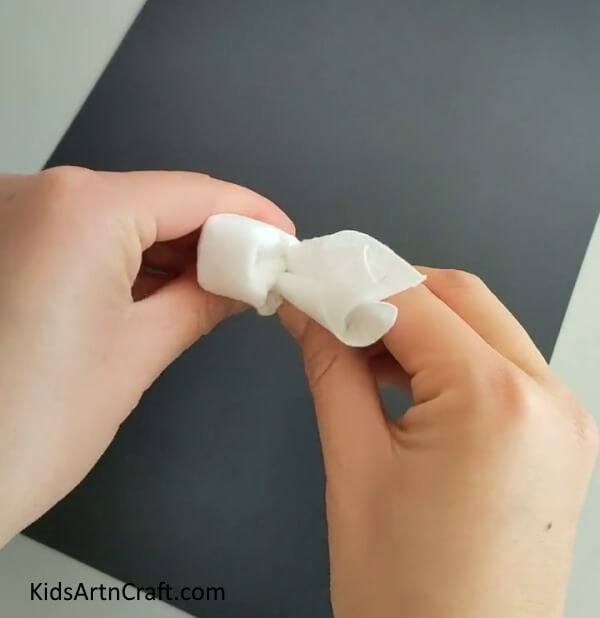
Now, bring the rolled tissue and fold it inwards, keeping a bulging portion on one side and the edges on the other side.
Step 5: Securing It With Elastic
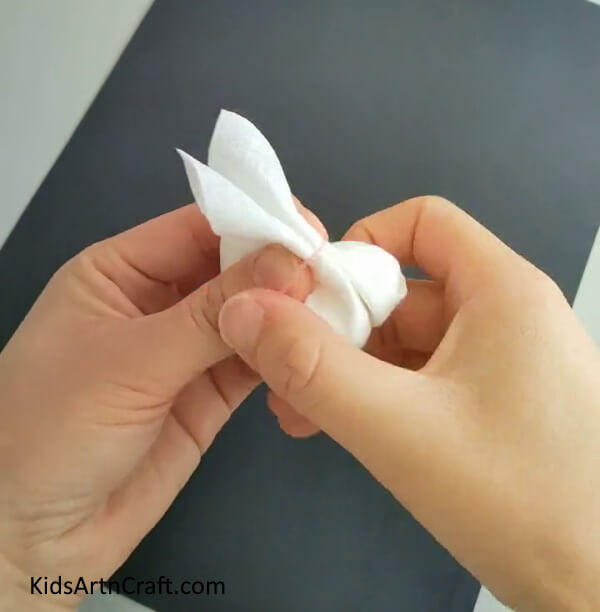
Now, carefully secure the whole design using an elastic or a rubber band.
Step 6: Adjusting The Bulgy Portion
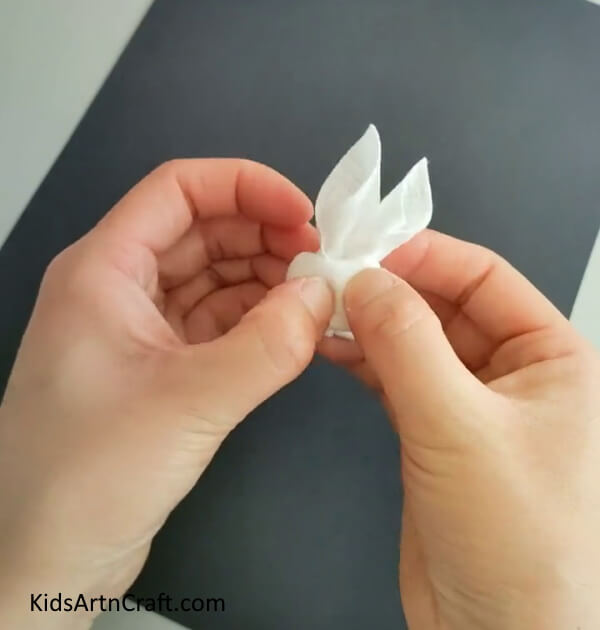
Now, adjust the bulging portion and press it inwards in order to hide the rubber band, and brush your fingers through the edges to make them more defined.
Step 7: Drawing The Facial Features
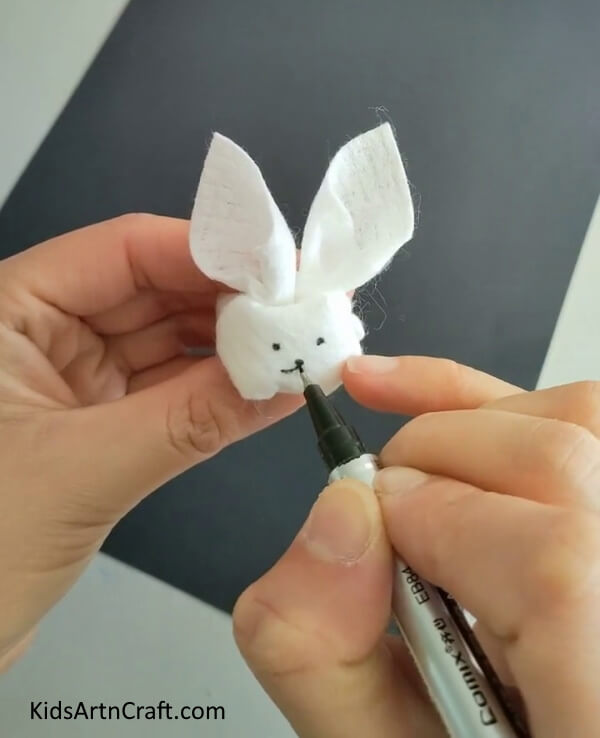
Next, take a black coloured marker and add facial features such as eyes and a nose, and do not forget the smile!
Step 8: Painting The Ears
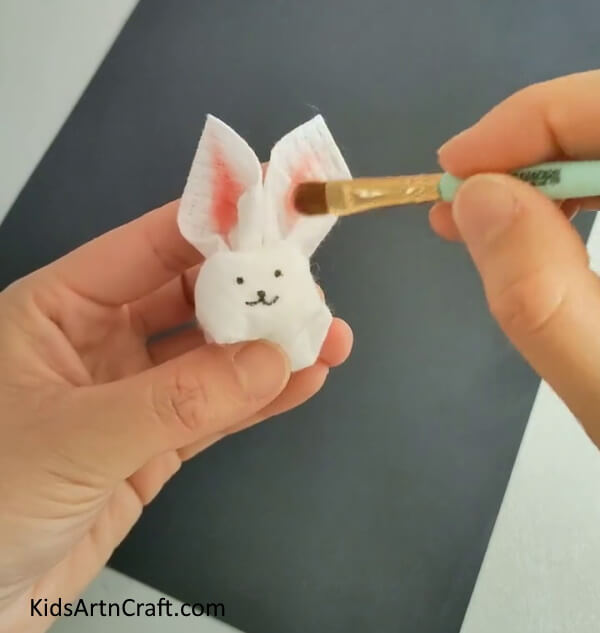
Next, take the red watercolour or poster colour and dip your paintbrush into it. Now, colour the inner portion of the bunny ears. You can also add blush to your bunny’s smile using this colour!
Look At The Adorable Final Result !!
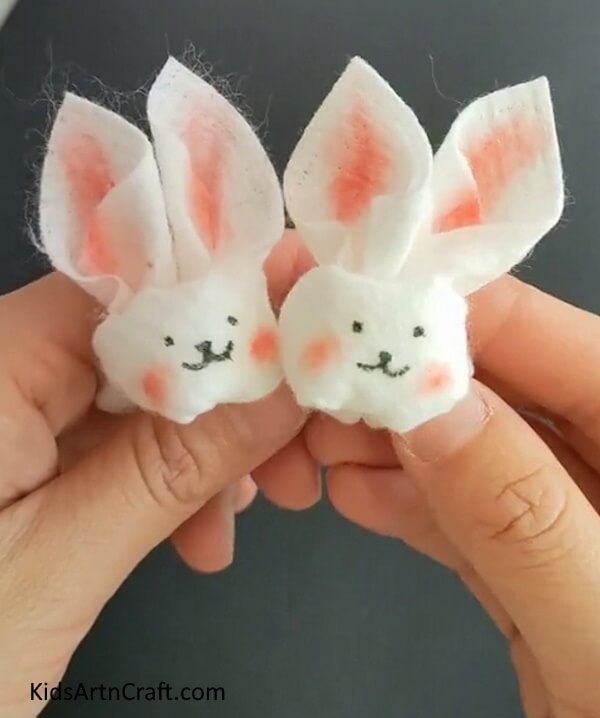
Creating tissue paper rabbits is a fun and engaging activity for youngsters that allows them to express their creativity while also developing their fine motor abilities. Children may make charming rabbits using a few materials by following these step-by-step instructions. This idea not only gives a delightful experience but also promotes creativity and aesthetic expression.
Tissue Paper Bunny Craft Tutorial for Kids | Easy DIY Bunny Art
Learn how to make a cute tissue paper bunny with this easy step-by-step craft tutorial for kids. Perfect DIY paper craft activity for Easter, school projects, classroom fun, and creative learning. Simple handmade bunny art using tissue paper helps improve creativity, fine motor skills, and kids’ crafting imagination in a fun way.
Why This Paper Bunny Craft Is Great for Kids
Making a paper bunny is much more than a fun craft activity. It encourages children to use their creativity while practicing important developmental skills. Folding, cutting, gluing, and decorating paper help improve fine motor skills, hand-eye coordination, and concentration. Children also learn to follow step-by-step instructions, which strengthens logical thinking and patience.
This easy bunny craft is suitable for preschoolers, kindergarten students, and elementary school children with adult supervision. Parents and teachers can also use this activity during Easter celebrations, spring-themed lessons, animal learning units, or weekend craft sessions. Crafting together creates meaningful learning experiences while reducing screen time and encouraging imagination.
Materials Checklist
Before starting, gather these simple craft supplies:
- Colored craft paper or construction paper
- White cardstock (optional for a stronger bunny)
- Child-safe scissors
- Glue stick or craft glue
- Pencil and eraser
- Black marker or sketch pen
- Googly eyes (optional)
- Cotton ball for the bunny’s tail
- Crayons, colored pencils, or markers for decorating
Most of these materials are inexpensive and commonly available at home, making this an easy, low-cost craft for families and classrooms.
Learning Benefits of Paper Bunny Crafts
This simple paper bunny activity supports several important early learning skills.
- Fine Motor Development
- Creativity and Self-Expression
- Focus and Patience
- Shape and Color Recognition
- Confidence Building
Tips for Parents and Teachers
These practical tips make the activity more enjoyable and successful:
- Prepare all materials before beginning.
- Use rounded, child-safe scissors for younger children.
- Demonstrate one step at a time.
- Allow children to decorate their bunny in their own unique style.
- Encourage storytelling by asking children to name their bunny.
- Display finished crafts on classroom bulletin boards or at home.
- Praise creativity instead of focusing on perfection.
These small adjustments help children stay engaged and build confidence throughout the activity.
Fun Ways to Use Your Finished Paper Bunny
After completing the craft, children can enjoy using their bunny in many creative ways.
- Easter decorations
- Spring classroom displays
- Handmade greeting cards
- Puppet shows
- Storytelling activities
- Animal learning projects
- Bulletin board decorations
- Gift tags
- Room decorations
- Scrapbook pages
Using finished crafts in different activities extends learning beyond the crafting session.
FAQs
Q1. What age is this paper bunny craft suitable for?
Answer: This craft works well for children aged 4–10 years with adult assistance for younger kids.
Q2. Can I make this bunny using recycled paper?
Answer: Yes. Old magazines, colored paper scraps, gift wrap, or recycled cardstock can be used to create an eco-friendly paper bunny.
Q3. Is this craft good for classroom activities?
Answer: Yes. Teachers often use paper bunny crafts for Easter, spring themes, farm animal lessons, and creative art classes because they require simple materials and are easy to complete.
Q4. How long does this craft take?
Answer: Most children can finish the project in 20–30 minutes, depending on the amount of decorating they choose.
Q5. Can children customize their bunny?
Answer: Absolutely. They can add bows, hats, glasses, flowers, cotton tails, stickers, glitter, or draw different facial expressions to make each bunny unique.
This easy paper bunny craft is a fun way to inspire creativity while building essential skills. Enjoy crafting with kids, personalize each bunny, and explore more simple art and craft ideas on Kids Art & Craft. Inspire young minds with fun crafts and creative learning activities. Follow us on YouTube, Telegram, & Facebook for more ideas.
Reviewed By Rachit Gupta
More Articles from Kids’ Art & Craft
- Easy to Make Snowman by Bottle Craft Tutorial
- How to Make a Paper Cup Doll Craft for Kids
- How to Make Paper Sheep With a Step-by-Step Tutorial
- Fruit Foam Net Pineapple Craft Idea for Kids
- How To Make an Easy Fall Tree Craft From Leaves