


Paper Crafts
How to Make Paper Flower Ring Easy Tutorial

Make a beautiful paper flower ring with this easy tutorial! Learn how to craft the perfect accessory for any occasion. Step-by-step instructions, supplies list, and helpful tips to make the perfect paper flower ring.
Making paper flower rings is a great way to add a unique and creative touch to any outfit. This tutorial will show you how to make a beautiful paper flower ring in just a few easy steps. With just a few materials and some creativity, you can make a unique and pretty paper flower ring that is sure to be a conversation starter.
Handmade Flower Ring Craft Made With Paper
Read More: How To Make Pine Cone Mouse Craft For Kids
Materials Required
- Colored Paper
- Scissors
- Glue Or Adhesive
- Pencil
Procedure
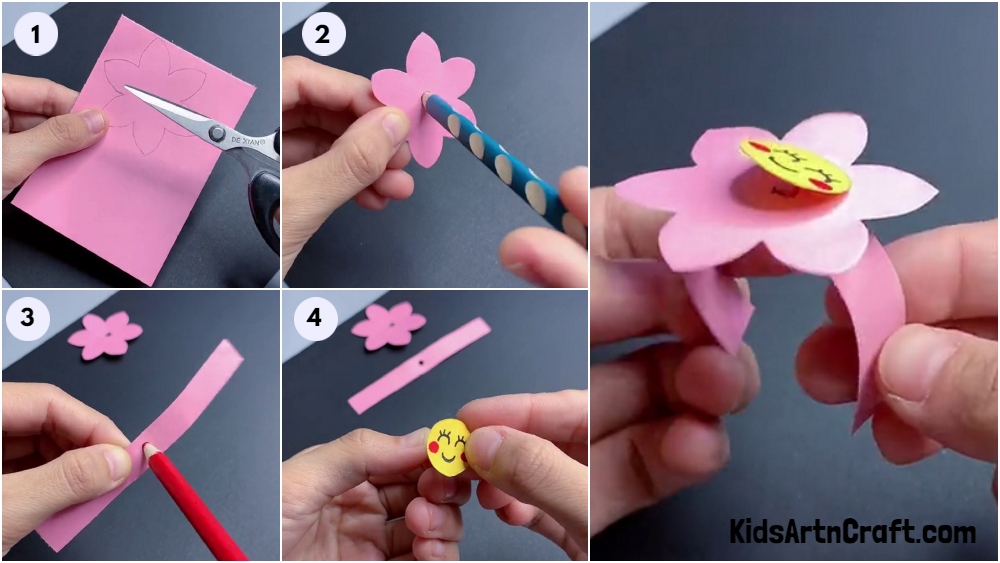
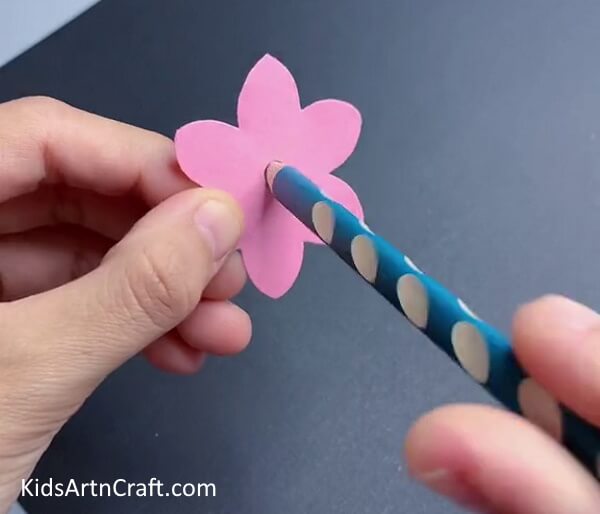
Step 1: Cutting a Flower Shape
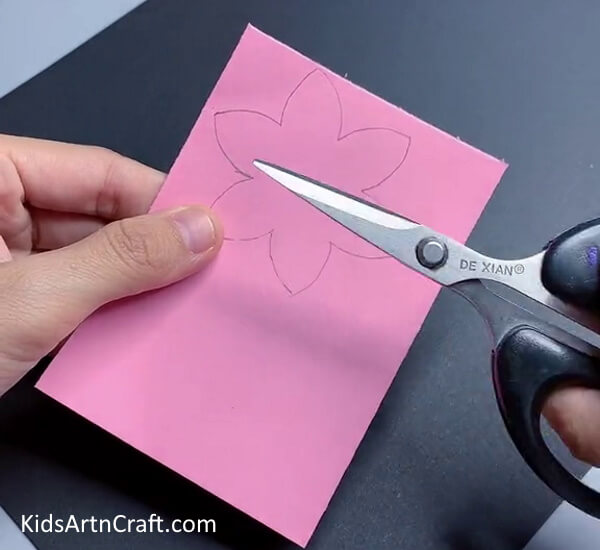
To begin making your paper flower ring, start by cutting a flower shape from colored paper. Using a pencil, lightly draw the outline of the flower on the paper, or you can use a template if you prefer. Then, carefully cut along the lines to create your flower shape.
Step 2: Making a Hole At The Center
Next, take your flower shape and carefully make a hole in the center using a pencil or the tip of a pair of scissors. This hole will serve as the anchor point for assembling the rest of the paper flower ring.
Step 3: Taking a Paper Strip And Make a Hole At The Center
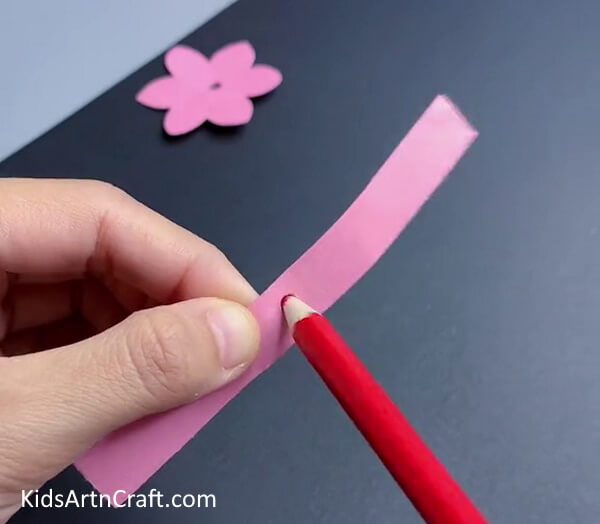
Next, take a paper strip of your desired length and width. Using a pencil or the tip of a pair of scissors, make a hole at the center of the paper strip.
Step 4: Making The Attached Strip
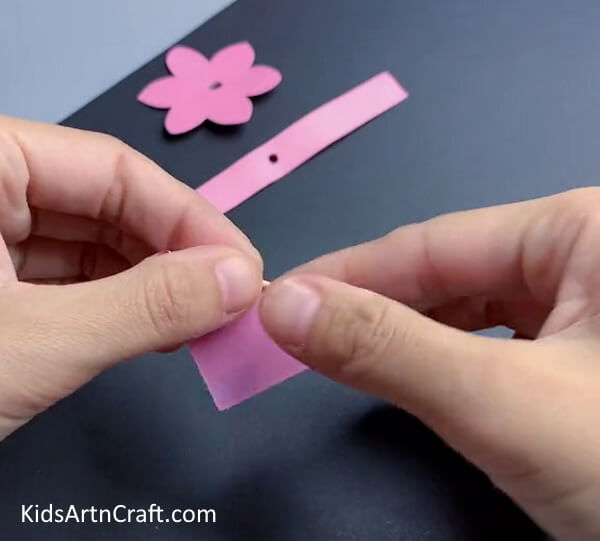
Next, take a small piece of paper and fold it into a strip by making multiple folds. Ensure that the strip is folded tightly and securely to make it strong enough to hold the flower shape and the paper strip together.
Step 5: Folding The Strip In Half
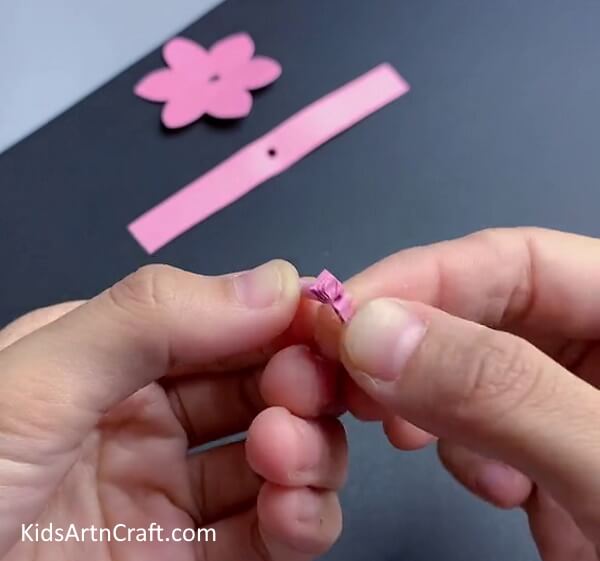
Next, take the attaching strip and fold it in half lengthwise. This will create a crease along the center of the strip and make it more sturdy.
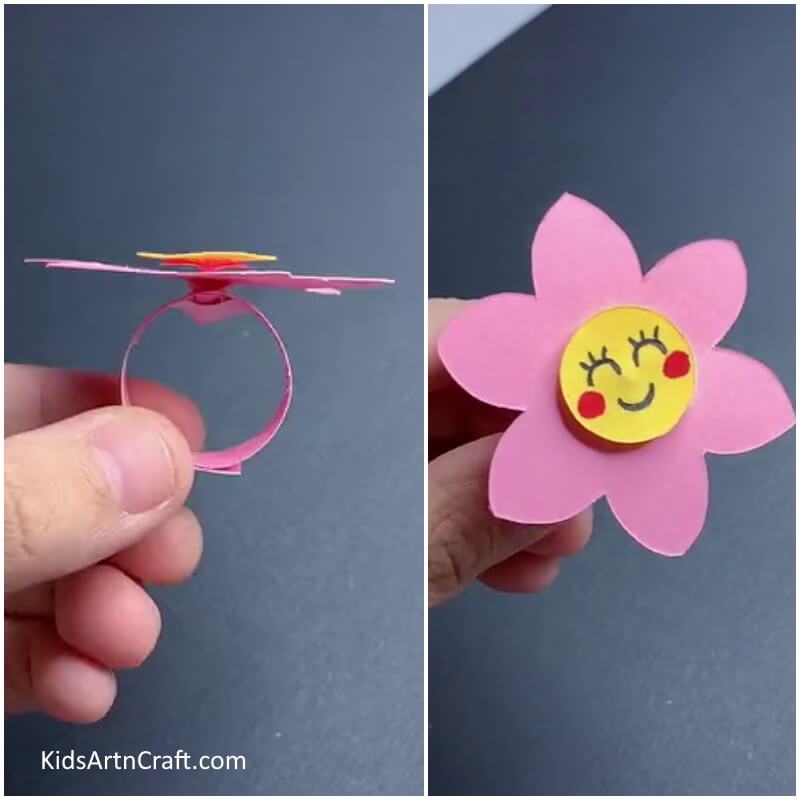
Step 6: Making The Central Part Of The Flower
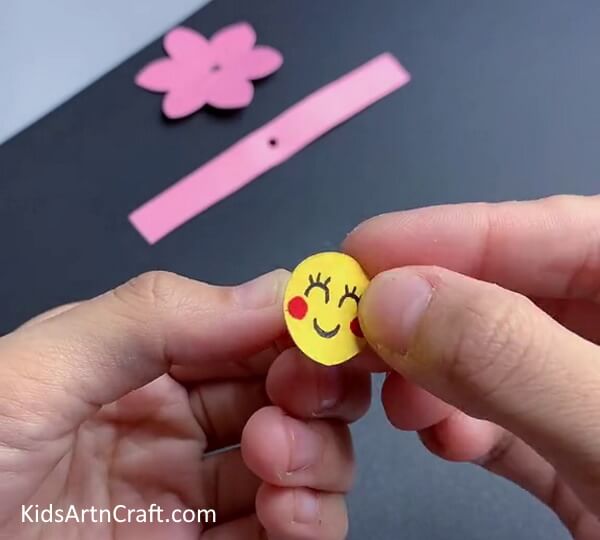
To create the central part of the flower, cut out a small circle from a contrasting color of paper. To add a playful touch to your paper flower ring, you can decorate the central part with a smiley face using markers or colored pencils.
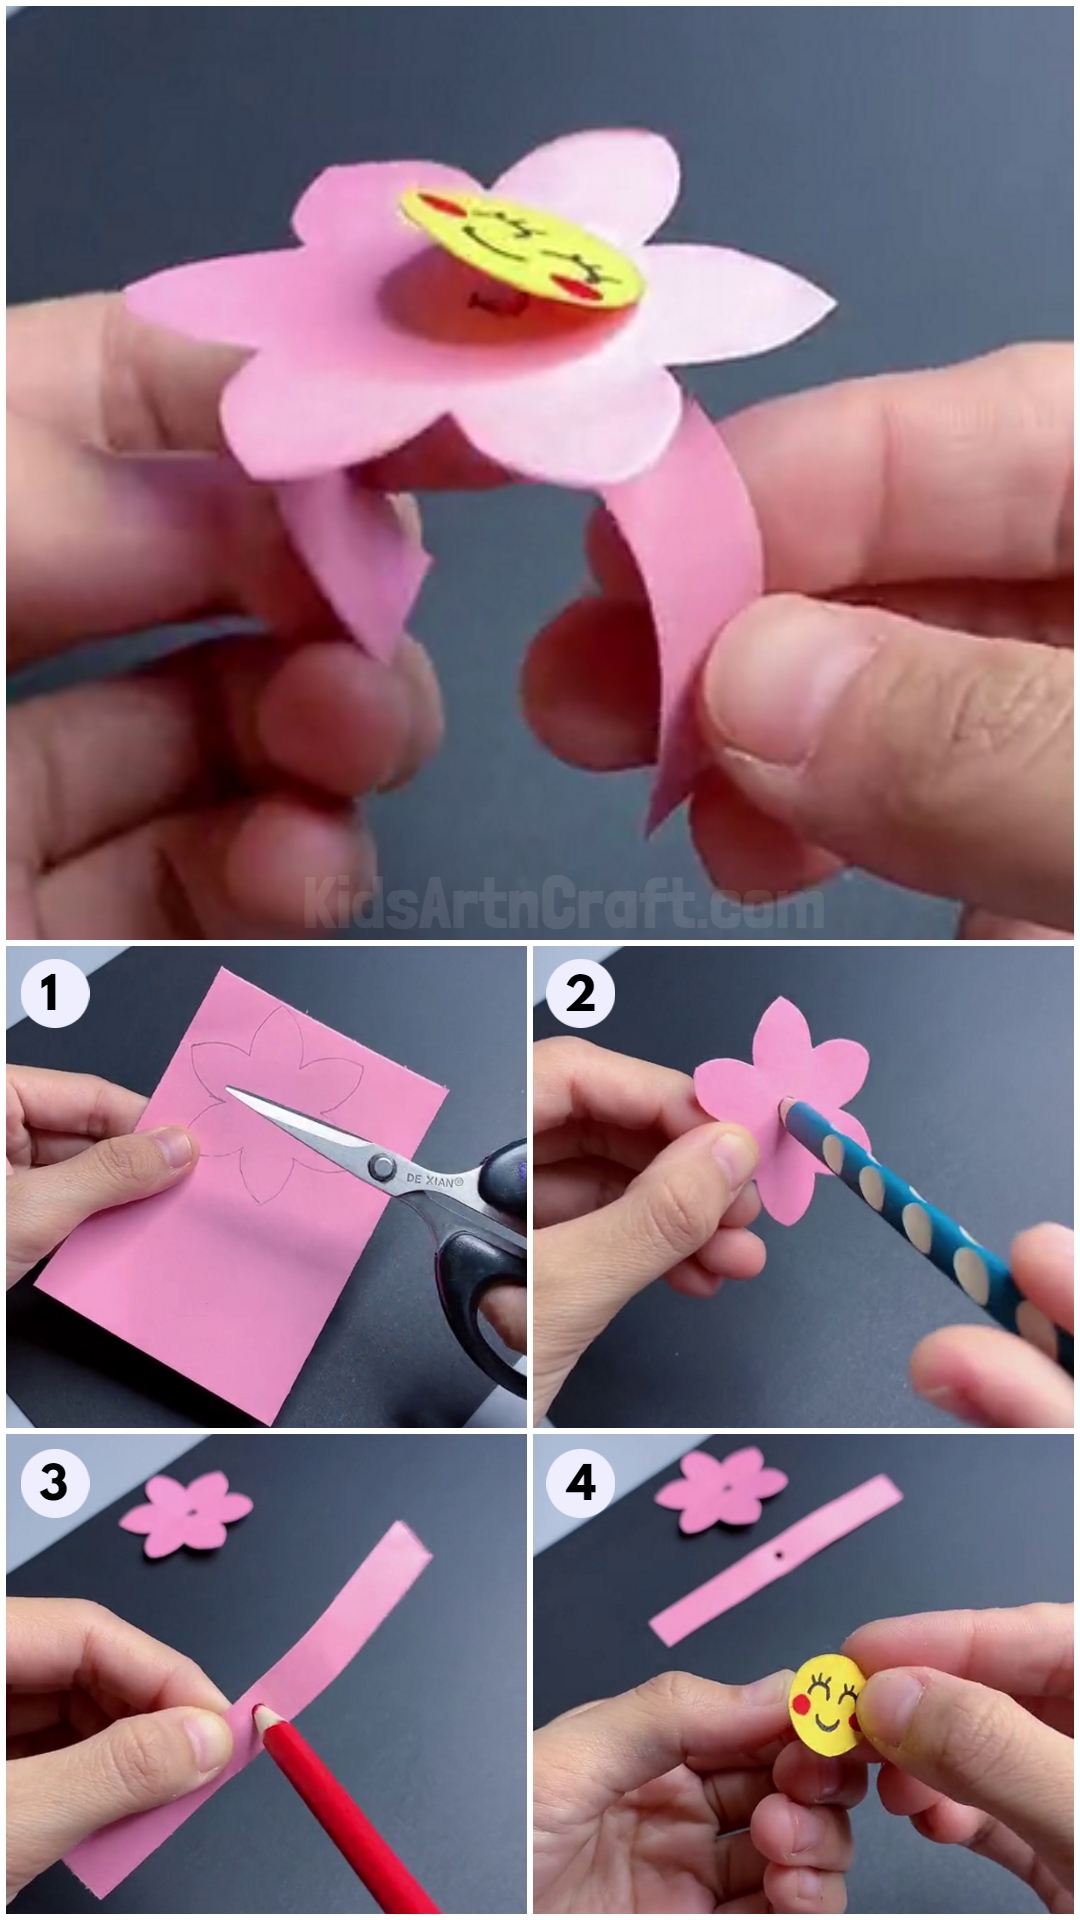
Step 7: Assembling The Pieces Together
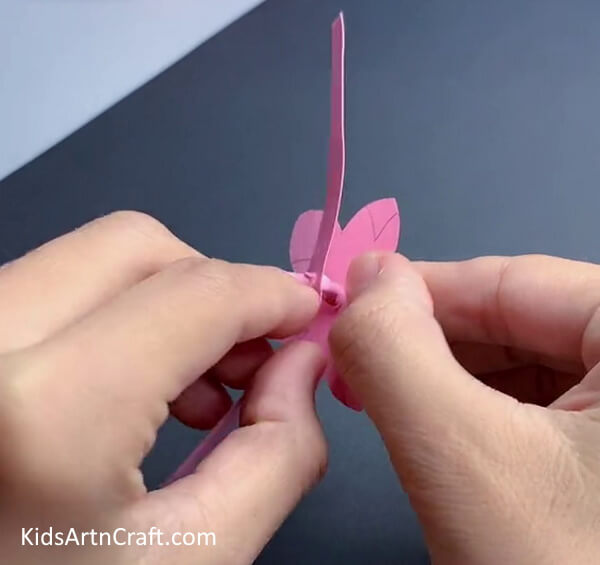
To assemble the paper flower ring, insert one end of the attaching strip through the central hole of the flower shape. Then, slide the attaching strip through the hole in the larger paper strip, ensuring it is positioned in the middle. Pull the attaching strip gently to bring the flower shape and the larger strip together, securely holding them in place. Ensure the flower shape is centered and aligned with the larger strip.
Step 8: Making The Ring
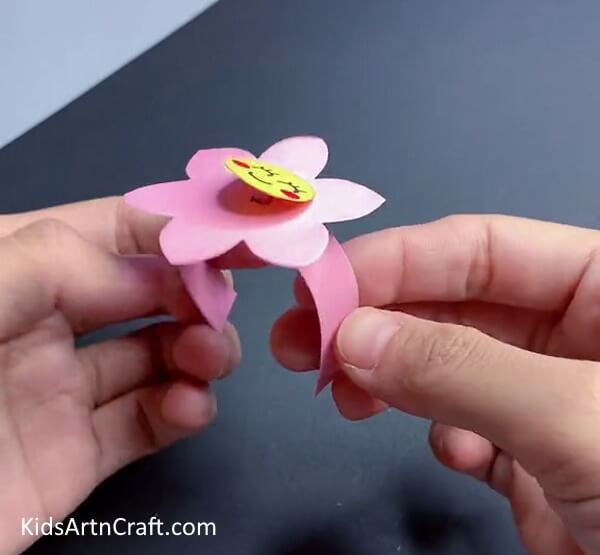
Next, align and attach the smiley at the center of the flower. To make the ring, fold the larger strip into a loop, bringing the ends together and overlapping them slightly. Secure the ends with glue to form a ring shape. Make sure the flower is positioned on top of the ring, creating a beautiful focal point.
Your Paper Flower Ring Is Ready!
Once the glue is dry, your paper flower ring is complete and ready to be worn with pride or given as a thoughtful gift.
Some More Paper Ring Craft Tutorial
Handmade Paper Flower Ring For Kids
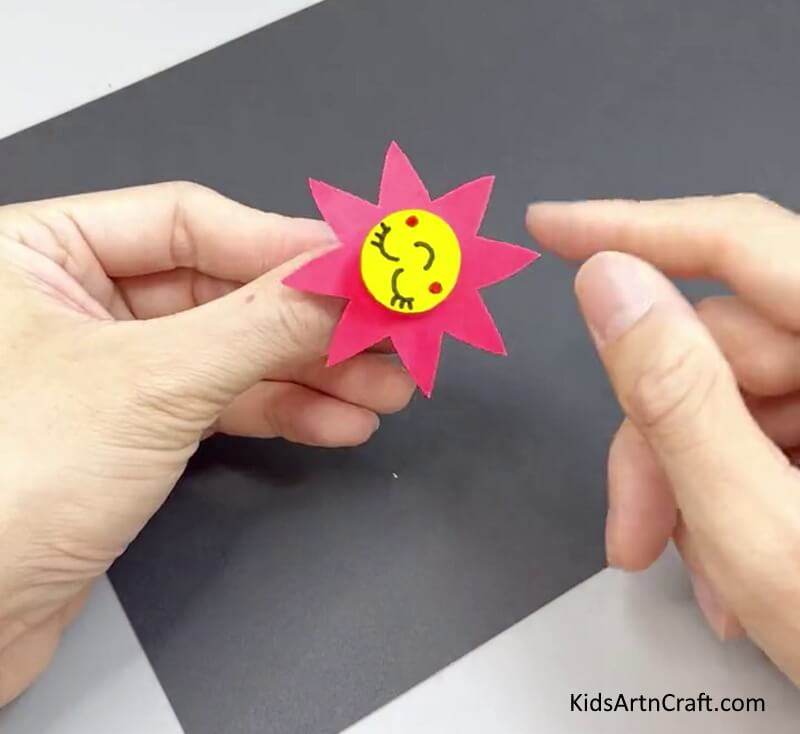
Image Source/Tutorial: Kids Art & Craft
This handmade paper flower ring is perfect for kids! It’s bright and colorful and looks great on any finger. It’s easy to make and can be a fun craft activity for the whole family.
We hope this step-by-step tutorial on how to make a paper flower ring has inspired you to get creative and try out this fun craft. It’s a wonderful way to express your personal style and add a touch of handmade beauty to your accessories. Don’t forget to explore our website for more exciting craft ideas and share your feedback with us by commenting on our posts. Happy crafting!
Follow us on Youtube for art and craft tutorials and much more.
More Articles from Kids Art & Craft
- Easy Paper Robot Craft Step-By-Step Tutorial
- DIY Paper Crafts Video Tutorial for All
- Easy Craft Ideas Make At-Home Video Tutorial
- Easy to Make Paper Chicken Craft Tutorial
- How to Make Bubble Wrap Corn Craft Easy Tutorial


