


DIY and Crafts
How To Make Pine Cone Mouse Craft For Kids

This article will show you how to make a cute and fun pine cone mouse craft for kids. Learn how to make the ears, eyes, nose, and tail, as well as how to put the pieces together to create a unique and adorable pine cone mouse. Perfect for a fun and creative activity with your kids!
Welcome to our guide on how to make a fun and easy Pine Cone Mouse craft for kids! Creating a pine cone mouse is a great way to bring the outdoors into your craft time and teach your kids about the natural world. This project is easy to do and requires minimal materials. In this article, we will walk you through the steps of creating this adorable mouse craft, perfect for any age. We will provide you with easy-to-follow instructions and helpful tips to ensure that your craft turns out great. So, let’s get started!
Make Your Own Easy Pine Cone Mouse Craft For Kids
Materials Required:-
- Pine Cone
- Yellow Construction Paper
- Scissors
- Glue
- Black Marker
Read More: Easy Craft Ideas Make At-Home Video Tutorial
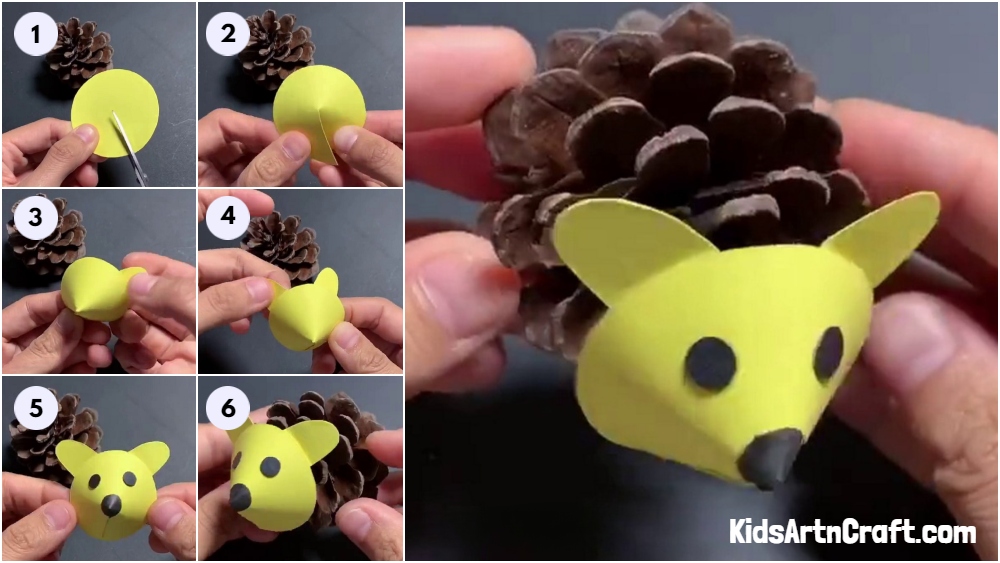
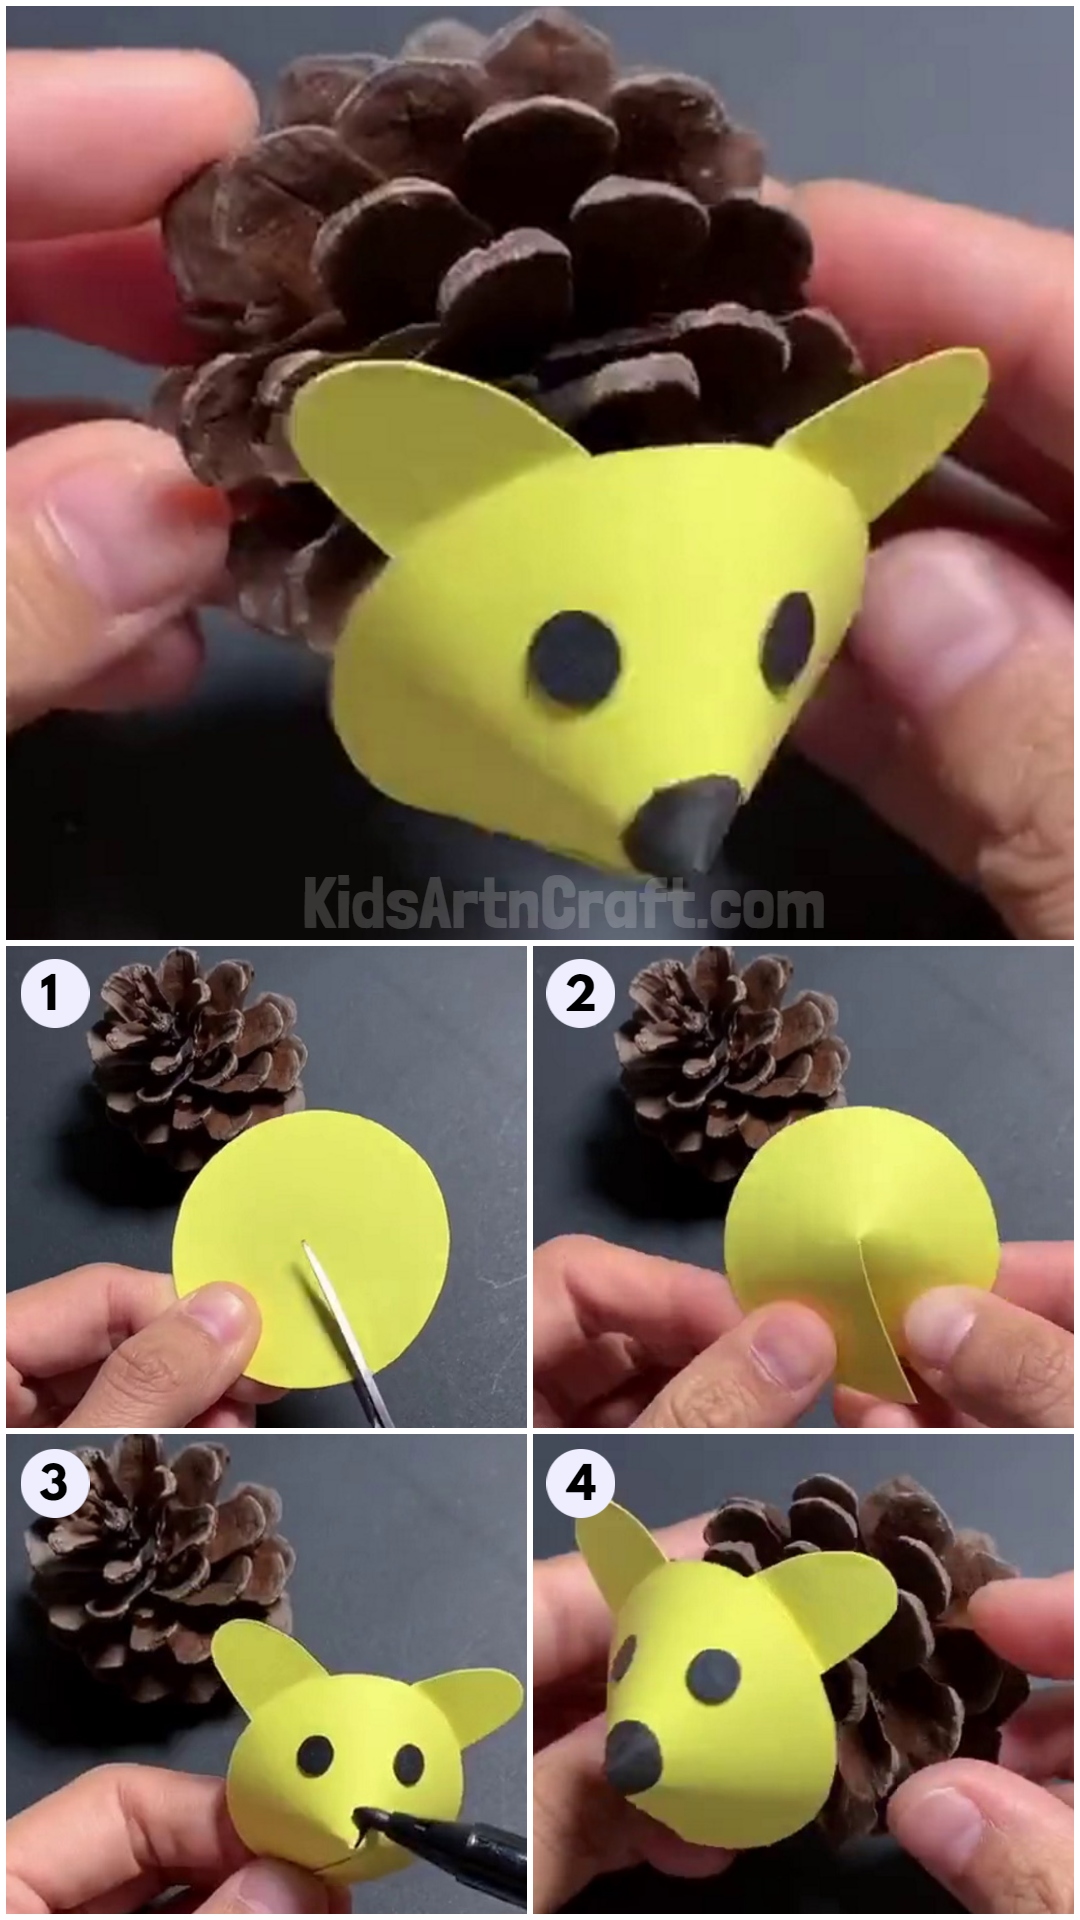
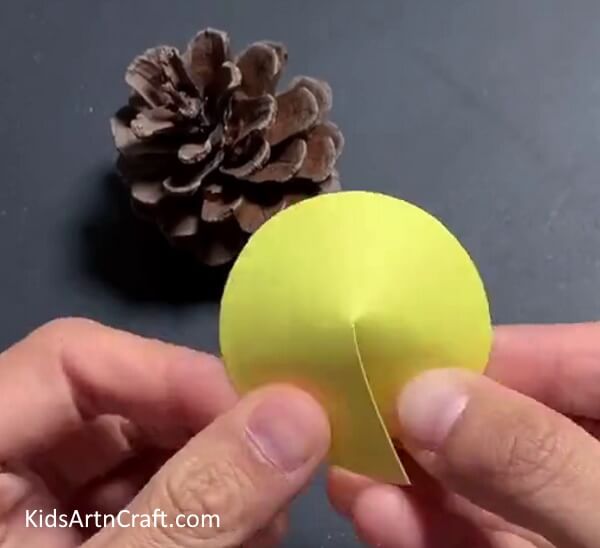
Step 1: Cutting A Yellow Circle
To make a pine cone mouse, first, cut a circle out of yellow paper to make the face of the mouse. Make a small cut from the edge to the middle of the circle.
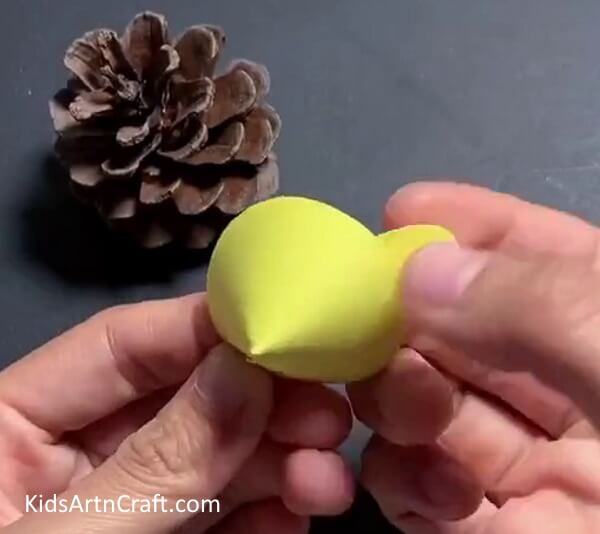
Step 2: Making Cone Out Of Circle
Now, overlap the edges of the circle and paste the edge on the back to form a cone shape.
Step 3: Making Ears Of Mouse
Once the cone shape is formed, cut an ear shape out of yellow paper and paste it on the back of the cone to make the ear of the mouse.
Step 4: Making Other Ear
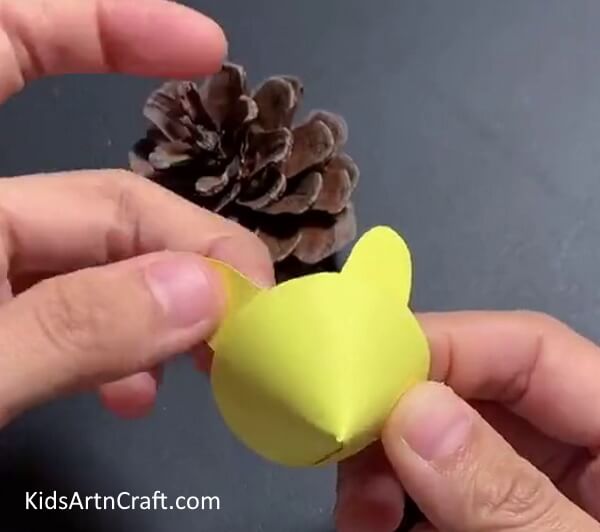
Same as the previous step, make the other ear of the mouse.
Step 5: Making Details Using Black Marker
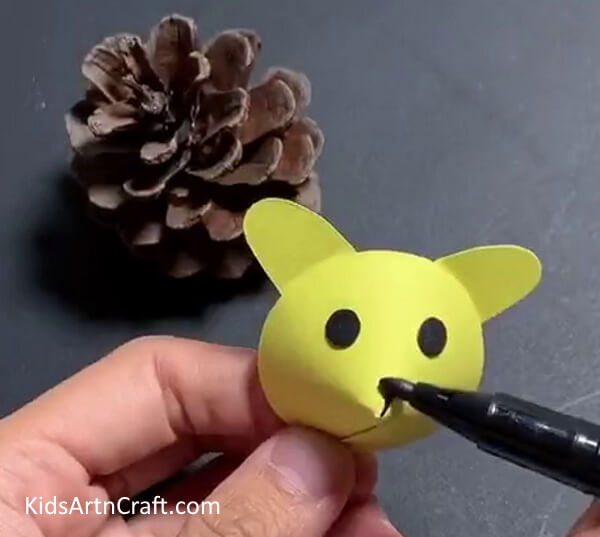
Now, using a black marker, draw the eyes and nose of the mouse.
Step 6: Making Face Of Mouse

Your mouth’s face should look like this.
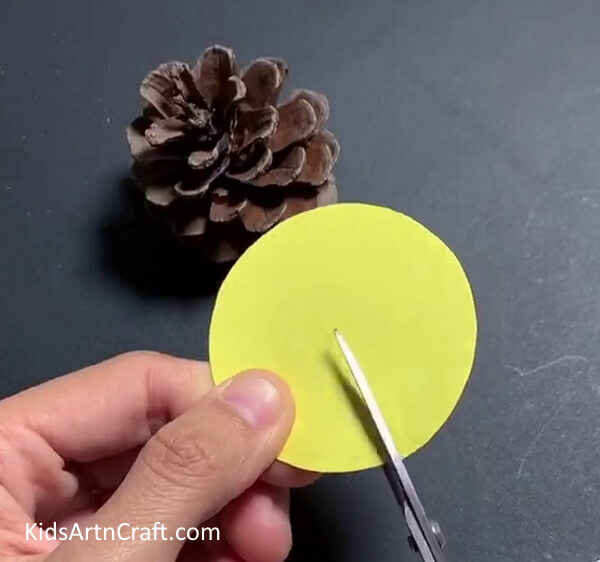
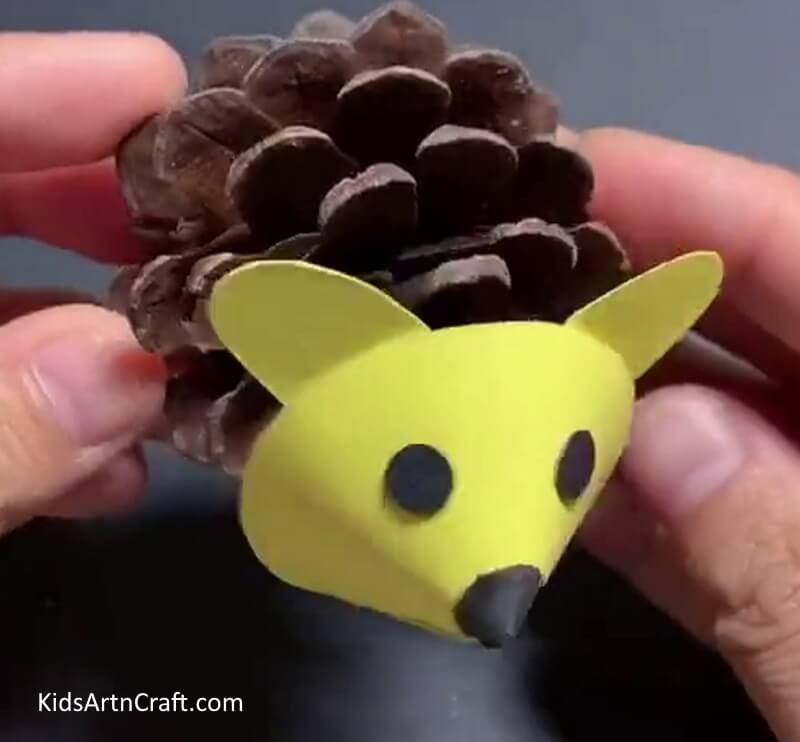
Step 7: Pasting Face On Pine Cone
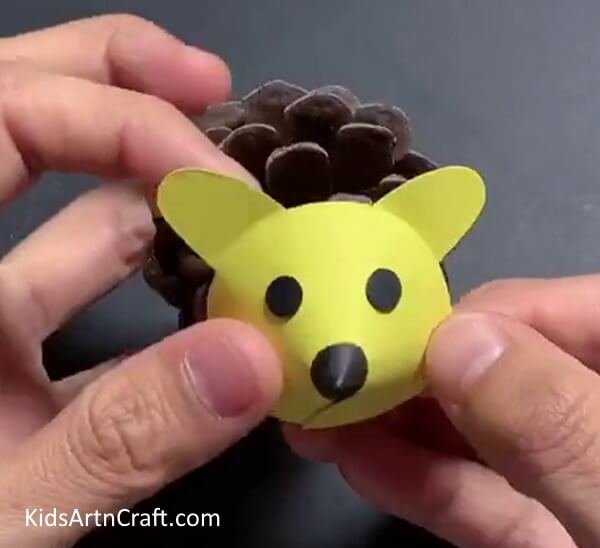
Finally, paste the face of the mouth on the pinecone using glue to complete your craft.
Final Image – Pinecone Mouse Craft Is Done!
Congratulations, your Pinecone Mouse Craft is now finished! This pinecone mouse craft is a fun and creative way to get your kids involved in a craft activity. This Craft is a great way to spend time with your kids and have a unique piece of art they can proudly show off. What are you waiting for? Make your pinecone mouse today and have fun.
Some More Mouse Crafts Tutorial
Quick And Easy Mouse Animal Drawing For Kids

Image Source/Tutorial: Kids Art & Craft
This article provides an easy step-by-step guide to drawing a mouse for kids. With simple shapes and lines, children can create a fun and cute mouse drawing. It is a great way to introduce kids to drawing and help them develop their creativity.
FAQs Related To How To Make Pine Cone Mouse For Kids
1. What materials do I need to make a pine cone mouse?
You will need a pine cone, some felt, googly eyes, a small piece of wire, fabric scraps, scissors, glue, and a black marker.
2. How do I begin to make the mouse?
Start by cutting two ears out of felt and gluing them to the top of the pine cone. Then, cut two small circles out of felt for the eyes and glue the googly eyes to the circles.
3. What size pine cone should I use?
You can use any size pine cone you’d like, but make sure it is wide enough to glue ears onto.
4. How do I attach the tail to the pine cone?
Wrap the wire around the end of the pine cone and secure it with glue.
5. What do I use for the whiskers?
You can use a black marker to draw the whiskers onto the mouse.
6. How do I finish the mouse?
Once all of the pieces are glued onto the pine cone, you can use a black marker to draw the details of the face.
Making a pine cone mouse is a fun and easy craft for kids and adults alike. With a few simple supplies, you can create a cute little mouse that can be used as a decoration or as a toy.
Follow us on Youtube for art and craft tutorials and much more.
More Articles from Kids Art & Craft
- Easy Paper Crafts Video Tutorial for Everyone
- Quick & Easy Paper Crafts Video Tutorial for Kids
- Easy Paper Craft Activities At Home Video Tutorial for All
- Super Easy Craft Activities Video Tutorial At Home
- Easy Paper Crafts DIY Video Tutorial for All


