Painting
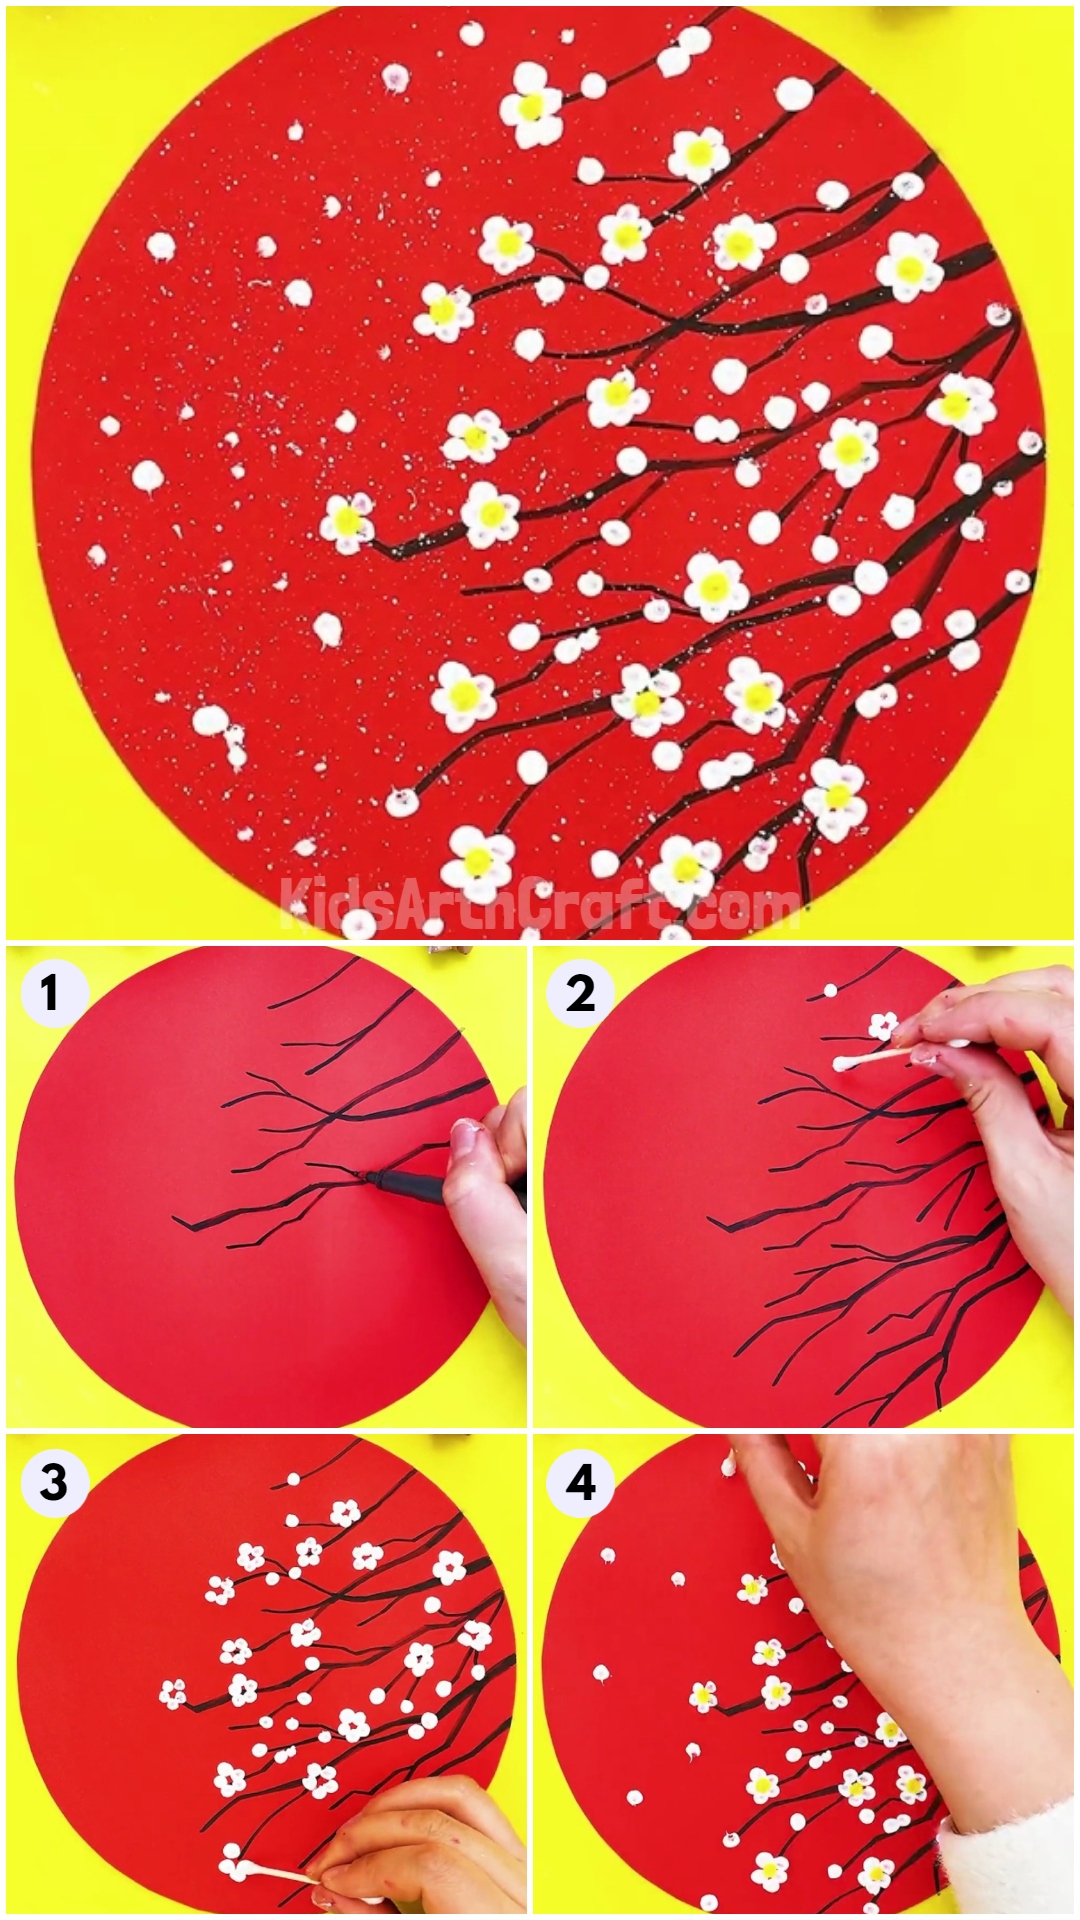
White Cherry Blossom Flowers Painting Using Cotton Buds

Create a beautiful landscape painting using cotton buds. Learn how to use cotton buds to add delicate details to your artwork and make a stunning painting.
Are you stunned by this piece of artwork?! I know you are, and what if I say you can create it too?!!!! This artwork is beginner friendly, which means if you are new to art you can still make it like a pro! This step-by-step tutorial includes very basic and easy steps and supplies which will help you to make this artwork in no time! You will only need a cotton earbud to make those pretty white cherry blossom flowers! And, do you know? Cherry blossom symbolizes purity and simplicity, so you can either decorate this artwork in your room or you can also gift it to someone! They will definitely love the idea behind it!
Simple White Cherry Blossom Flower Painting

Read More: How To Make Easy Fall Tree Craft From Leaves
Materials Required
- Red-color Circular Paper Sheet
- White And Yellow Paint
- Black Marker
- Broad Paintbrush
- Cotton Earbud
Procedure
Step 1: Drawing Tree Branches

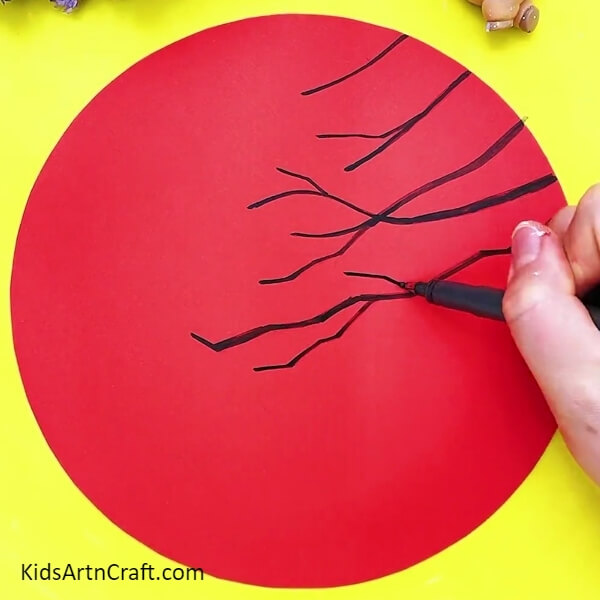
To begin this artwork, take a red-colored circular paper sheet and a black marker. Using the marker draw irregular tree branches from the right side of the paper sheet.
Step 2: Completing Drawing Branches

Cover the whole right side of the circle by drawing branches all over. Make sure to keep them a little thick from the start to give them a realistic look.
Step 3: Making White Cherry Blossom
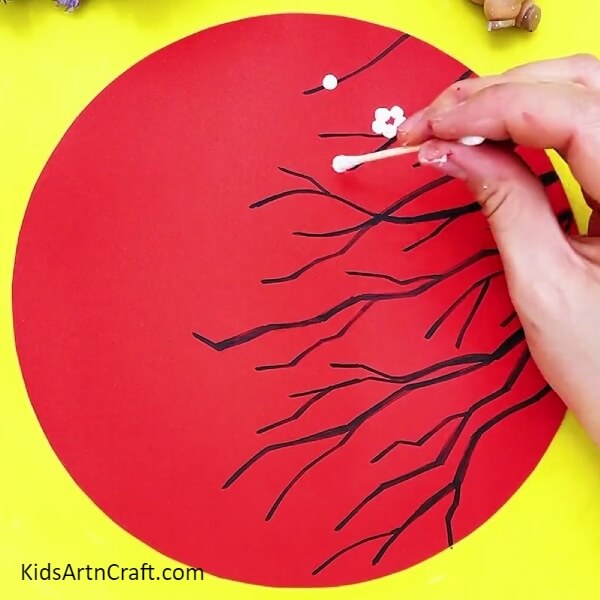
Dip a cotton earbud into white paint and dab it over the drawn branches individually and in a closed circle to form a flower.
Step 4: Completing Making The Cherry Blossom
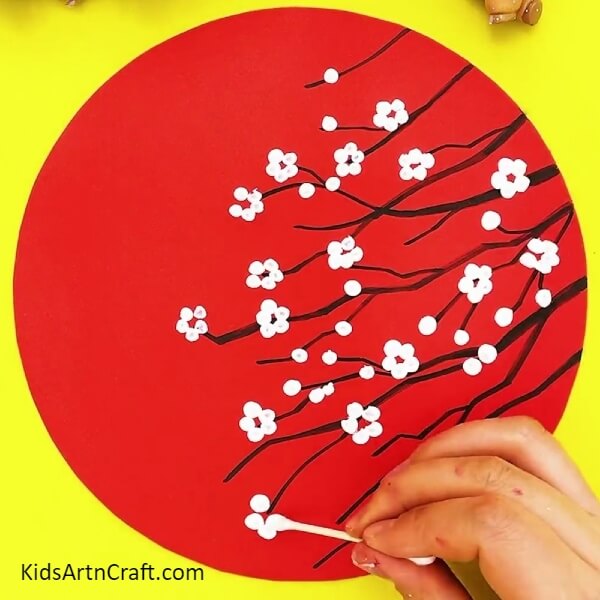
Cover the whole branches with random cherry blossoms with dots individually and with flowers too.
Step 5: Making The Center Of The Flowers
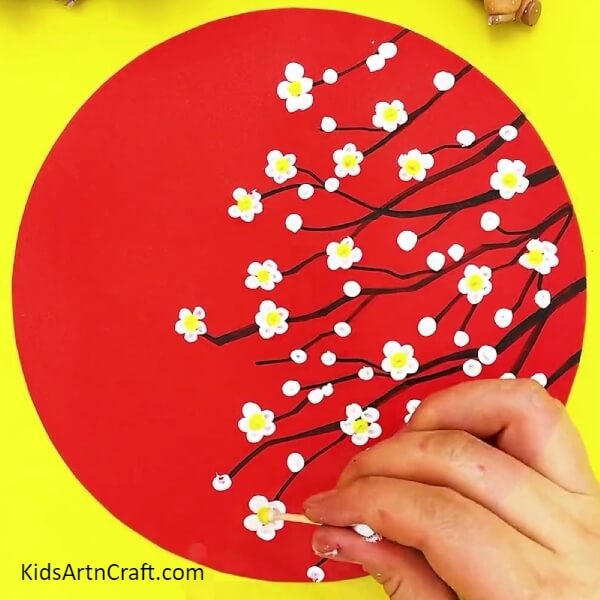
Dab the cotton earbud into yellow paint and make dots over the middle of the flowers to make their center.
Step 6: Making Some Scattered Cherry Blossom
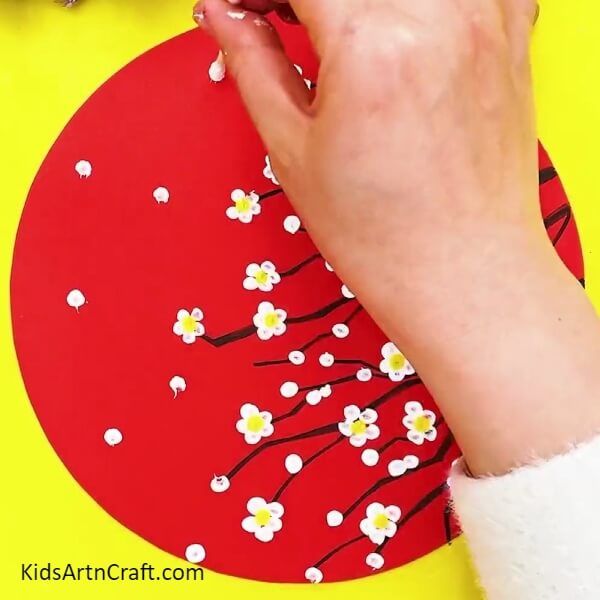
Dab the cotton bud again into white paint and make some scattered cherry blossoms in the sky by making dots over the red sheet.
Step 7: Sprinkling Some White Paint
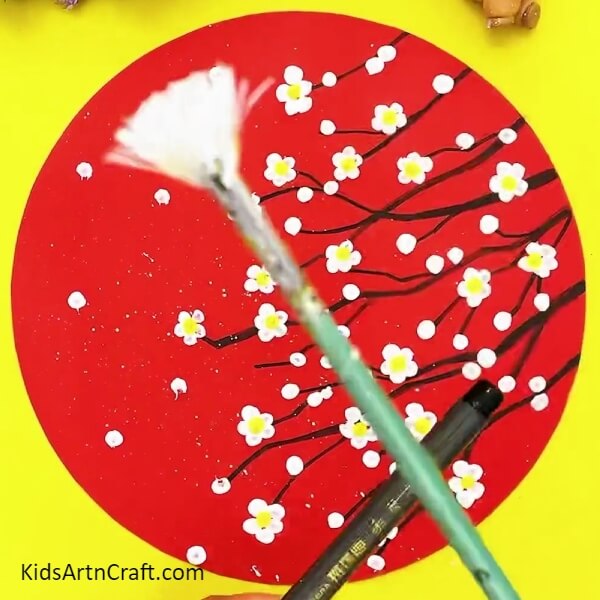
Dip a broad paintbrush into the white paint and sprinkle some white paint all over the painting by gently tipping the paintbrush over the marker.
The Final Look Of Your White Cherry Blossom Painting!
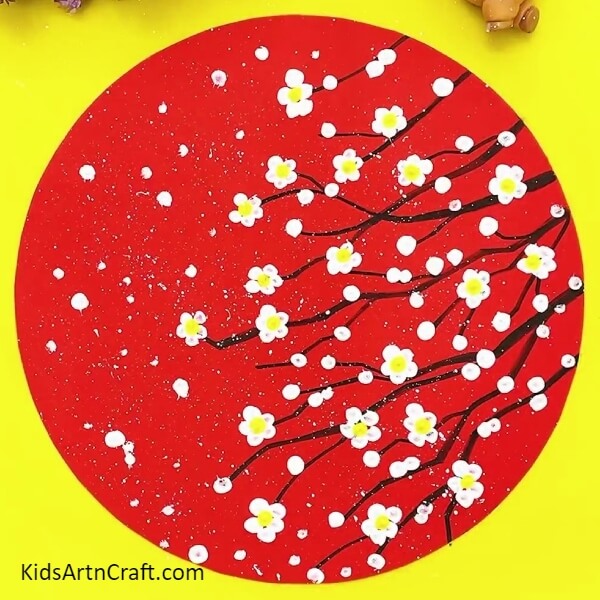
Whoa! Look at the astonishing results! The white flowers over the red background look stunning!
This painting was easy to make yet looked enormously beautiful and detailed! It looks as if it is made by an artist! Well, you are the little artist and this painting can be the first step for your future! Decorate your artwork up your wall to tighten any corner and wall! This painting definitely catches everyone’s eye as the white pretty flowers over the red background give it a contrasting effect!
Follow us on Youtube for art and craft tutorials and much more.
More Articles from Kids Art & Craft
- Clay watermelon ice cream easy craft tutorial
- Landscape Drawing Step by Step Tutorial for kids
- Colorful Dandelion Artwork Step-by-step Tutorial for Kindergartners
- Easy Chinese New Year Dragon Craft For Kids
- Beautiful Flower Vase Artwork Craft Step by Step Tutorial