Painting
Easy to Make Crane Bird Hand Print Art Tutorial For Kids

Looking for a fun art activity?! This step-by-step tutorial will guide you to make a crane bird while playing with paint hand impression!
Hello and welcome to the wonderful world of art and craft! Today, we brought you a step-by-step tutorial for making this crane bird using your handprint impression! Handprint will make this artwork easier, as this gives you a readymade base for your crane bird! This art is a perfect example of “Work smart, not hard”! This tutorial is a great way to engage your kids in an art activity and get creative with playing with paints! This artwork is full of creativity, innovation, and sensory activity that will drive your motor skills! Grab your art supplies and let’s begin to make something amazing and unique!
DIY Crane Bird Hand Print Art Idea For Kids


Read More: Awesome Canvas Painting Video Tutorial for Beginners
Materials Required
- White Circular Paper Sheet
- Red And Black Paint Colors
- White Clay
- Black Marker
- Thin Rounded Paintbrush
Procedure
Step 1: Making The Base And Body Of The Crane
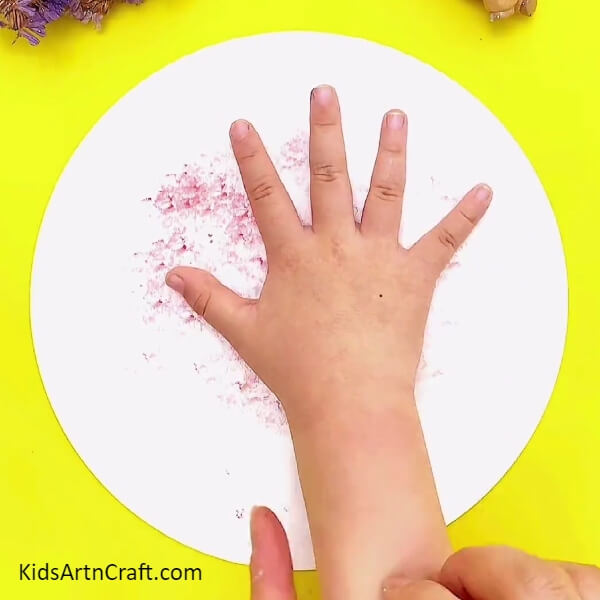

To begin this artwork, take a white circular paper sheet as the base of the artwork and red paint. Make the texture over your base by dipping your fingers into red paint just a little and speed it over your palm, you will see just some of the paint is left over your palm, then impress it randomly over the white base 2-3 times to create the blurry texture.
Again, paint your palm with the red paint using the rounded paintbrush wholely and impress the palm in the center of the base properly to make. This will be the body of your crane.
Step 2: Adding A Beak To The Crane
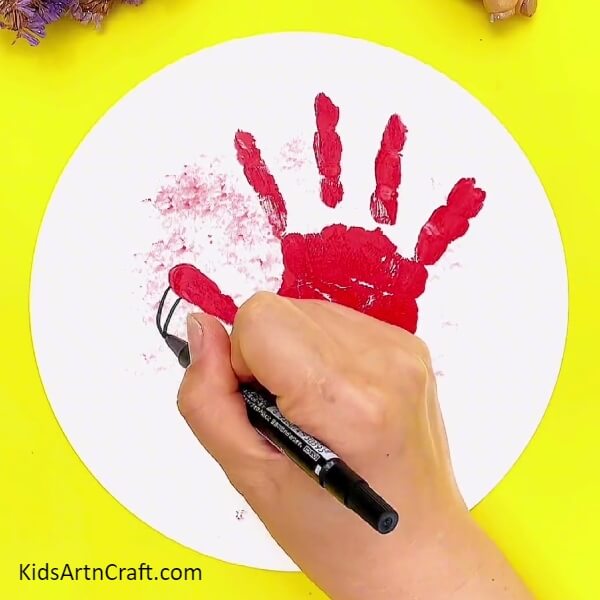
Using a black marker, draw a curved beak on the side of your thumbprint and make a curved line in between the beak along the beak outline from the tip of it.
Step 3: Making Eye Of The Crane
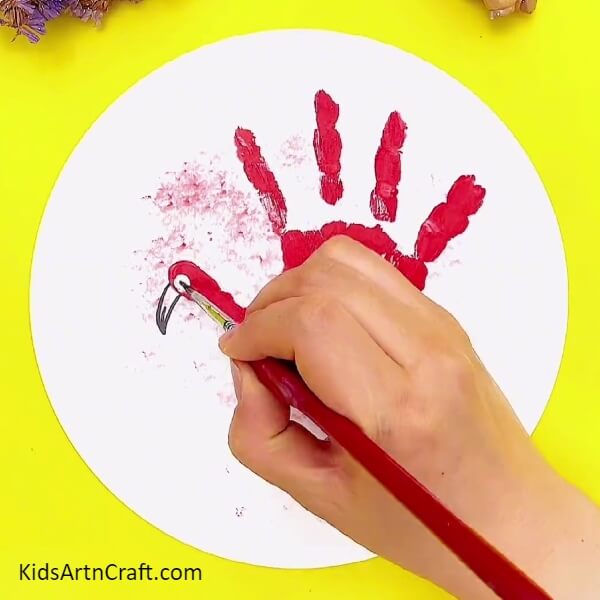
Take a piece of white clay and make a small round ball of it. Place the ball on the thumbprint beside the beak and press it to flatten it into a circle, this will make the eye of your crane. Using a thin rounded paintbrush, make a small black paint dot in the center of the eye to make the eyeball in it.
Step 4: Making Legs Of The Crane

Using the black marker, draw a straight line beneath the crane, and beside it, draw an ‘L’ shaped line to make the legs of the crane. Now, for the paws, make 3 lines at the end of them in the classic way.
Your Crane Artwork Is Finally Ready!
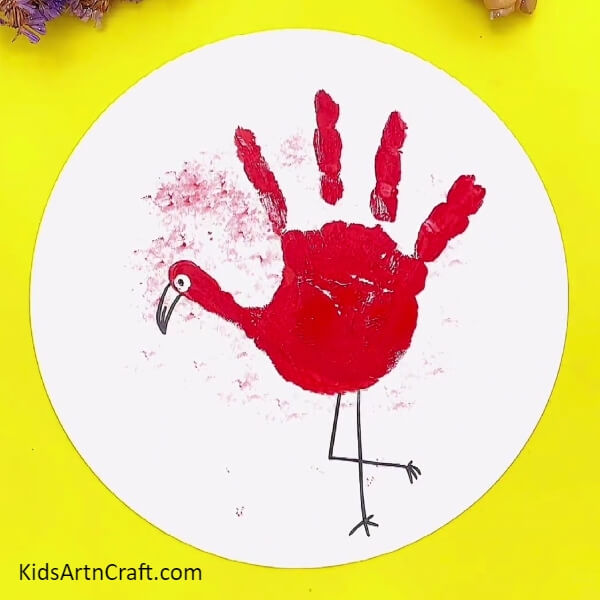
Congratulations! You’re done with your crane bird! Isn’t it quick and easy!?
This craft is a perfect way to teach your kids about crane birds! You can also customize the color of your crane bird by using various color paints and can also add textures to it to make it more realistic! Use your creativity to make it as unique as you are! Show it off to your friends and family and let them admire your fabulous creation! Decorate this artwork in your room to let everyone see it who passes by! Give it a try to flaunt your art skills and creativity!
Follow us on Youtube for art and craft tutorials and much more.
More Articles from Kids Art & Craft
- Realistic Tree Landscape Stamp Painting Using Fruit foam
- Bubble Wrap Printed Pomegranate Craft For Kids
- Easy Paper Snail Craft Tutorial For Kids
- How to Make Ladybug Crafts Tutorial for Kids
- Easy Bunny paper craft for kids