DIY and Crafts
Colorful Dandelion Artwork Step-by-step Tutorial for Kindergartners

This step-by-step tutorial will teach kindergartners how to create beautiful and colorful dandelion artwork. Learn how to make this lovely craft with easy-to-follow instructions and simple supplies.
Dandelions are the most fun plant to play with. Just a single blow of air will make the seeds fly around. In this tutorial, we will be making one through art and drawing. It is extremely simple to make and requires basic artistic skills. Collect all the material and let’s get started.
DIY Colorful Dandelion Artwork For Kids

Read More: DIY Crane Bird Artwork Step-by-Step Tutorial for Kids
Materials Required
- A White Sheet Of Paper
- A Black Sketch Pen
- Paint In Five Different Colors
- A Pair Of Scissors
Procedure
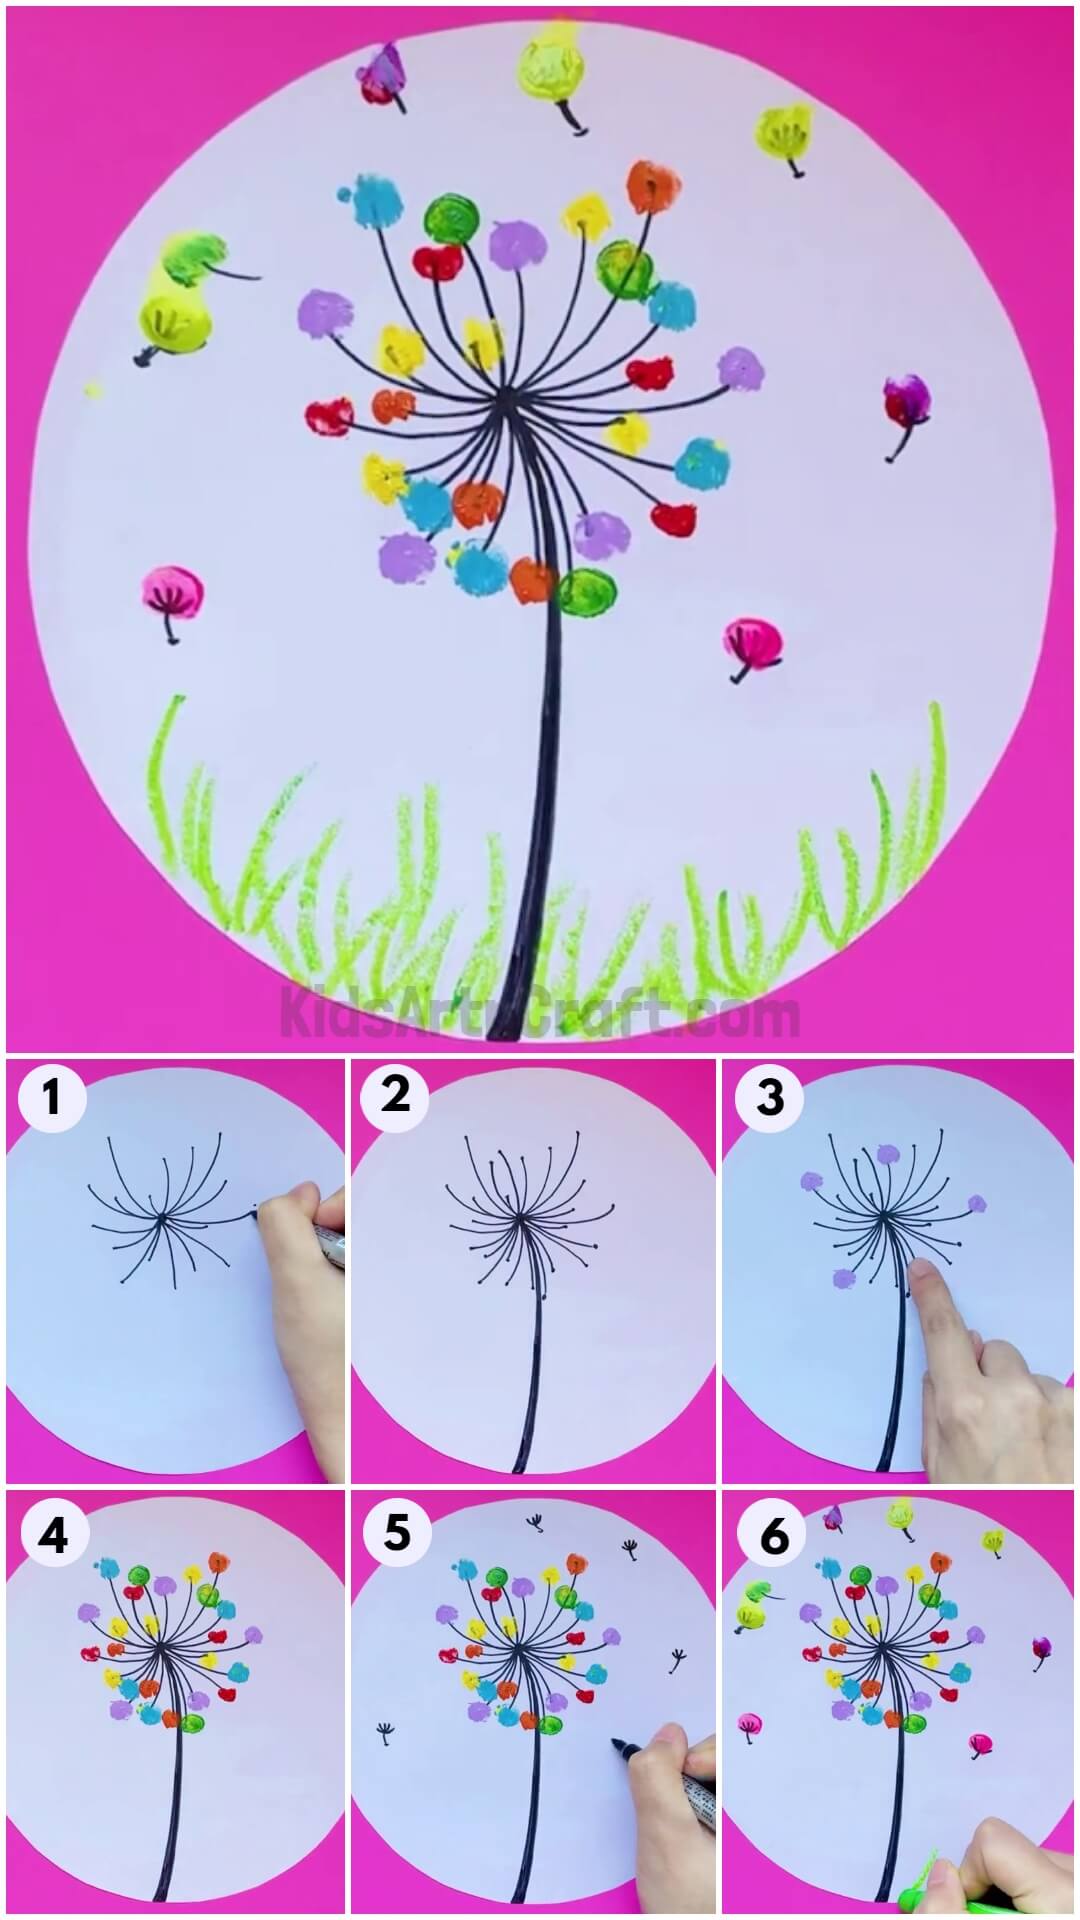
Step 1: Cutting a Sheet Of Paper

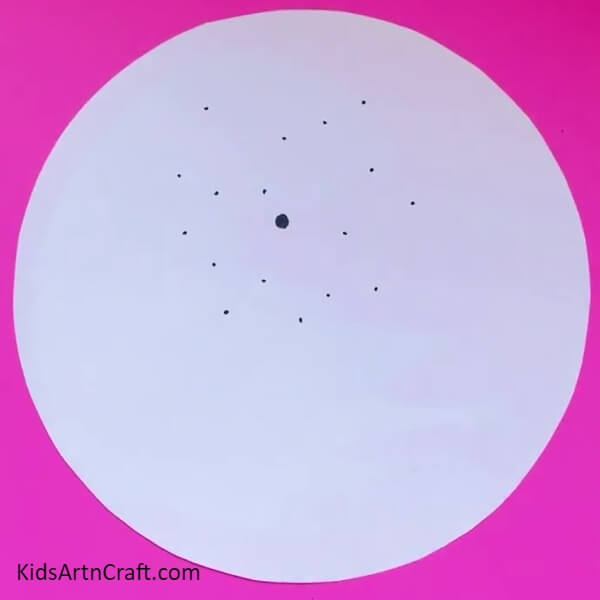
Take a white sheet of paper and cut it into a big circle. Now, take a black sketch pen and make a big dot at some distance above the center of the sheet. Make smaller dots around the sides of the big dot as shown in the picture below.
Step 2: Connect The Dots
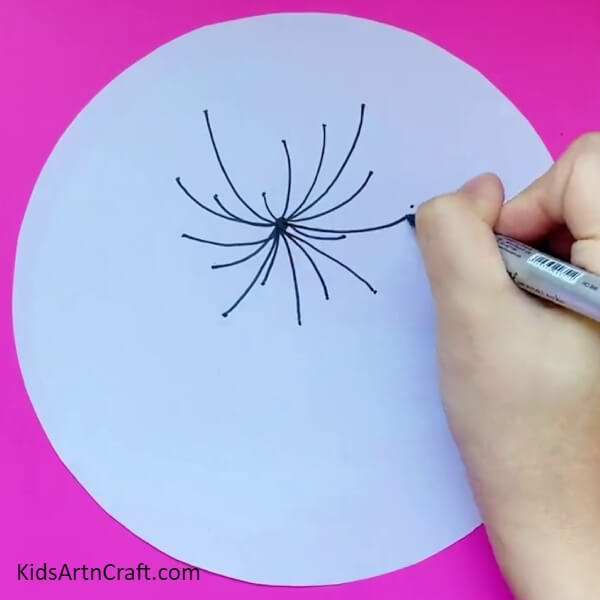
Connect all these dots starting from the big dot in the middle to the small dots around it. The dots should be connected in curved lines making the shape drawn in the picture below.
Step 3: Making The Stem
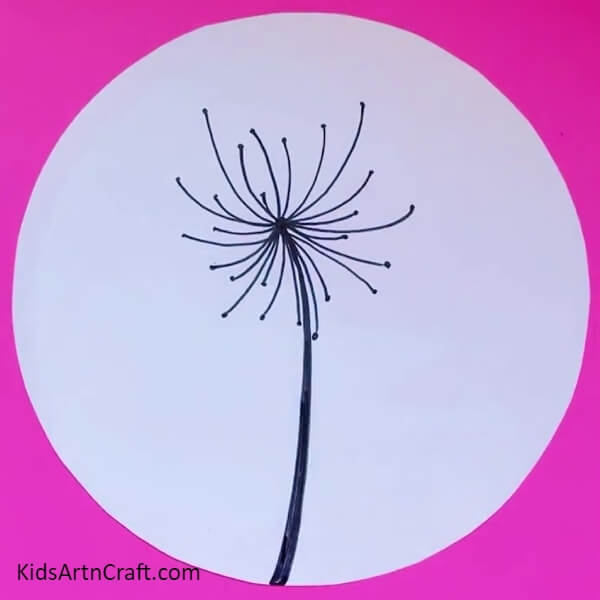
Make slight dots at the ends of these curved lines. Make a slightly curved line at the bottom of the big dot in the middle connecting the dot with the bottom end of the sheet. Outline it twice to make it thick and prominent.
Step 4: Painting The Fingers
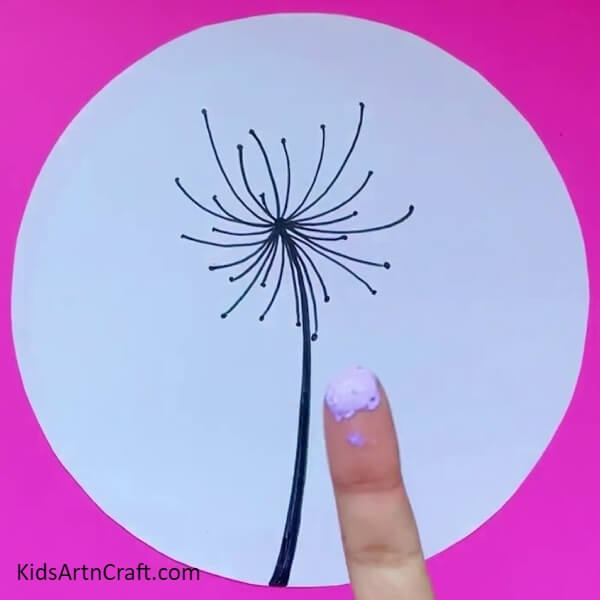
Take some lavender paint and dip your index finger in it. Don’t forget to have some fun with it.
Step 5: Stamping The Lines
Stamp five of the ends of these curved lines with your painted finger as shown in the picture below.
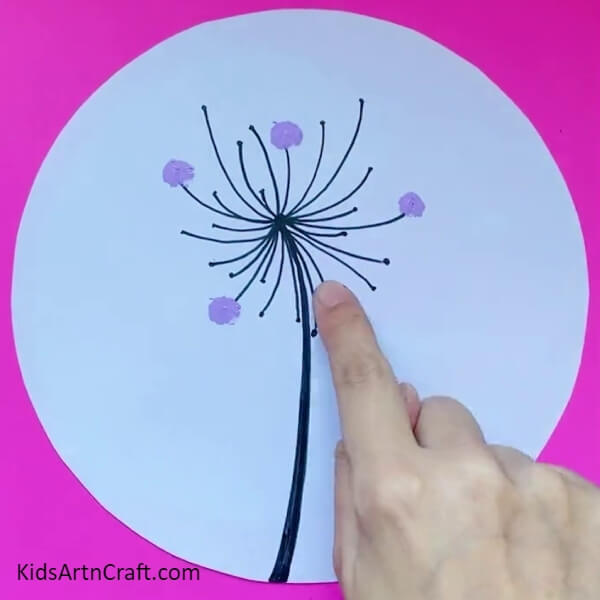
Step 6: Painting All The Ends
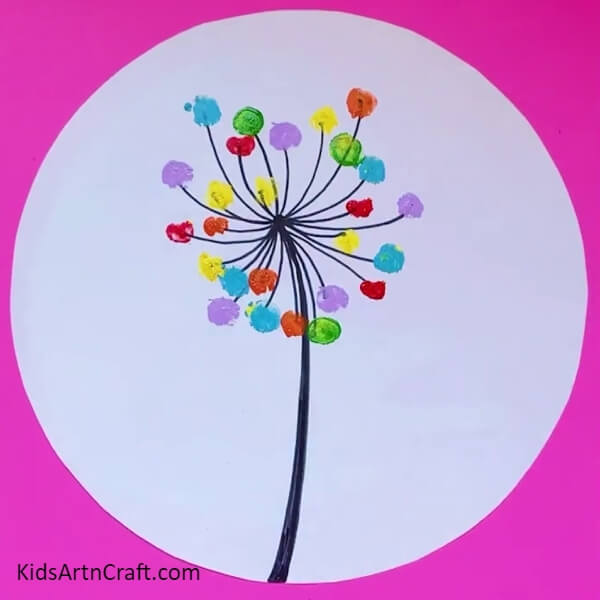
Take some green paint and stamp the ends of three curved lines similarly. Five of the curved lines with yellow paint, four with red, three with green, and four with orange paint. See the picture below for reference.
Step 7: Make Some Of The Seeds Fly
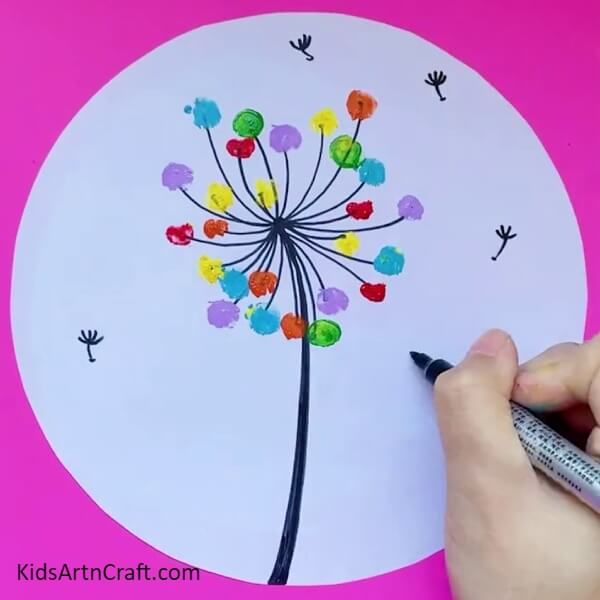
Draw a small line near the circumference of the circle and make four smaller lines at the top of this small line with a connected base and join the base with the line below. See the picture below for reference. This is going to act as the flying seeds around the dandelion.
Step 8: Making More Seeds
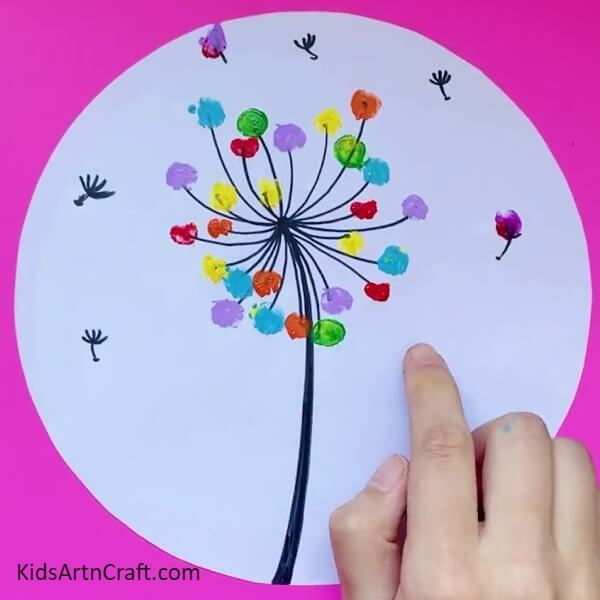
Make eight more seeds in a similar fashion near the circumference of the circular sheet.
Step 9: Painting The Seeds
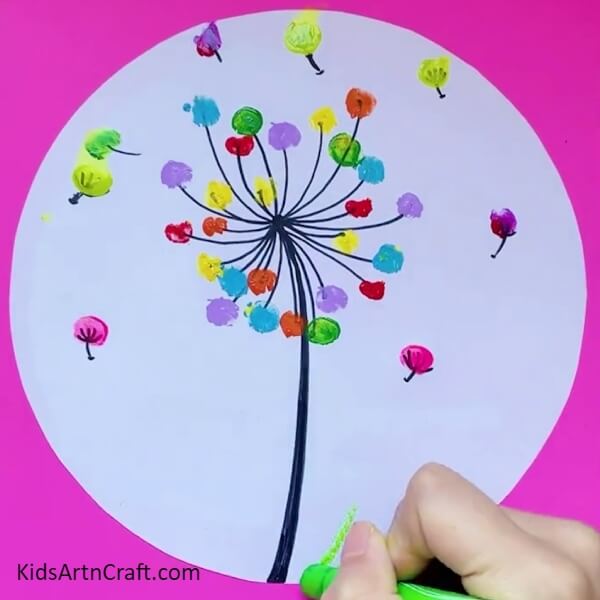
Paint these seeds with your fingers using different colors as shown in the image below.
Finally, Your Dandelion Artwork is Ready!!
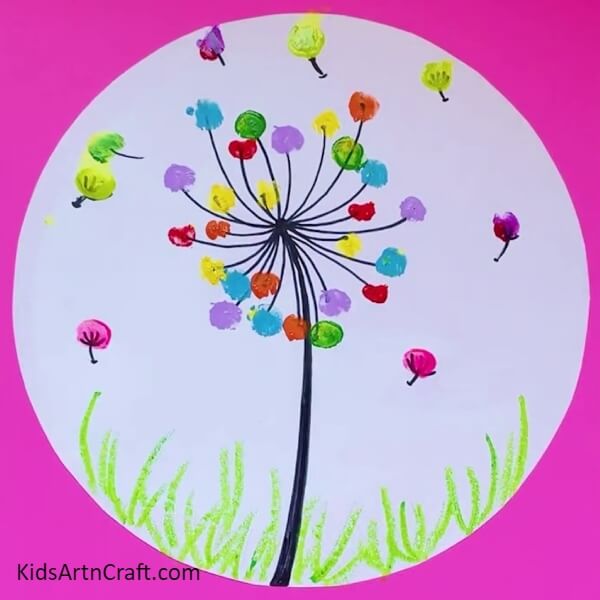
Take a green crayon and start making lines at the bottom circumference of the round sheet, resembling grass. This completes the dandelion art with all its seeds and stems.
The dandelion art we just made has colorful seeds which is an improvisation you made through art. This made the art stand out and more beautiful and colorful than the original. You can hang it on the walls of your home or paste it into your art book. You learned to paint with your fingers and draw using the technique of connecting dots through lines. Use these techniques in other forms of art taking inspiration from your surroundings like we did in this tutorial. It is suitable for kids starting on the journey of art and crafts like kindergarteners. Keep learning and keep practicing your art to reach perfection. Good luck.
Follow us on Youtube for art and craft tutorials and much more.
More Articles from Kids Art & Craft
- How to Make a Lion Using Flower Easy Craft For Kids
- Tissue Paper Flower Artwork For Kids
- Easy Flower Painted Rock Ideas For Kids
- Easy Craft Activities At Home Video Tutorial for Kids
- Clay watermelon ice cream easy craft tutorial