DIY and Crafts
How To Make Paper Cup Frog Puppet Craft Tutorial For Kids

Love puppet shows? If yes, then create a frog puppet on your own using paper cup with the help of this easy step-by-step tutorial!
Following this engaging and easy-to-follow tutorial will unleash your child’s creativity and imagination as they bring their frogs to life with colors and personalities. Perfect for rainy days, playtime, or imaginative storytelling. With some easily available material create this ‘Paper Cup Frog Puppet’ and let your little ones hop into the world of puppetry and enjoy the excitement of crafting their very own frog puppet!
Paper Cup Frog Puppet Crafts For Kids


Read More: How to Make Paper Cup Crab Craft for kids
Materials Required
- Green, Red & White Craft paper
- Plastic Straw
- Green paper cup
- Scissors
- Glue
- Black Pen
Procedure
Step 1: Gathering Materials And Cutouts
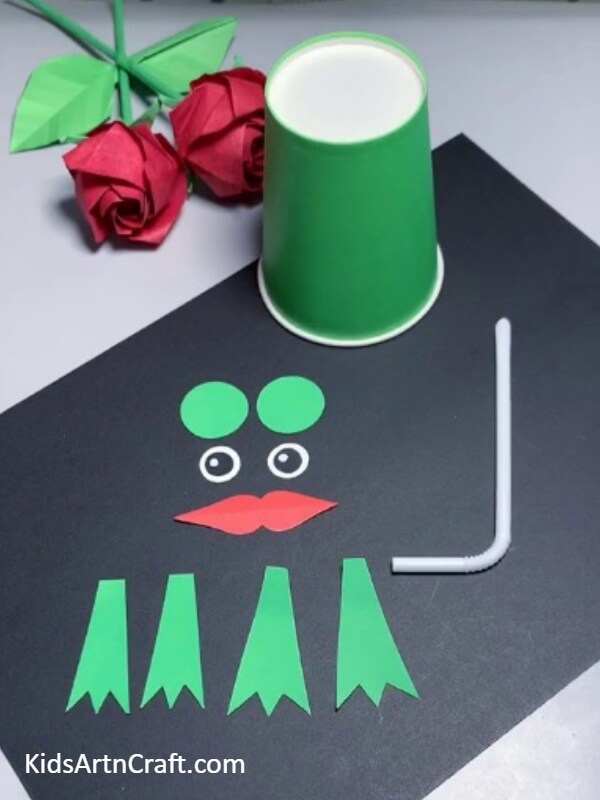

To begin this craft, from a green sheet of craft paper, cut out 4 feet and eyes of the frog. From a red sheet, cut out the shape of lips. Similarly, from a white sheet cut out two circles for its eyeballs. Now, Get a green paper cup and a plastic straw.
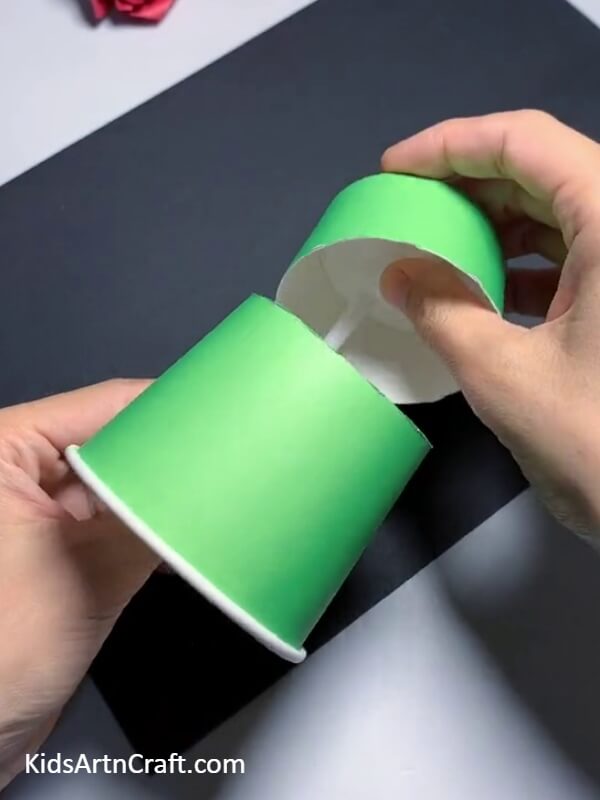
Step 2: Making Marking On The Paper Cup
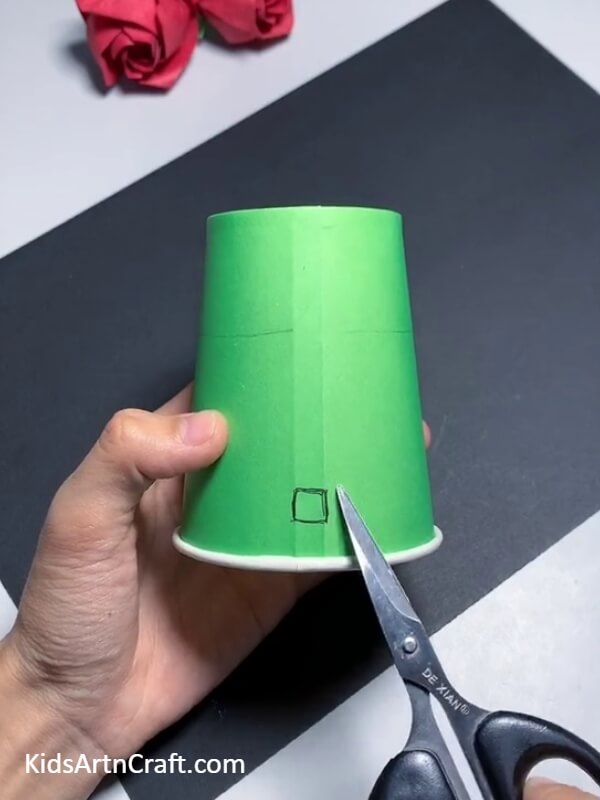
With a pencil, make 2 straight line over the cup, keep them close to make a strip and make a horizontal line around the cup a little over the half of the cup. Now, using the pen make a small square in the strip a little above the end.
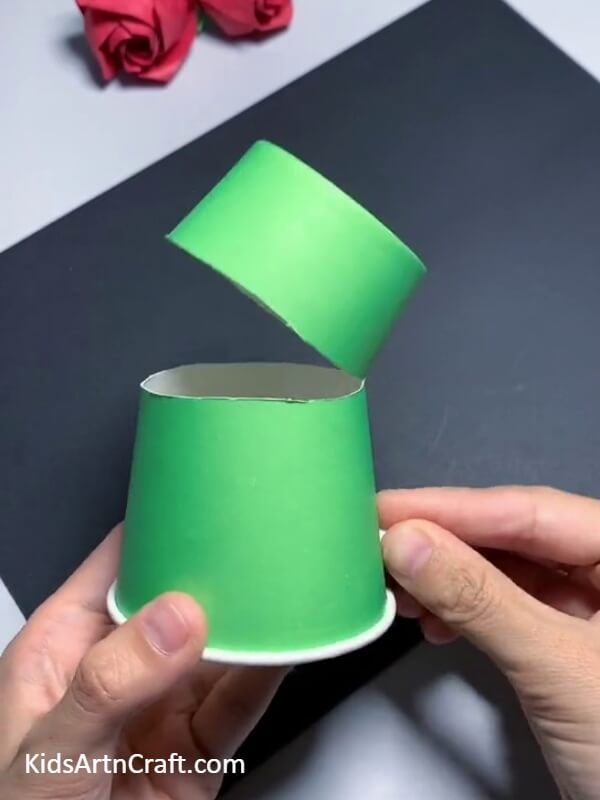
Step 3: Cutting The Markings
Using Scissors, cut out the small square and also the horizontal line but not from the strip.
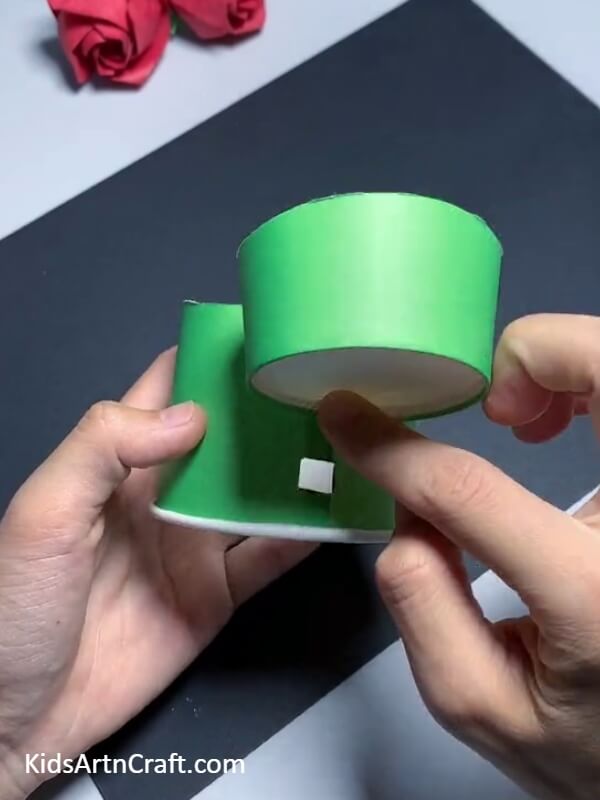
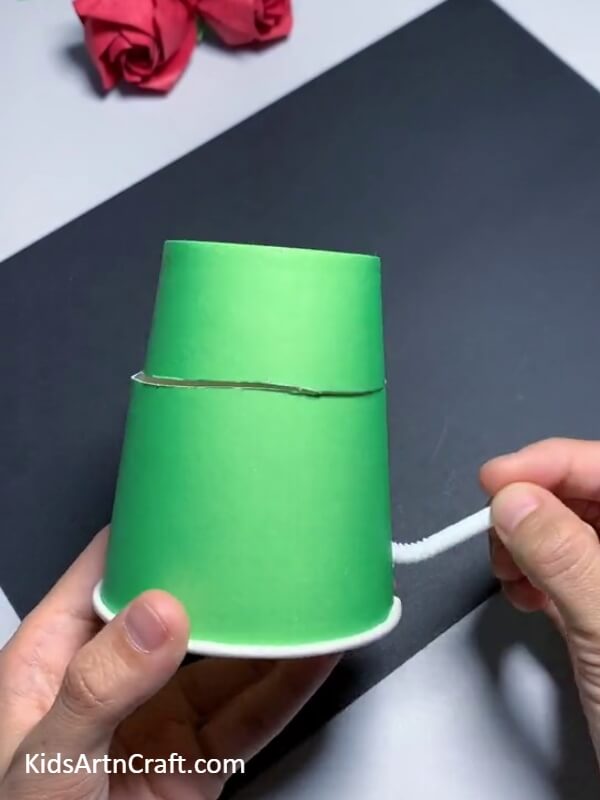
Step 4: Inserting A Straw
From the square-shaped hole that you cut before, insert the longer part of the straw.
Step 5: Pasting The Straw
Your straw should be reaching to the base of your paper cup. If it’s a long straw, you can cut it to fit in the cup. Paste that end of the straw into the cup surface using glue.
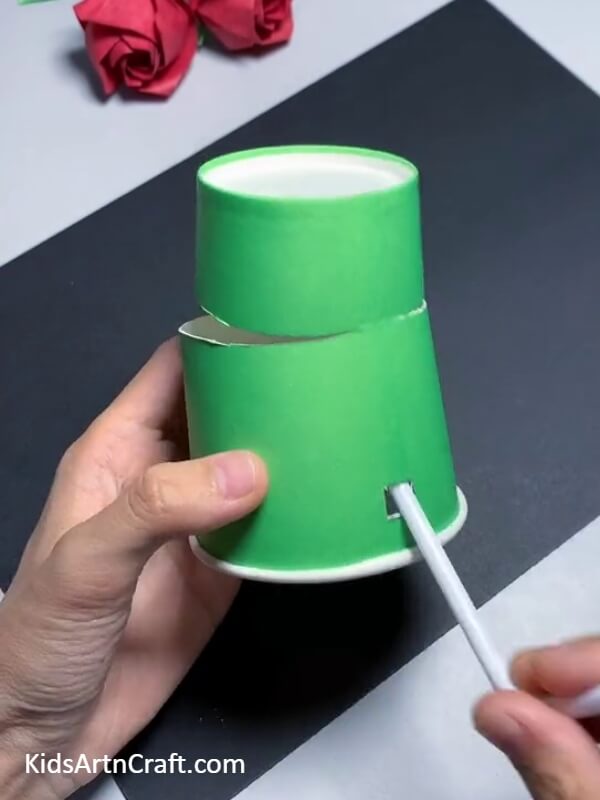
Step 6: Opening The Mouth
Push the lower part of the straw inside the cup and see how your frog opens its mouth!
Step 7: Closing The Mouth
Push the straw out again to close the mouth.
Step 8: Pasting The Eye Circles
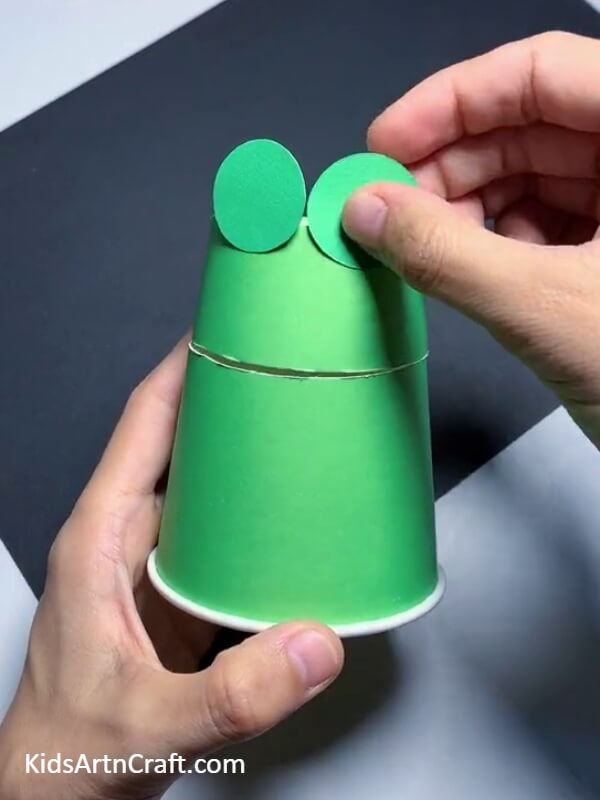
Paste the two green circles that you cut out before, to make eyes using glue above the cup and keep it more then half outwards.
Step 9: Pasting The Eyes
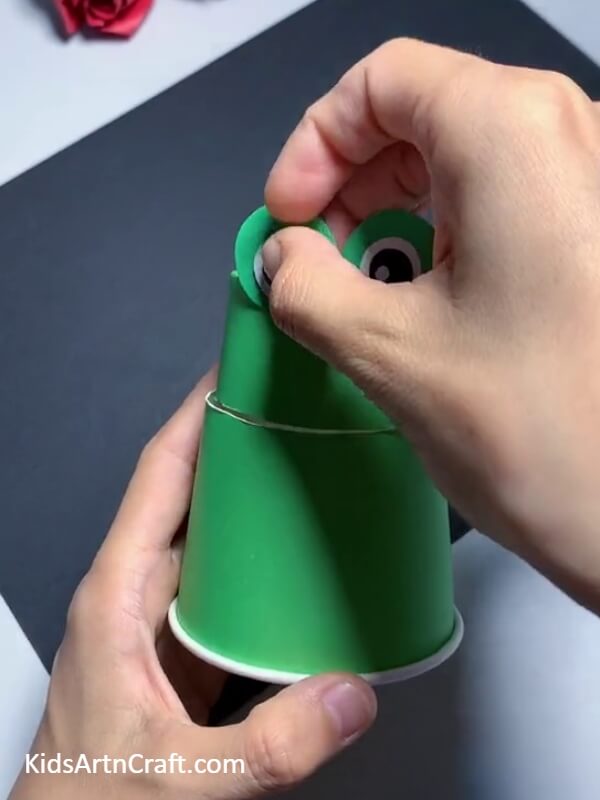
On the green circles, paste these two white circles using glue to add the eyes and voila! your frog can now see.
Step 10: Pasting The Upper Lip
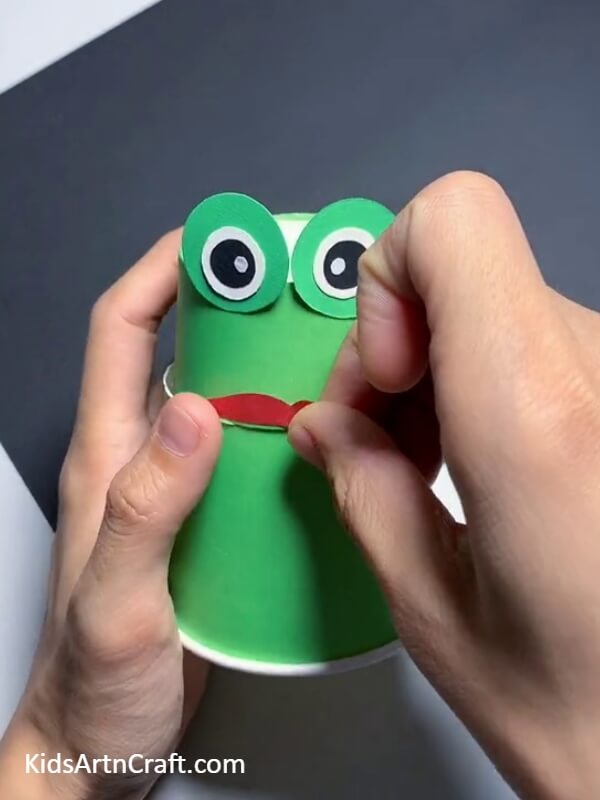
The lips that you made before, cut them in half and paste the the upper one to the upper half of the cup below and between the eyes using glue.
Step 11: Pasting The Lower The Lip
Paste the lower lip to the below half of the cup cut.
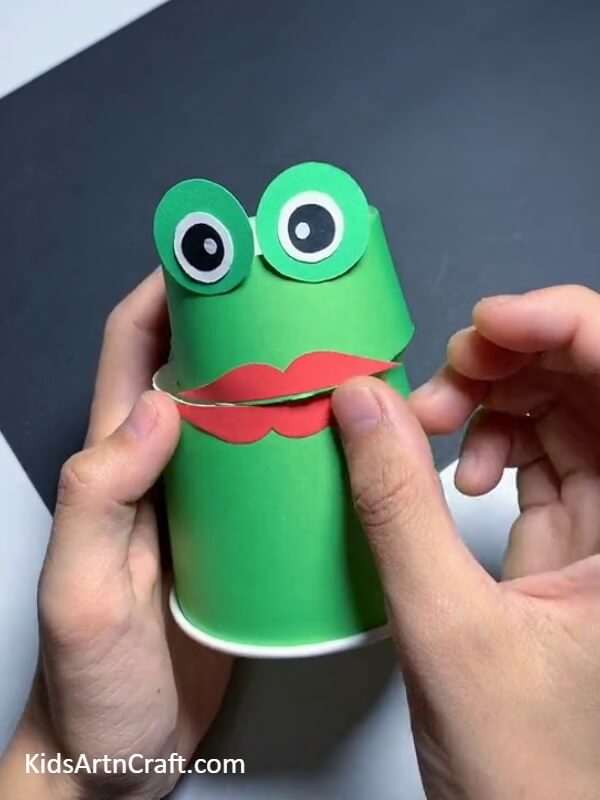
Step 12: Pasting The Front Legs
Paste the front legs of your frog using glue from below the frog as shown in the image.
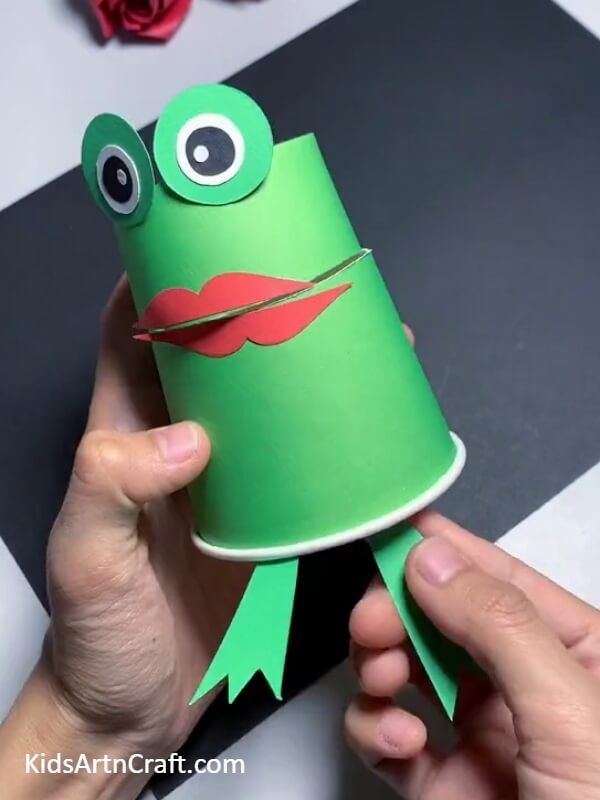
Step 13: Pasting The Hind Legs
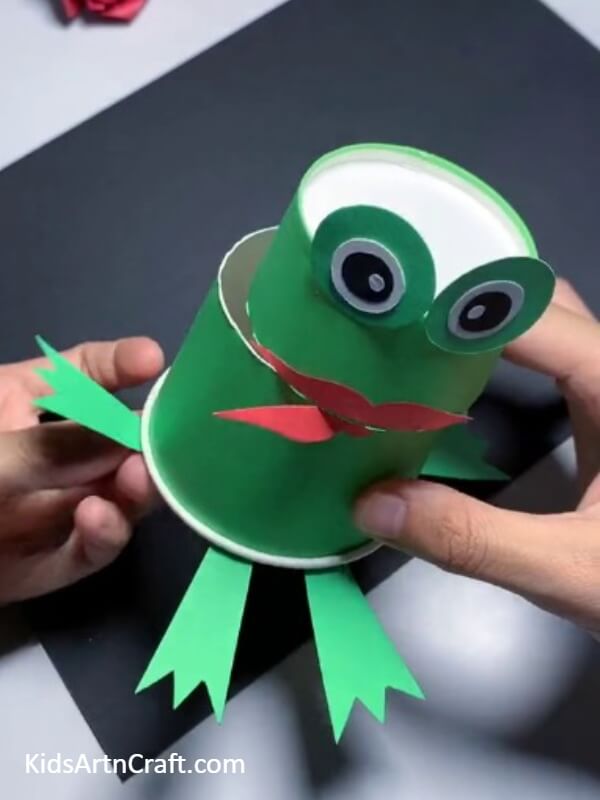
Using glue, give your frog hind legs too at the side of the cup.
Step 14: Letting The Glue Dry

Let the glue dry of your whole frog puppet and parts.
The Final Look Of Your Frog Puppet!

Congratulations! This completes your frog puppet! Move the straw to make it talk!
Hope you all had fun doing this project. this Paper Cup Frog Puppet Craft tutorial provides a fulfilling experience that will enrich children with precious memories. The joy of puppetry has come alive through this craft, providing endless opportunities for storytelling. Moreover, the tutorial has stimulated bonding between parents and children. The collective laughter and enthusiasm have enhanced the perception of togetherness.
Do try this activity at home with your little ones and, tell us what you think in the comment section below.
Thank you for reading. Visit again!
Follow us on Youtube for art and craft tutorials and much more.
More Articles from Kids Art & Craft
- How to Make Paper Cup Wrist Watch Tutorial for Kids
- DIY Easy Paper Cup Octopus Craft For Kids
- Easy Frog Puppet Toy Craft Using Paper Cup For Kids
- Easy to Make Doll with Yarn and Tissue Paper
- How to Make Handmade Straw Fan Tutorial for Kids