Clay Crafts
Heart Flower Bouquet Clay And Paper Craft For Kids

Make a special flower bouquet out of clay and paper with your kids! This simple activity will be so much fun and it will brighten up any room. Follow our directions to make a heart-shaped flower bouquet!
This unique tutorial mixes craft and painting together. We will be making a flower painting which actually is a bouquet craft. Not just any flowers but heart-shaped flowers bunched in a bouquet at the bottom. You will get to paint on cardboard sheets and work with clay molds as well. So, collect all the material required, and let’s start making this craft.
DIY Heart Flower Bouquet Clay And Paper Craft

Read More: Easy to make Clay Rose Bouquet Craft For Kids
Materials Required
- A sheet of cardboard
- Black sketch pen
- Red clay dough
- Tissue paper
- A black ribbon
- Double sides tape
Procedure
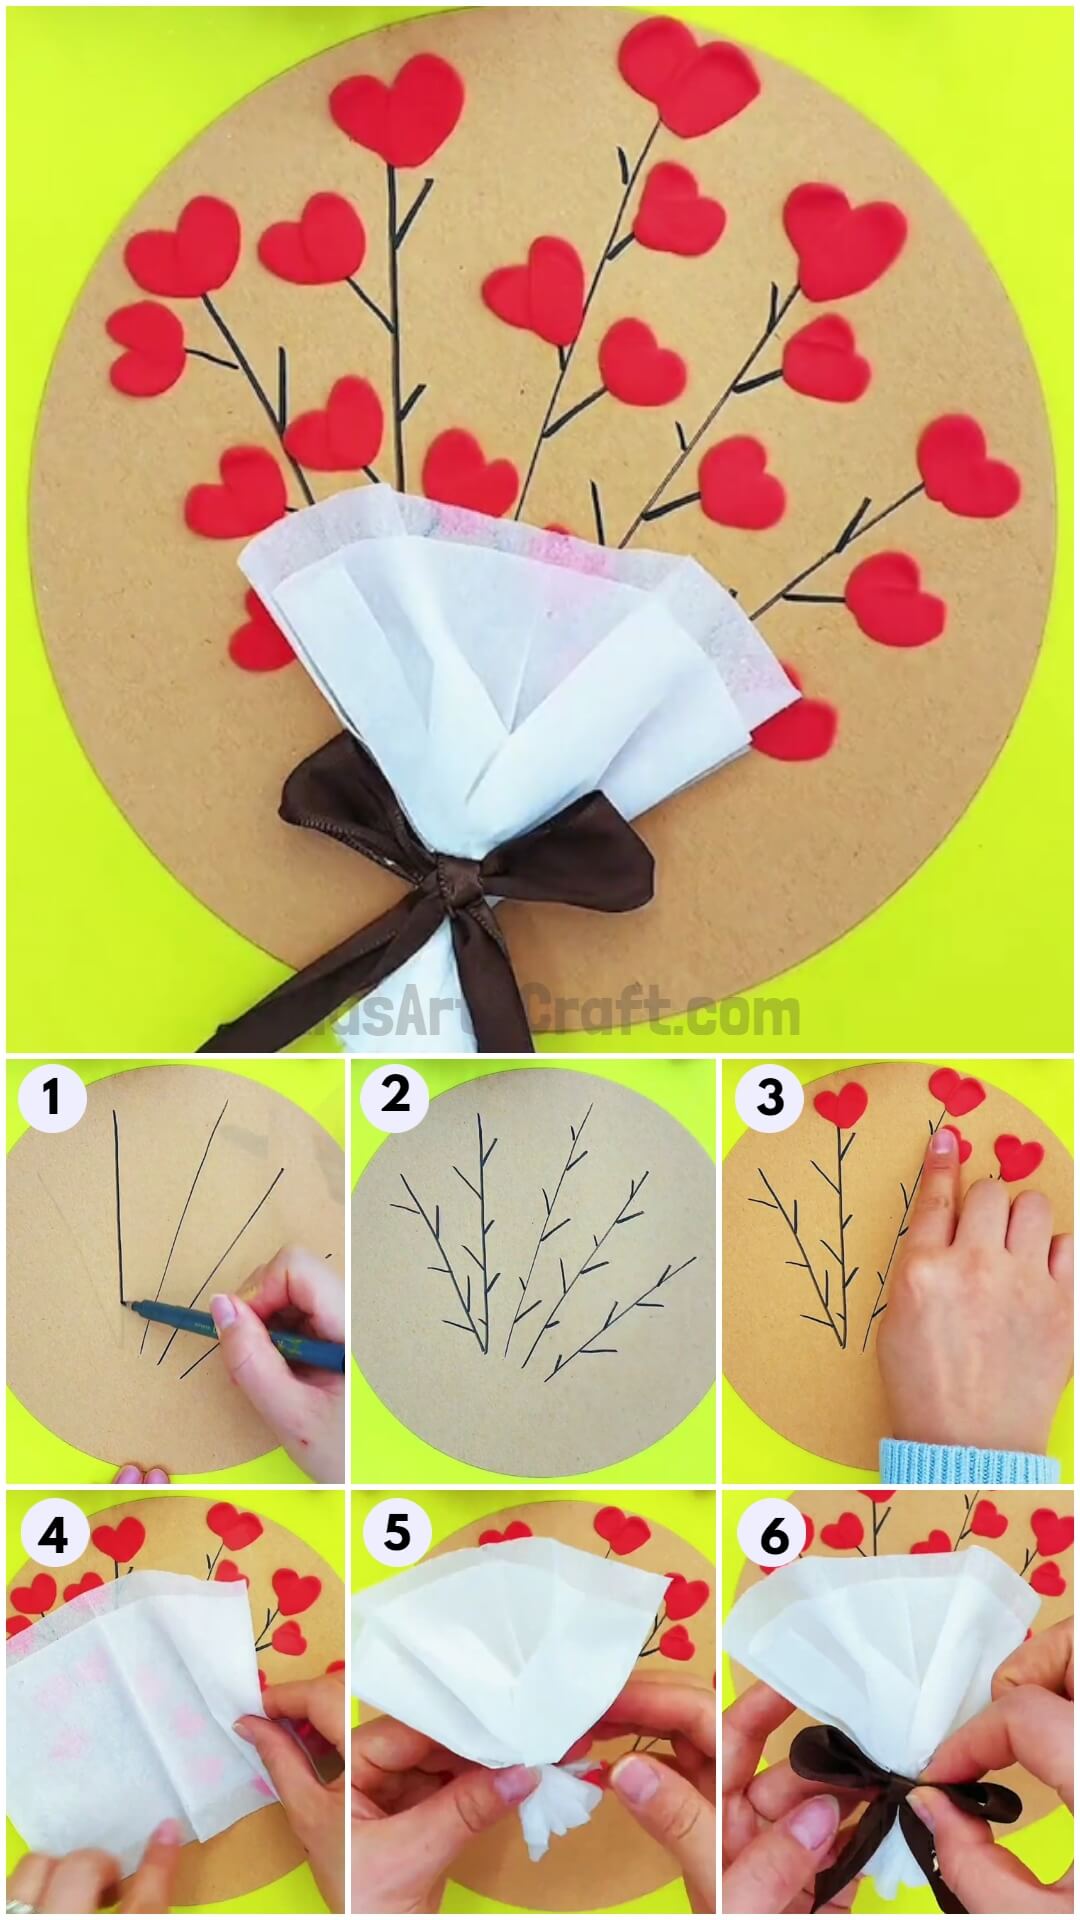
Step 1: Drawing On The Cardboard Sheet
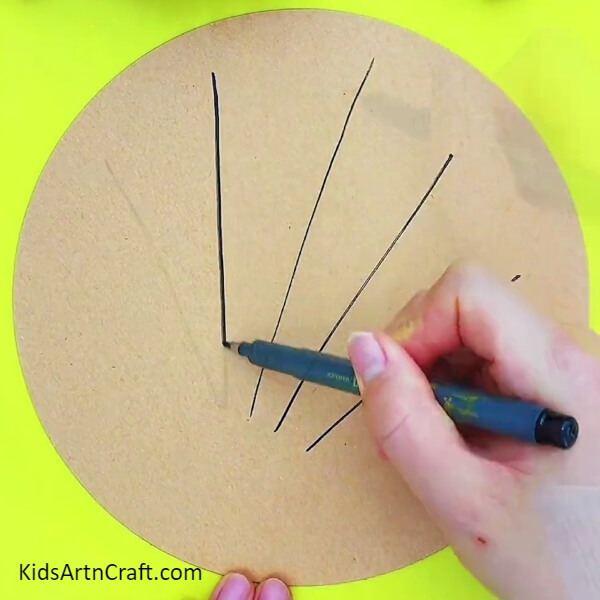

Take a cardboard sheet and cut a circle out of it. Now, using a black sketch pen, draw six lines throughout the middle section of the sheet. These lines should be slanted while aiming toward each other at the bottom. See the picture below for reference.
Step 2: Drawing Branches On The Lines
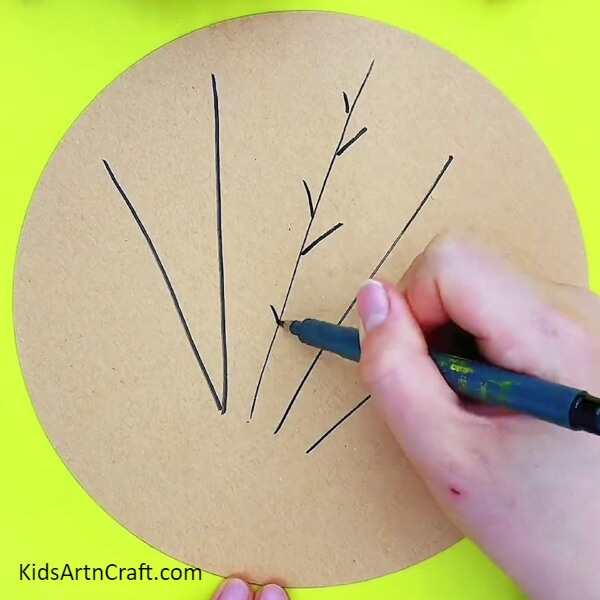
Draw smaller slanted lines as branches on the sides of the line in the middle as shown in the picture below.
Step 3: Drawing Branches On All The Lines
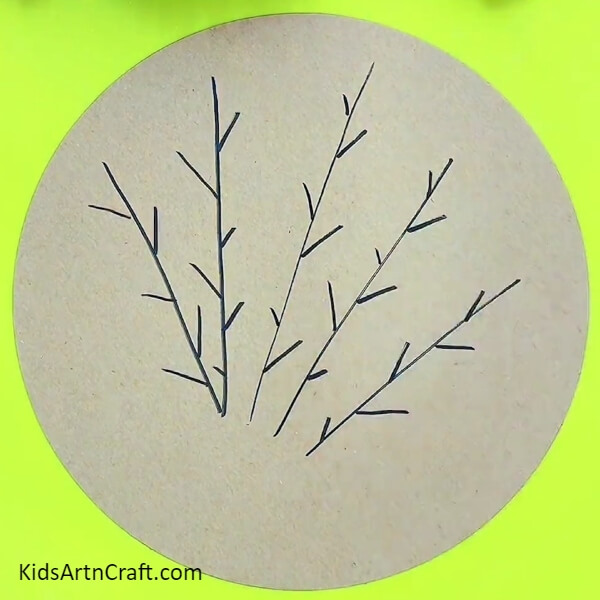
Repeat the process on all the lines making small branches connected to both sides. See the picture below for reference.
Step 4: Working With The Clay Mold
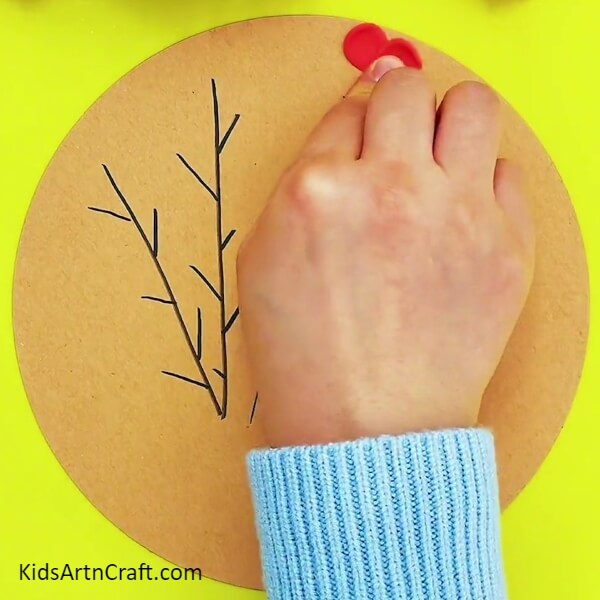
Take some red clay and mold to to make it more flexible. Now, take a small amount of this clay and place it at the end of one of the lines and press it down with your index finger flattening it on the cardboard. Now, flatten another similar piece of clay on the right side of the previously flattened clay. See the picture below for reference. This will be the first heart-shaped flower of this bouquet.
Step 5: Making More Heart-shaped Flowers
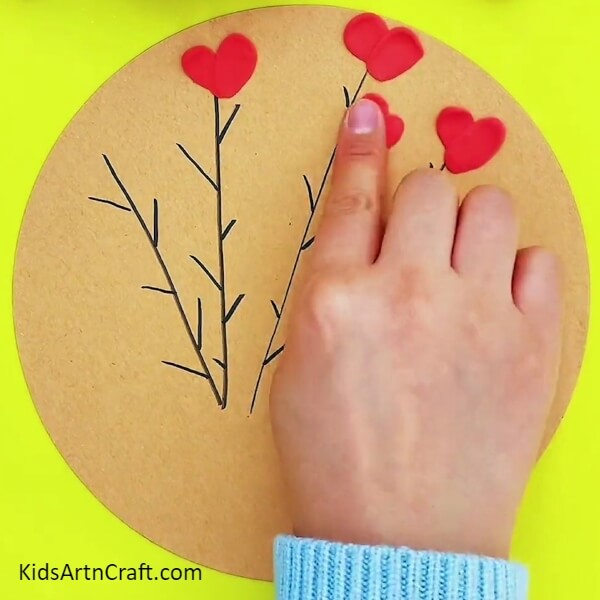
Repeat the process with more red clay flattening them on the ends of the lines on each side of the line with the heart flower. See the picture below for reference.
Step 6: Filling The Branches With The Flowers
Flatten more clay pieces in heart shapes on the ends of all the branches of the line in the middle as shown in the picture below.
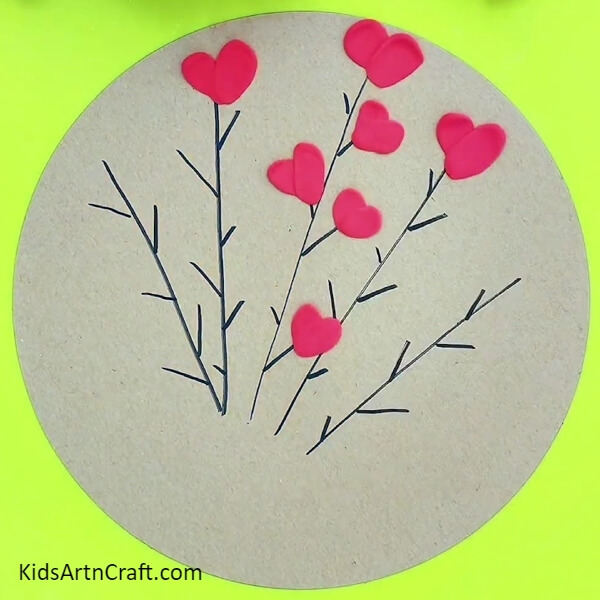
Step 7: Flattening More Clay Molds
Make more of these heart-shaped clay flowers on the branches of the line lying on the left side of the line in the middle. See the picture below for reference.
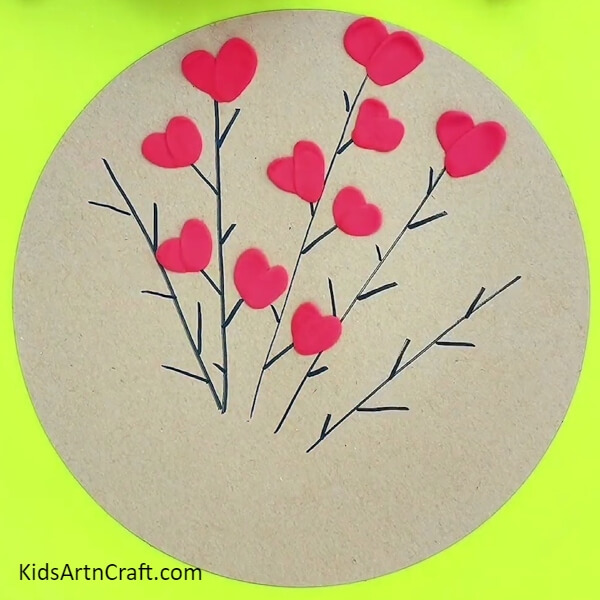
Step 8: Moulding Flowers On The Rest Of The Branches
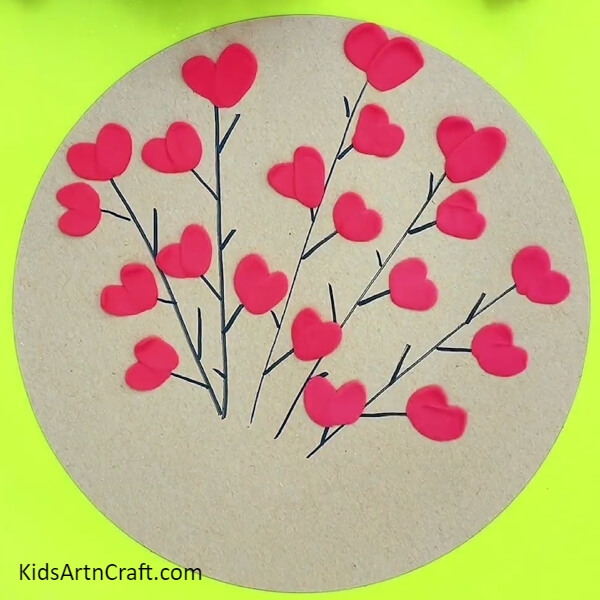
Repeat the process of flattening the clay molds on the rest of the branches filling the bouquet with plenty of flowers. See the picture below for reference.
Step 9: Working With The Tissue Paper
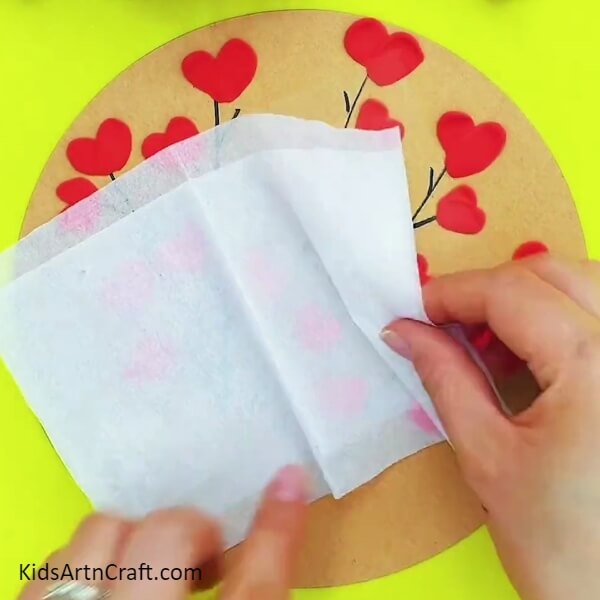
Take a piece of tissue paper and place it on the table. This tissue paper will be used to make the wrapping of the bouquet.
Step 10: Tying The Tissue Paper At The Bottom
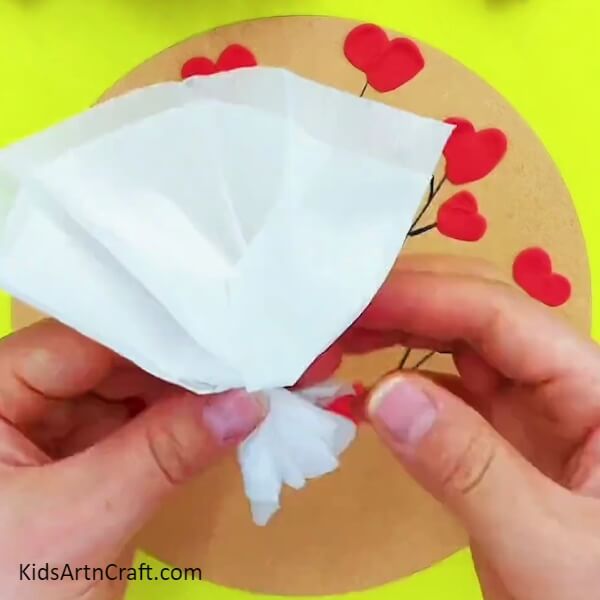
Bunch the tissue paper at the bottom section and cut a piece out of double-sided tape, stick it around the bunched area. This will give a proper bouquet shape to this tissue paper as shown in the picture below.
Step 11: Making A Bow Out Of The Ribbon
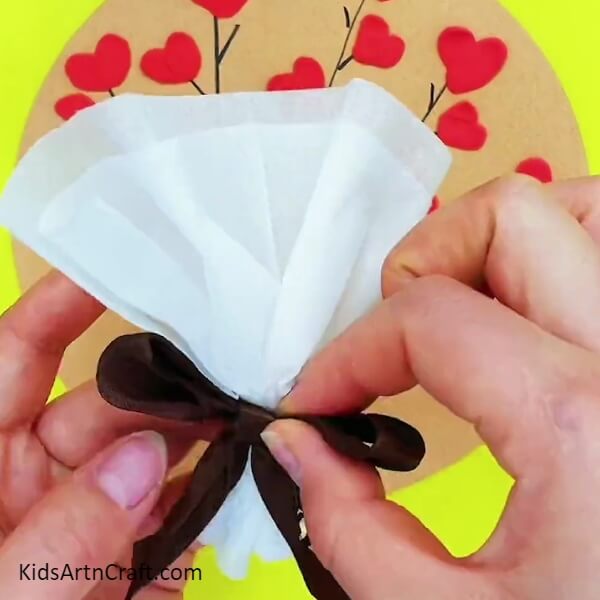
Take a black ribbon and tie a bow with two loops and two loose ends below. Now, peel the top layer off the double-sided tape and stick the ribbon on top of it. Adjust the ribbon properly onto the tissue paper. See the picture below for reference.
Finally Pasting The Tissue On The Cardboard
Paste this tissue paper on the bottom section of the flowers crafted on the cardboard. See the picture below for reference.
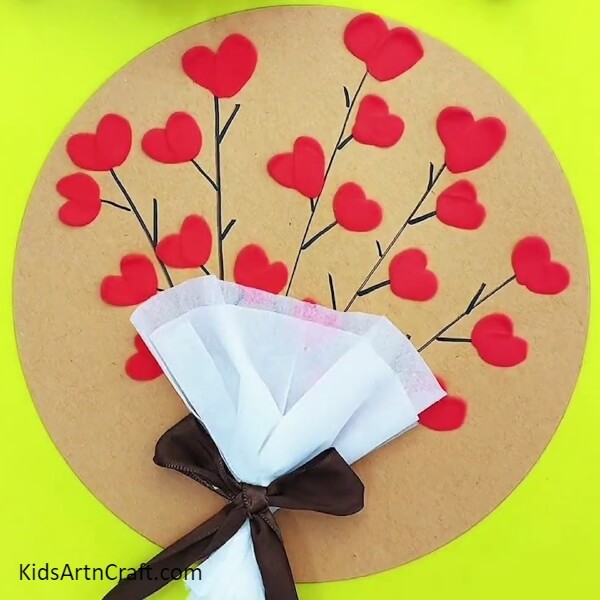
This completes the process of making this bouquet craft and you learned to work with a unique craft material like tissue paper and ribbons. We also learned to make a unique floral design using clay molds. You can hang it on the walls of your room or simply gift it to someone on their birthday or any other occasion. Keep practicing these techniques on your own ideas making your craft more original and unique.
Follow the tutorials to learn more about the craft. Good luck.
Thank you for visiting the website.
Follow us on Youtube for art and craft tutorials and much more.
More Articles from Kids Art & Craft
- Unique Clay-Sunflower Seeds Hedgehog Craft Idea For Kids
- Amazing Hot-air Balloon Clay Craft Step by Step Tutorial For Kids
- Beautiful Tinker Bell House Craft Using Plastic Bottle And Super Clay
- Super-clay Cheery Blossom Tree Craft From Toilet Paper Roll
- How to Make Clay Flower Easy Tutorial for Kids