


Clay Crafts
Beautiful Tinker Bell House Craft Using Plastic Bottle And Super Clay

Make a decorative piece of a tinker bell house on your own! This step-by-step tutorial will guide you to make a pretty tinker bell house!
Are you a tinker bell fan? Then you must love the house she lives in! Today, we brought a craft inspired by that pretty house! You will definitely be stunned by the results! This is an easy step-by-step tutorial including simple instructions for every step! You will be able to create the model of a tinker bell house just by using a plastic bottle and super clay! This craft will be a hit among all the craft collections you have! I promise you won’t be able to take your eyes off this craft! Unleash your creativity and imagine while making it! So, let’s begin!
DIY Tinker Bell House Craft Using Plastic Bottle And Super Clay
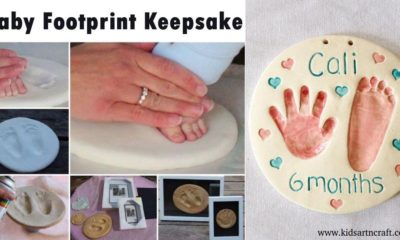
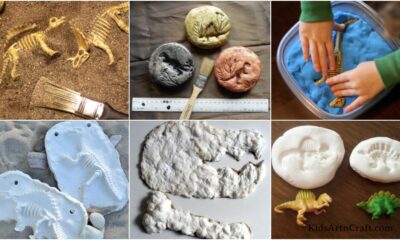
Read More: How To Make Clay Chick Craft Step by Step Tutorial
Materials Required
- Plastic Bottle
- Scissors
- Colored Super Clay
- Clay Shaping Tools
- Clay Knife
- Toothpick
- Marker
Procedure
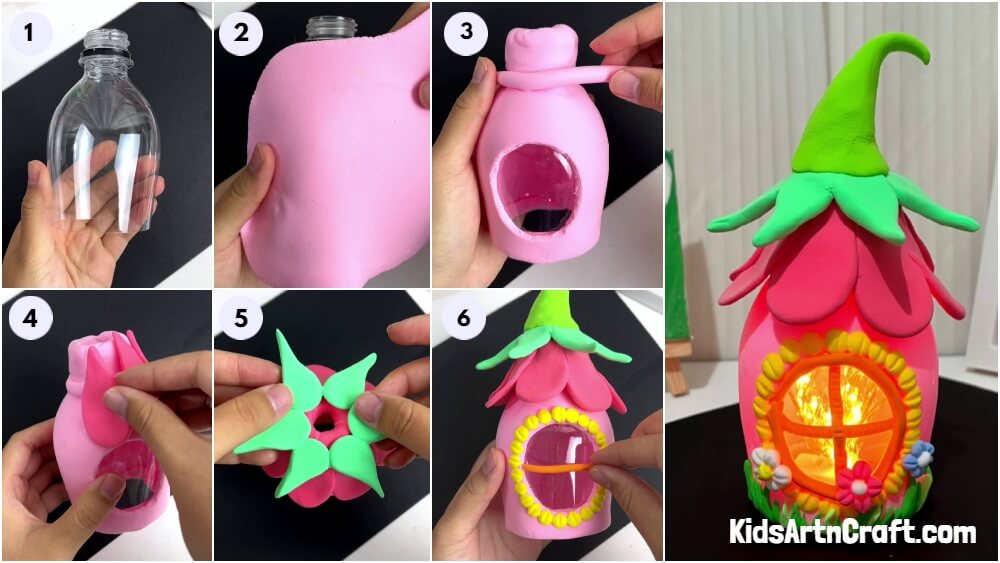
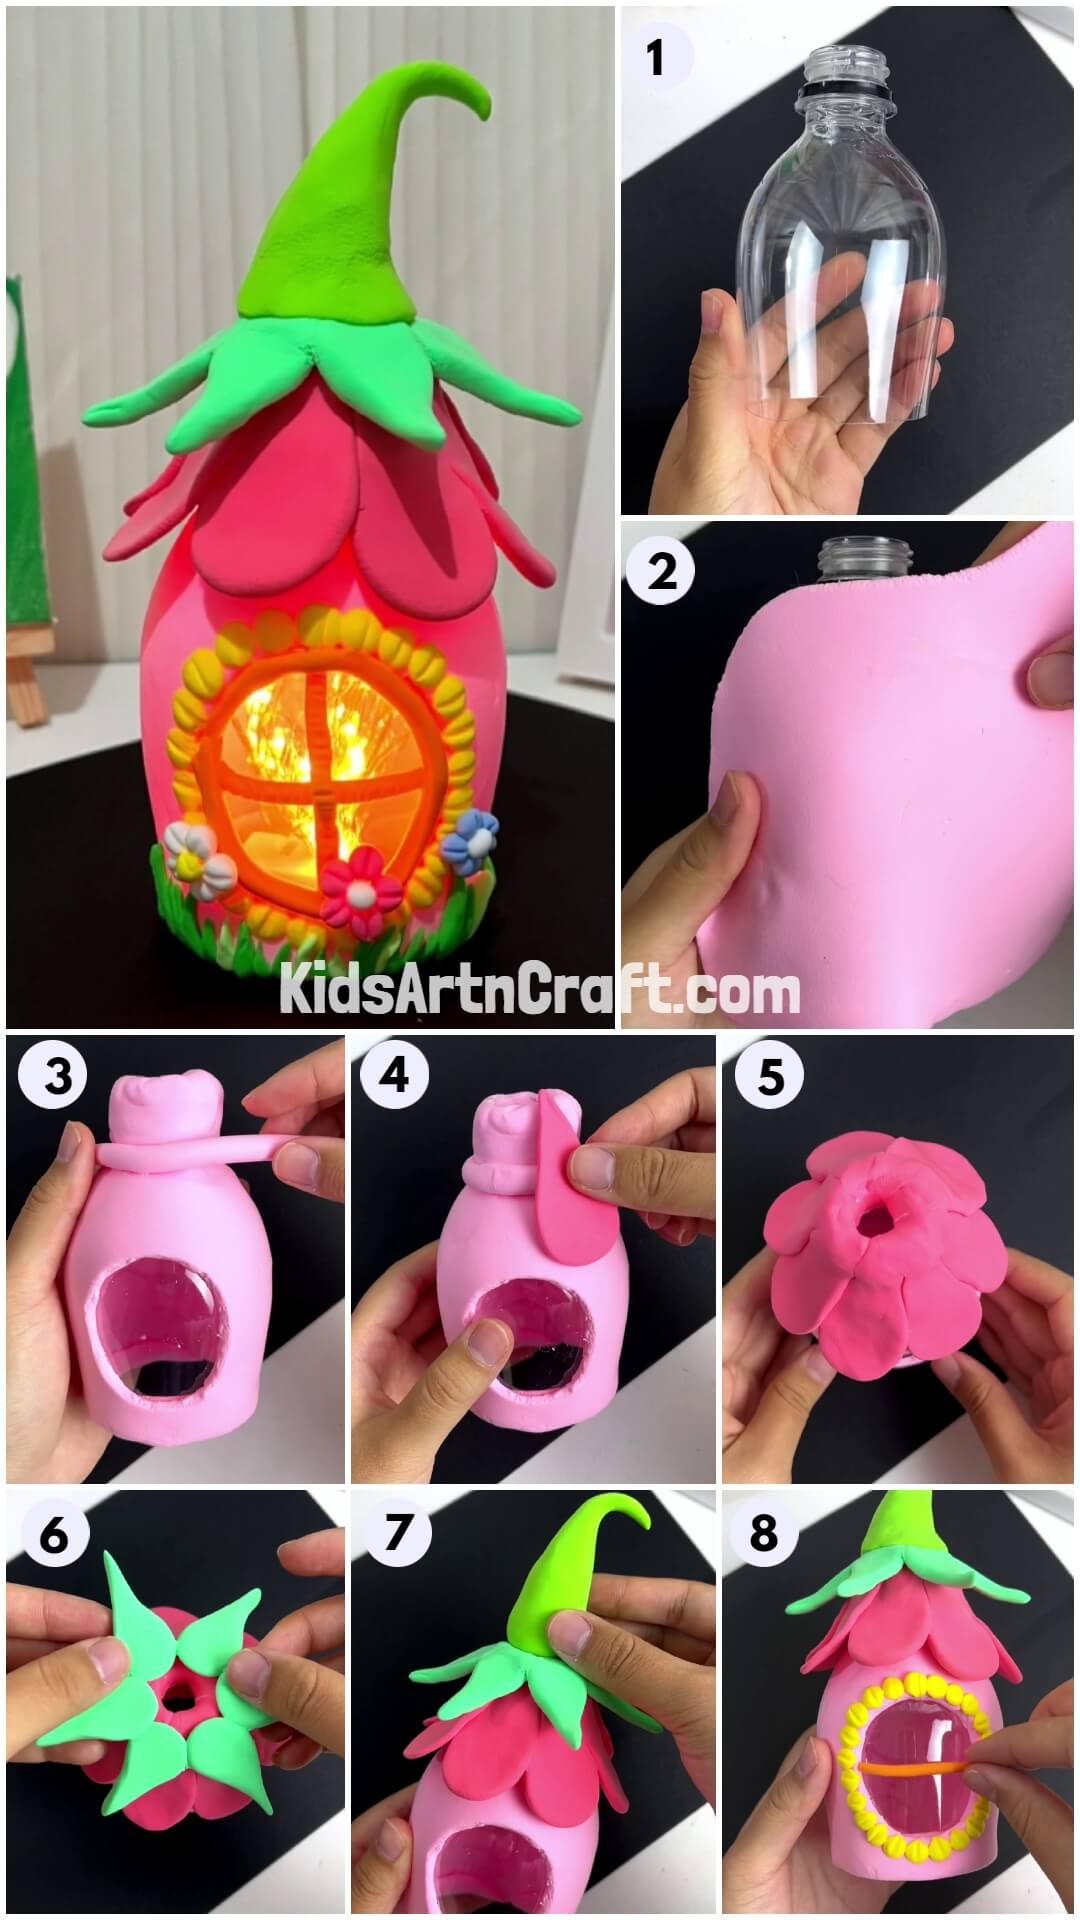
Step 1: Gathering The Materials
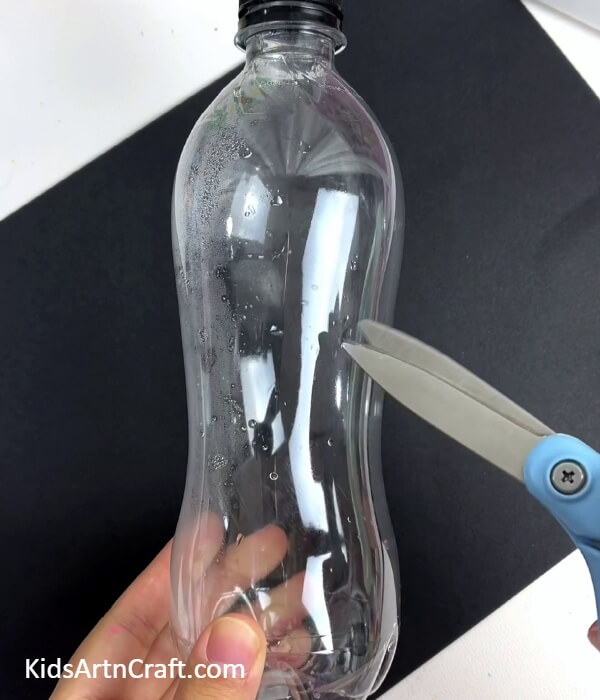
To begin this craft, take a plastic bottle and a pair of scissors.
Step 2: Cutting Out An Upper Bottle Part
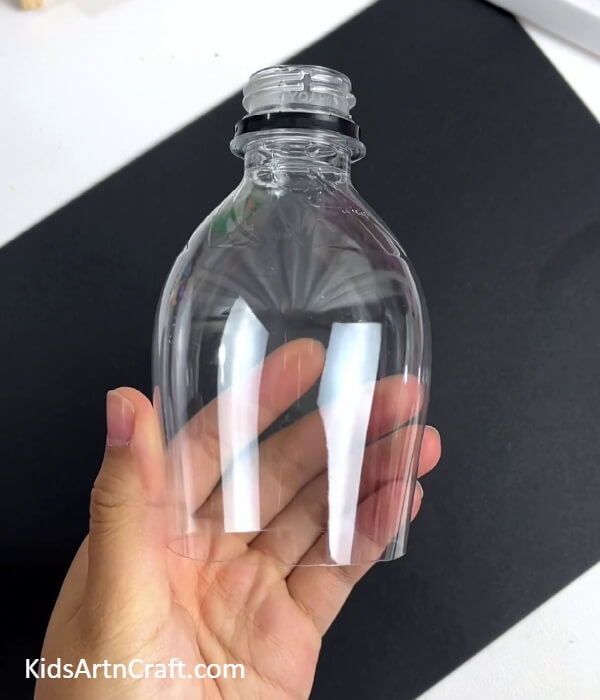
Using scissors, cut out the upper half bottle part.
Step 3: Flattening Pink Super Clay
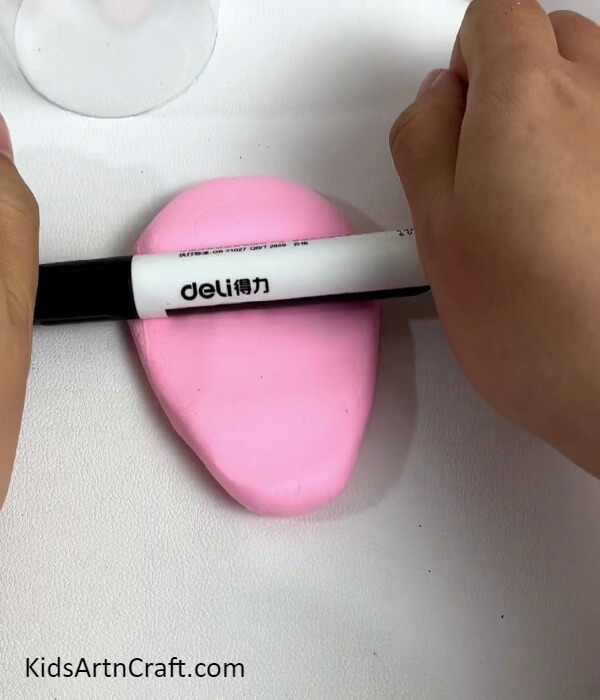
Take pink-colored super clay and using a marker pen, roll the clay into a flat sheet.
Step 4: Covering The Bottle-part With Clay Sheet
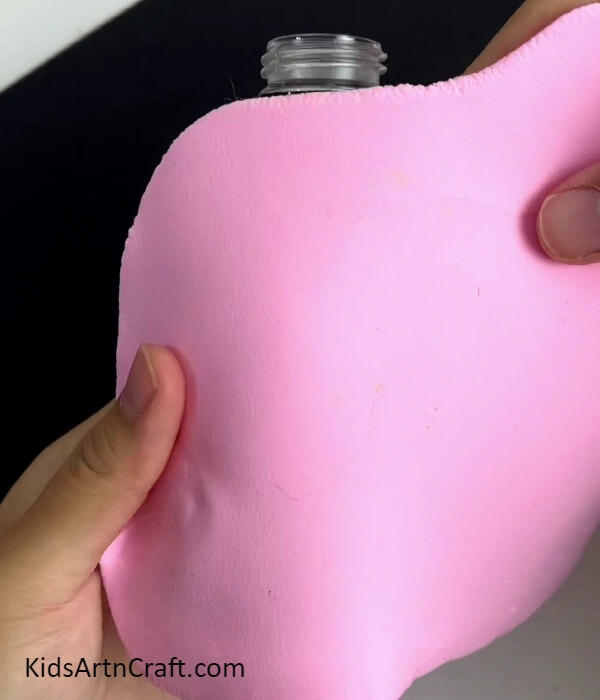
Cover the upper bottle part with the pink clay sheet all over, even at the bottle cap top. This will be the house.
Step 5: Taking A Clay Knife
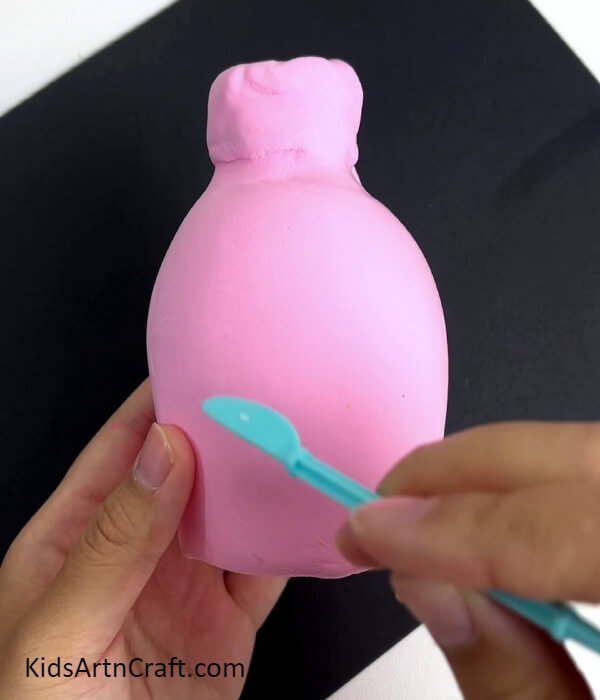
For the next step, take a clay knife.
Step 6: Cutting Out A Window
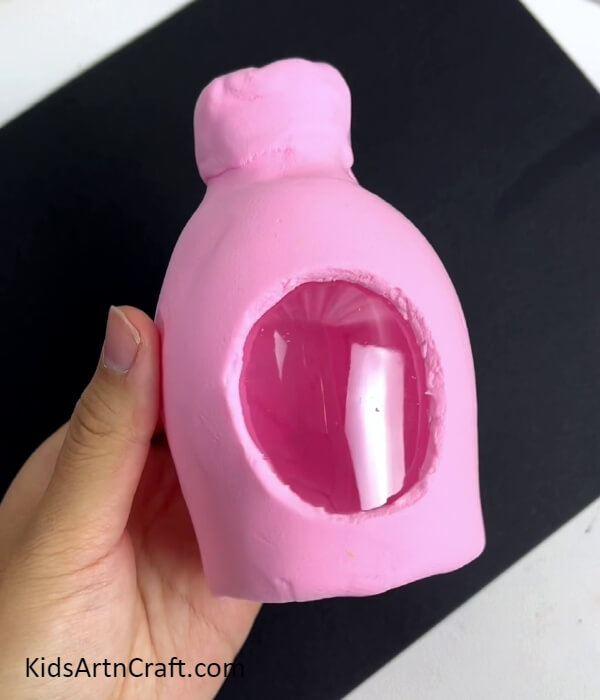
Using the clay knife, cut out an oval shaped-window on the house as shown in the image.
Step 7: Adding A Clay Strip

Roll the pink clay into a strip and stick the strip around the bottle cap base of the house.
Step 8: Making A Drop Shape Petal
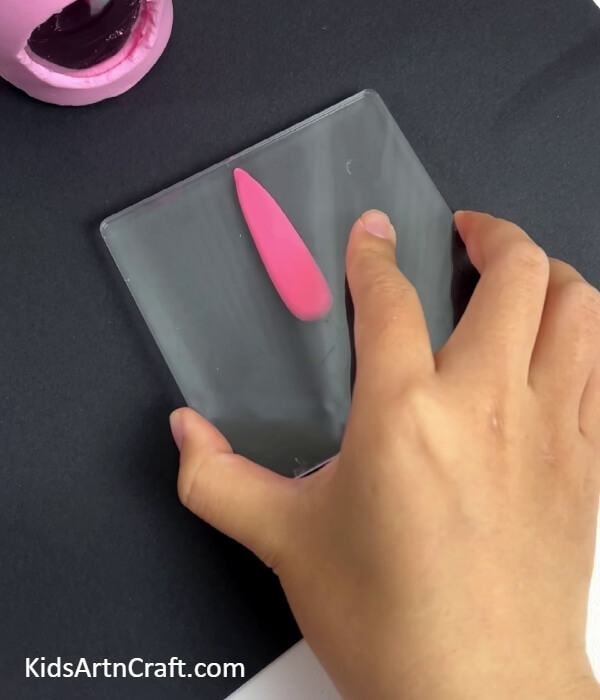
Using dark pink colored clay make a drop shape and press and flatten it using the clay shaping tool to make a petal.
Step 9: Sticking The Petal Over The House
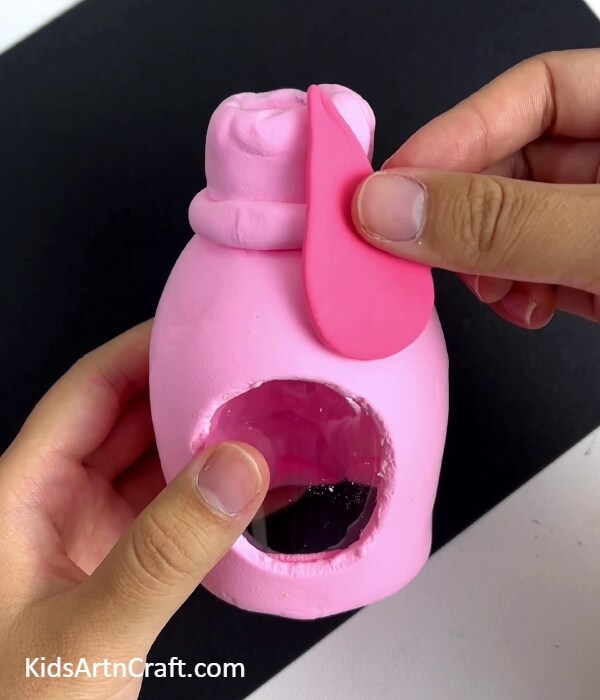
Stick the petal from the top of the bottle cap coming downwards.
Step 10: Sticking More Petals
Following the same, create more petals and one by one paste them over the top of the house beside each other.
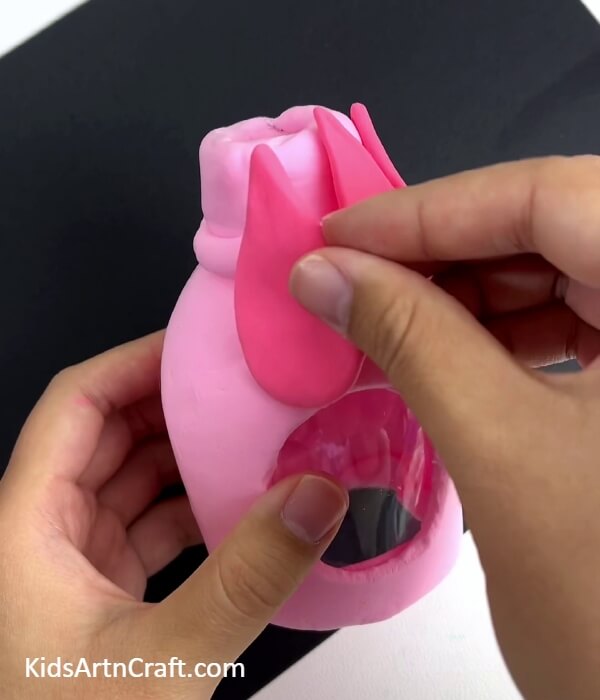
Step 11: Completing Sticking The Petals
Complete a whole circle by sticking the petals, now, from the top, bend the petal’s tops inside the bottle cap base.
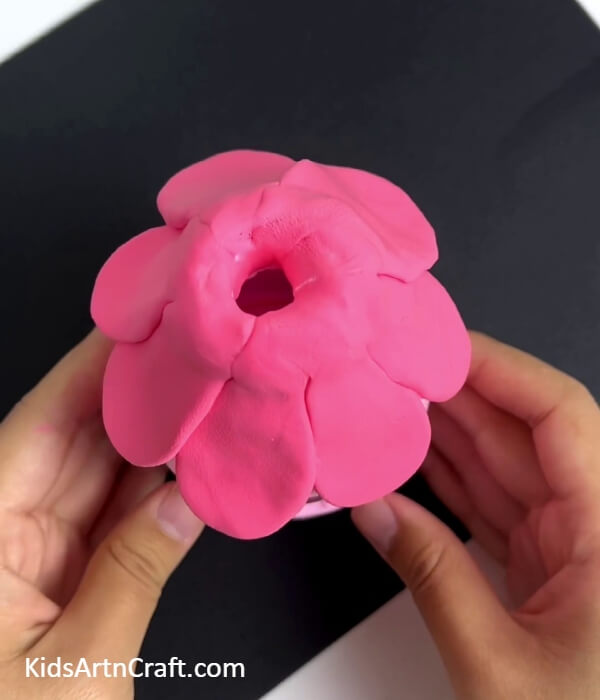
Step 12: LeavesMaking Drop-Shape Sepal
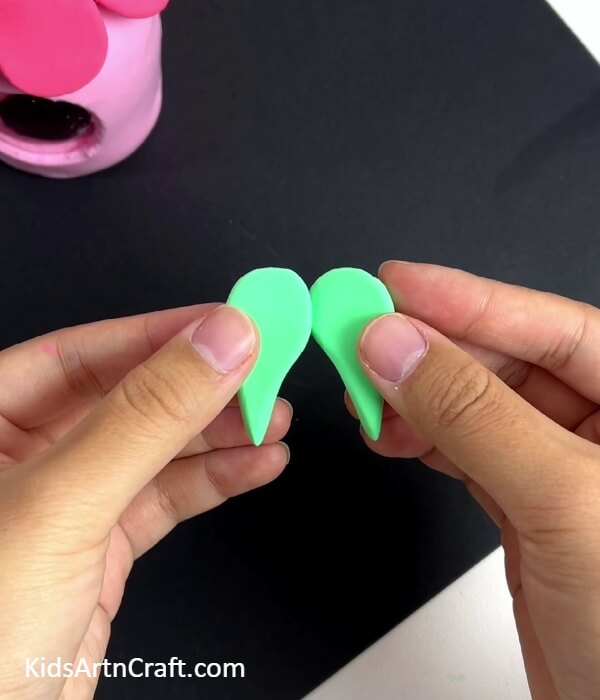
Following the same make green-colored drop shape petals for the sepal of your flower petals. Make sure to make the sepals smaller than the petals.
Step 13: Sticking The Sepal Over Flower
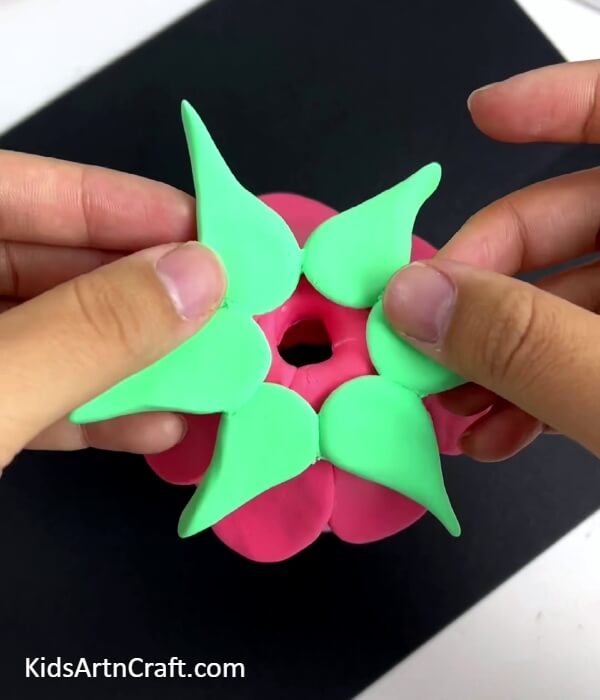
Make a circle of the sepal leaves and stick them over the top of the petals as shown in the image.
Step 14: Adding A Stem
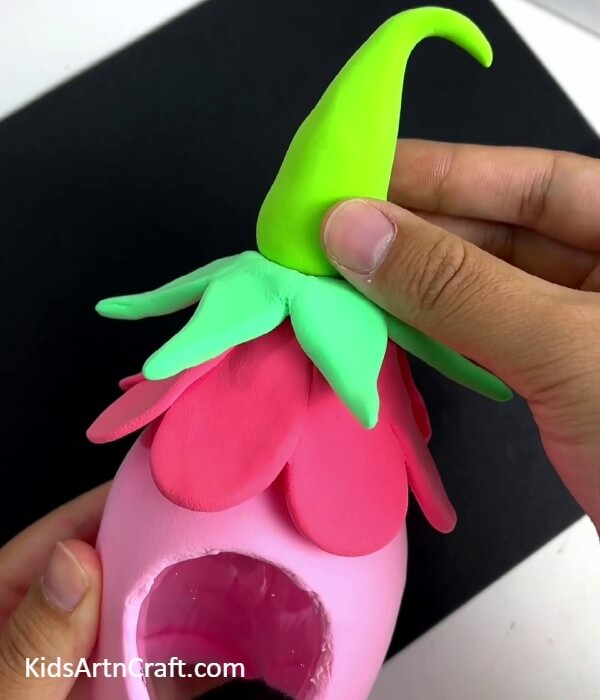
Using the lime green colored super clay make a broad stem over your flower with a curved-bent end and stick it at the top for your flower house.
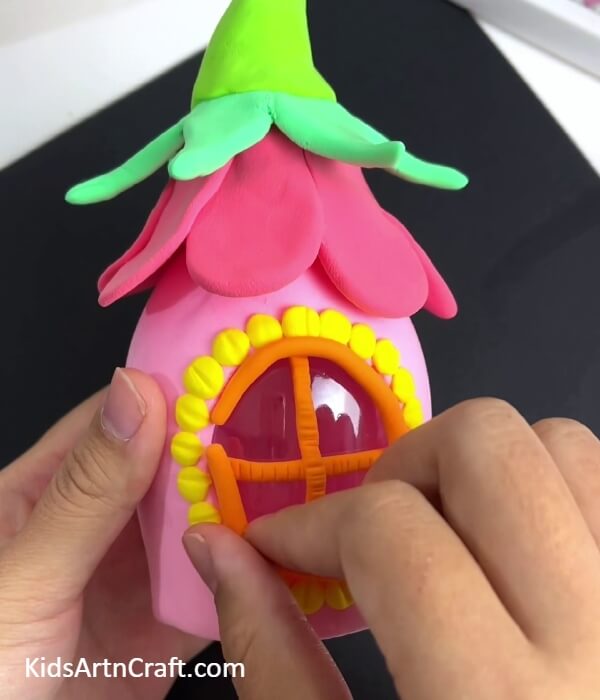
Step 15: Sticking Yellow Circles Around The Window

Using yellow-colored super clay, form tiny circles and stick them one by one onto the other boundary of the window to cover it whole.
Step 16: Detailing The Yellow Circles
Using a toothpick, make a line between the yellow circles to make them look like small petals as shown in the image.
Step 17: Making The Window Partition
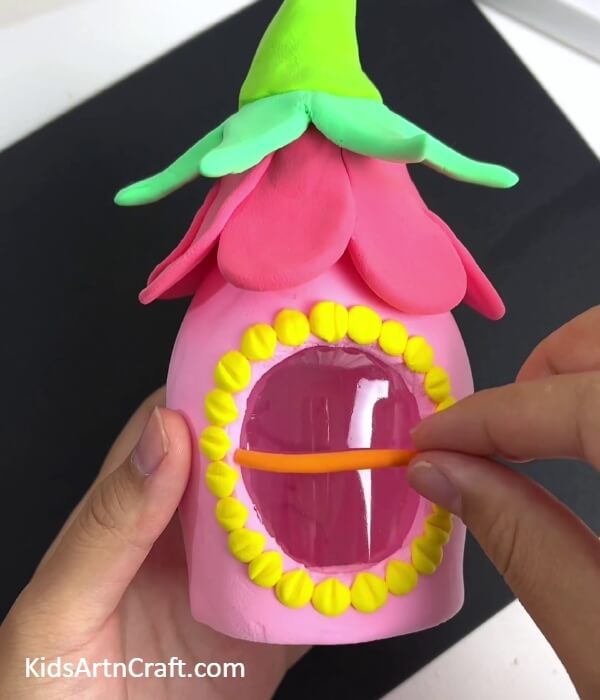
Roll a piece of orange super clay into a strip and stick it over the bottle base of the window to make a horizontal partition.
Step 18: Detailing The Window Partition
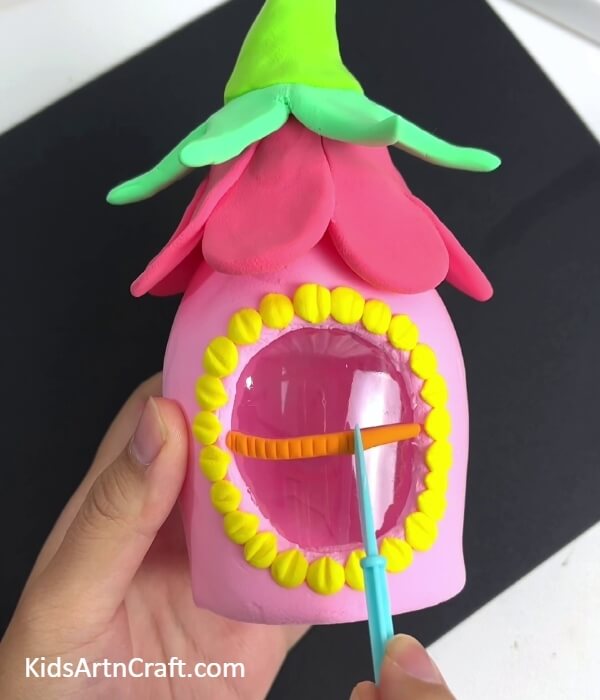
Using a clay shaping tool, make small lines over the window partition as shown in the image.
Step 19: Competing Making The Window Partition
Following the same, make a vertical window partition and detail it too. Now, roll the orange clay again in a long strip and stick it over the inner boundary of the window.
Step 20: Adding Flowers And Grass To Your House
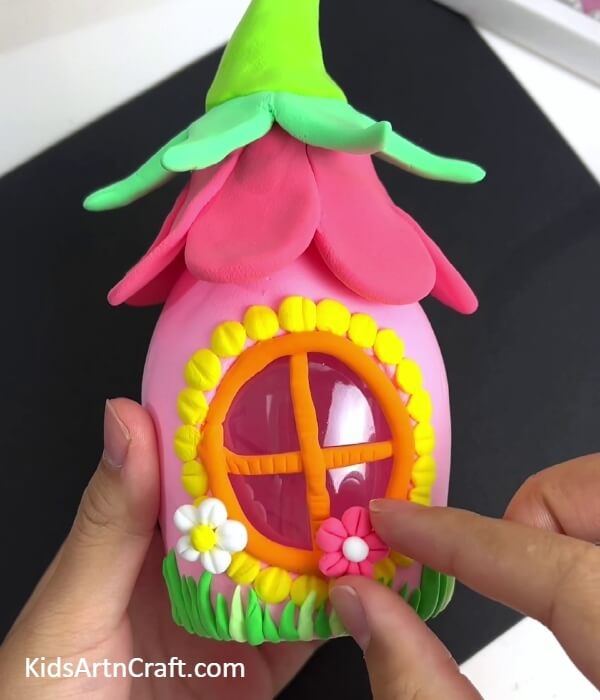
Make some small drop-shape-like grass and stick them on the bottom boundary of the house using the green shades of super clay. Also, make the flowers using pink-white and white-yellow colored super clay. Make small balls of this clay, arrange them in a circle, and put them over the center in the mid-top to make flowers and stick them over the window boundary.
The Final Look Of Your Fairy House!
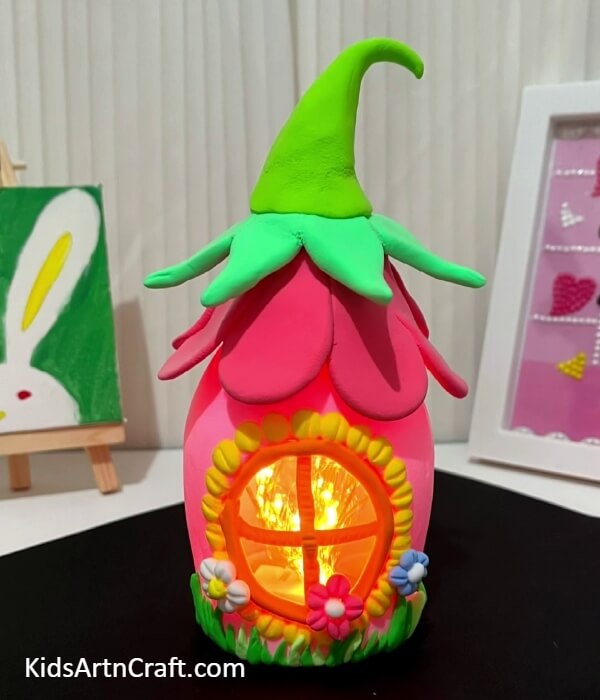
Over a bundle of fairy lights, put this tinker bell house to see it lighten up!
OMG! You can’t take your eyes off it, right? Because me too! Look at the prettiest tiny house craft!
This craft will be a hit addition to your craft collection! This craft will definitely be a piece to showcase to your friends and family and let them admire your creation too! This craft will take you to your fantasy world ride while engaging in a fun learning activity! This may seem hard but is very easy to make with this tutorial! Share it with your friends too to see who makes the best one!
Hope you liked this article! Do give this amazing craft a try and share the results with us in the comments section!
Follow us on Youtube for art and craft tutorials and much more.
More Articles from Kids Art & Craft
- Plant Garden Artwork Craft Using Clay And Peanut Shells
- How to Make Clay Flower Easy Tutorial for Kids
- How to Make Worm Using Clay For Kids
- DIY Clay Giraffe Step by Step Tutorial For Kids
- How To Make Caterpillar Eating Apple Using Clay