Home Decor
Pretty Flower Wreath Craft Using Cardboard And Wool Tutorial For Kids

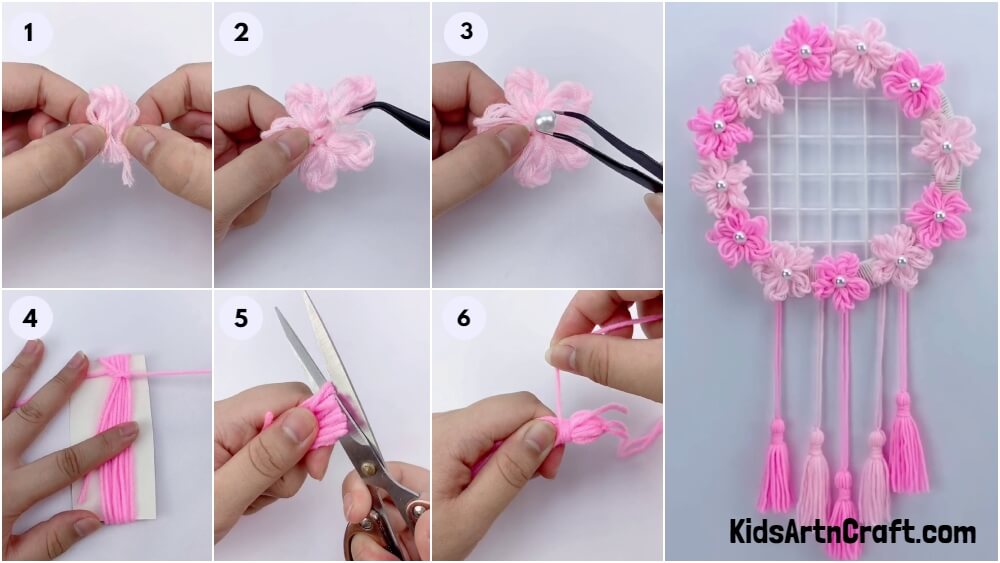
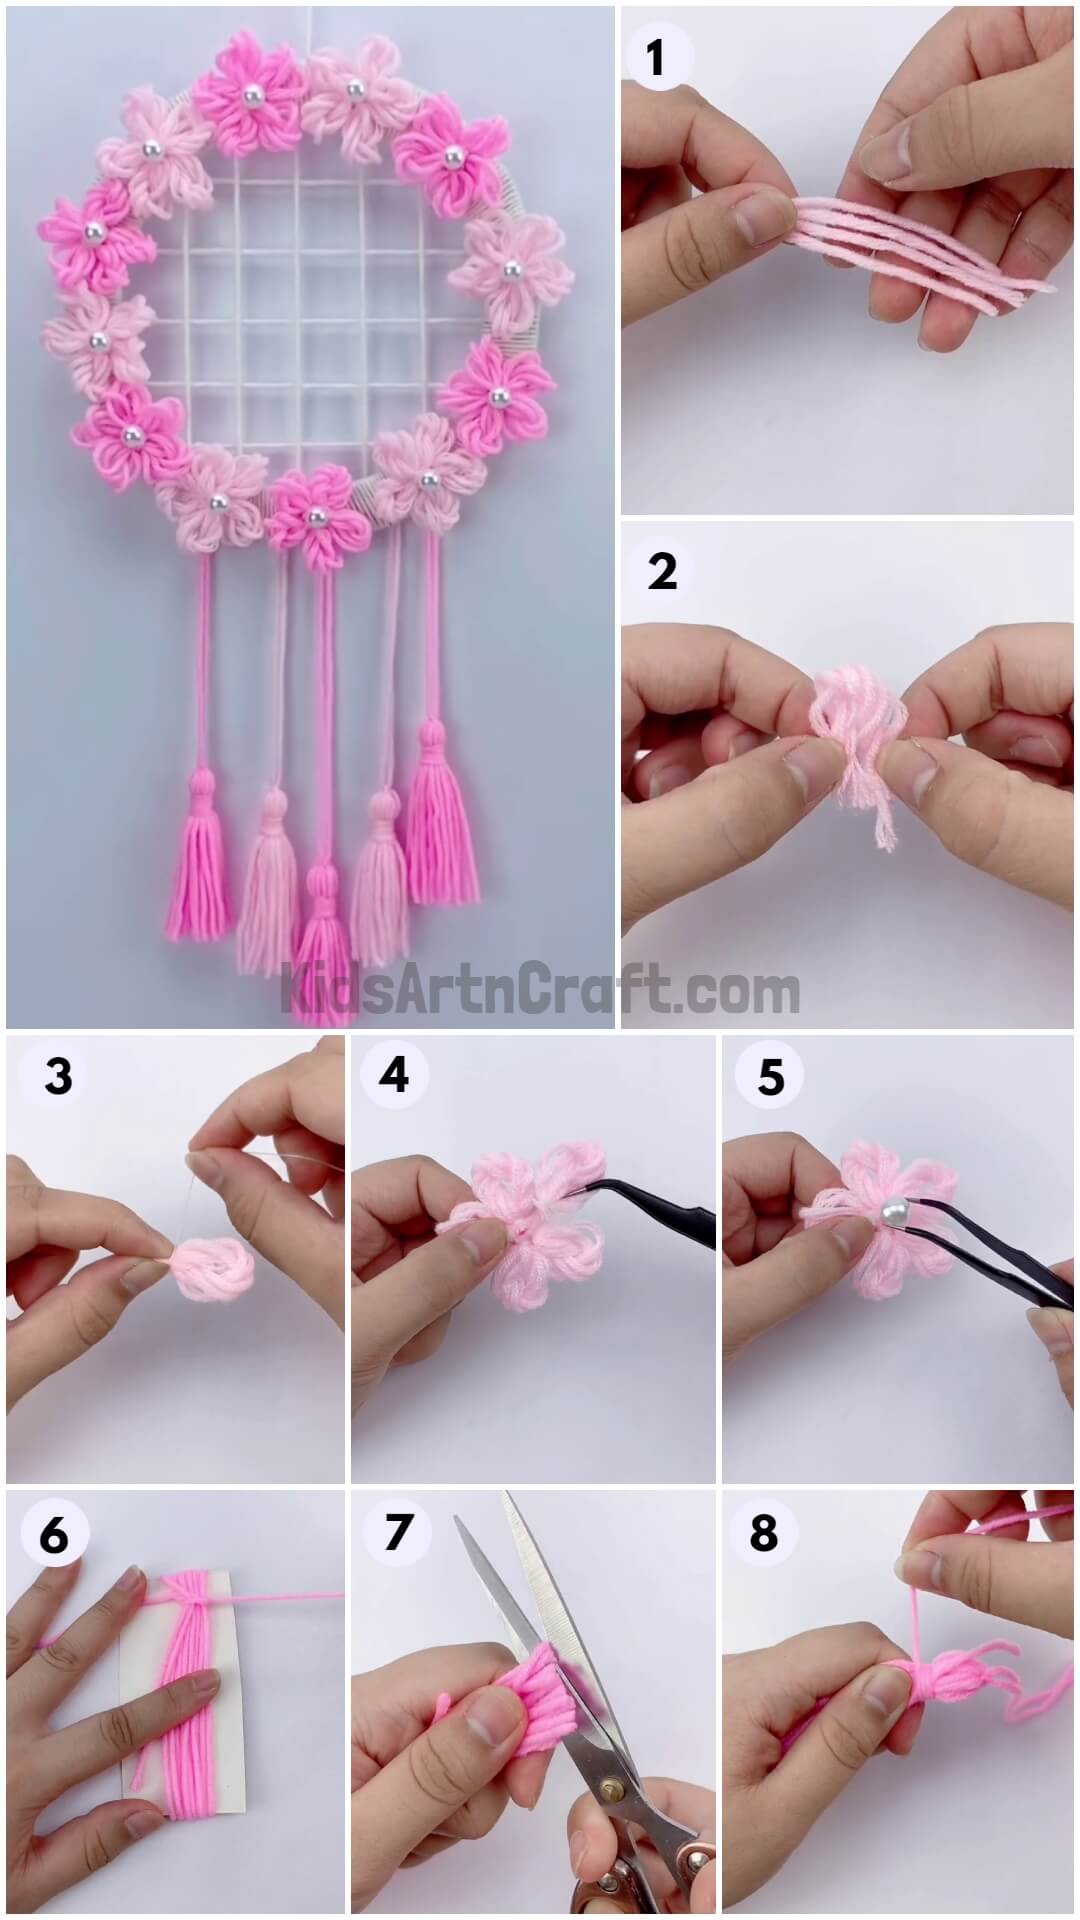
Help the kids make a pretty flower wreath using cardboard and wool! Follow the instructions in this tutorial to help them make their own unique craft. Great for a rainy day or a special event!
Wreath are always so pretty especially when it comes in different colours and decorations. It is also used for different occasions such as Christmas, funeral, weddings, etc. So, today we are going to make our own flower wreath but with a twist. Let’s begin!
Bring all your materials to the table and follow the steps given below to make your own flower wreath.
DIY Flower Wreath Craft Using Cardboard And Wool
Read More: Fruit Foam Net flower craft For Home Decor
Materials Required
- Cardboard
- Wool (White, Light Pink, Dark Pink)
- Thread
- Small white cardboard pieces
- Rectangular cardboard
- Pearls
- Tongs
- Scissors
- Glue
Procedure
Step 1: Take A Cardboard And Cut It With Scissors
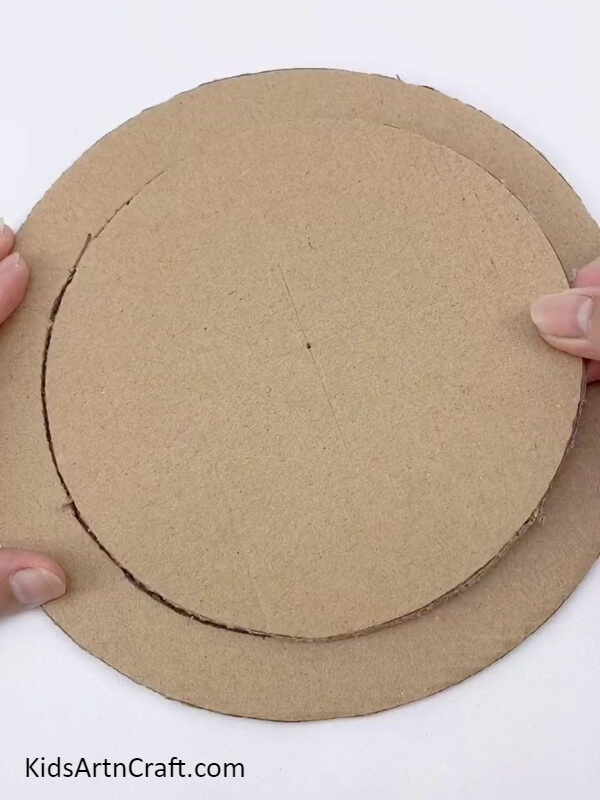
Your first step is to take a cardboard. The cardboard should be circular in shape. After taking a circular shape cardboard, take a scissors. After taking scissors, cut the cardboard from the middle area as shown.
Step 2: Wrap The White Wool Around The Cardboard
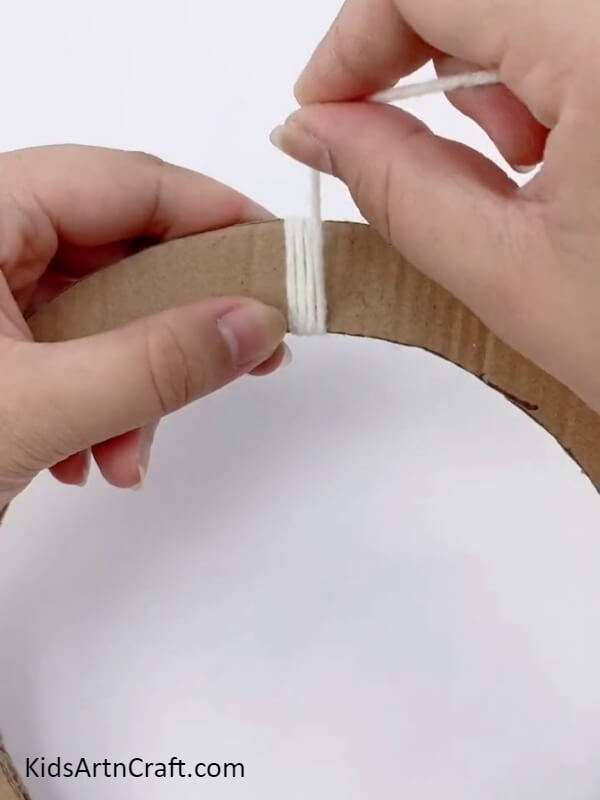
After cutting the cardboard with the help of scissors, take the outer part of the cardboard after cutting the circular cardboard and not the inner part.
Then, take a white coloured wool. After taking a white coloured wool, you have to start wrapping the white coloured wool around the outer circular cardboard which you cut in the above step.
Step 3: Wrap The White Wool Till The End Of The Cardboard
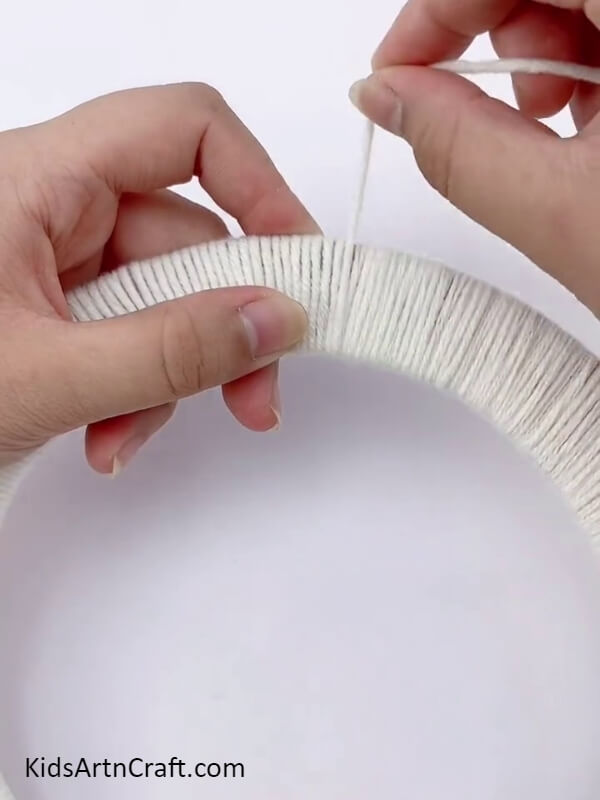
Keep repeating the step of wrapping the white coloured wool around the outer circular cardboard. You have to wrap the white coloured wool around the whole circumference of the circular cardboard till the white wool reaches the end of the circumference.
Step 4: Stick The White Wool In Horizontal Manner With Glue
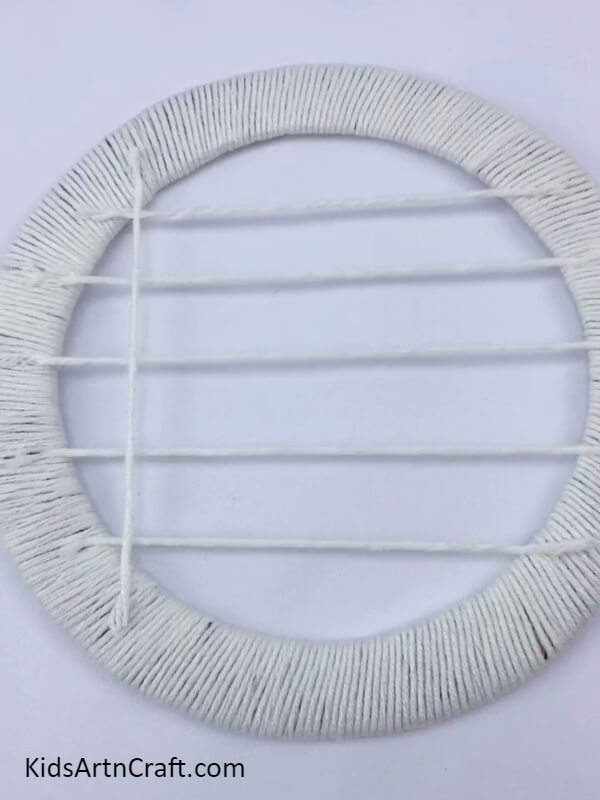
Now, take a white coloured wool and a glue. Take a strip of white coloured wool. After taking a strip of white colored wool, stick the strip of white coloured wool in a horizontal manner in between the circle with the help of glue. You have to repeat this process of sticking the strip of white coloured wool in a horizontal manner five times. So, you have to stick five strip of white coloured wool, one after the other as shown.
Step 5: Stick White Wool In Vertical Manner With Glue
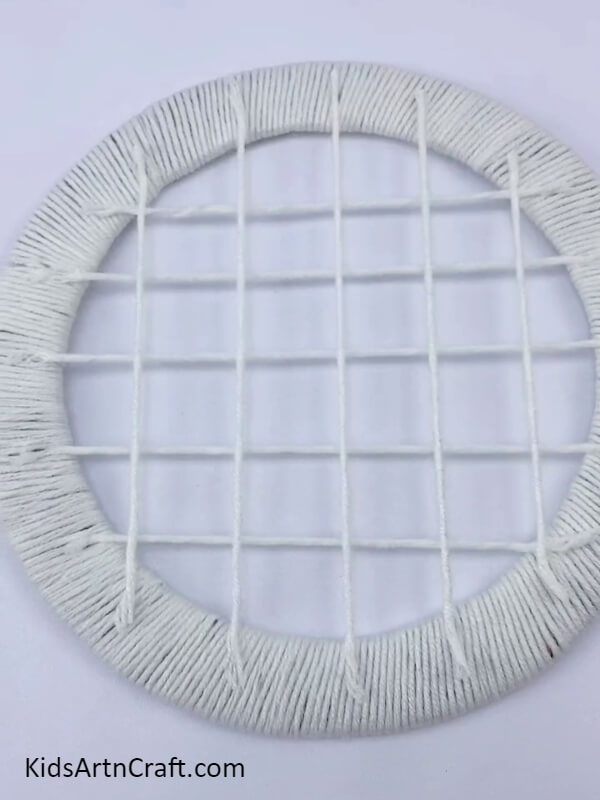
Repeat the step of sticking the strip of white coloured wool in between the cardboard with the help of glue but this time you have to stick the strip of white coloured wool in a vertical manner. So, you have to make a strip of white coloured wool and then, stick it between the circular cardboard from one end to the other with the help of glue. You have to repeat this step of sticking the strip of white coloured wool in between the circular cardboard in vertical manner,one after the other, five times.
Step 6: Take Strips Of Light Pink Wool
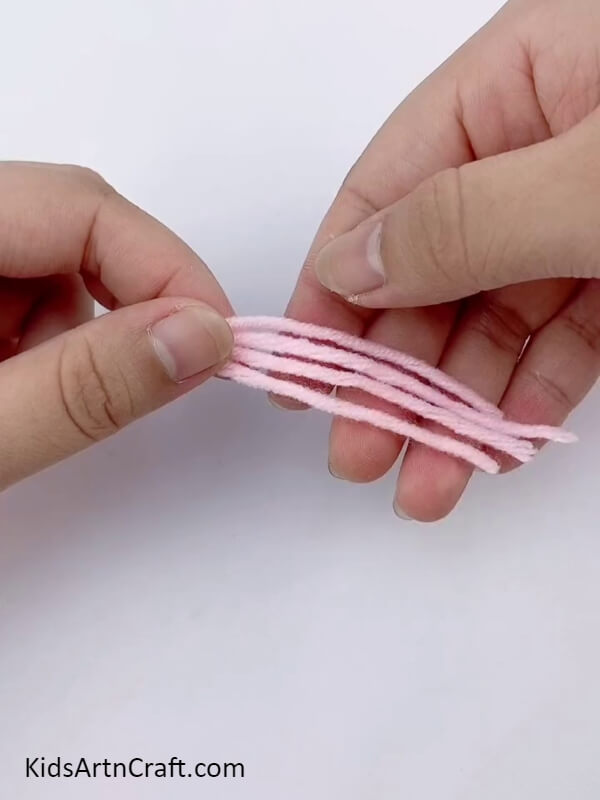
Now, take a light pink coloured wool. After taking a light pink coloured wool, you have to take out strips from the light pink coloured wool. You have to take out total four strips from the light pink coloured wool and after taking out four strips of light pink coloured wool, you have to hold all the strips of light pink coloured wool together from the top end.
Step 7: Make Twist In Light Pink Wool
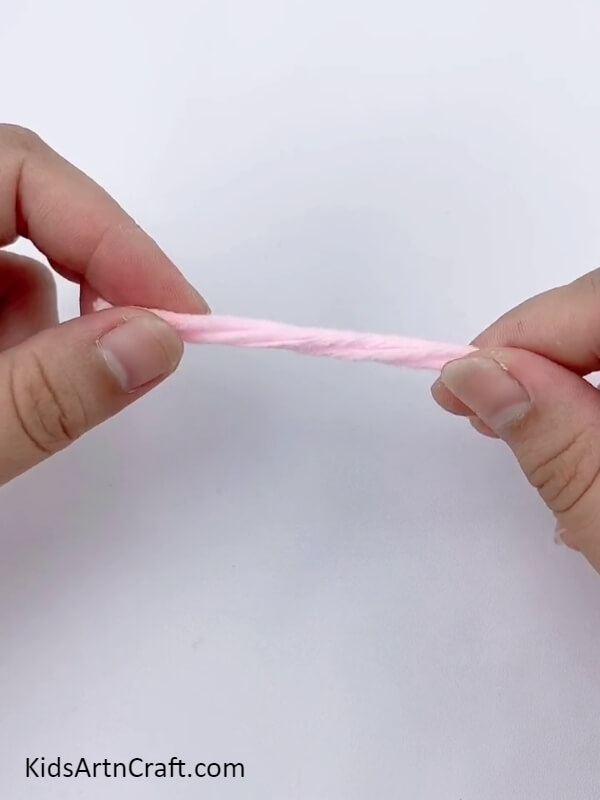
After taking out the strips from the light pink coloured wool, you have to make twists in the strips of light pink coloured wool. You have to make tight twists in the light pink coloured wool.
Step 8: Spread Out The Twisted Light Pink Wool
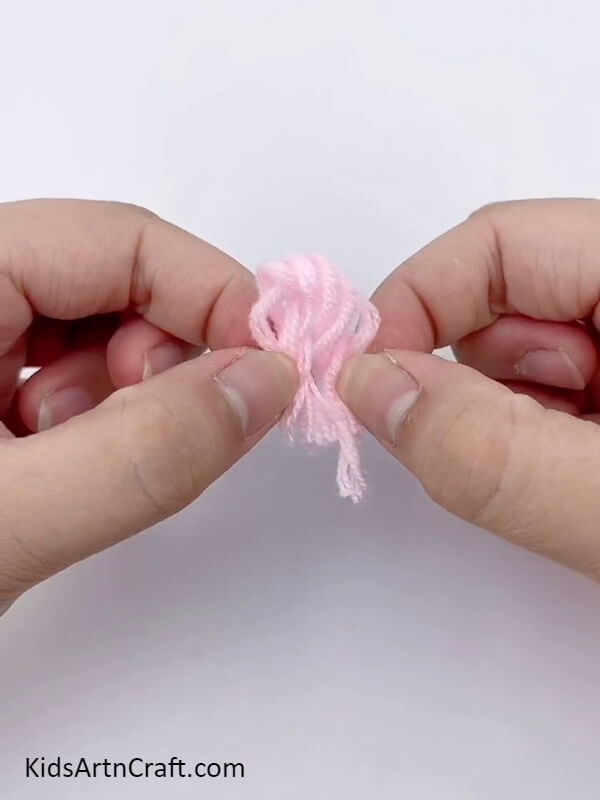
Now, after twisting the light pink coloured wool tightly in the above step. You have to now bend the twisted light pink coloured wool from the middle and hold the ends of the light pink coloured wool by joining the ends with your fingers.
After joining the ends of the light pink coloured wool with your fingers, spread out the twisted part of the light pink coloured wool with your other fingers.
Step 9:Tie A Thread On The Corner Of Light Pink Wool
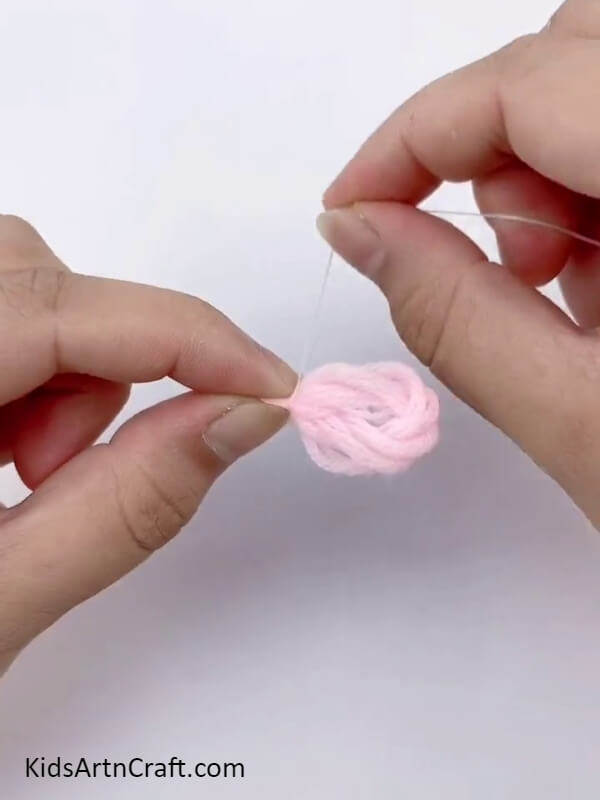
After spreading out the twisted part of the light pink coloured wool. You have to take a thread. After taking a thread you have to tie the thread on the bottom corner of the light pink coloured wool by wrapping it on the bottom corner of the light pink coloured wool.
Step 10: Make Five More Twisted Knots
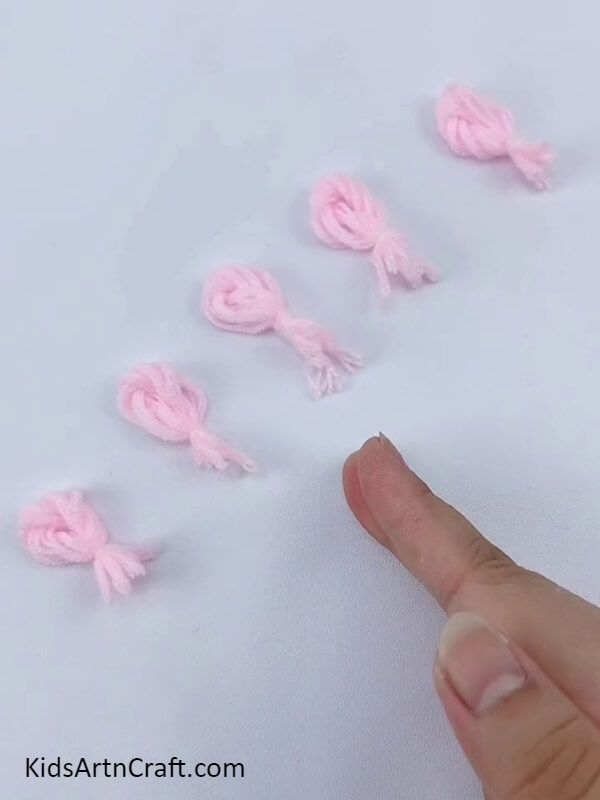
Repeat the same step of taking the four strips of the light pink coloured wool. Then, twists the strips of light pink coloured wool tightly and then, bend the light pink coloured wool from the middle and spread out the part which you have twisted. Then, tie a thread on the bottom corner of the light pink coloured wool. You have to repeat this step five times to make five light pink coloured knots as shown.
Step 11: Cut The Extra Part Of The Light Pink Wool With Scissors
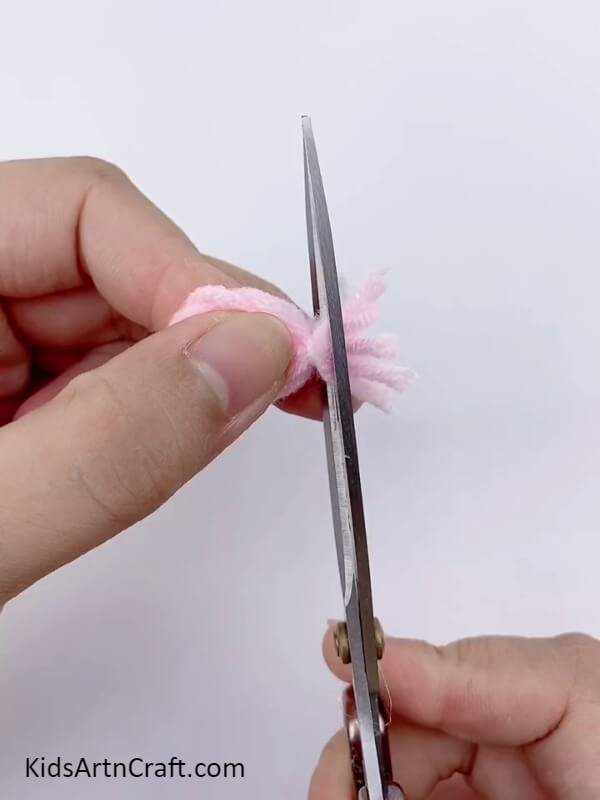
Now, take scissors. After taking a scissors, cut the extra part which is on the light pink coloured wool knots you have made in the above step. You have to cut only the extra part from the bottom with the help of scissors and nothing else. You have to repeat this step for all the five light pink coloured wool knots which you have made. This will turn the light pink coloured wool knots into a light pink coloured wool petals.
Step 12: Stick The Petal On The Small White Cardboard Piece
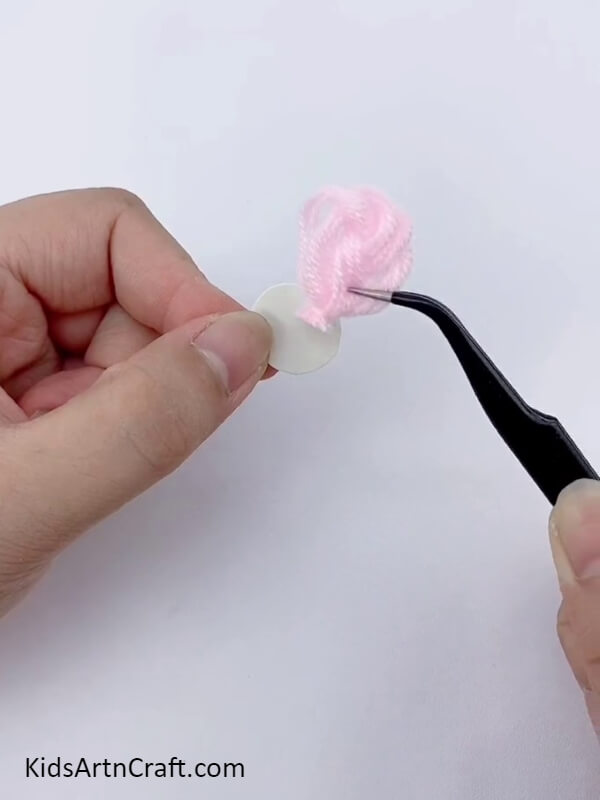
Take a glue and a small piece of white cardboard which should be in circle shape. After taking a glue, stick the light pink coloured wool petal on the small piece of the white cardboard with the help of glue. Remember to stick the light pink coloured wool petal from the tongs onto the small white cardboard piece. You have to stick from the end part of the light pink coloured wool petal as shown.
Step 13: Stick All Five Pink Wool Petals On Small Piece Of White Cardboard
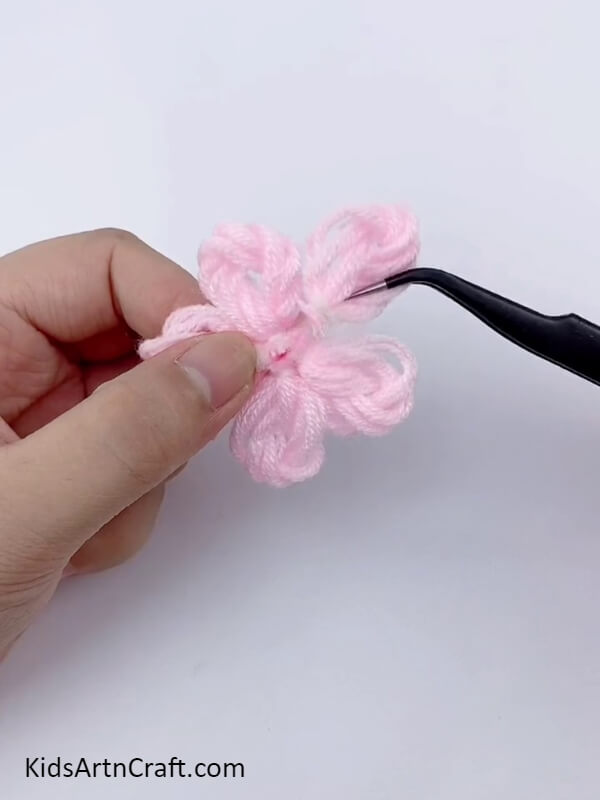
Bring all your light pink coloured wool petals. You have made total five light pink coloured wool petals, so you have to keep sticking each of the five light pink coloured wool petal one by one onto the small piece of white coloured cardboard with the help of glue and the tongs. After sticking all the five light pink coloured wool petals, you will get a pink coloured wool flower.
Step 14: Stick The Pearl In The Middle Of The Pink Wool Flower
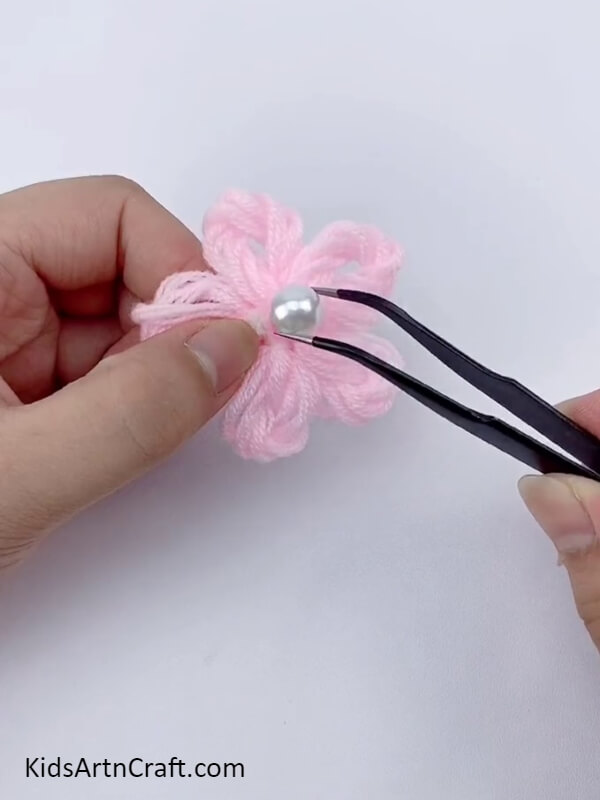
Now, take out the pearl and after taking the pearl, you have to stick the pearl in between the light pink coloured wool flower with the help of glue. You have to hold the pearl with the help of the tongs and then, stick the pearl in the middle of the light pink coloured wool flower with the help of glue.
Step 15: Stick The Light Pink Wool Flower On The Cardboard
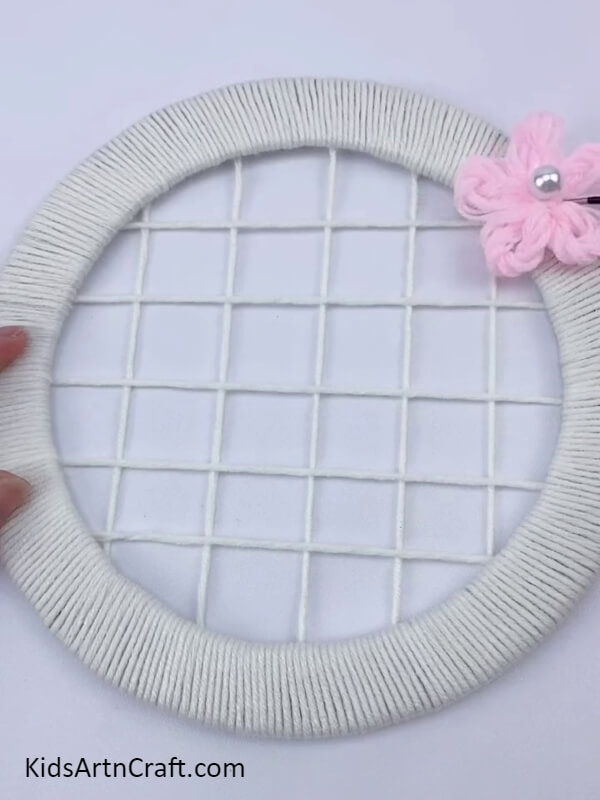
Now, take the circular cardboard in which you had wrapped the white coloured wool around the whole circumference. After taking the circular cardboard, turn the circular cardboard upside down as the vertical and horizontal lines which you have stuck with the help of white coloured wool strips, should be facing downwards.
After turning the circular cardboard upside down, take the light pink coloured wool flower and stick the light pink coloured wool flower on the space of the circular cardboard with the help of the glue.
Step 16: Make More Flowers And Stick It On The Cardboard
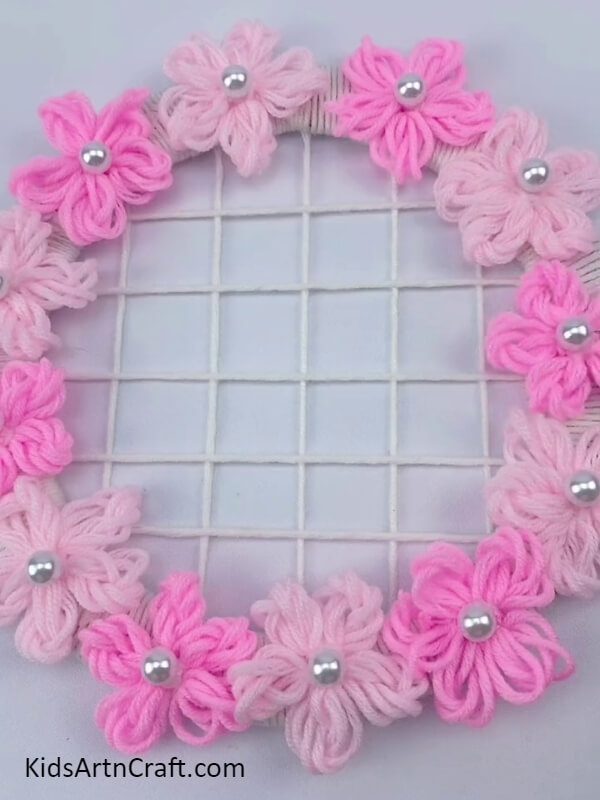
Keep repeating the step of making more flowers with the help of light pink coloured wool and dark pink coloured wool. You have to follow the same steps from above and keep making the light pink coloured wool flowers and dark pink coloured wool flowers. After you have made enough flowers from both the light pink coloured wool and dark pink coloured wool, you have to stick the wool flowers alternatively on the space of the circular cardboard with the help of glue.
Step 17: Wrap The Dark Pink Wool Around Rectangular Cardboard
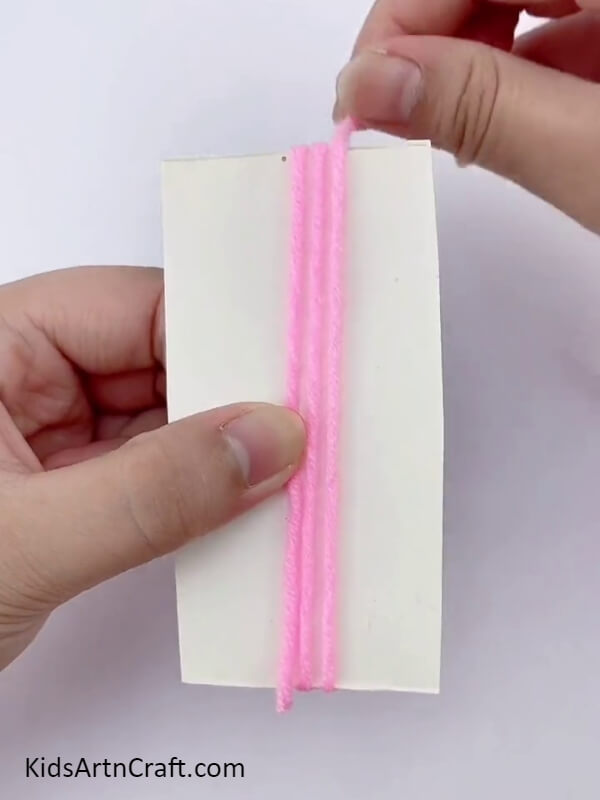
Now, take a dark pink coloured wool and a rectangular cardboard. After taking a dark pink coloured wool and a rectangular cardboard, wrap the dark pink coloured wool around the middle of the rectangular cardboard as shown in the picture.
Step 18: Tie A Knot From The Dark Pink Wool
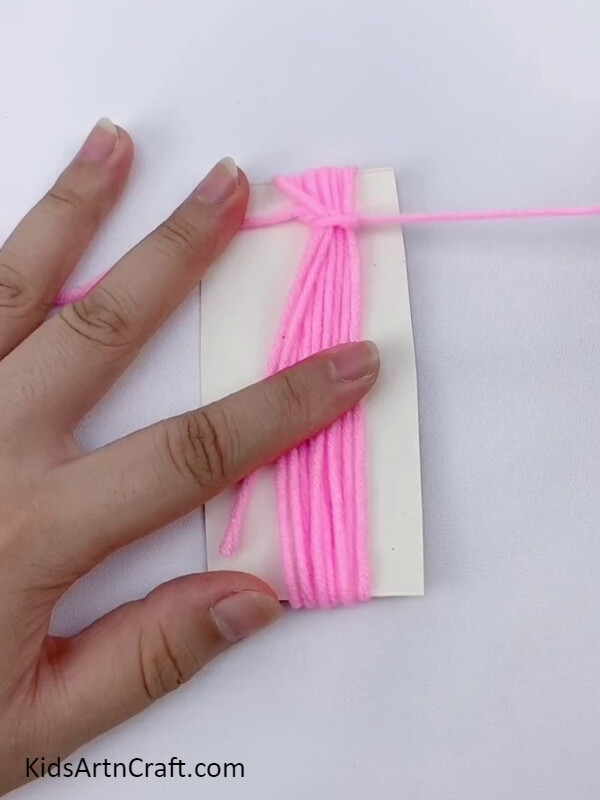
Your next step is to wrap more dark pink coloured wool around the middle of the rectangular cardboard. After wrapping the dark pink coloured wool around the rectangular cardboard, you have to tie a knot at the top of the dark pink coloured wool.
Step 19: Cut The Extra Part From The Scissors
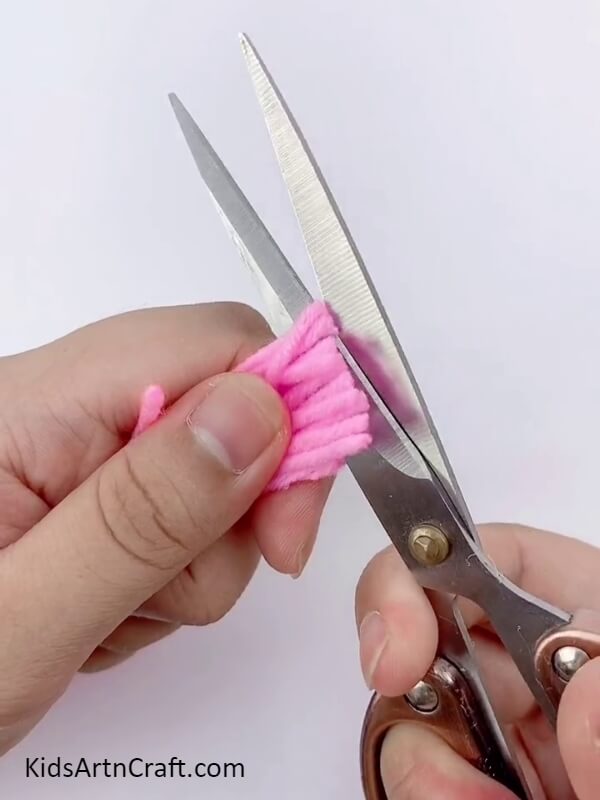
After tying the knot from the top of the dark pink coloured wool, you have to remove the dark pink coloured wool from the rectangular cardboard. Do this step very carefully.
After removing the dark pink coloured wool from the rectangular cardboard, you have to cut the extra part from the dark pink coloured wool with the help of scissors.
Step 20: Tie The Dark Pink Wool To Make A Tassel
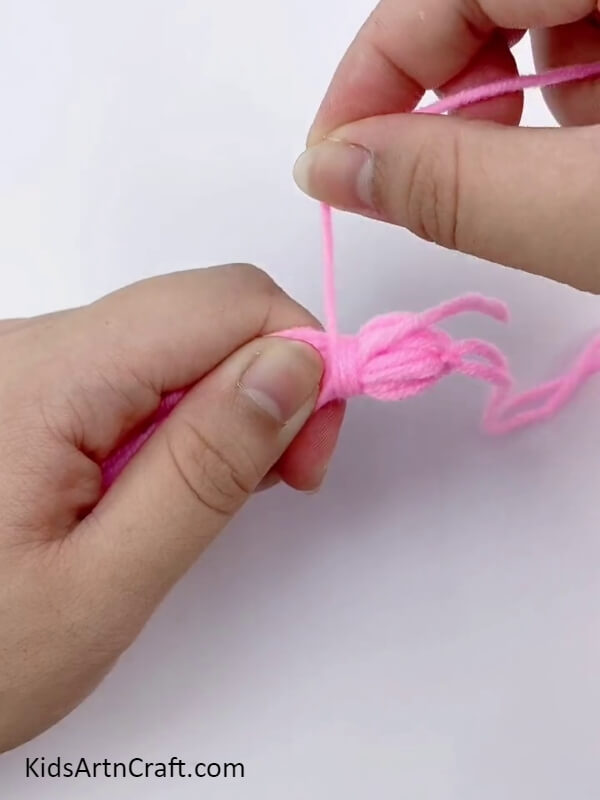
After cutting the extra part of the dark pink coloured wool with the help of scissors, take one strip of the dark pink coloured wool and tie the strip of the dark pink coloured wool around the dark pink coloured wool to make it into a tassel.
Step 21:Cut The Extra Part Of Dark Pink Wool With Scissors
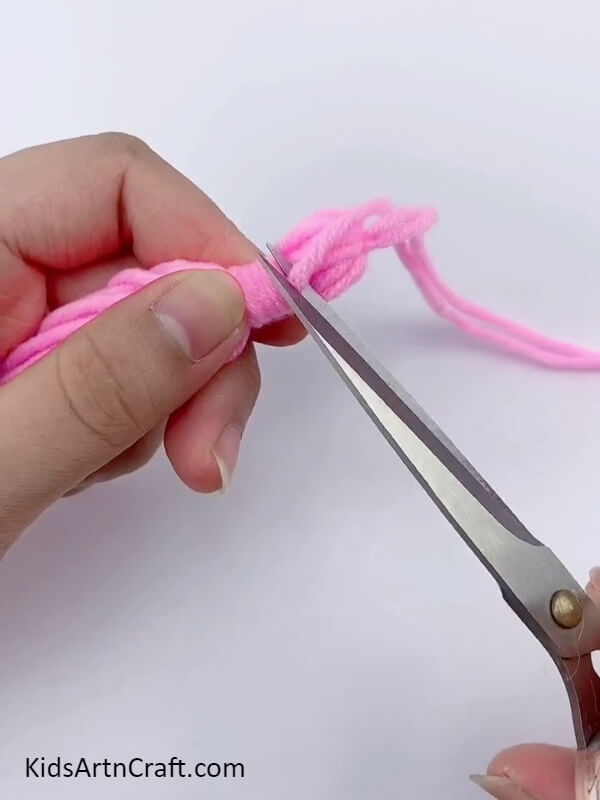
After tying the strip around the dark pink coloured wool, take a scissors and cut the extra part of the dark pink coloured wool, after tying the dark pink coloured wool to make a tassel.
Your Craft Is Ready!!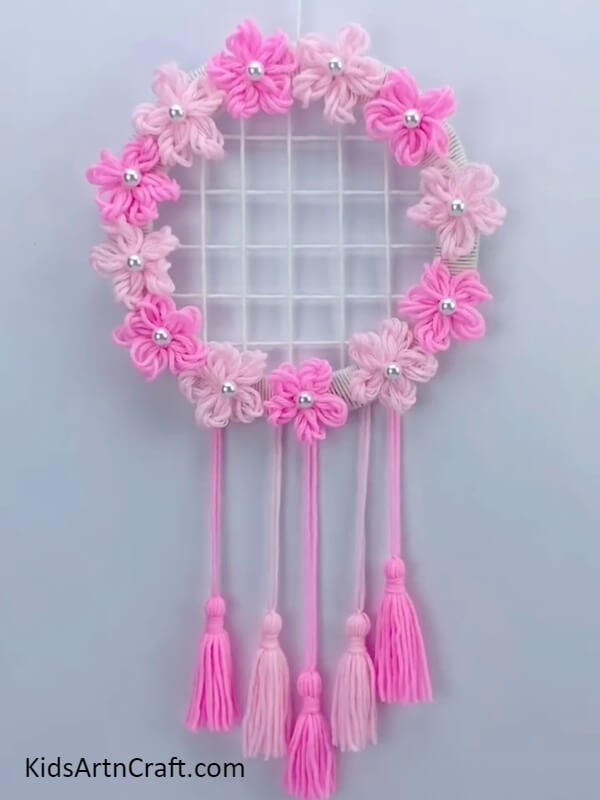
Finally your beautiful flower wreath is ready to be hanged somewhere at your house to make the corner of your house look more aeshtetic and pleasing. This craft is little lengthy to process but it is very easy and you should definitely try to broaden the horizon of your crafting skills. Anyone can try this craft from kids to adult. You can decorate you house with this craft or use this beautiful wreath for some occasion.
Do you want something new to decorate you house with? This craft is perfect for your tastebuds and it will even look good to lit up the aeshtetic of your house. So, go and try out this craft right now to decorate your house with some new vibe.
Some More Flower Wreath Craft Tutorial
Easy To Make Egg Carton And Paper Flower Wreath Craft For Kids
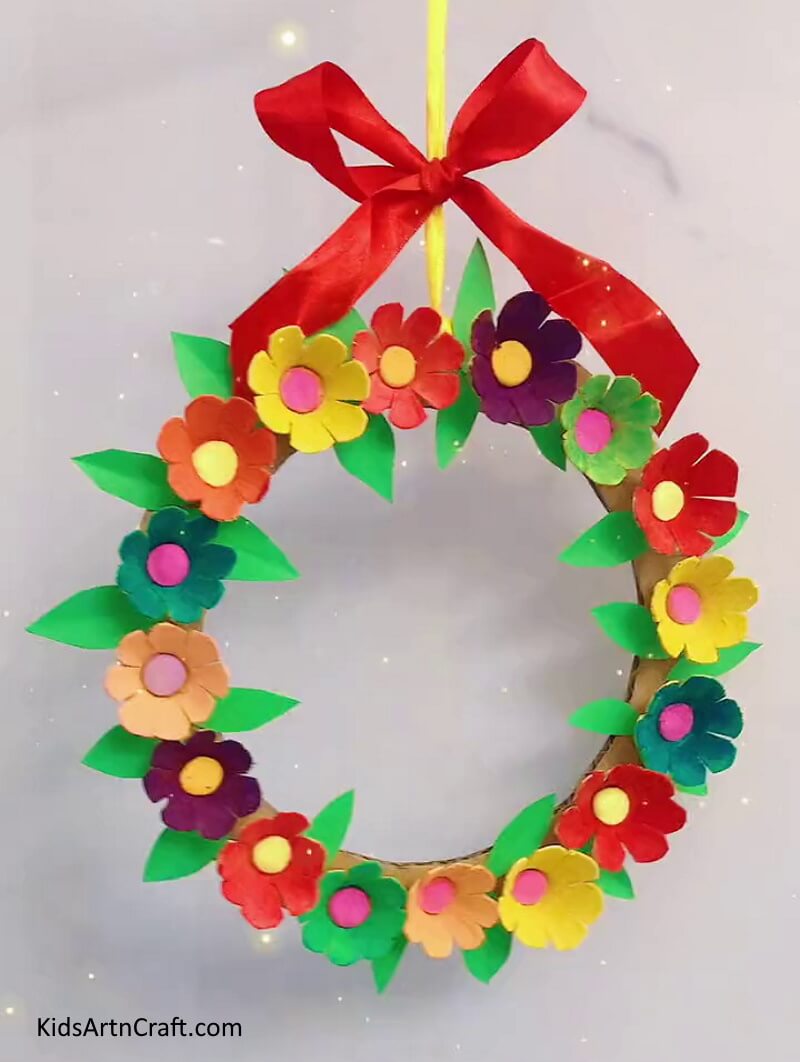
Image Source/Tutorial: Kids Art & Craft
This easy craft is perfect for kids! Using an egg carton and some paper, they can make a beautiful flower wreath in no time. A great project for a rainy day, or a fun activity for a birthday party.
Follow us on Youtube for art and craft tutorials and much more.
More Articles from Kids Art & Craft
- DIY Paper Flower Hanging Craft Step-by-Step Tutorials
- DIY Beautiful Flower Art & Craft Idea On Cardboard With Step by Step Tutorial
- Colorful Thread Pom Pom Flowers Craft Making Tutorial For Kids
- DIY Paper Flower Vase For Kids For Home Decor
- DIY Flower Basket Step by Step Tutorials for Kids


