Christmas
Christmas Wreath Artwork Tutorial Idea For Kids

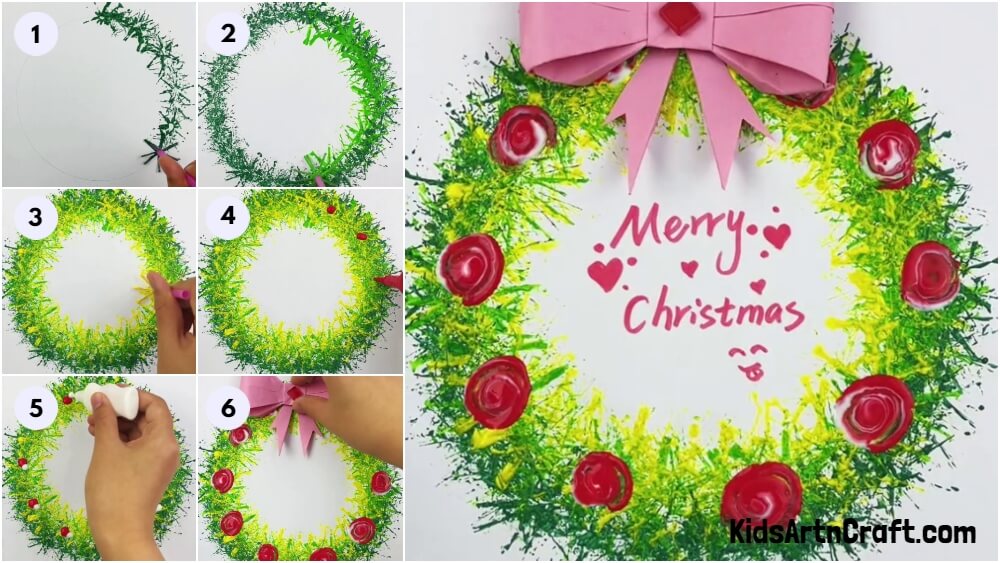
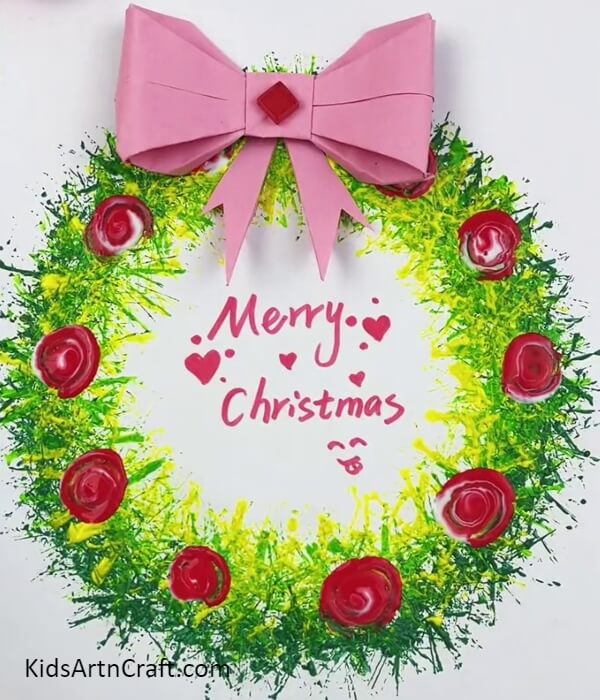
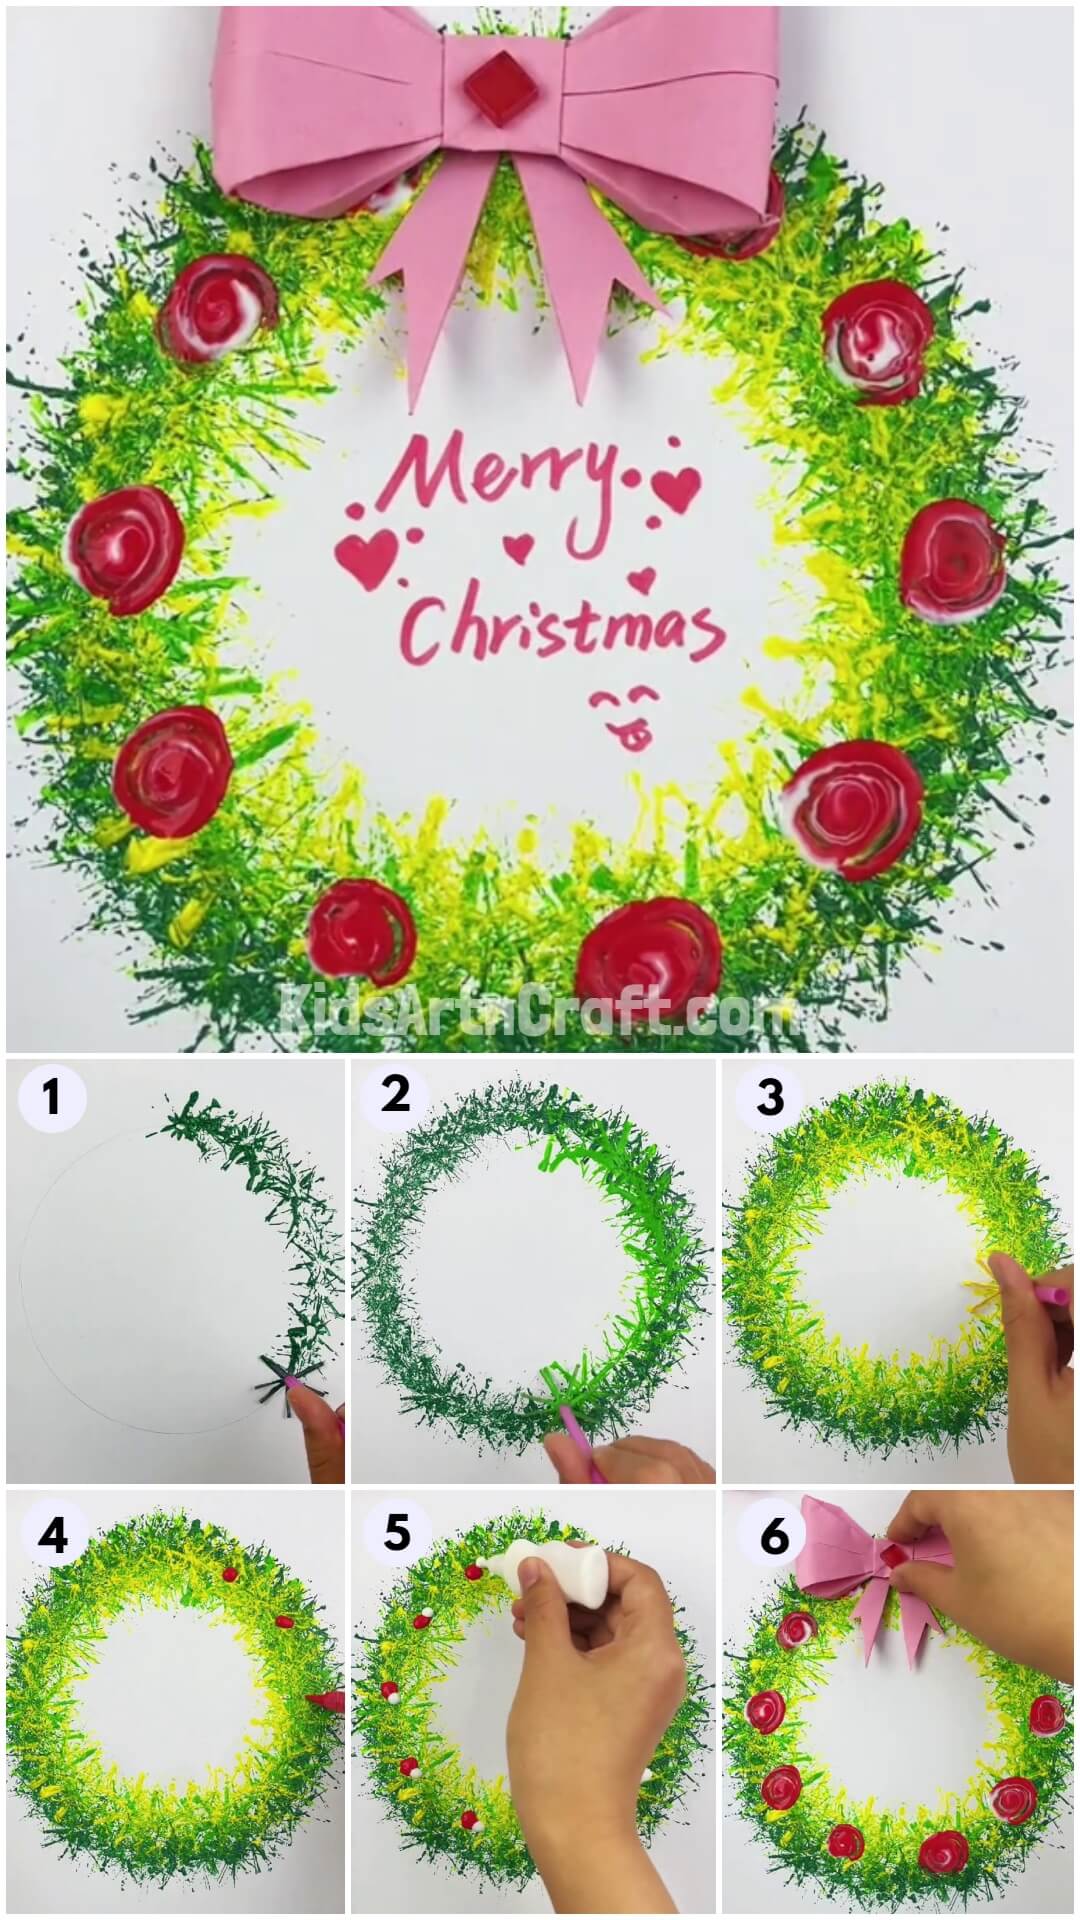
This is an easy step-by-step tutorial to make a realistic merry Christmas wreath artwork that will surely be a hit on Christmas days!
Christmas time is the time to decorate your home! This Christmas wreath flower will be a perfect artwork craft at this time! The wreath looks just real but is made using paints and this tutorial will guide you through each and every step to create this merry Christmas wreath like a pro! You will also learn to mix and shade through paints in this artwork and decorate it just as shown in the image! This craft will definitely be a hit at Christmas time to contribute to decorating your home! Unleash your artist in you, grab the materials, and let’s start!
Simple Christmas Wreath Artwork Craft
Read More: Creative Owl Painting Idea For Kids Step-by-step Tutorial
Materials Required
- White Paper Sheet
- Star Stamp
- Paint Colors (Green, Light Green, Red, White, And Yellow)
- Pink Paper Bow
- Cotton Earbud
- Glue
- Red Sketch Pen
- Pencil
Procedure
Step 1: Stamping A Star
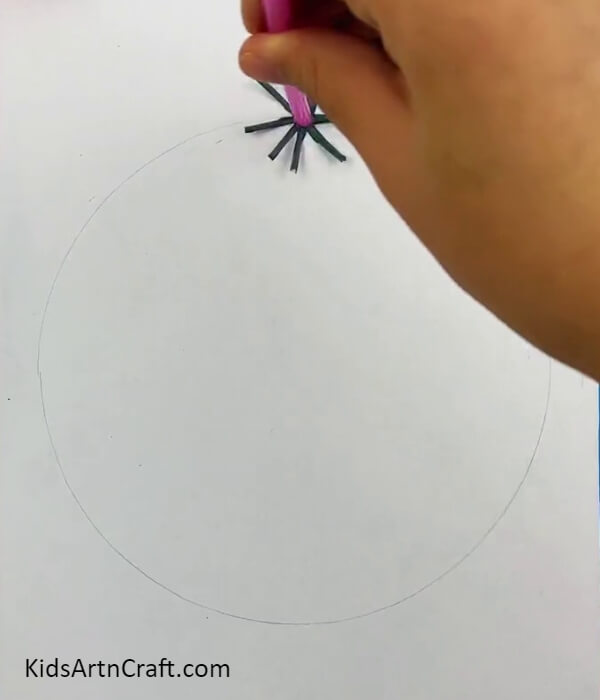
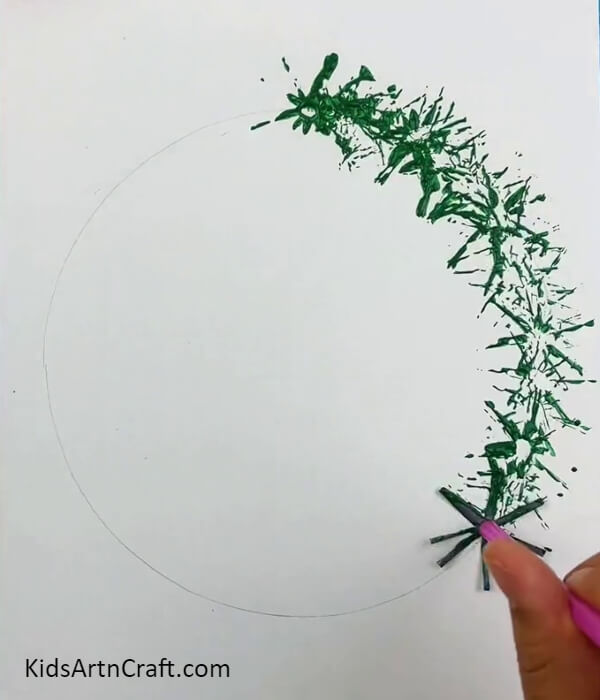
To begin this craft, take a white colored paper sheet, a pencil, and a star stamp. Now, draw a circle over the white paper using a pencil. Then dip a star stamp into green paint and stamp it over the boundary of the circle.
Step 2: Continuing Stamping Over The Circle
Dip and dab green stars continuously over the boundary of the circle.
Step 3: Completing Stamping Onto The Circle
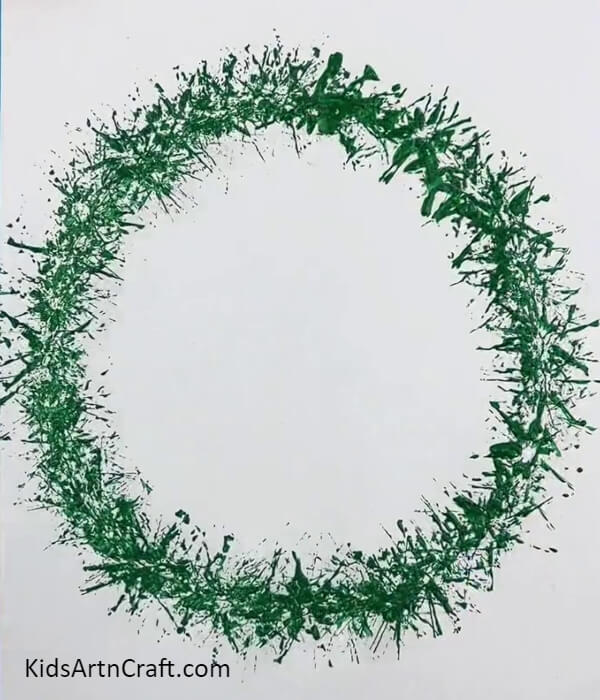
Continue stamping 2-3 times over the circle to make a wreath.
Step 4: Shading The Wreath With Light Green Paint
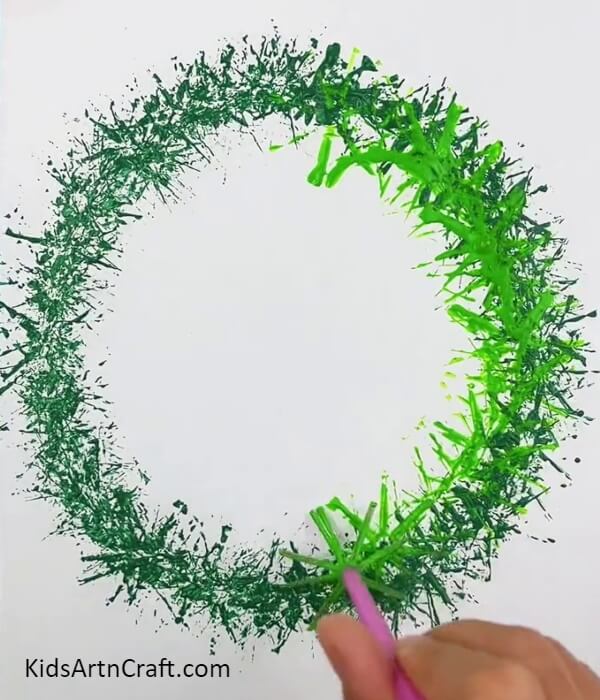
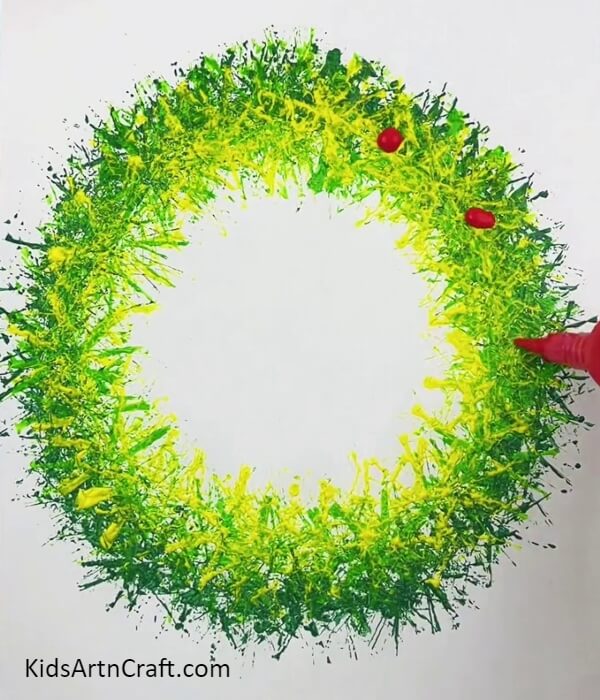
Now, dip the star stamp in the light green paint and dab it over the inner boundary of the green wreath to give it shade.
Step 5: Shading The Wreath With Yellow Paint
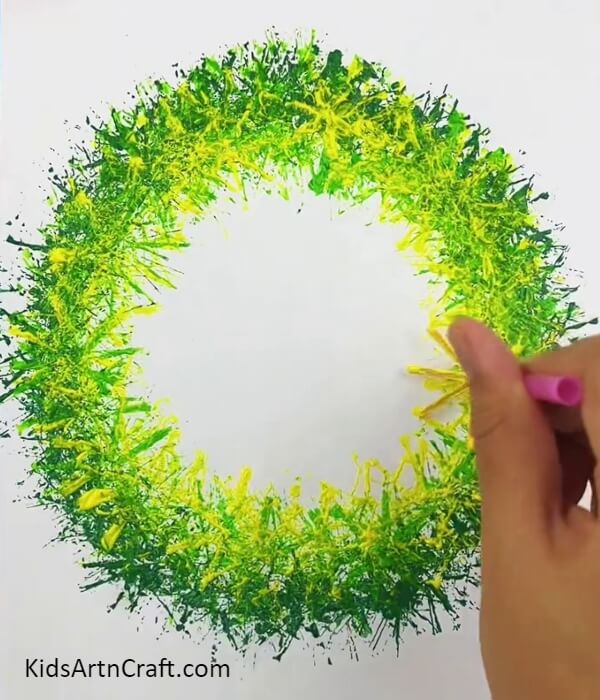
Now, dip the star stamp into yellow paint and dab it onto the further inner boundary of the wreath to give the wreath a shade of yellow color.
Step 6: Putting Red Paint Drops
Over the wreath, put 12 red paint drops at a certain distance to each other.
Step 7: Putting White Paint Drops
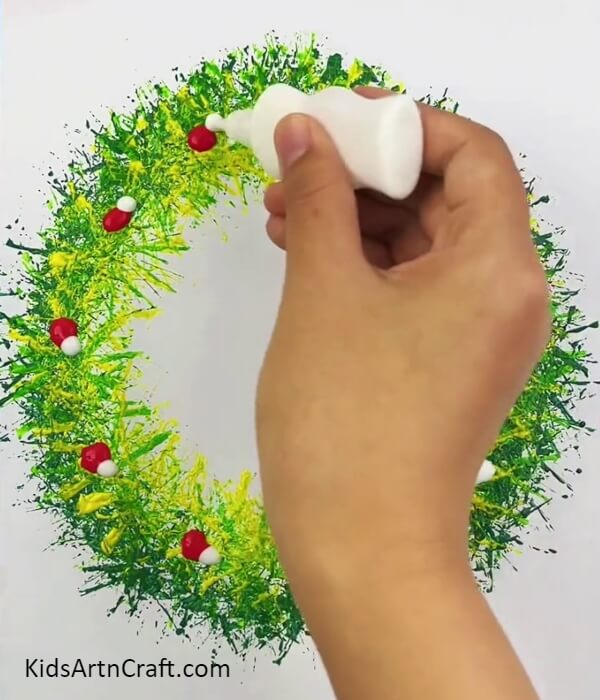
Slightly over the red drops, put white paint drops, this time the drop should be lesser than the red one.
Step 8: Making A Spiral
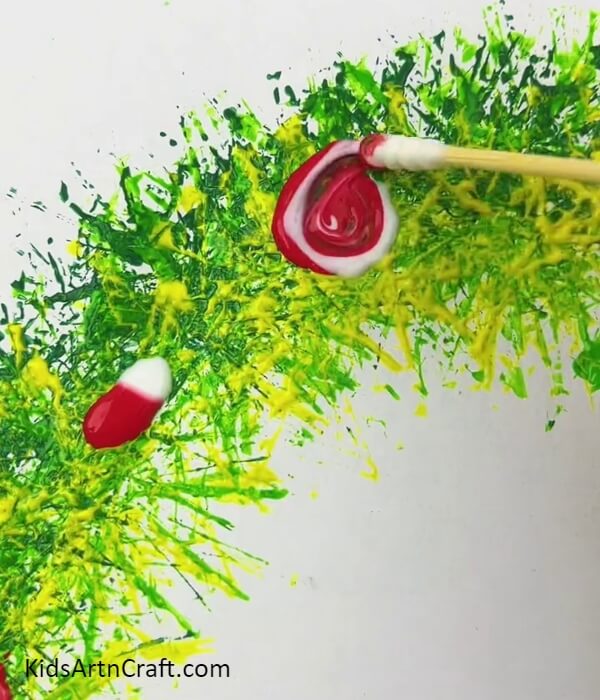
Using a cotton earbud, make a spiral over the paint drops to make them look like flowers.
Step 9: Adding A Bow
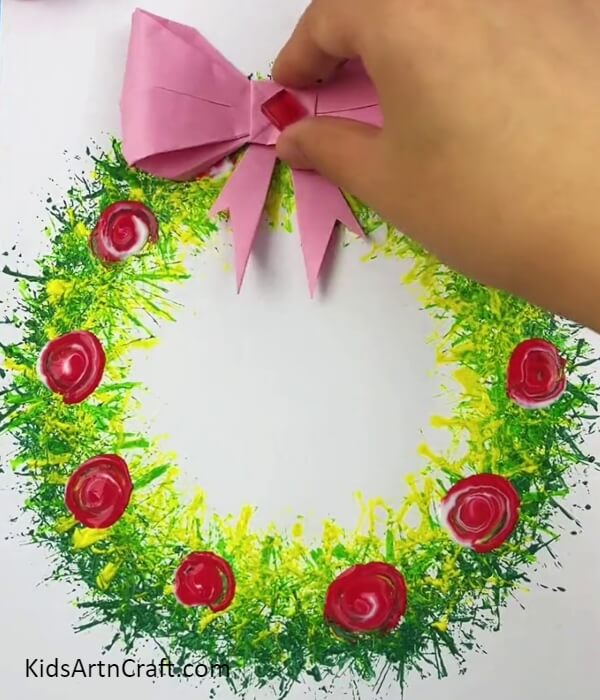
Paste a pink paper bow over the top of your wreath using glue.
This Is The Final Look Of Your Wreath Artwork!
Using a red sketch pen, write Merry Christmas in the center of the wreath artwork to give the statement of the occasion.
Congratulations! You have finally created your pretty merry Christmas flower wreath artwork!
This flower wreath looks 3D and real not just an artwork! The roses too are very easy to make and look eye-catchy! This craft is a perfect way to engage your kids at the time of Christmas! Let them decorate this artwork on their door to decorate it as well as will motivate them to stay creative! You can also make this artwork as a gift for your loved ones on the occasion of Christmas, they will definitely love it, and will bring a smile to their faces! You can also customize the statement in this artwork to suit it for any occasion!
Hope you liked this article! Give it a try and share your art journey with us in the comments section!
Follow us on Youtube for art and craft tutorials and much more.
More Articles from Kids Art & Craft
- Beautiful Butterflies Over Flowers Painting Idea For Kids
- Easy Tree Craft Using Christmas Tree Leaves & Pom Poms
- Easy Flower Stump Painting Art Tutorial for Kids
- Easy & Fast Christmas Crafts Video Tutorial for Kids
- Easy Christmas Gift Card Crafts Video Tutorial For All


