


Kids Activities
Creative Butterfly Painting Using Sponge Idea For Kids

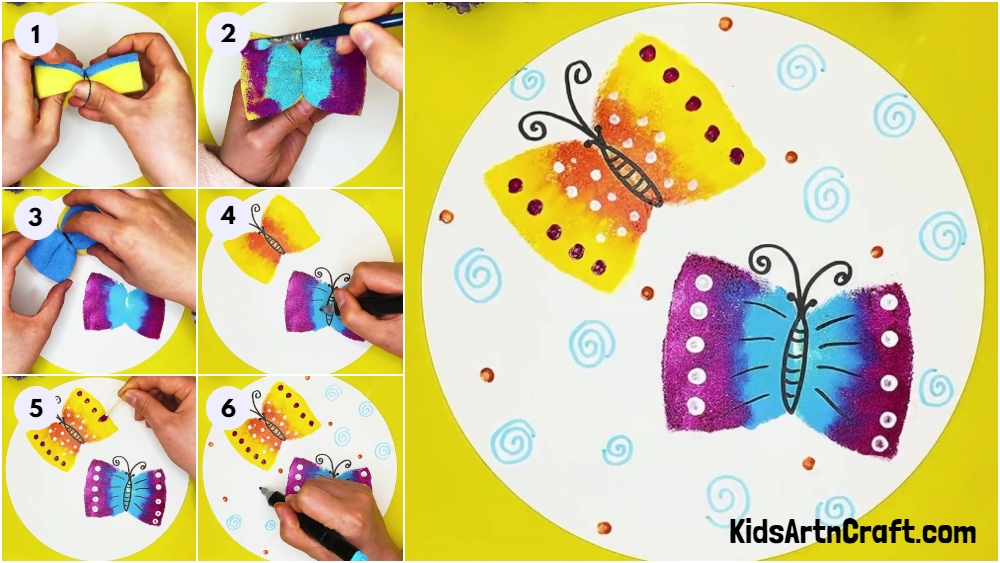
Create a one-of-a-kind butterfly painting using a basic sponge! This fun activity is suitable for everyone, regardless of age or experience. Personalize the colors and design to produce a unique piece of artwork. Have a blast with this easy painting project!
We all love colourful butterflies flapping their wings in the air. We place great efforts in catching them but all in vain as they are quick to escape one’s hold and even if you get close enough, their delicate frames stop you from touching them. Today we will be making these butterflies through a painting. The tutorial will teach you a unique way of working with paints, instead of using a conventional paint brush, we will use dish washing sponges to make this painting. So, collect all the material required and let’s get started.
Easy To Make Butterfly Painting Using Sponge
Read More: Easy Paper Butterfly Craft For Kids
Material Required
- A white sheet of chart paper
- A pair of scissors
- A dish washing sponge
- Water colours
- A paint brush
- A black and a blue sketch pen
- A rubber tie
- Ear buds
Procedure
Step 1: Working on The Sheet of Paper
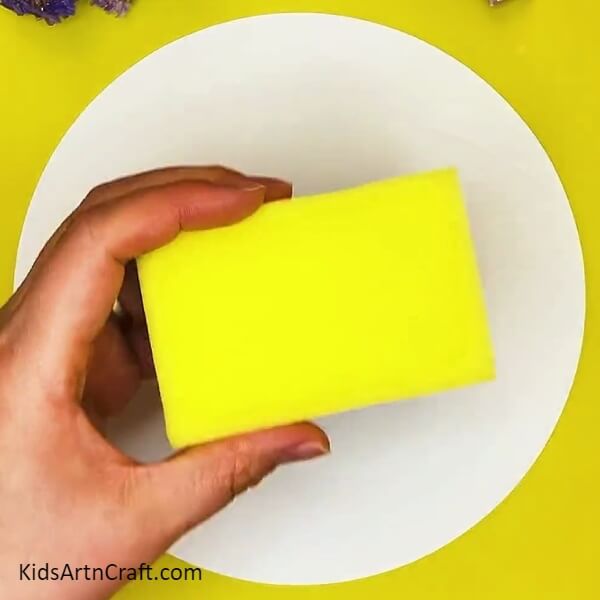
Take a sheet of paper and cut a circle out of it. Place it on the table. Now, go to your kitchen and take out a new dish washing sponge.
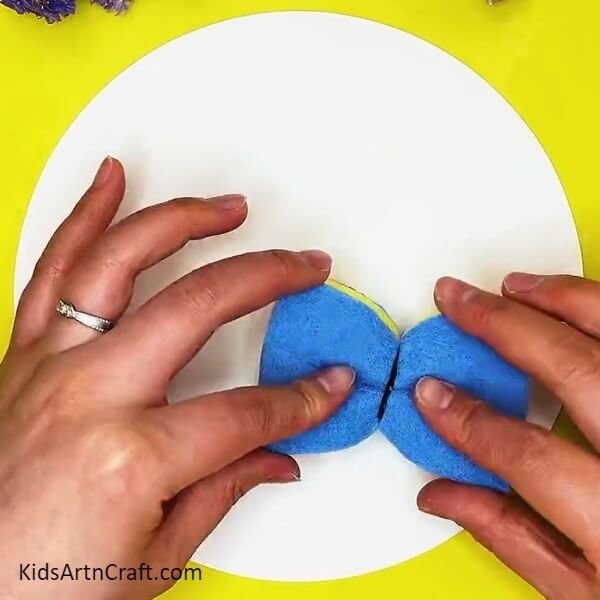
Step 2: Tying the Rubber Tie on The Sponge
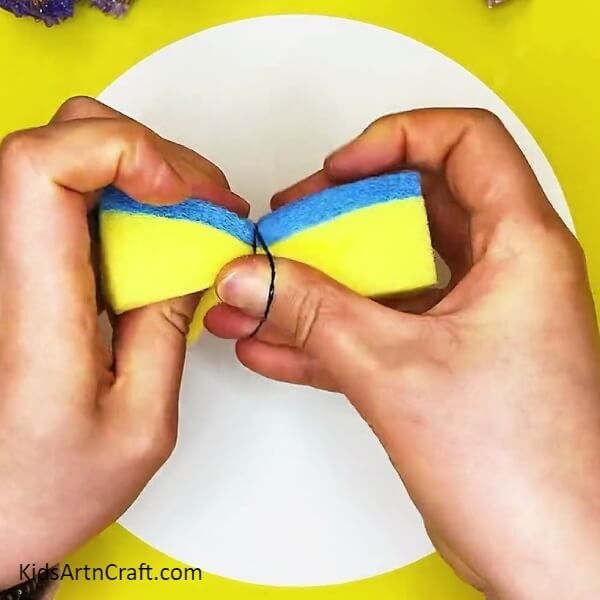
Take a thin rubber tie and bind the sponge in the middle creating two wing like shapes on each side of the tie. See the picture below for reference.
Step 3: Painting The Sponge
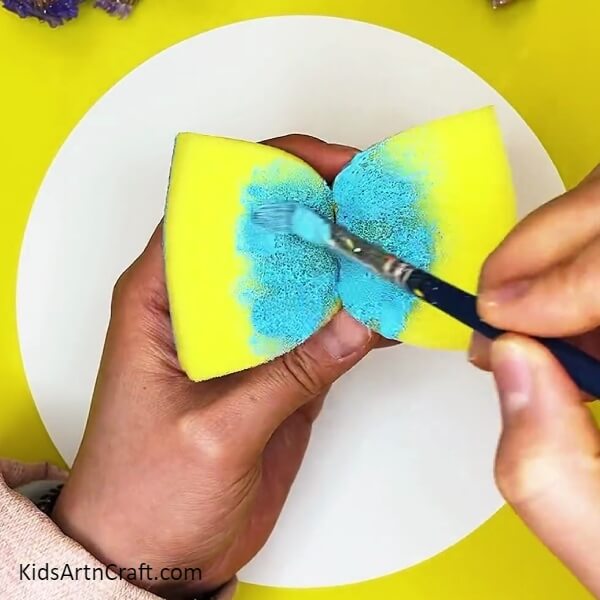
Take a paint brush and dip it directly in some blue paint. Now, paint half the surface of the wings starting from the tie up to the middle of each wing. See the picture below for reference.
Step 4: Painting the Rest of the Sponge
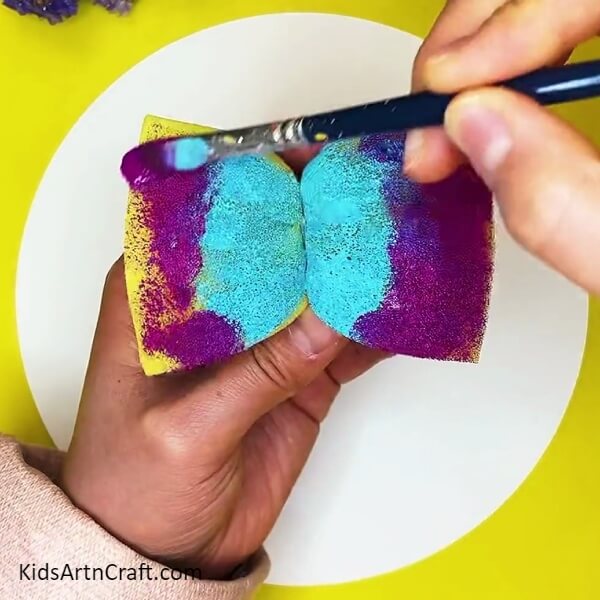
Paint the rest of the sponge on each side with colour purple using the same paint brush. Remember to wash the brush first before dipping in the purple paint. See the picture below for reference. The sponge now has blue colour in the middle and purple on the sides.
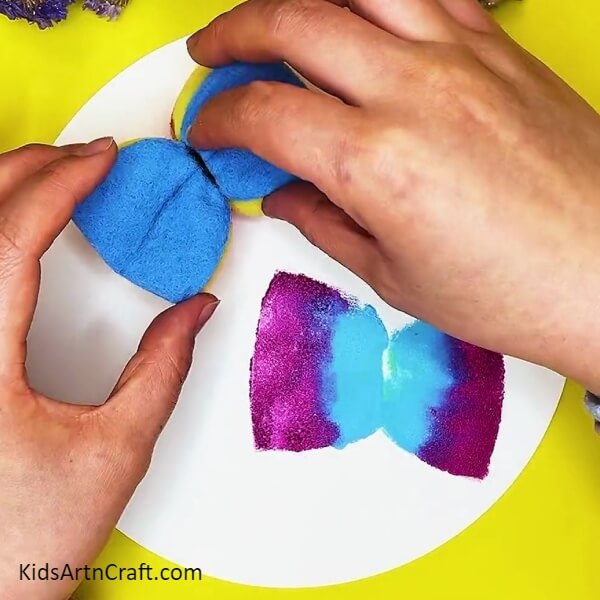
Step 5: Stamping the Sponge on the Sheet
Stamp the sponge at the bottom right side of the sheet. Keep the sponge a little tilted to the right while placing it on the sheet. See the picture below for reference.
Step 6: Painting the Sponge Again
Wash the sponge thoroughly using soap and water. Now, squeeze the sponge to drain all the water out and pat dry it as well. Tie the rubber back creating the same wing shapes. Dip a clean brush in orange paint and colour a small area surrounding the rubber tie. Washing the brush again, dip it in yellow paint and paint the rest of the surface left on each wing. Finally, stamp the sponge on the top left side of the sheet. Keep the sponge a little tilted to the left while placing it on the sheet as shown in the picture below.
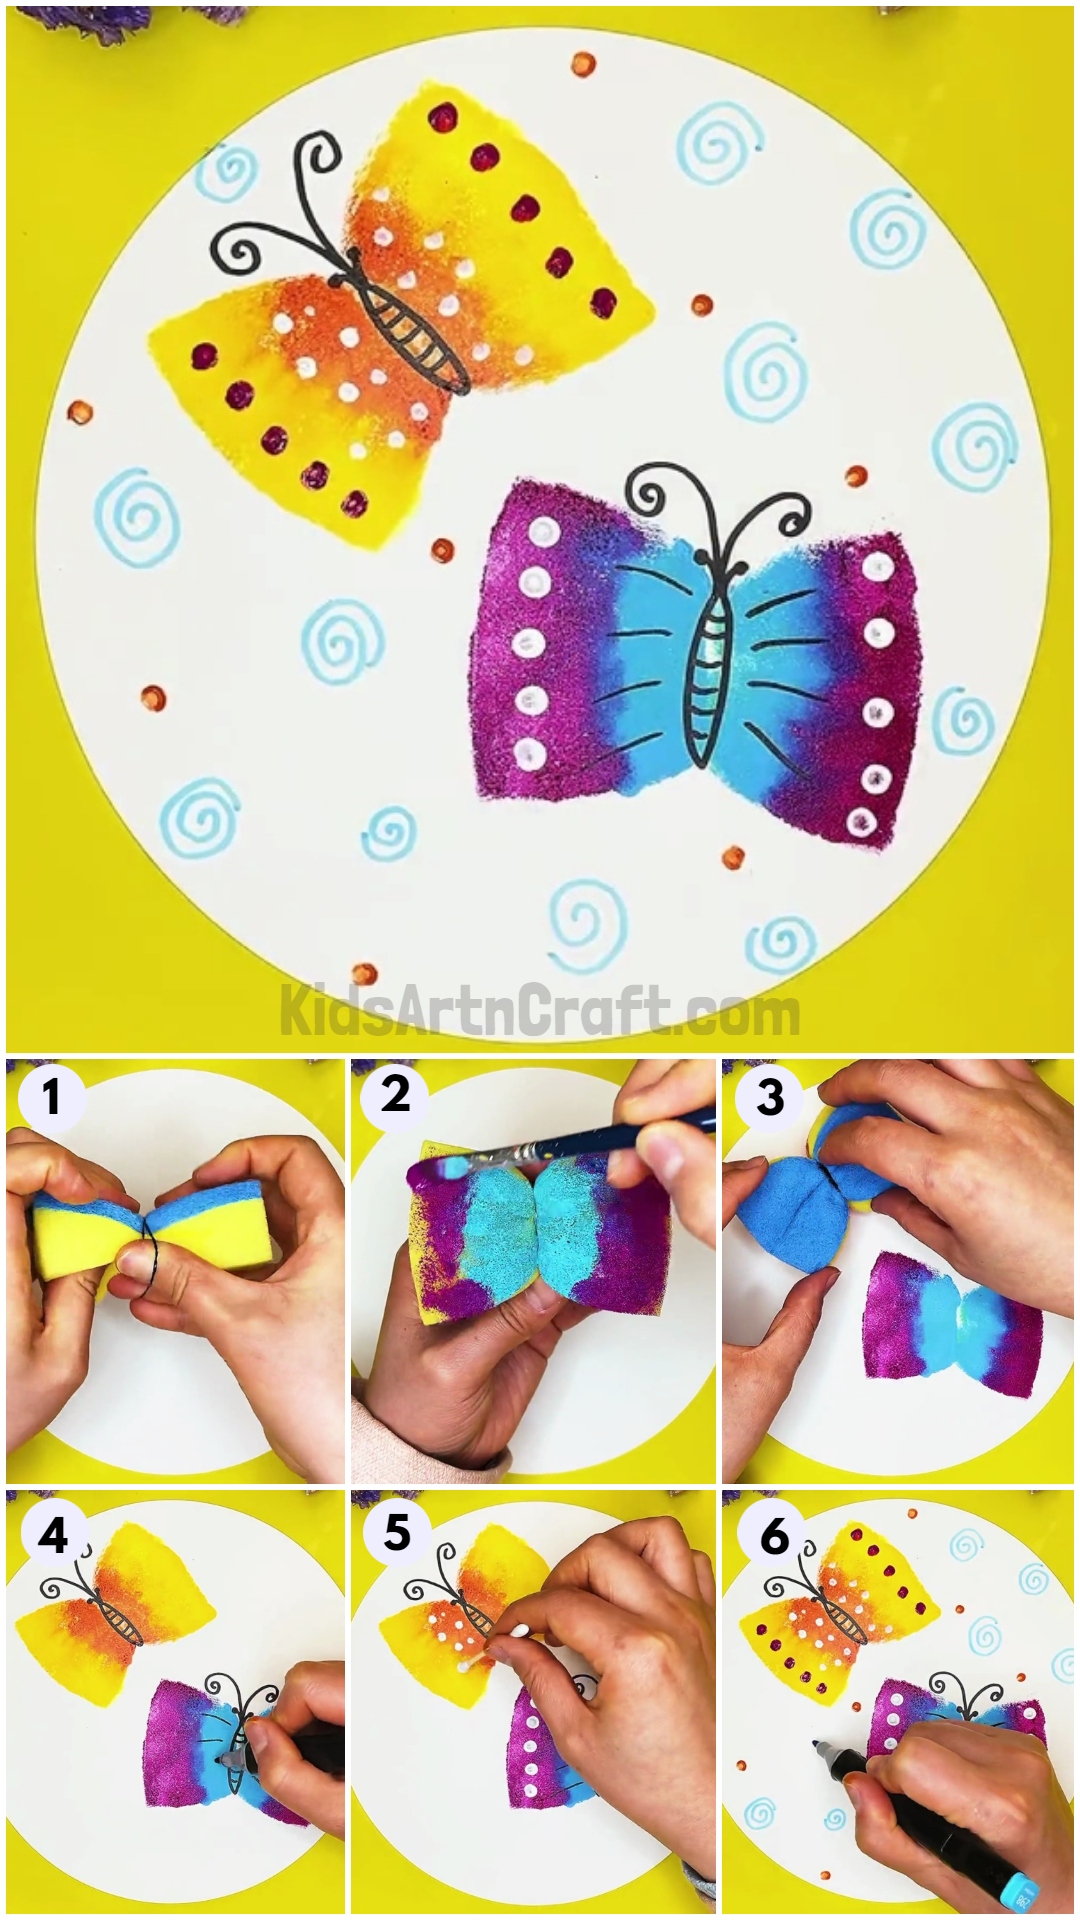
Step 7: Paint Stamps on the Sheet
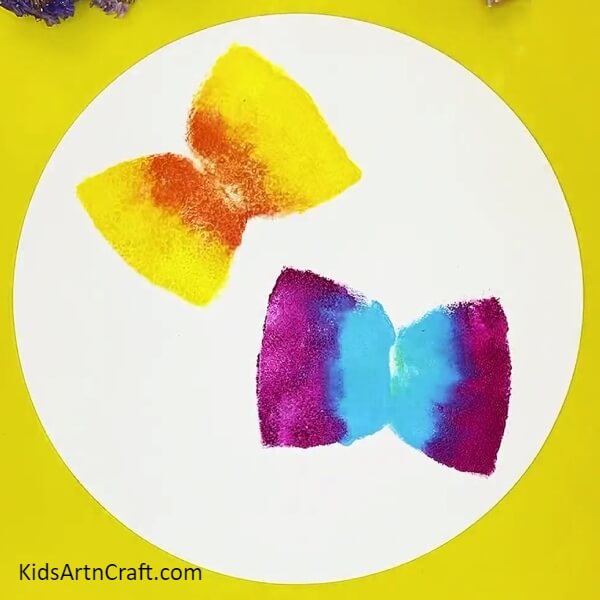
You can now see two sponge stamps on the sheet. These stamps are the the wings of the two butterflies in the painting. The texture of the sponge has replicated itself on the sheet as well making the wings more appealing and realistic as shown in the picture below. Let the paint dry completely before moving on to the next step.
Step 8: Drawing the Bodies of the Butterflies
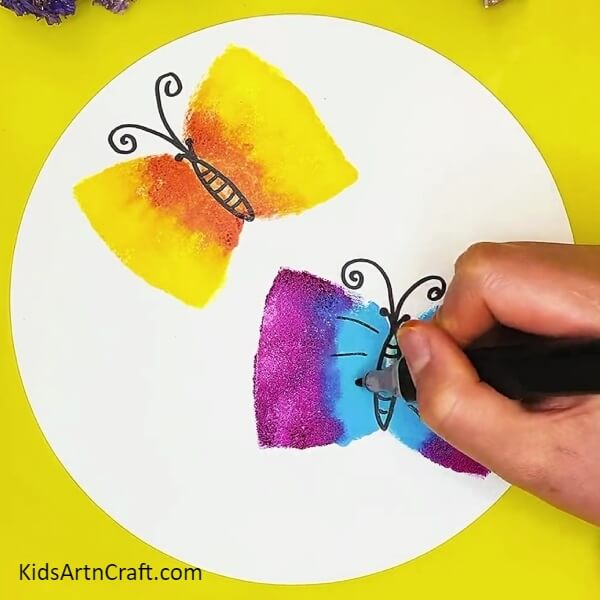
Take a black sketch pen and make an oval shape pointed at both ends, in the middle of the wings. Repeat the process on both the butterfly wings. This shall serve as the body of the butterflies. Now, draw two antennas on the top of the shape you just drew. Make the antennas coiled at the top ends. Also draw two small compound eyes next to the bottom of the antennas. Repeat the process on both the butterflies. Also draw small horizontal lines on the bodies of the butterflies. See the picture below for reference.
Step 9: Adding Some More Features to the Butterfly
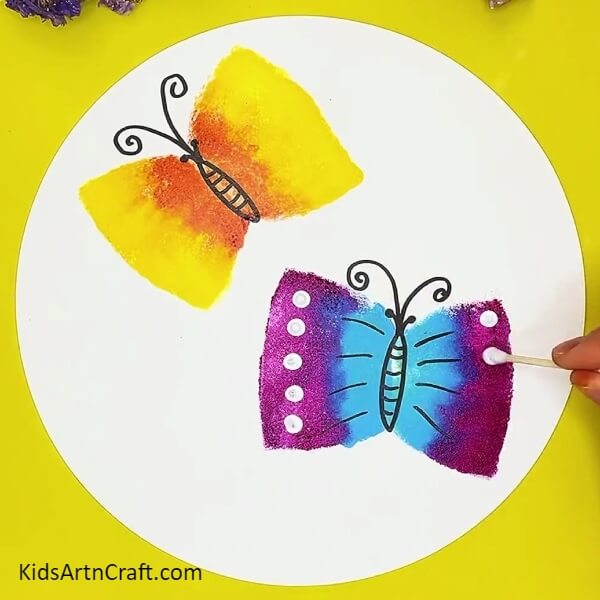
Using the same sketch pen, draw four horizontal lines on each side of the body of the purple butterfly at the bottom. Now, take an ear bud and dip it into some white paint and stamp five dots ,vertically on the purple section of each the wing. See the picture below for reference.
Step 10: Making Some Dots on the Yellow Butterfly
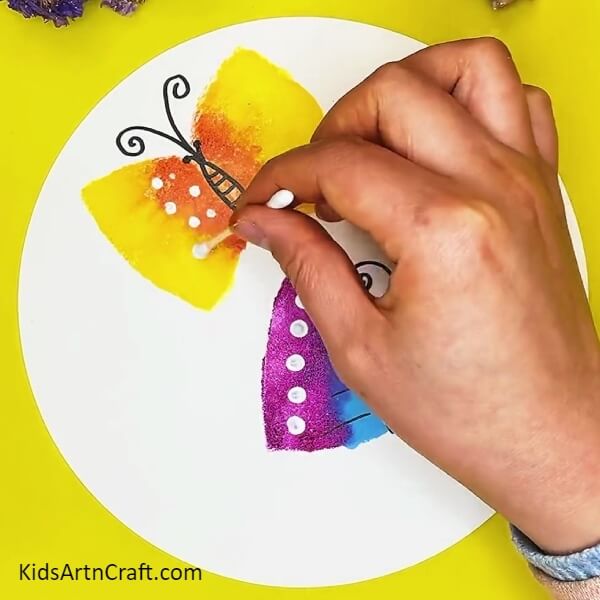
Using the same ear bud and same paint stamp eight dots in a scattered way on the orange section of each wing of the butterfly at the top. See the picture below for reference.
Step 11: Stamping More Dots on the Same Butterfly
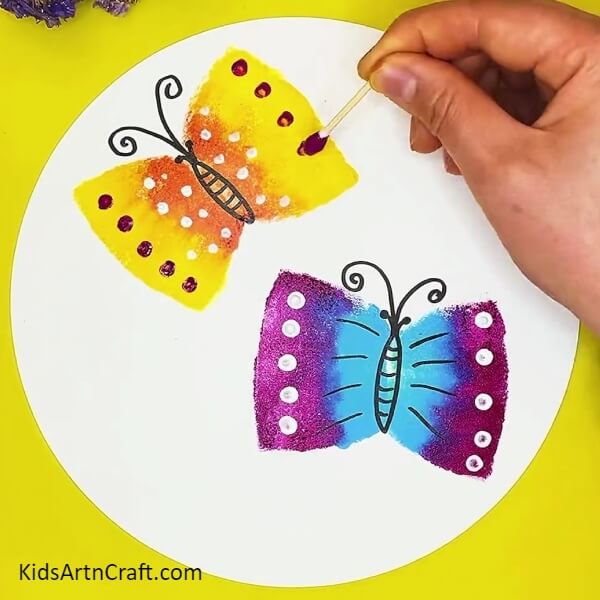
Take a clean ear bud and dip it directly into some red paint and stamp five dots, vertically on the yellow section of each wing. See the picture below for reference.
Step 12: Drawing on the Black Spaces of the Sheet
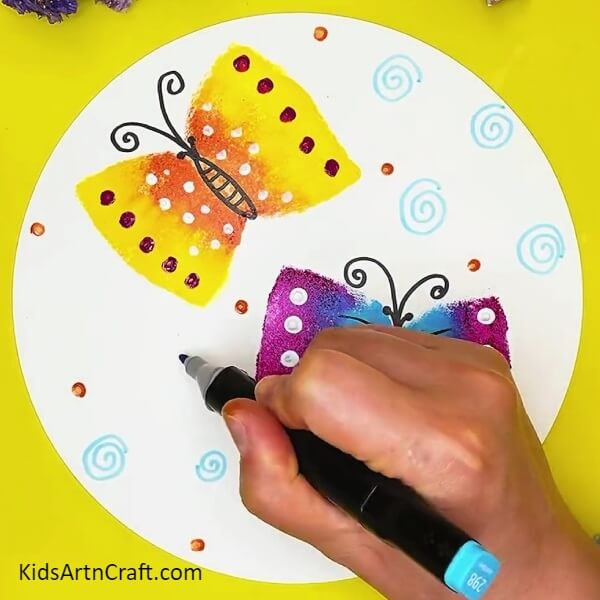
Take a blue sketch pen and draw small spiral shapes on the blank spaces around the butterflies. Draw twelve spirals in total, scattered around the white sheet. See the picture below for reference.
Finally!! Adding Orange Dots into the Sheet

Take a clean ear bud and dip it in some orange paint. Now, stamp dots on the blank spaces between the spirals you drew in the previous step. Stamp eight dots in total as shown in the picture below.
Some More Butterfly Craft Tutorial
Make Your Own Paper Butterfly Craft For Kids
Image Source/Tutorial: Kids Art & Craft
Making paper butterflies is a fun and creative craft for kids. It is an easy-to-follow project that will help them develop their fine motor skills, while having a great time at the same time. They will love the satisfaction of creating something beautiful!
This completes our beautiful butterfly painting with two pretty butterflies flashing their vibrant colours in a happening background. You can hang this painting on the walls of your room or paste it in your art book. You learned unique painting skills in this tutorial and some amazing sketching skills as well. Keep practicing all the techniques you learn in these tutorials and keep experimenting with your ideas. Good luck.
Follow us on Youtube for art and craft tutorials and much more.
More Articles from Kids Art & Craft
- Easy Paper Folding Crafts Video Tutorial for Kids
- How to Make Ladybug Crafts Tutorial for Kids
- How to Make a Paper Peacock Easy Craft
- Mushroom Drawing Step-by-Step Tutorial For Kids
- Awesome Canvas Painting Video Tutorial for Beginners


