


Kids Activities
How to Make a Paper Peacock Easy Craft

Create a beautiful paper peacock craft with this easy step-by-step tutorial! Learn how to make a paper peacock using materials you can find around the house. A perfect craft for kids of all ages!
If you’re looking for an easy craft project to do with your kids, look no further than a paper peacock! This fun and colorful craft is perfect for kids of all ages and can be made with just a few simple supplies. You can even make a few different versions of the peacock, giving you a chance to explore your creativity. After learning through this tutorial, you will be able to create a fun and colorful craft that you can proudly display in your home. Here’s a quick guide to help you make your own paper peacock.
DIY Paper Peacock Craft For Kids To Make
Read More: Paper Rainbow Cloud Craft step by step Tutorial
Materials Required
- Colored Papers (Yellow, Blue, and Green)
- Colored Sketch Pens
- Googly Eyes
- Glue
- Scissors
Procedure
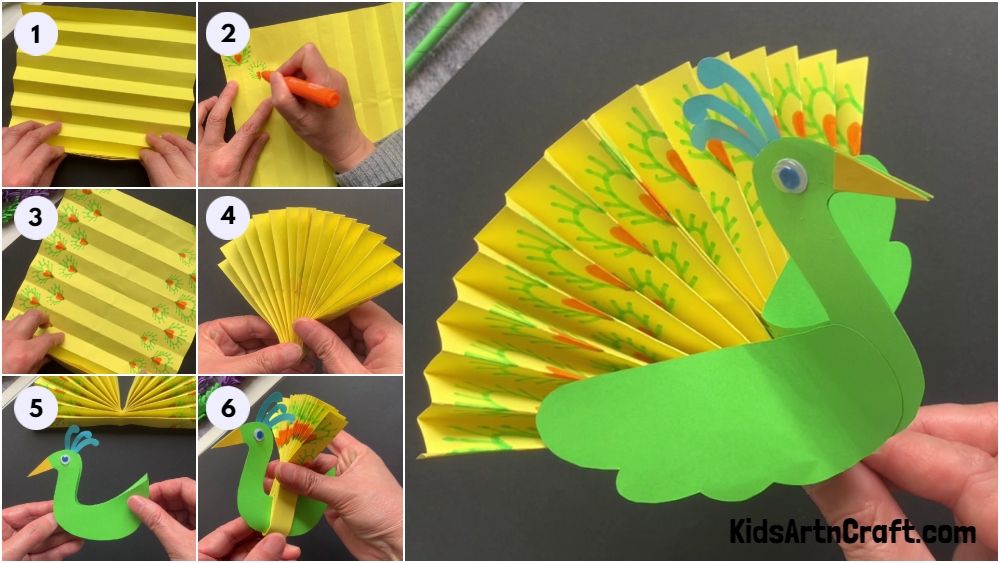
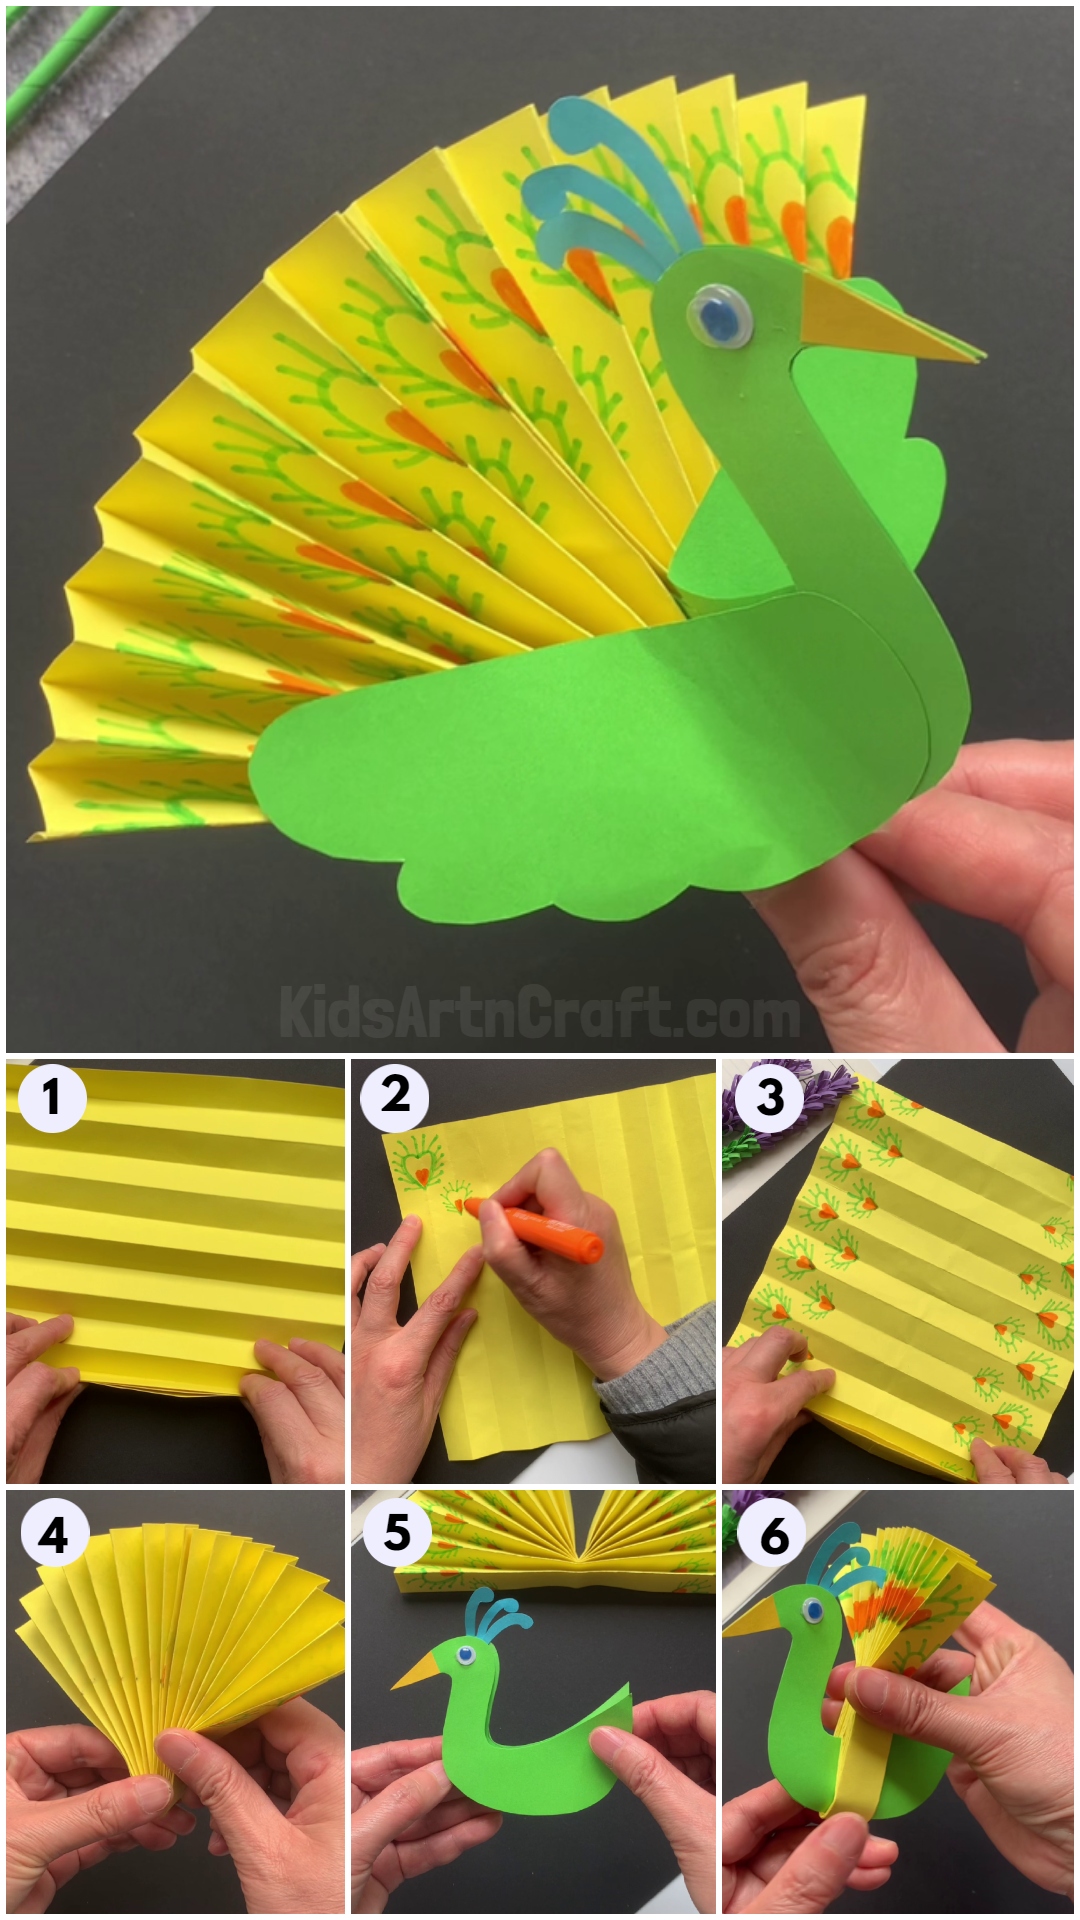
Step 1: Making Wings By Folding Paper
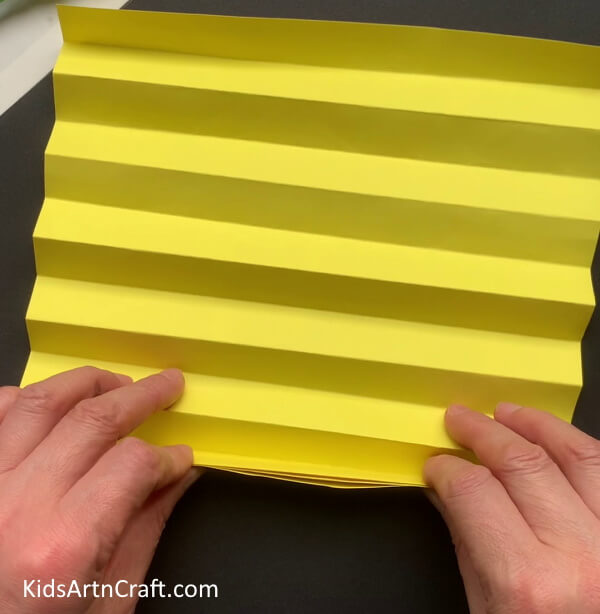
As a first step, take a yellow paper sheet and fold the paper about one inch from one side of the paper, and flip the paper. Again fold about an inch but in the opposite direction, and flip the paper again. Repeat the same till the end of the paper.
Step 2: Folding Paper Strip In Half
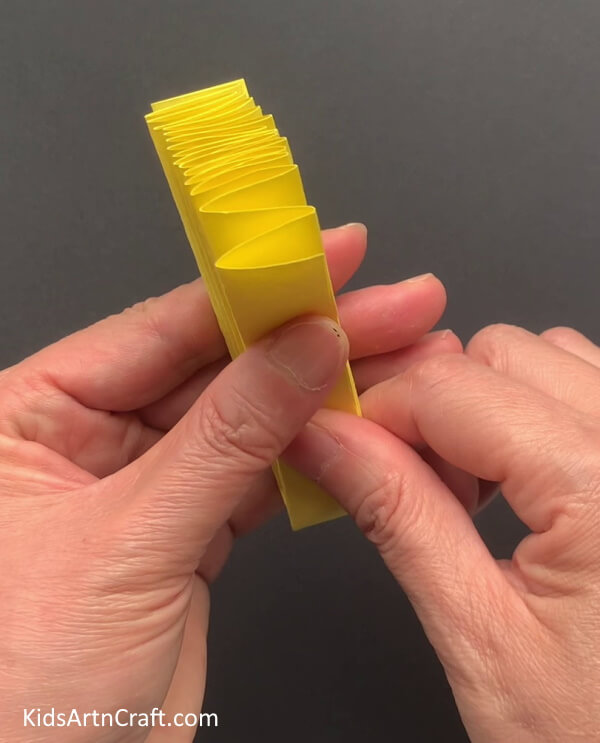
After folding, you should get a paper strip and fold it in half.
Step 3: Drawing Design On Paper
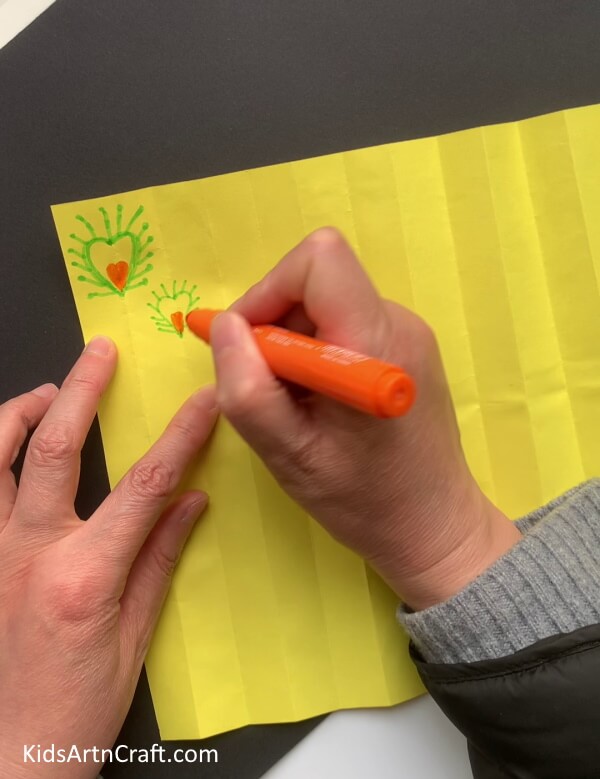
Unfold the paper and draw designs on top and bottom of the lengths using colored sketch pens. You can customize your designs.
Step 4: Folding Paper Along With The Creases
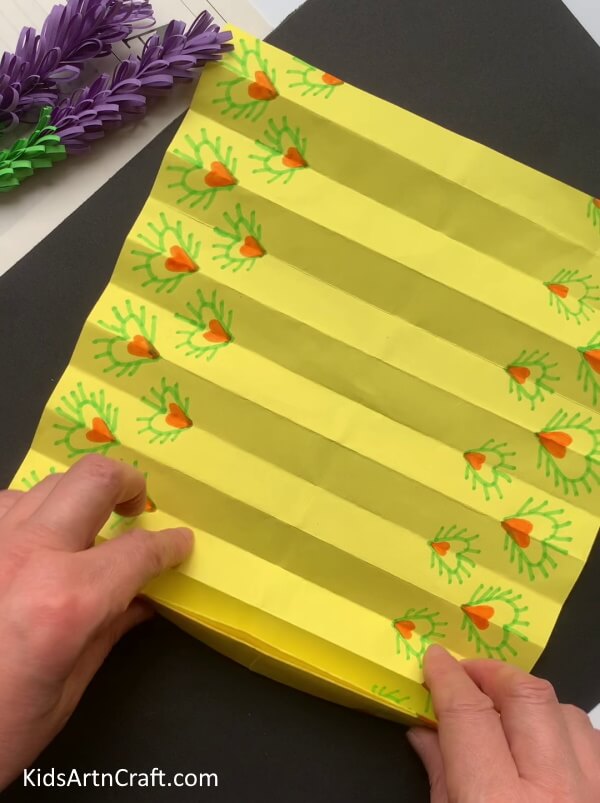
Again, fold the paper along with the creases.
Step 5: Folding Feathers In Half
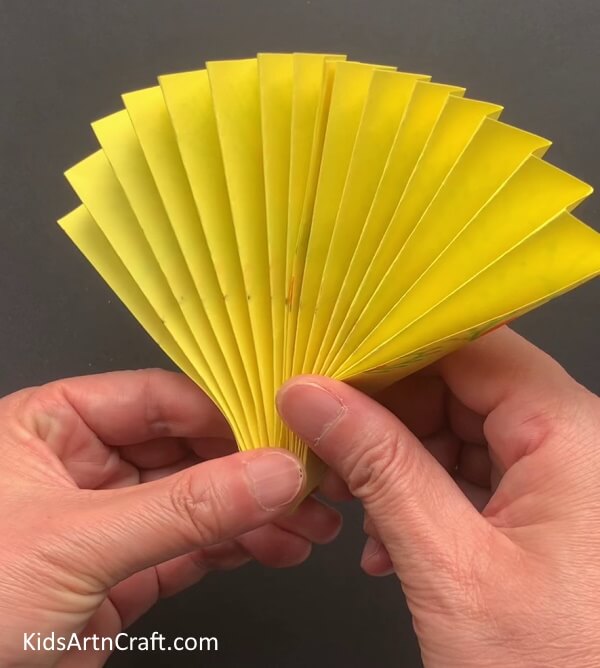
Fold the paper strip in half to make the feathers of the peacock.
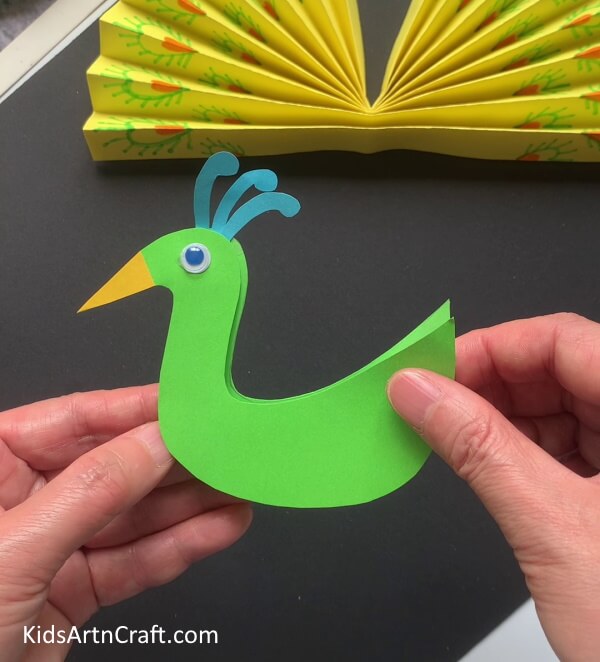
Step 6: Making Peacock’s Body
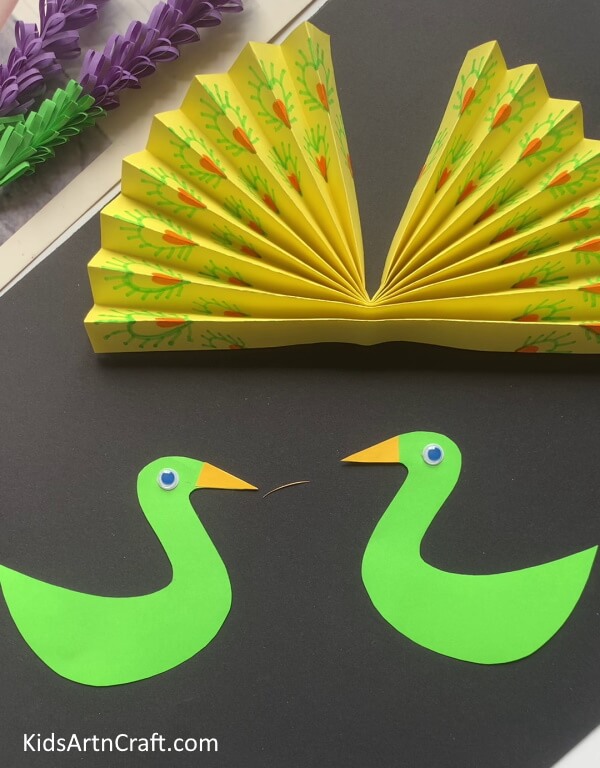
Cut out two peacock shapes from green paper. Paste the googly eyes on them using glue. Also, paste triangle-shaped yellow beaks on them.
Step 7: Pasting Crown On Peacock’s Head
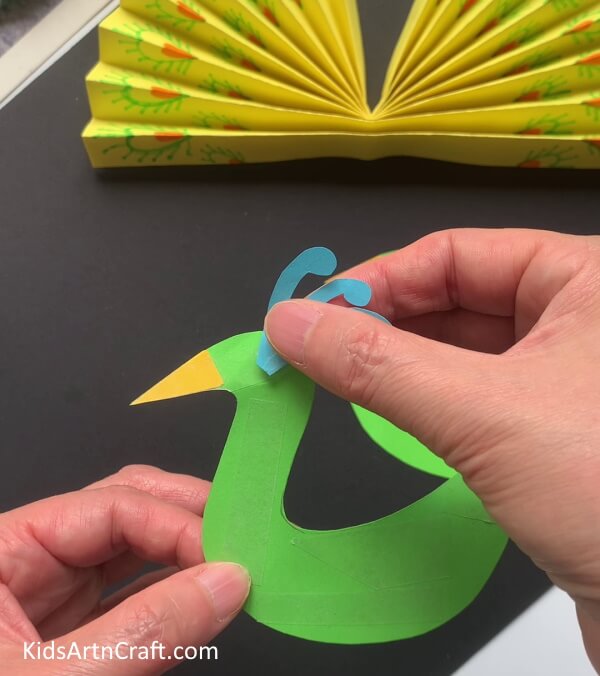
Make a crown from blue paper and paste it on the top back side of a peacock.
Step 8: Pasting Both Peacocks To Each Other
Paste both the peacocks overlapping each other.
Step 9: Attaching Wings To Body
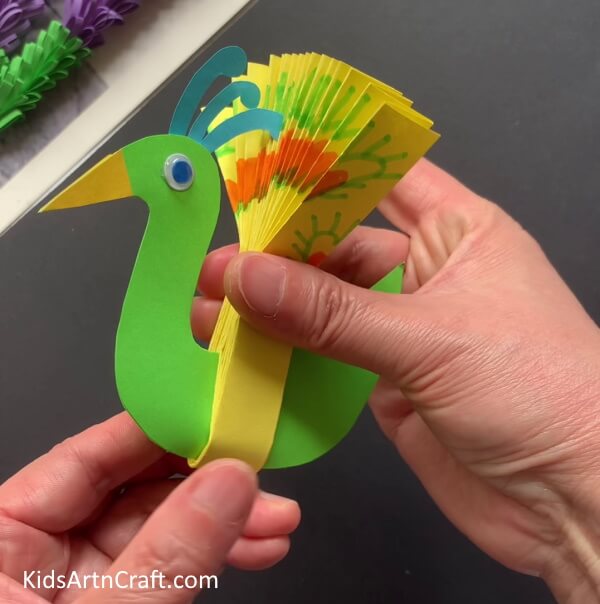
Now, take the feathers of the peacock and place the peacock’s body in the middle of the feathers.
Beautiful Paper Peacock Craft Is Ready To Decor!
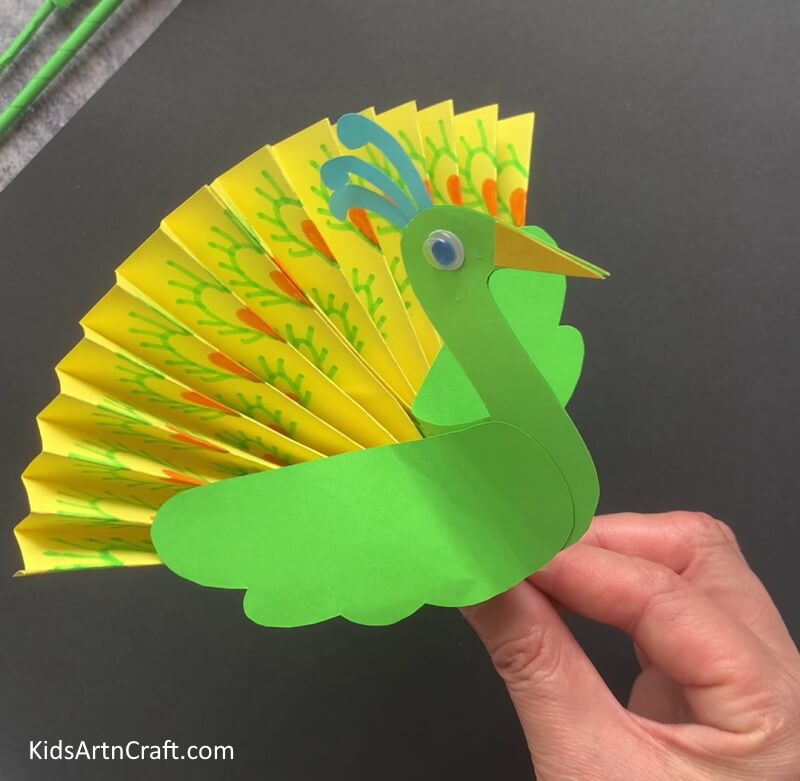
Finally, cut two green paper wings and paste them on each side using glue to complete the paper peacock craft. Congratulations! you are done with your peacock craft.
Some More Peacock Craft Tutorial
Handmade Peacock Craft Using Paper Strips For Kids
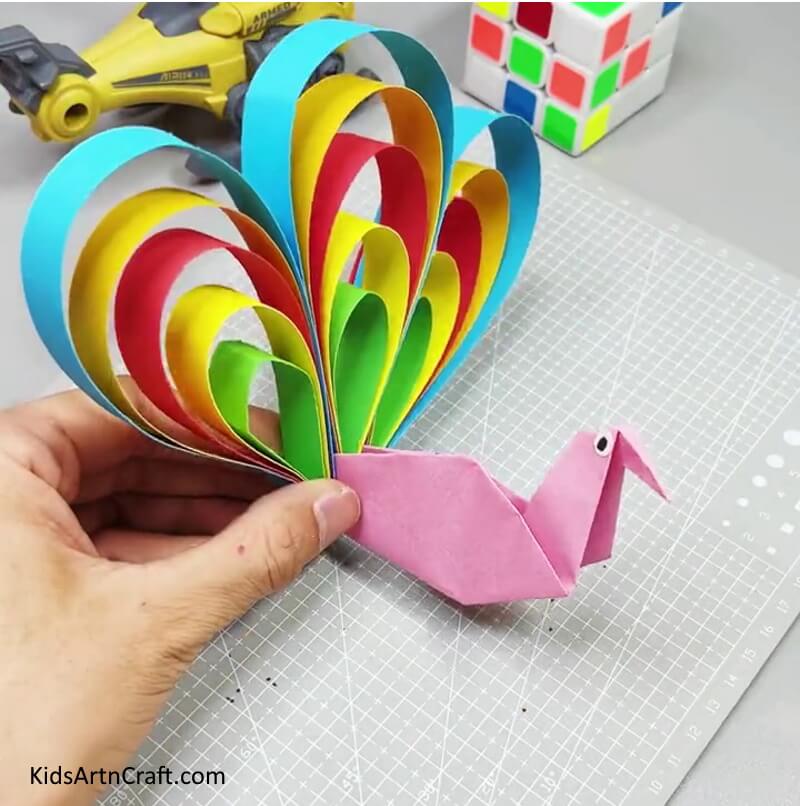
Image Source/Tutorial: Kids Art & Craft
This fun and colorful craft is perfect for kids! Using paper strips and other materials, create a beautiful handmade peacock craft! It’s a great way for kids to learn about colors, shapes, and design. With some help, they will be proud of their work!
FAQs Related To Paper Peacock Easy Craft
1. What materials do I need to make a paper peacock craft?
You will need Colored paper, scissors, glue, markers, and googly eyes.
2. How do I make the peacock’s eyes?
Paste googly eyes on the peacock’s head.
3. How do I make the peacock’s beak?
Cut out a triangle shape from a piece of colored paper and glue it onto the peacock’s head.
4. How do I finish making the paper peacock?
Use markers or other decorative items to add eyes, beaks, and other details.
5. Is there any special way to display the paper peacock?
You can hang the paper peacock using a string or ribbon.
6. What other materials can I use to make the paper peacock?
You can use fabric, felt, or any other materials you have on hand.
7. How can I make the paper peacock look more realistic?
You can add details like feathers, sequins, or glitter to make the paper peacock look more realistic.
Making a paper peacock is a great way to keep your kids entertained and explore their creativity. With just a few simple supplies, you can create a colorful and unique craft that your kids will love. So don’t wait, grab your supplies and get creative!
Follow us on Youtube for art and craft tutorials and much more.
More Articles from Kids Art & Craft
- Easy Paper Robot Craft Step-By-Step Tutorial
- How to Make Toilet Paper Roll Penguin Craft For Kids
- Easy to Make Paper Crafts Video Tutorial for Kids
- Paper Origami Frog Craft Tutorial for Kids
- How to Make Paper Cup Wrist Watch Tutorial for Kids


