


Kids Activities
Paper Origami Frog Craft Tutorial for Kids

This paper origami frog craft tutorial is perfect for kids! Follow along with step-by-step instructions to create an adorable paper frog. This craft is a great way for kids to learn origami and have fun at the same time.
Welcome to this fun paper origami frog craft tutorial for kids! This tutorial is designed to help kids of all ages create a cute and colorful origami frog. With just a few simple steps and some basic materials, kids will be able to create their own origami frog in no time. So get your scissors, paper, and some glue ready, and let’s get started!
DIY Paper Origami Frog Craft With Step By Step Instructions

Materials Required:-
- Green Origami Paper
- Colored Sheets (Yellow, Black, and White)
- Scissors
- Glue
Read More: Recycled Bookmark Ideas for Kids
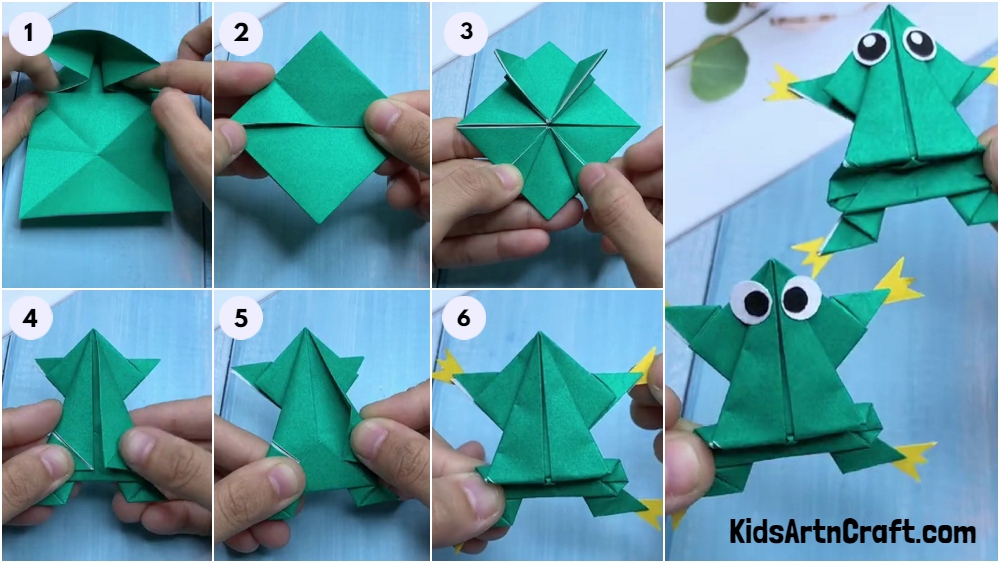
Step 1: Making The Frogs
Let’s make this jumping frog using green paper. So, let’s get started.
Step 2: Get Ready With Green Paper
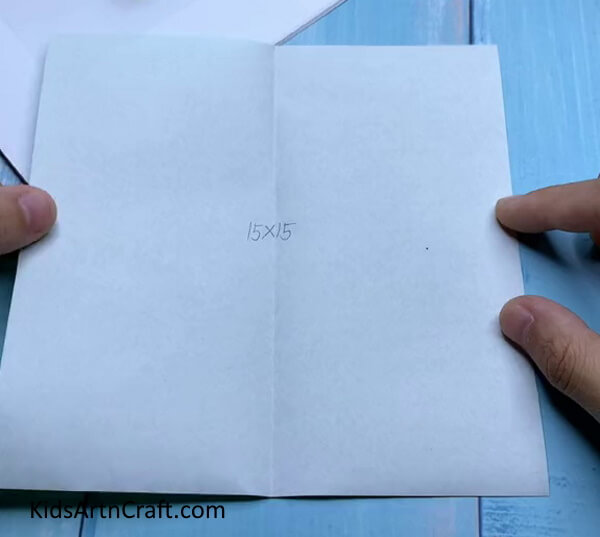
Firstly, we need a square-shaped one-sided green color paper of 15*15 cm in size. Now fold the paper in half, crease it, and unfold it.
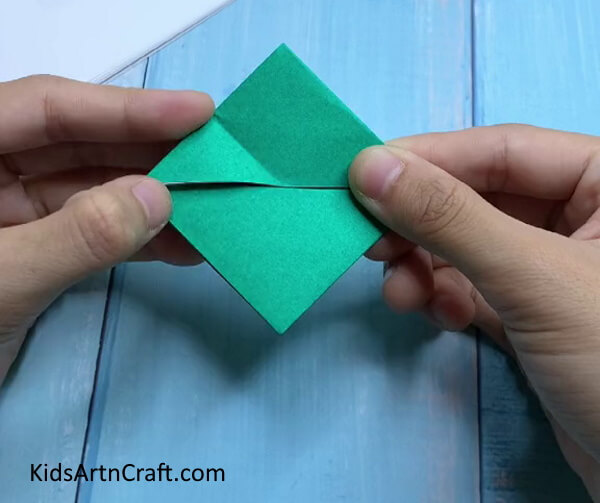
Step 3: Making Squash Folds
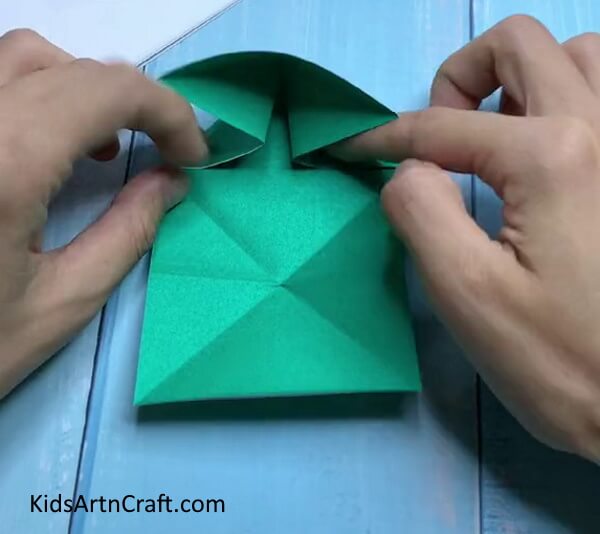
Bring the top right corner to the left, crease it, and unfold it. Repeat the same with a top left-side corner. Turn the paper. Bring the top rectangle to the diagonal and unfold it. Again, turn the paper.
Repeat the process on the lower side of the paper.
Make the two sides of the corner together so that they can meet. And then, flatten the top of the rectangle to make a triangle. This is known as squash fold. Hard to understand but easy to make.
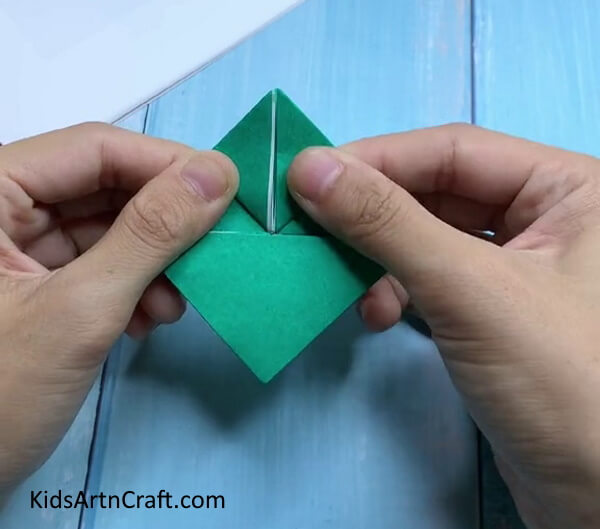
Step 4: Forming a Diamond Shape
Repeat the squash fold on the lower side of the paper. Your paper should give it a diamond shape.
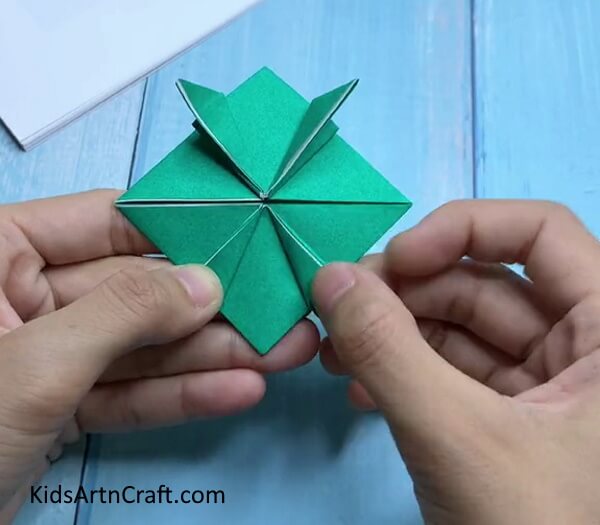
Step 5: Folding Papers
Bring the right corner of the middle to the top and the left corner of the middle to the top.
Step 6: Repeating The Process

Repeat the folds on the lower side too.
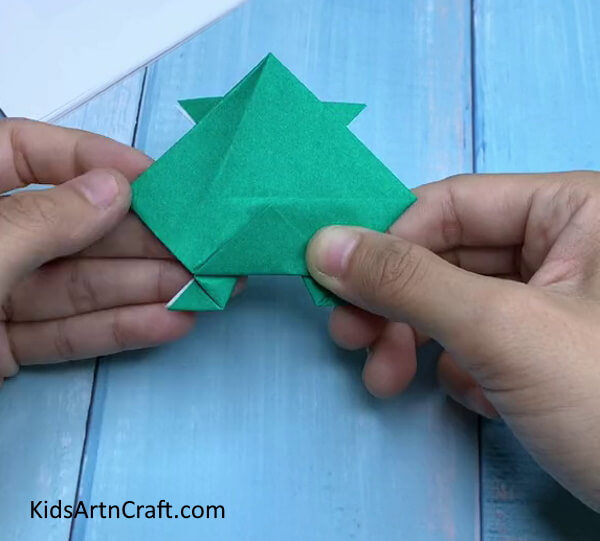
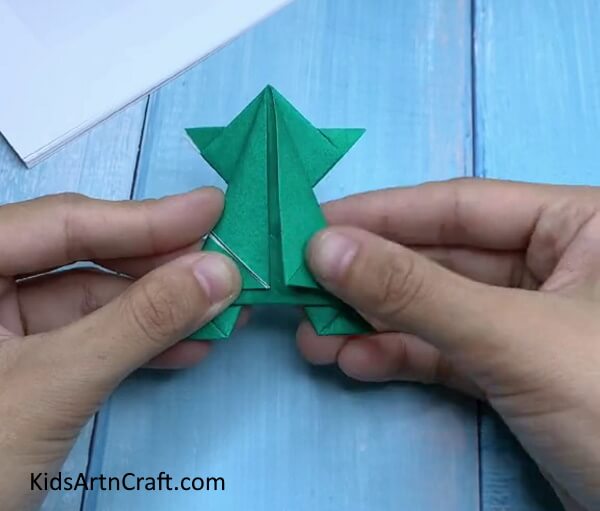
Step 7: Making Folds
Now, fold the right corner to make it half shown in the above image. Follow the process to the other three corners of the frog.
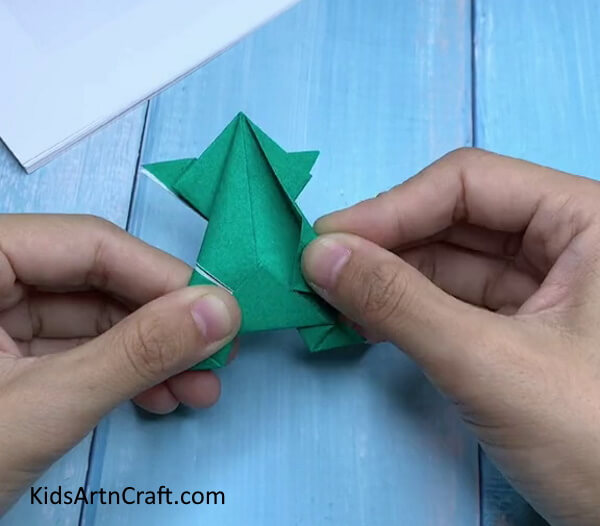
Step 8: Turning Paper And Folding
Turn the paper and fold the lower triangle.
Step 9: Folding The Side Edges
Now, fold the right and left corners to the middle of the paper and again fold the triangles to meet the edges of the corner.
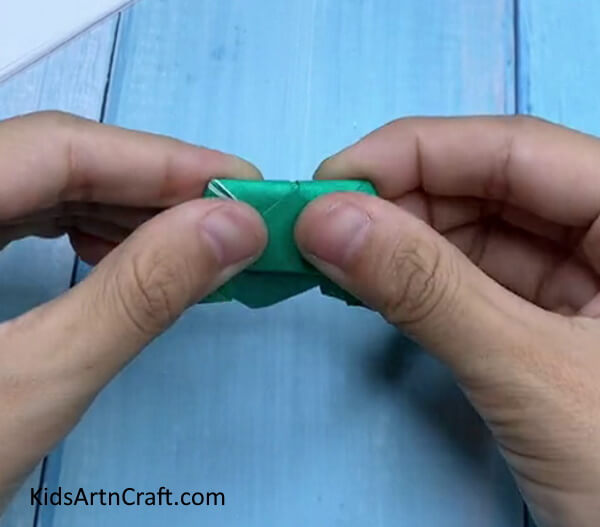
Step 10: Turning Paper
Turn the model and fold the remaining sides of the triangle inside that we left in the previous step.
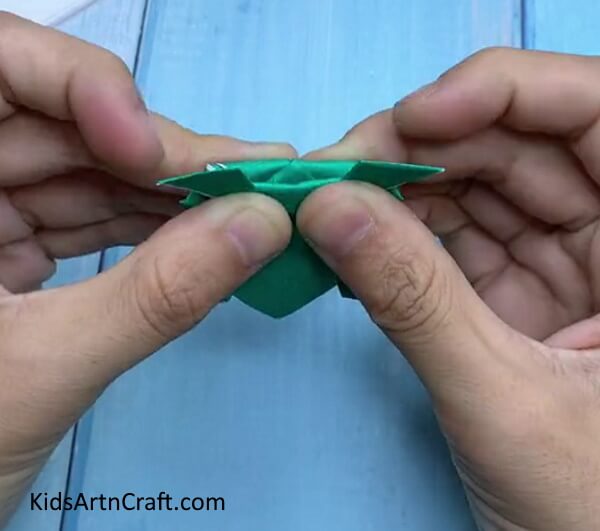
Step 11: Folding
Fold the lower part of the body in the opposite direction.
Step 12: Folding In Opposite
Again, fold the lower part in the opposite direction. And the frog model is ready.
Step 13: Adding Legs

To add the legs, cut the yellow paper in the shape of the legs and paste them to each corner using glue.
Step 14: Adding Eyes
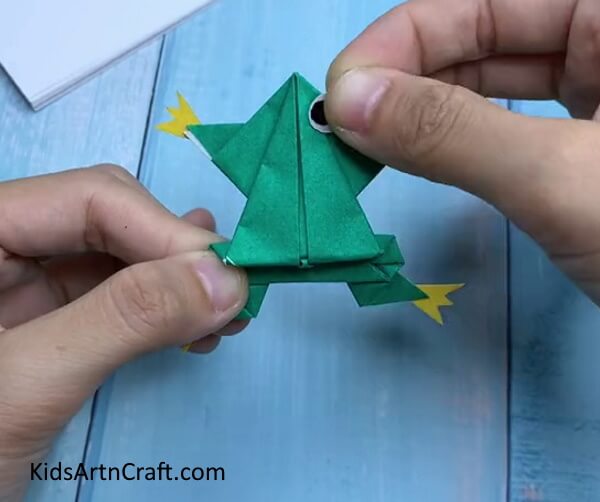
Add the eyes of the frog using a black-and-white sheet. And finally, it’s done.
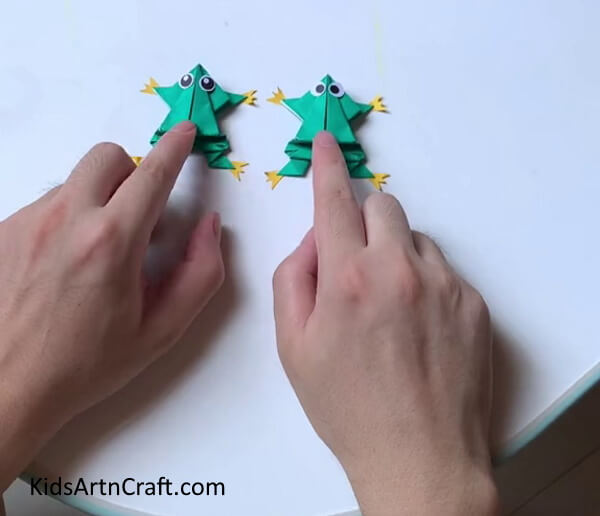
Final Image – Handmade Paper Frog is Ready To Jump
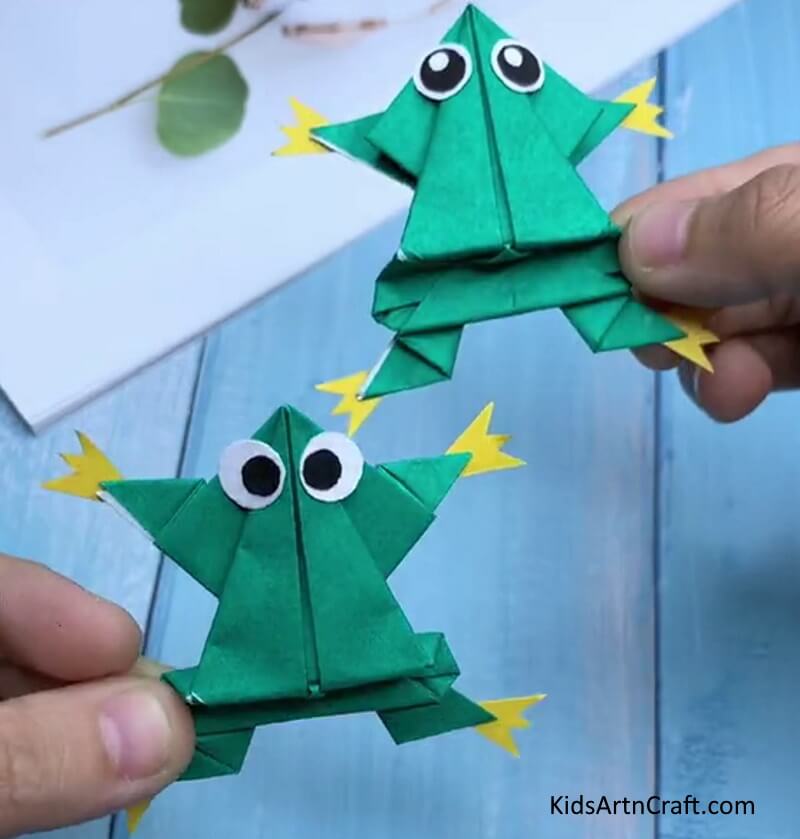
Making a handmade paper frog is a fun and easy craft project that can be enjoyed by all ages. With a few simple supplies and a few steps, you can create an adorable frog that can hop, jump, and play. Creating a handmade paper frog is an enjoyable and simple craft that can be a great activity for the whole family. Give it a try and let the fun begin!
This Paper Origami Frog Craft Tutorial for Kids is a great way to spend quality time with your children while also creating a fun craft. With a little bit of patience and some basic materials, your kids will have a great time making this origami frog craft.
Some More Frog Craft Tutorial
Frog Craft For Kids Using Paper
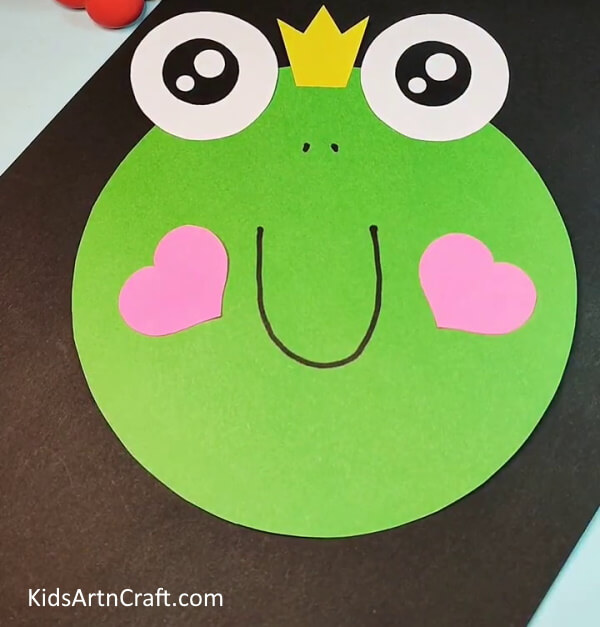
Image Source/Tutorial: Kids Art & Craft
Creating a frog craft with paper is a fun and easy craft for kids of all ages. It is a great way to use up scrap paper and get creative! With minimal supplies, kids can have hours of fun folding and cutting paper to make a unique frog craft.
FAQs Related To Paper Origami Frog Craft Tutorial for Kids
1. What materials do I need to make an origami frog?
You will need a piece of square paper, scissors, and a pen or marker for the eyes.
2. What type of paper should I use?
You can use any type of paper you like, such as construction paper, printer paper, or even wrapping paper.
3. What is the best way to fold the paper?
Start by folding the paper in half diagonally and then in half again. Then fold each corner of the triangle to the center point. Finally, fold the triangle in half again.
4. How do I make the frog’s legs?
Fold the triangle in half and then make two small cuts on the sides. Unfold the triangle and create four small flaps. Then fold them inwards to create the legs.
5. How do I make the frog’s eyes?
Draw two small circles on the frog’s head with a pen or marker.
6. How do I attach the legs to the body?
Use a small piece of tape to attach the legs to the body of the frog.
Follow us on Youtube for art and craft tutorials and much more.
More Articles from Kids Art & Craft
- Paper-Cutting Designs For Projects
- How To Make Sunflower Clock Craft Using Paper
- DIY Paper Flower Craft – Step-By-Step Tutorial
- Origami Heart Craft To Make At Home – Simple Tutorial
- Paper Mouse Craft For Kids – Step-by-Step Tutorial


