


Kids Activities
Summer Paper Fan Step by Step Tutorial for Kids

This step-by-step tutorial will show kids how to make a colorful summer paper fan. With just a few simple materials, kids will be able to create a fun and festive decoration to hang in their room or give as a gift. Get ready to cool off with this fun summer craft!
Welcome to this DIY Summer Paper Fan Craft Tutorial! This tutorial will show you how to make a fun and decorative paper fan, perfect for the summer season. This craft is an easy and affordable way to brighten up your home and is sure to be a hit with family and friends. With just a few simple materials, you can create a beautiful paper fan in just a few minutes. et creative and make your own unique fan with this easy and fun tutorial.
DIY Summer Paper Fan Craft Tutorial With Step by Step Instructions
Materials Required:-
- Colored Papers
- Scissors
- Glue
- Thread
Read More: How To Make Sunflower Clock Craft Using Paper
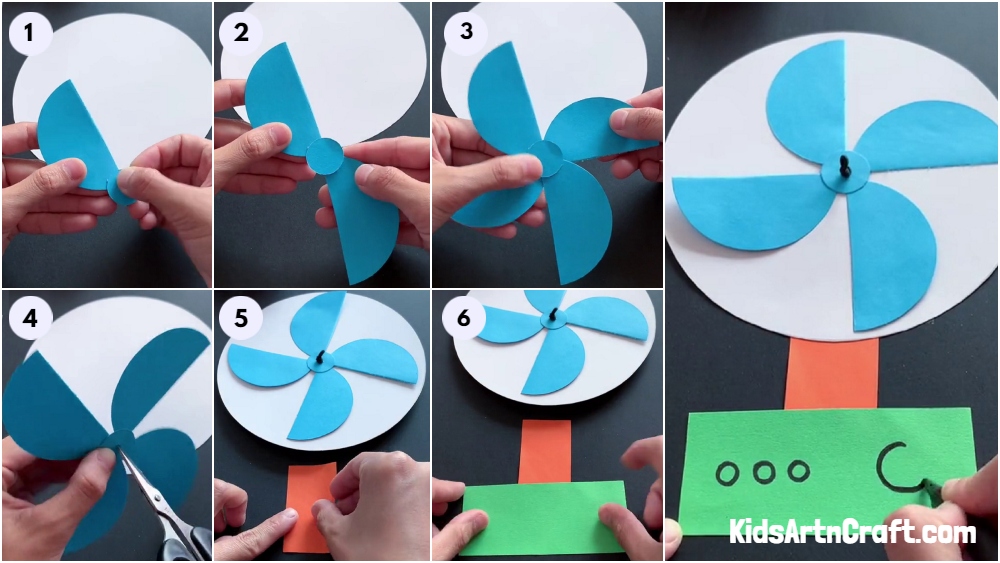
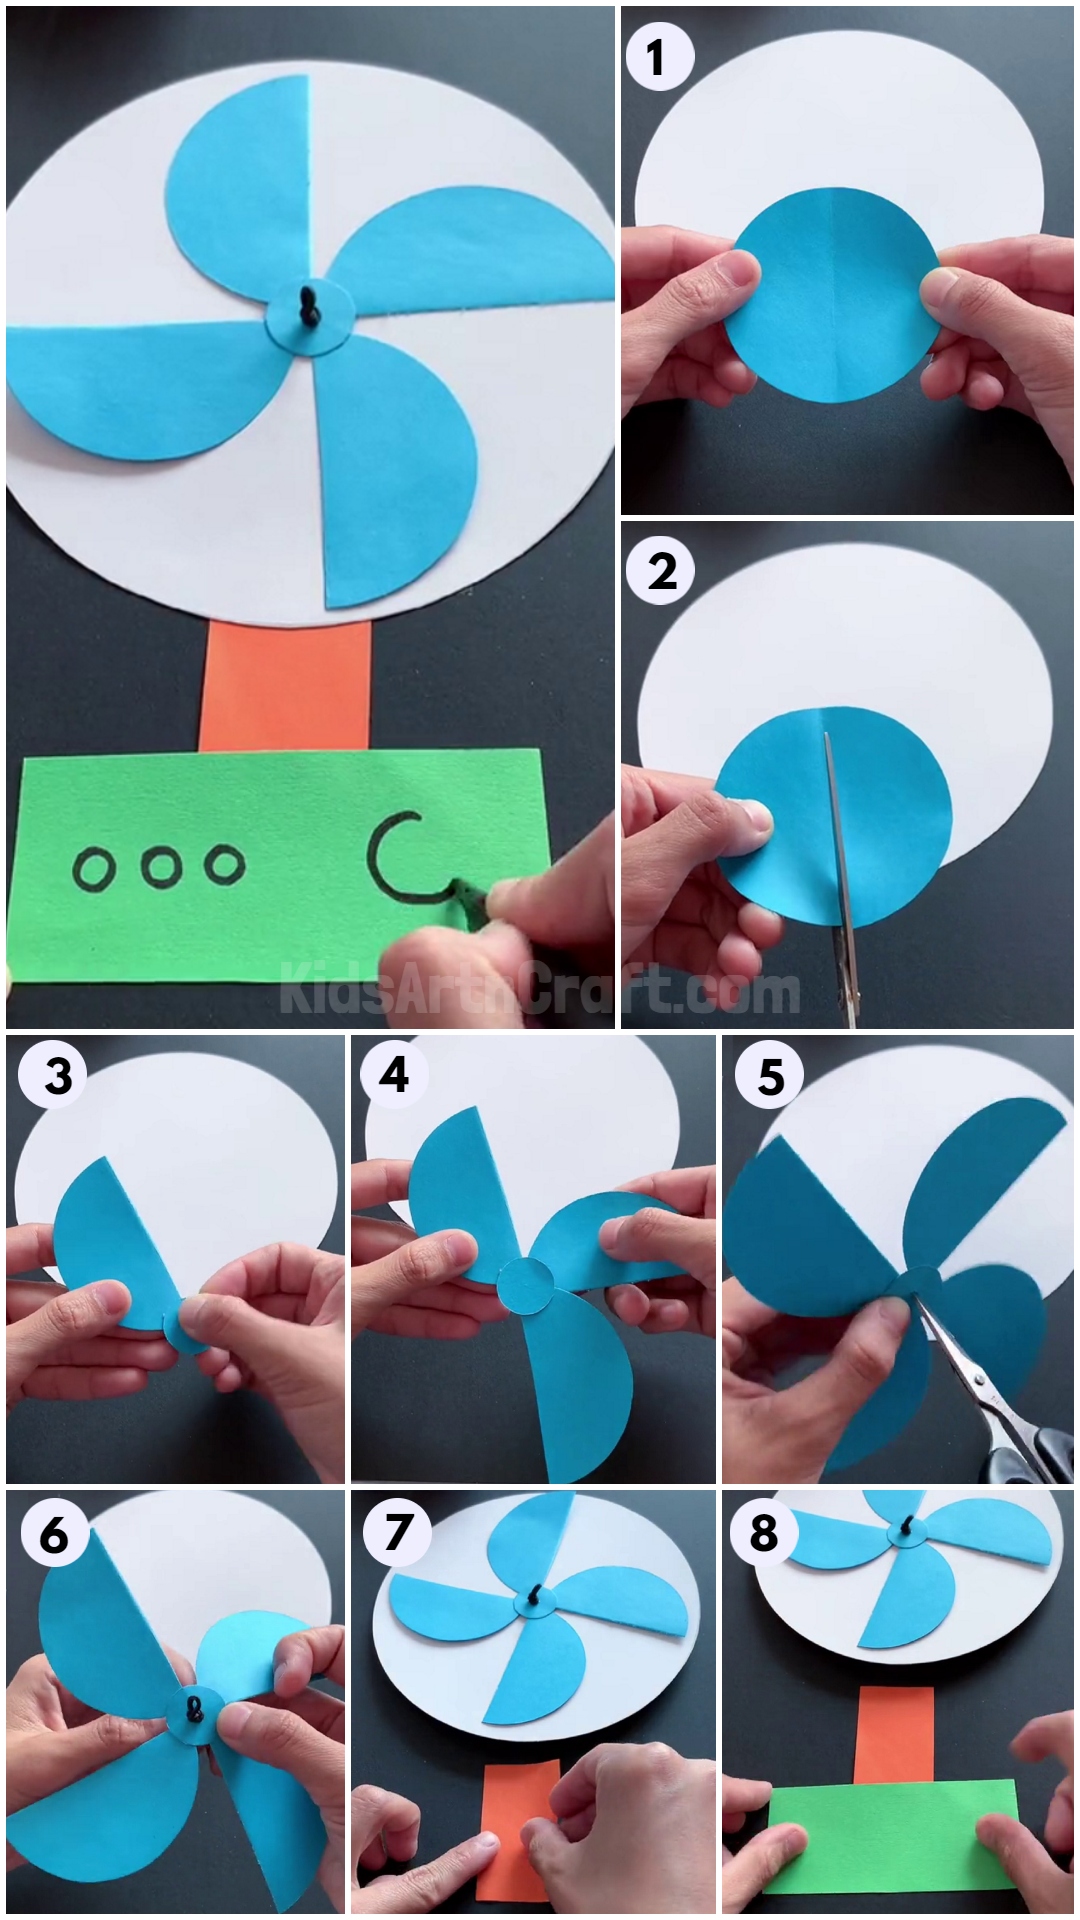
Step 1: Making The Paper Pinwheel
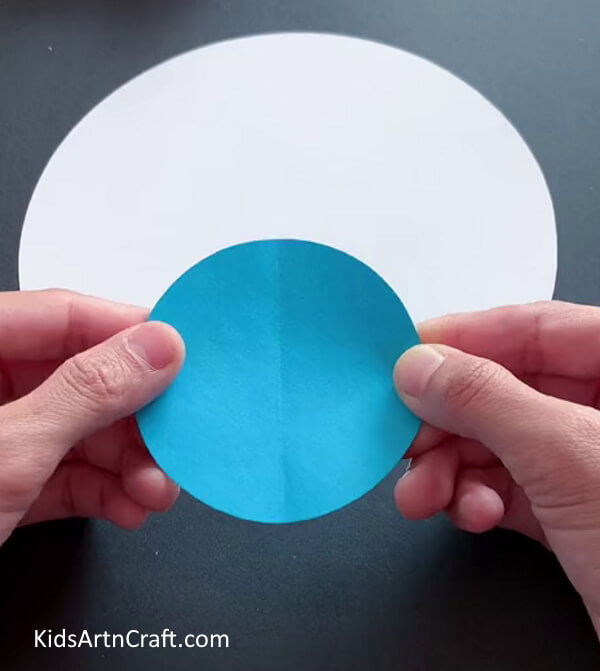
Firstly, cut down a circle from the blue paper sheet. And a bigger circle from the white paper sheet.
Step 2: Cutting The Circle
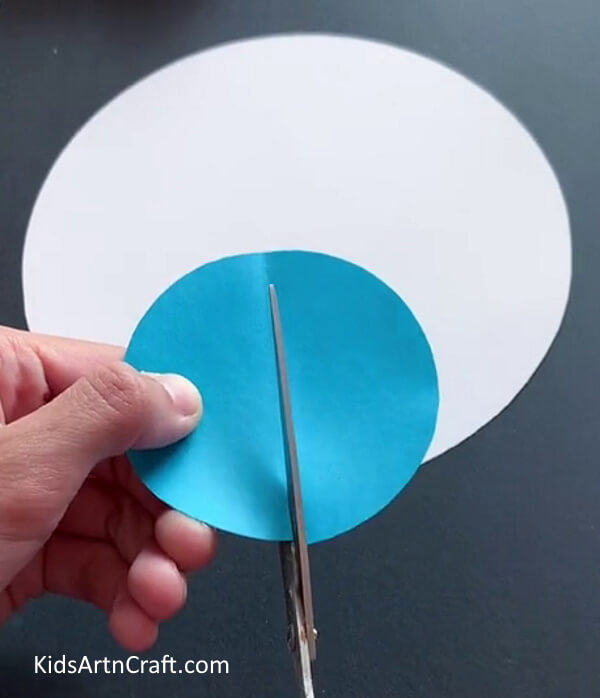
Now, cut the blue circle into two equal halves, that is two semicircles.
Step 3: Making The Wings of The Pinwheel

Now, cut a small blue circle and paste it on the corner end of the semicircle.
Step 4: Adding The Wings

Paste the other wing on the opposite side of the previous one.
Step 5: Adding The Third Wing
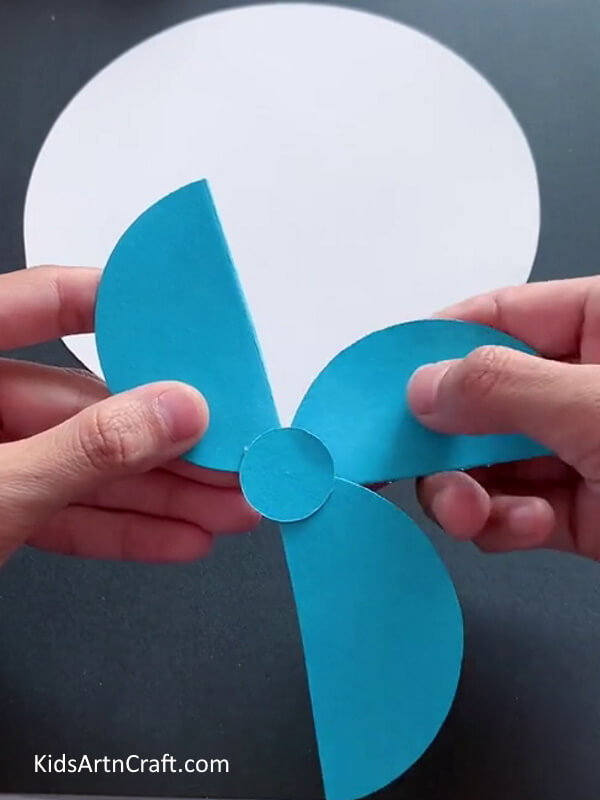
Now, repeat the same process. Paste the wing as shown in the above image.
Step 6: Pasting Final and Fourth Wing

Now paste the final and fourth wing of the pinwheel to complete it.
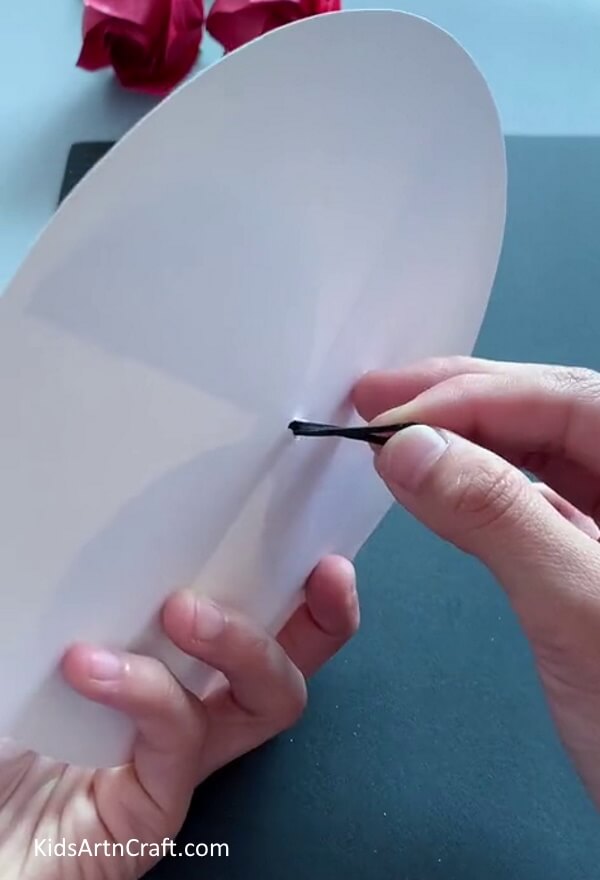
Step 7: Making a Hole
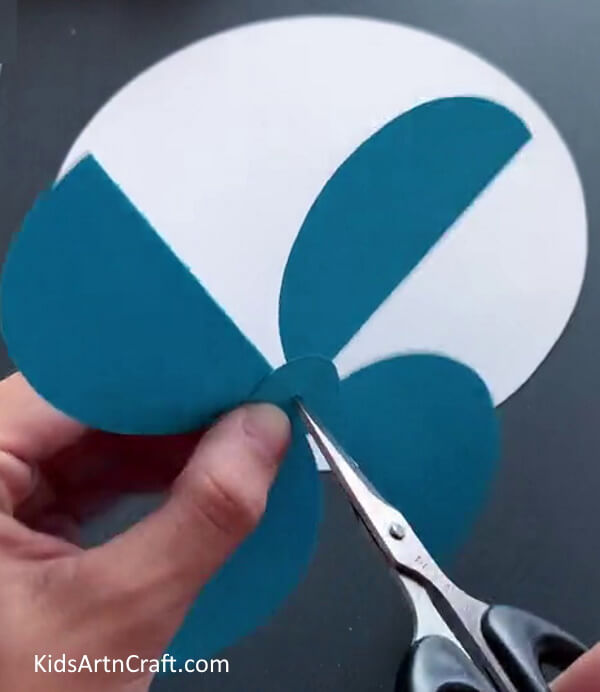
Using scissors, make a hole in the middle of the pinwheel and a white circle.
Step 8: Inserting a Thread
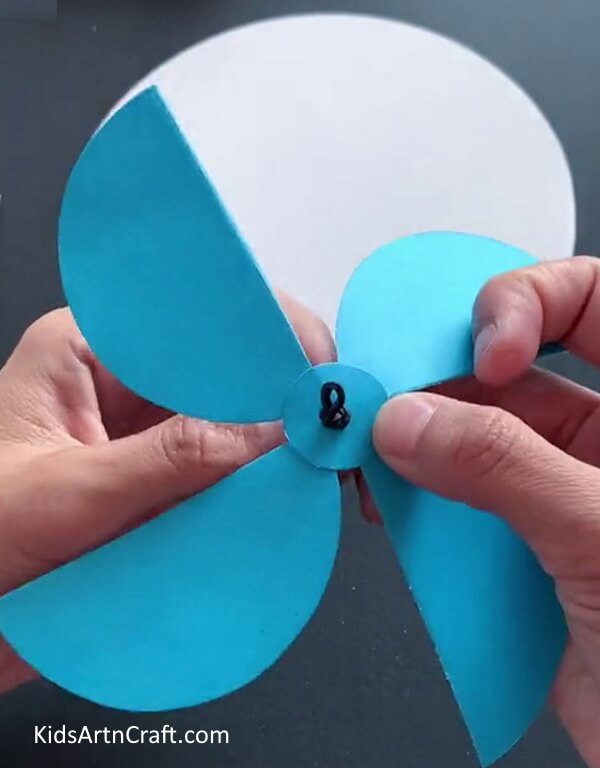
After making a hole, insert a thread and make a knot in the pinwheel as shown in the above image.
Step 9: Attaching Paper Fan With White Circle
Now, attach the fan with the white circle using the thread
Step 10: Making Stand of The Fan
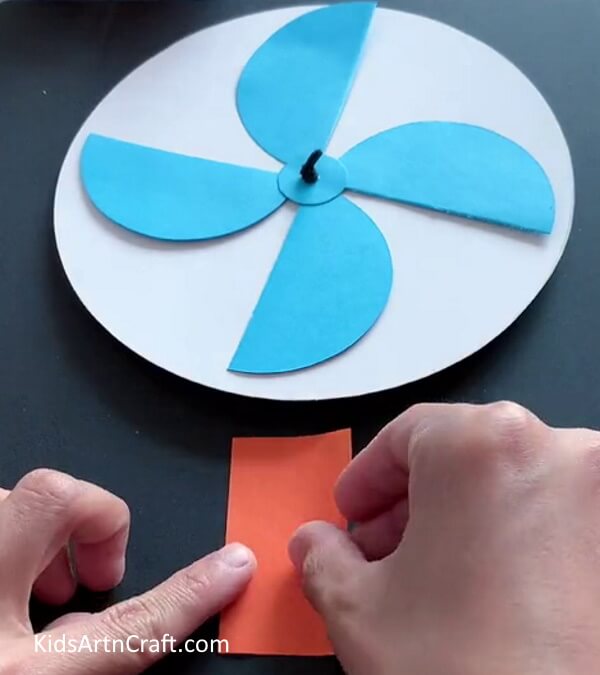
Now, cut a long rectangle from the orange sheet using scissors.
Step 11: Making Switch Board of The Fan

Take a green color sheet and cut it down into a rectangular shape.
Step 12: Pasting The Stand and SwitchBoard

Paste the stand under the white circle and switchboard to the stand using glue as shown in the above image. Draw some details using a black sketch pen as shown in the figure.
Paper Fan Is Ready To Cool Down The Air!
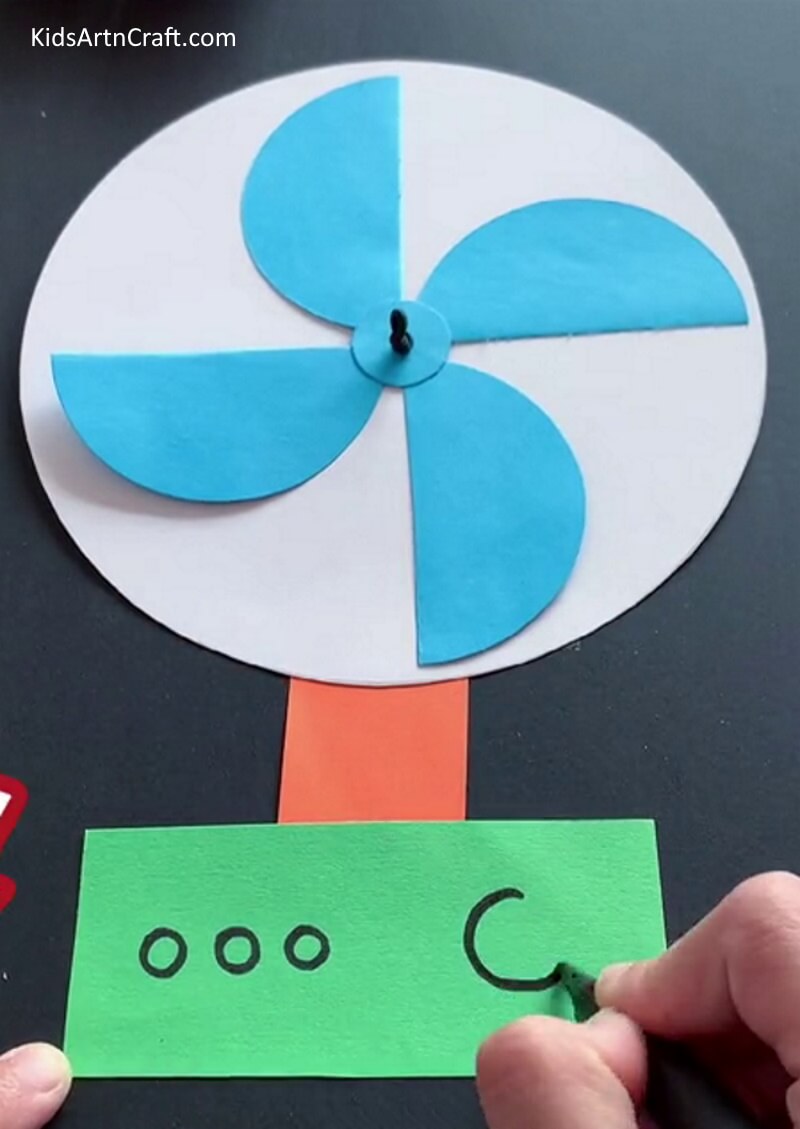
Finally, your handmade paper fan is ready to give you cool air. With just a few simple materials, you can make a colorful fan to cool yourself off this summer. Crafting your own paper fan is a great way to stay cool and creative this summer! Give this DIY Summer Paper Fan Craft Tutorial a try and you’ll be sure to have a unique, beautiful fan in no time.
Some More Fan Craft Tutorial
Amazing Paper Cup Fan Craft For Kids
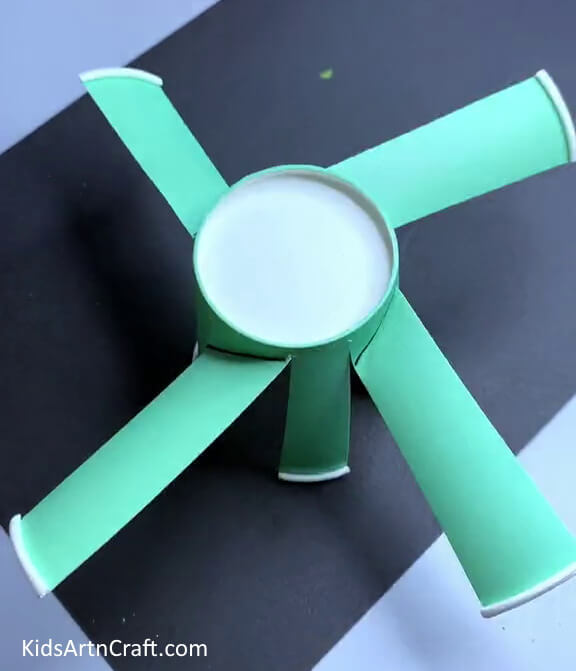
Image Source/Tutorial: Kids Art & Craft
This craft is easy and fun and creative for kids to make. Cut the cups in half and glue them together, then fan them out to create an interesting fan shape. Let the kids get creative with color and decorations. A great craft for kids of all ages to enjoy!
FAQs Related To Summer Paper Fan Step-by-Step Tutorial for Kids
1. What materials do I need to make a paper fan?
You will need two pieces of paper, a ruler, scissors, and a stapler.
2. What size should I make my paper fan?
The size of the fan will depend on the size of the paper you are using.
3. How do I make a fan out of paper?
First, measure and cut two pieces of paper to the same size. Next, fold the paper in half and staple it at the fold. Finally, cut out a fan shape from both pieces of paper and attach them together at the top.
4. Can I use other materials to make a paper fan?
Yes, you can use different types of paper, fabric, or other materials to make a paper fan.
5. How do I decorate a paper fan?
You can use markers, paints, or stickers to decorate your fan.
6. What other activities can I do with a paper fan?
You can use paper fans as props for a play, use them to make a breeze or use them as a noise maker.
This Summer Paper Fan Step by Step Tutorial for Kids is a great way to get your little ones crafting and having fun in the summer sun.
Follow us on Youtube for art and craft tutorials and much more.
More Articles from Kids Art & Craft
- Fun To Make Blue Paper Sunflower Craft For Kids
- Recycled Bookmark Ideas for Kids
- Paper-Cutting Designs For Projects
- Fun To Make Paper Chick Craft
- Paper Cutting Shapes Crafts


