Clay Crafts
Clay Giraffe 3D Model Craft Project For Beginners

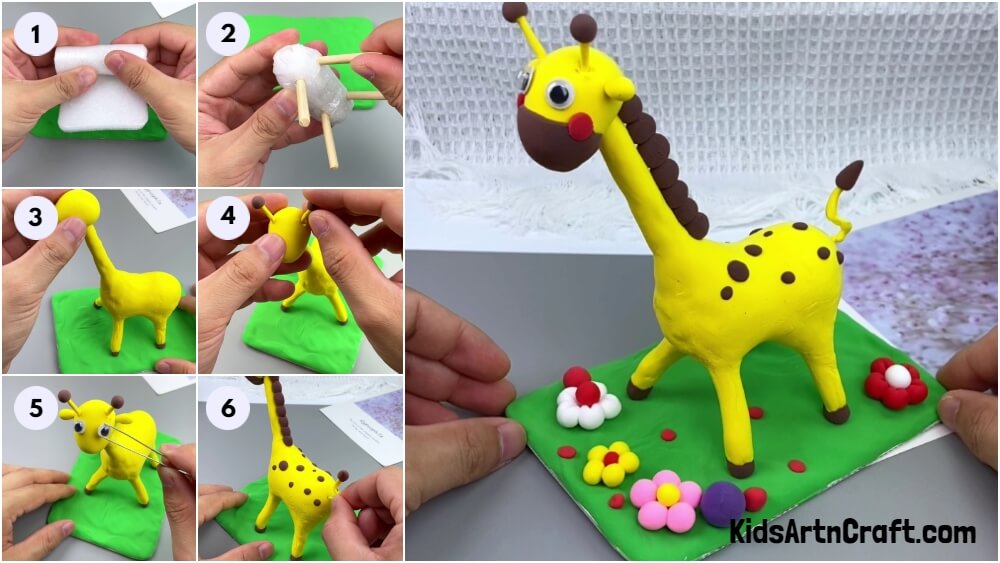
A step-by-step tutorial for you to make a 3D giraffe standing over grassy ground craft model! This craft will easily be made in minutes!
Learn to make a cute giraffe craft model with this step-by-step tutorial! In this tutorial you will be provided with easy instructs on each and every step of this craft journey and the results will definitely be a piece to showcase! This will be not just the basic craft, but a whole 3D model of a giraffe standing on grassy ground! This craft will also be a hands-on craft activity for your little one and will help to drive those motor skills through the clay molding and creating it! Unleash your creative spirit to make this craft and let’s begin!
DIY Clay Giraffe 3D Model Craft For Kids

Read More : DIY Clay Giraffe Step by Step Tutorial For Kids
Materials Required
- Rounded Rectangle Cardboard
- Foam Sheet
- Wooden Sticks (Thin And Thick)
- Colored Super Clay
- Googly Eyes
- Cello Tape
- Holding Craft Tweezers
Procedure
Step 1: Making The Grassy Base
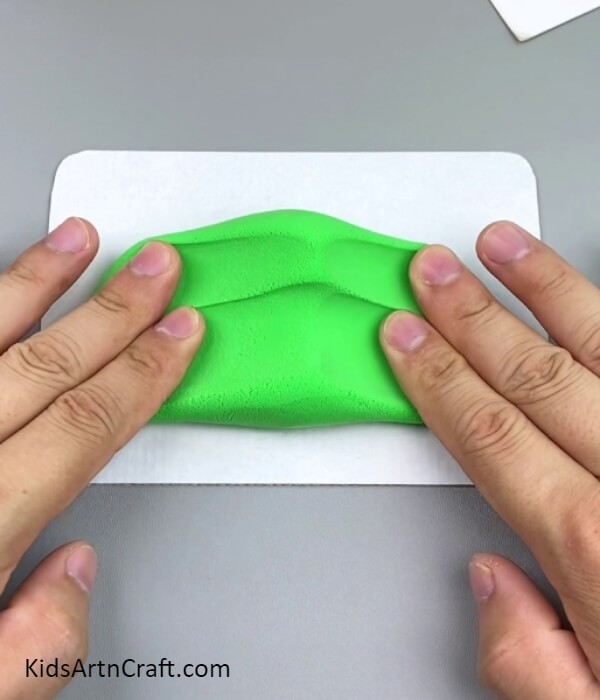
Begint his craft by taking a rounded rectangle and green-colored super clay. Mold the clay to flatten it over the rounded rectangle.
Step 2: Covering The Rectangle With Clay
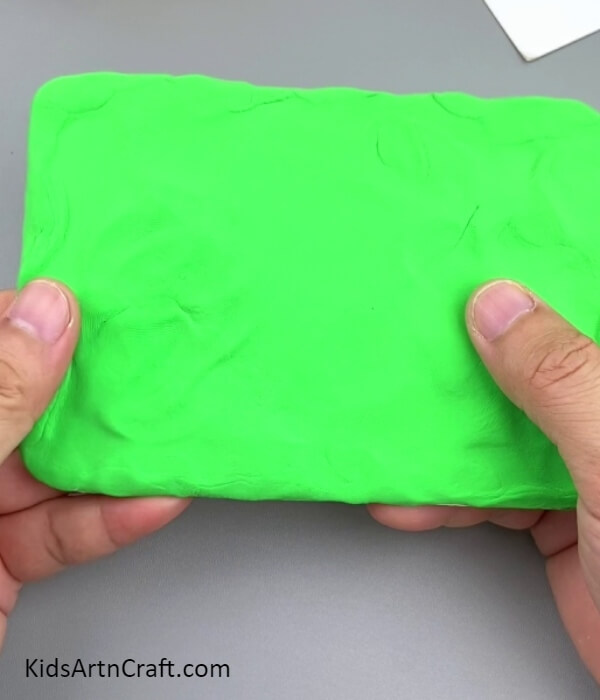
Cover the whole rectangle with clay by flattening it. This makes the grassy base of your craft.
Step 3: Rolling A Piece Of Foam Sheet
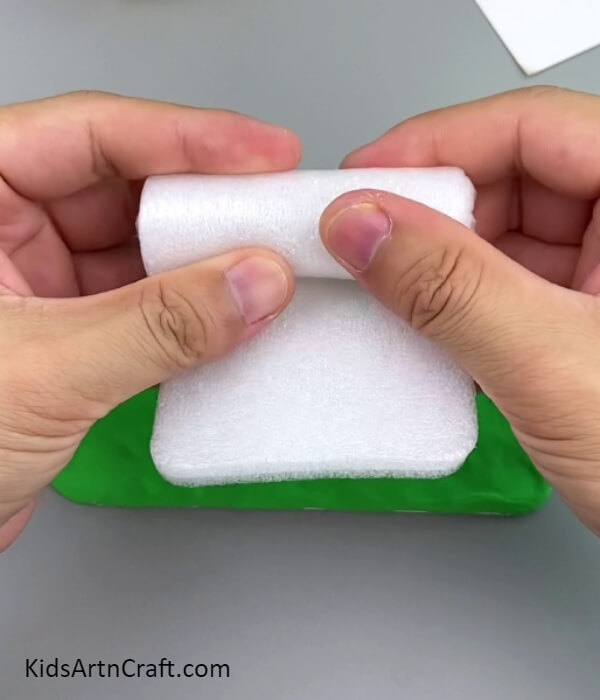
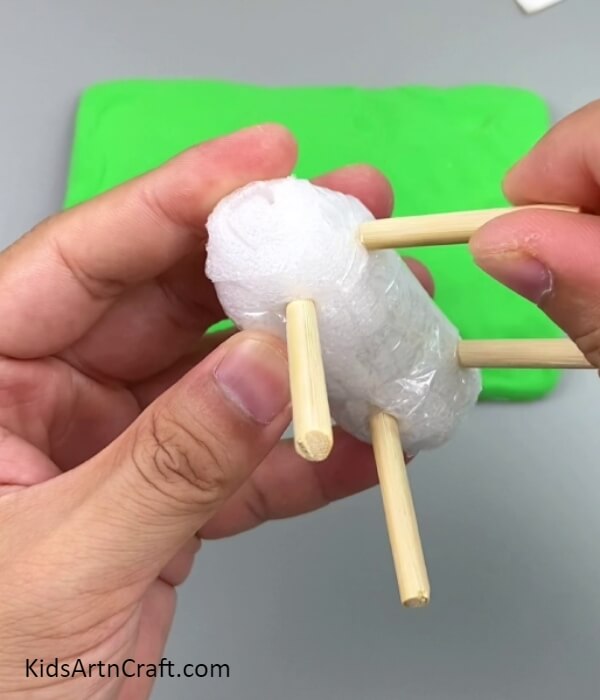
Take a rectangular piece of foam sheet and roll it over from the longer side and secure it by wrapping a cello tape over it.
Step 4: Making Giraffe’s Legs
Take 4 pieces of a wooden stick and push them inside the foam roll in a slanting way tilted outwards to make the giraffe’s legs.
Step 5: Making The Long Neck
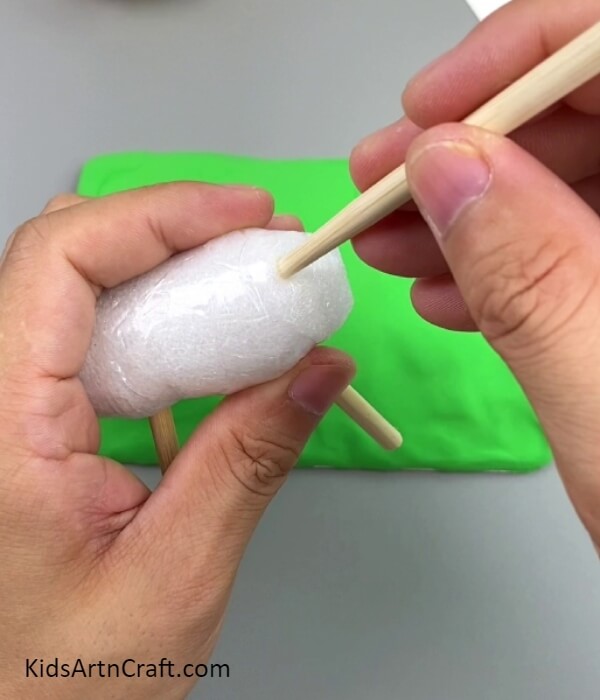
Put a long wooden stick in the foam roll on the other side of the legs in a slanting way as shown in the image to form a long neck of your giraffe. This becomes the rough giraffe figure.
Step 6: Covering The Whole Figure With Clay
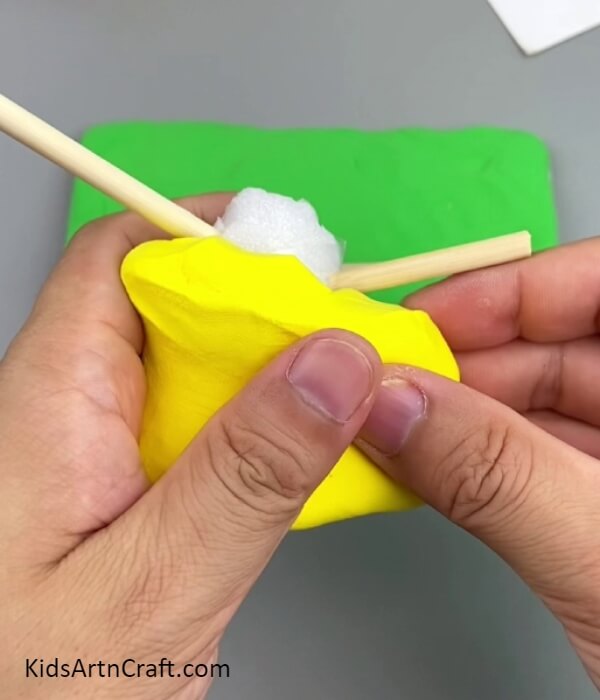
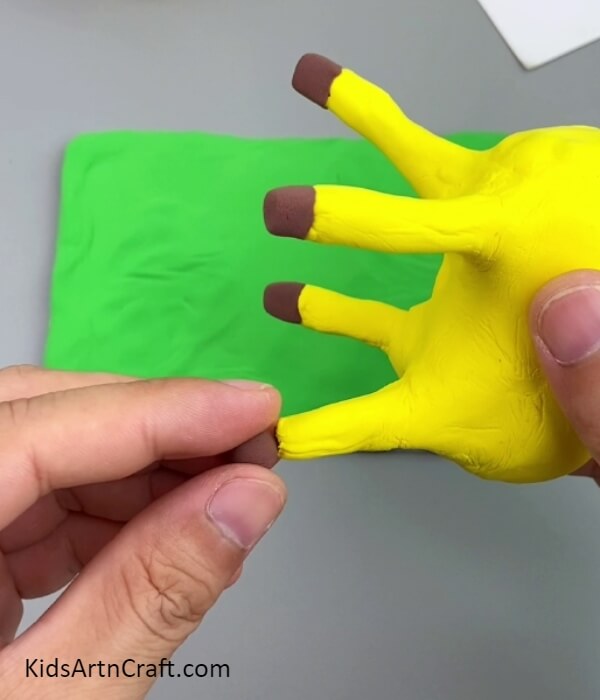
Take yellow-colored super clay and spread it evenly over the whole figure i.e. foam roll and sticks. This becomes the body of your giraffe.
Step 7: Making Hooves/Toes Of The Giraffe
Using brown-colored super clay, make the cylindrical hooves/toes of the giraffe under each foot.
Step 8: Making The Face Of The Giraffe
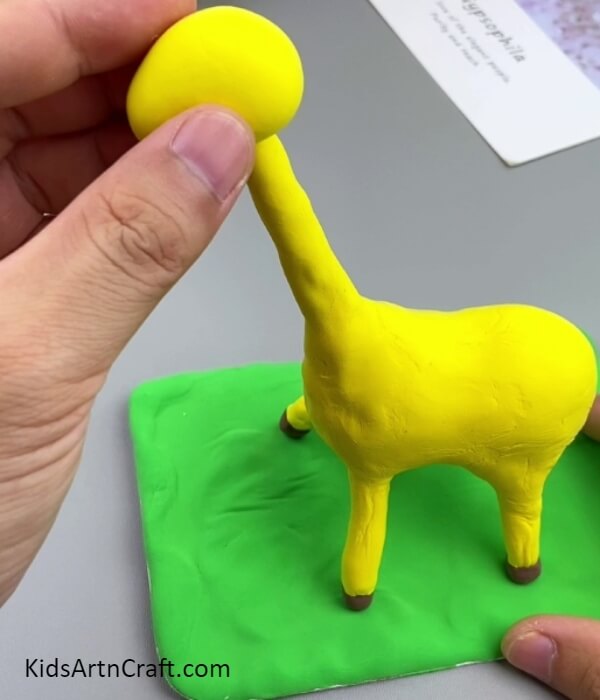
Doug a piece of yellow super clay into a spheroid shape (3D oval) and stick it over the long neck to make the face of the giraffe. Stick this giraffe over the grassy ground.
Step 9: Making Horns Of The Giraffe
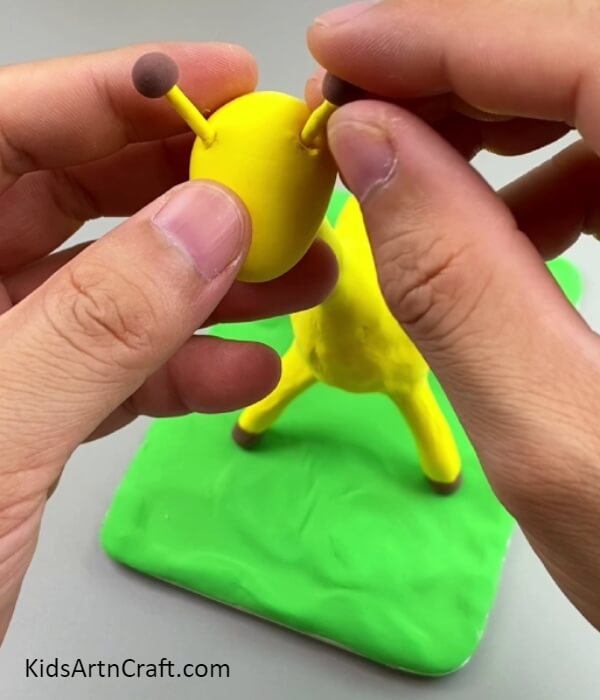
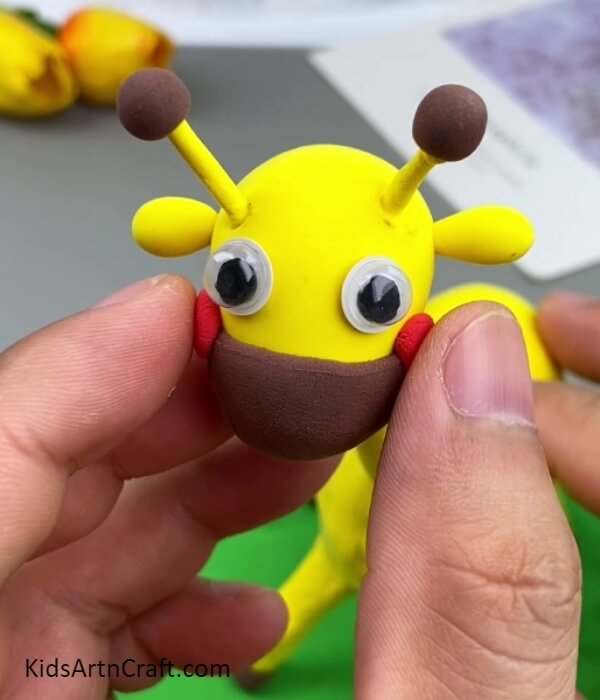
Take 2 thin and very small pieces of wooden stick and cover them with yellow clay also make 2 small balls of brown clay and stick them over the clay-covered sticks. These will become the horns of the giraffe. Put the horns over the face on each side as shown in the image.
Step 10: Making Ears Of The Giraffe
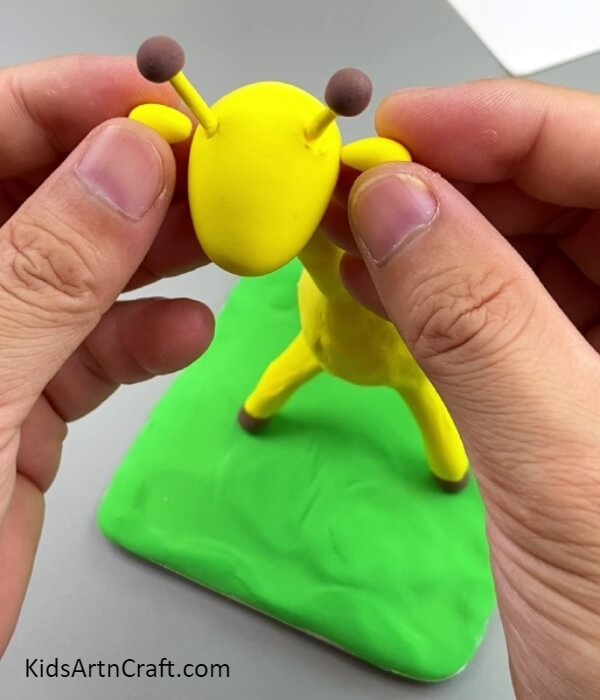
From the yellow-colored super clay make 2 small dropshape-like ears and stick them over the sides of the face below the horns.
Step 11: Sticking Googly Eyes
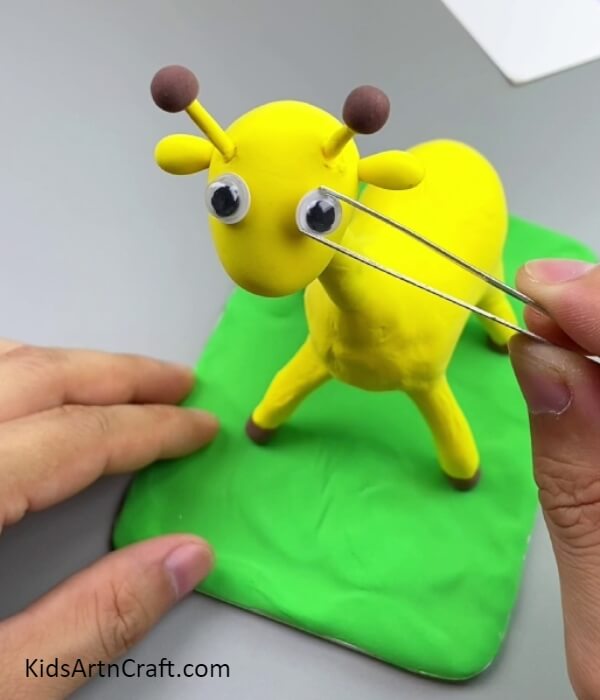
Stick 2 googly eyes over the face on the front side below the horns using the holding tweezers.
Step 12: Making Brown Mouth
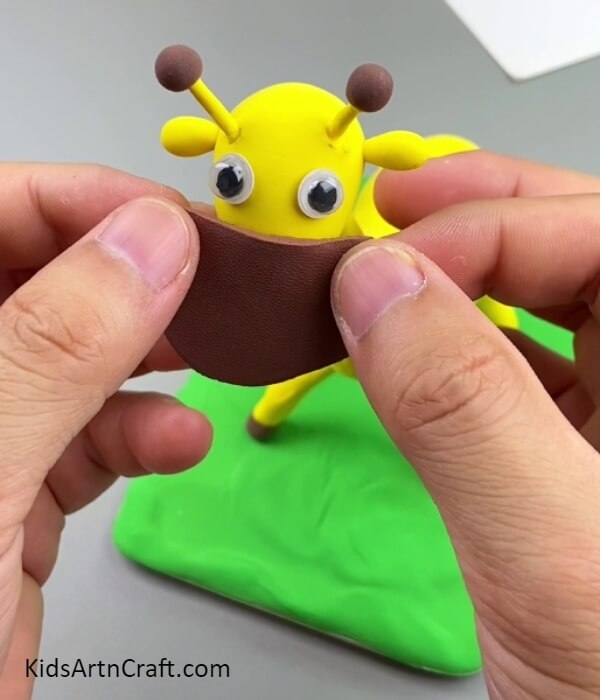
Make a brown super-clay semi-circle sheet by flattening the clay and sticking it below the eyes to the whole bottom face part to make the mouth.
Step 13: Adding Blush To The Cheeks
Dough 2 small red-colored super clay balls and stick them to the sides of the brown mouth and press them to flatten it and make blush.
Step 14: Making Giraffe Neck Hair
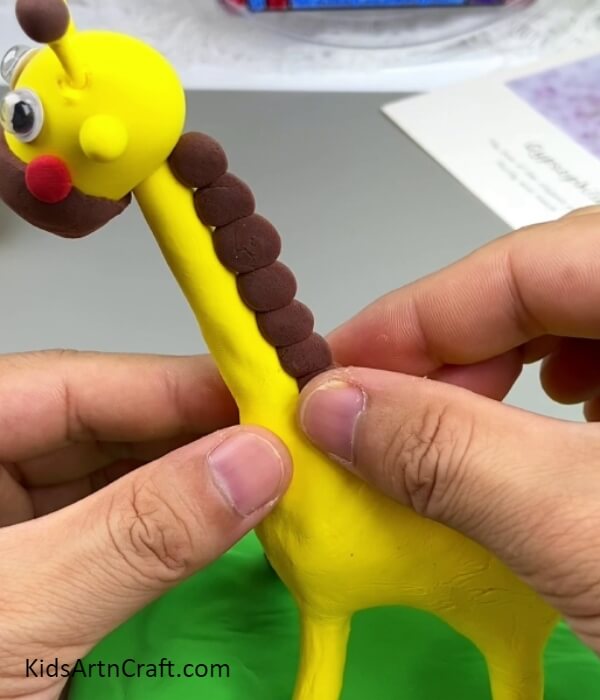
Make small circles of brown-colored clay and stick them over the neck side-by-side close to each other to represent them as the hair over the neck of the giraffe.
Step 15: Making Giraffe Textures On Its Body And Adding A Tail

Make random small circles and stick them onto the top of the body of the giraffe to create the texture. Now, for the tail, take a small wooden stick, cover it with yellow super clay further make a wavy tail of the giraffe, also stick a brown circle over the top of the tail. Push the stick-tail inside the back body of the giraffe.
Step 16: Making Flowers On The Grassy Ground
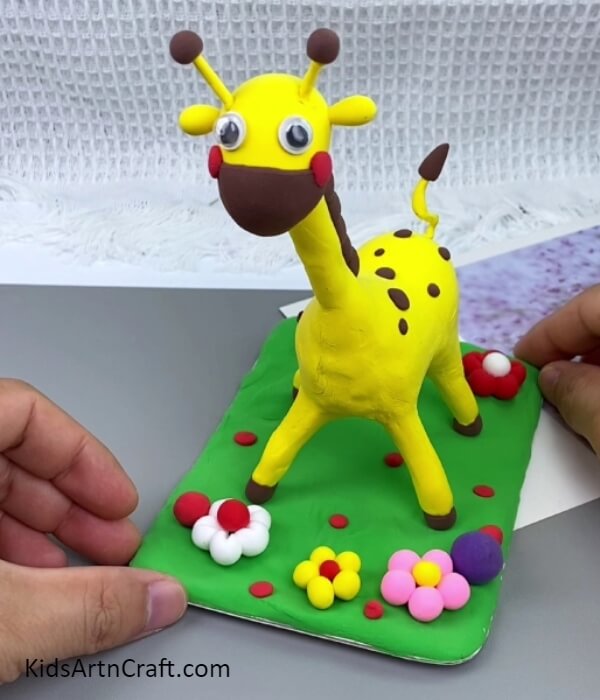
Make small circles and stick them together also on in the center at the top using the colored super clay and form flowers. Stick these flowers over the grassy ground as shown in the image.
This Is The Final Look Of your Giraffe Model Craft!
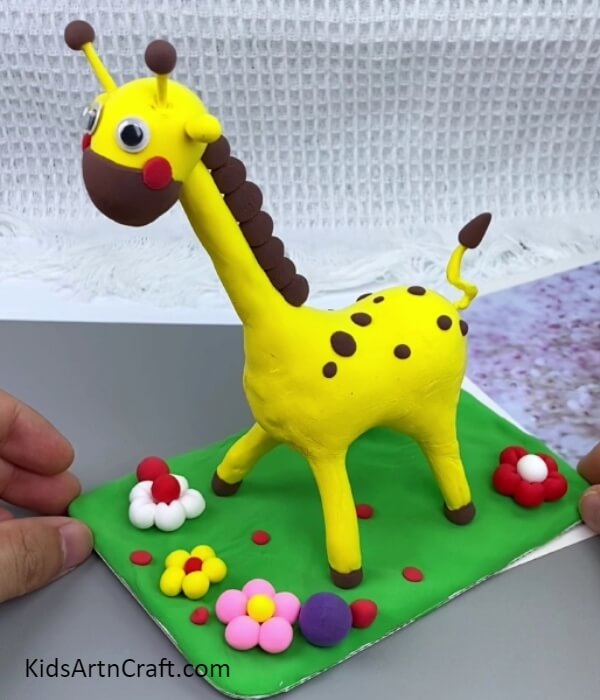
Woohoo! Look at your giraffe craft model it looks amazing!
You can use this artwork as your school craft project, I’m definitely sure your raft teacher would love it and you will b env of your classmates being the favorite of your teacher! You can also make a lot of animals using the same tutorial with the blend of your innovation! Show it off to your friends and family and let them admire your amazing creation and creativity skills too! This craft is not only fun to make but also consists of various learning activities!
Try it out to get into the amazing crafting world! Also, share your crafting experience and journey with us in the comments section!
Some More Giraffe Craft Tutorial
Adorable Clay Giraffe Art Project for Children
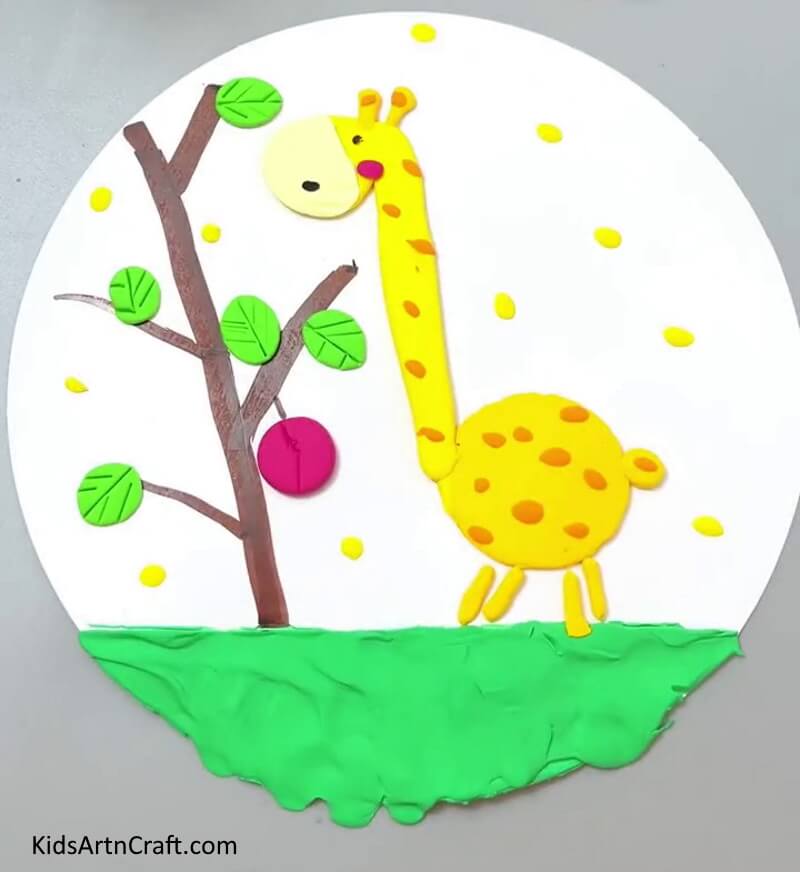
Image Source/Tutorial: Kids Art & Craft
This clay giraffe art project is great for children. It is a fun and creative way to get them engaged in art. Kids will have a blast making their own clay giraffes and showing off their unique creations.
Follow us on Youtube for art and craft tutorials and much more.
More Articles from Kids Art & Craft
- How to Make Worm Using Clay For Kids
- DIY Seed Germination Using Clay Easy Artwork For kids
- How to Make Clay Flower Easy Tutorial for Kids
- DIY Bees Clay Art Tutorial for Kids
- Easy Carrot Growing Artwork Craft Step-by-step Tutorial


