Clay Crafts
DIY Bees Clay Art Tutorial for Kids

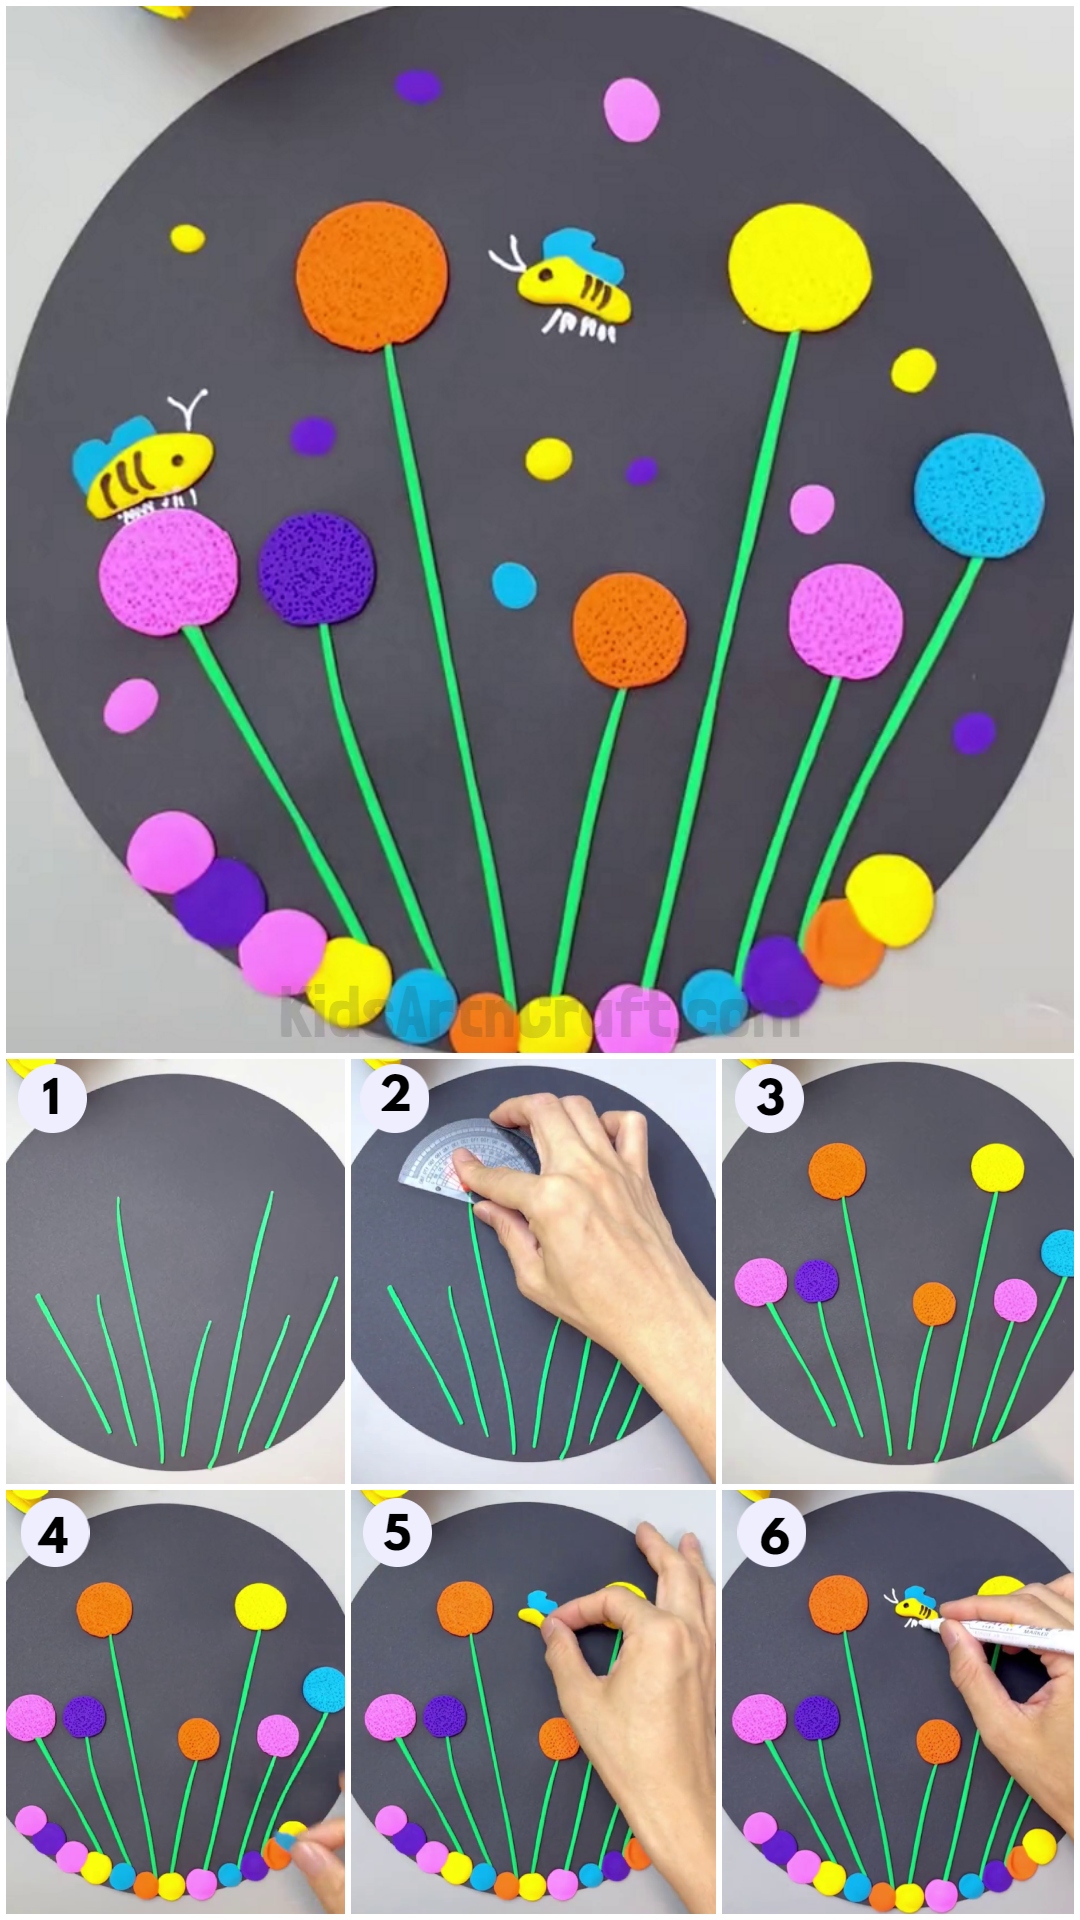
This DIY tutorial shows kids how to create creative and fun garden bees out of clay! Learn how to make these garden bees with step-by-step instructions and have a blast bringing these little clay critters to life. Perfect for any nature lover, this DIY project is sure to bring a smile to your child’s face!
Welcome to this beautiful garden bee clay art tutorial! This tutorial is perfect for kids to explore their creative and artistic side by making their very own garden bee figures. With easy-to-follow instructions and simple materials, this tutorial will help kids create and explore the wonders of clay art at home. With a few simple steps, they will be able to create their own clay bee sculptures, which can be used as a unique decoration in the home or garden. Let’s get started!
Beautiful Garden Bees Clay Art Tutorial For Kids To Make At Home
Read More: Paper-Cutting Designs For Projects
Materials Required
- Clay
- Black paper
- Scissors
- Protractor
- Toothpicks
Procedure
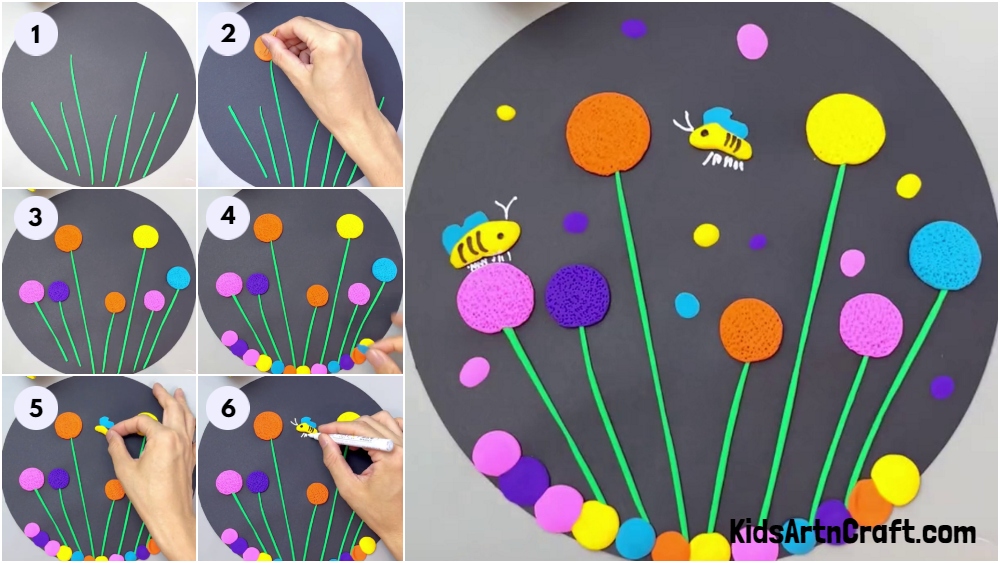
Step 1: Making Green Stems On The Black Paper
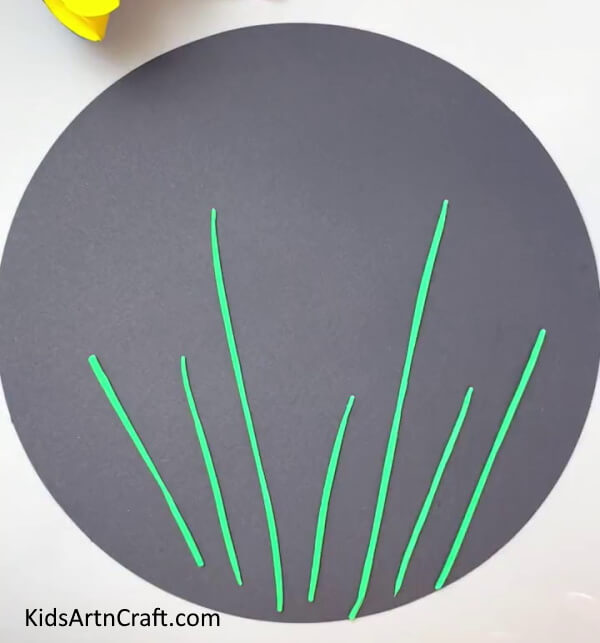
Take black paper. Cut out a big circle as shown. Take green clay and make stems out of it as shown. Paste them on black paper.
Step 2: Making Orange Clay Ball
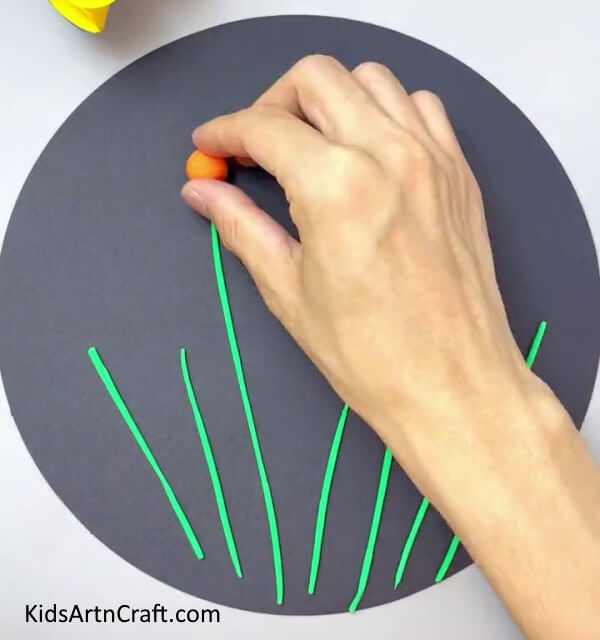
Take orange clay and make a clay ball. Paste it on top of one stem.
Step 3: Pressing The Orange Clay Ball
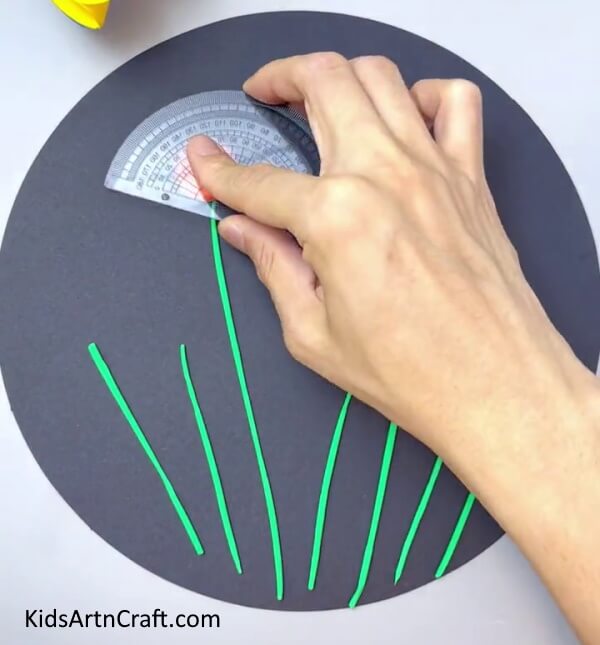
Take a protractor, and press the ball into a flat circle.
Step 4: Pricking The Orange Clay With Toothpicks
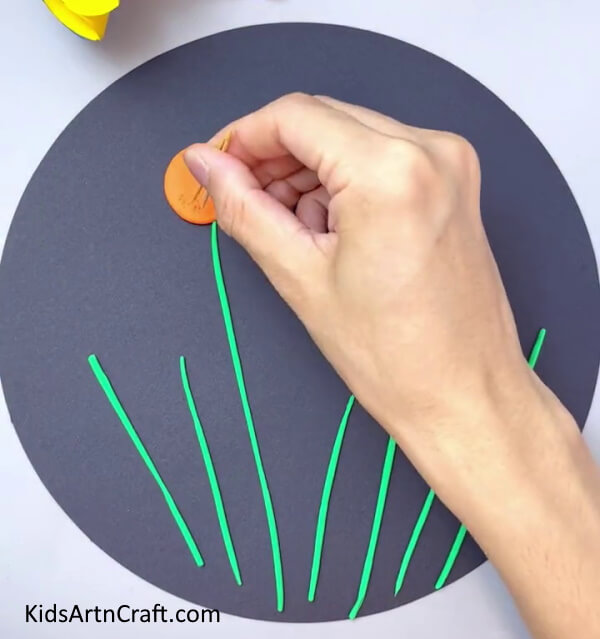
Take two toothpicks and start making small dots on the orange clay by softly pricking it as shown.
Step 5: Adding More Colorful Clay Circles
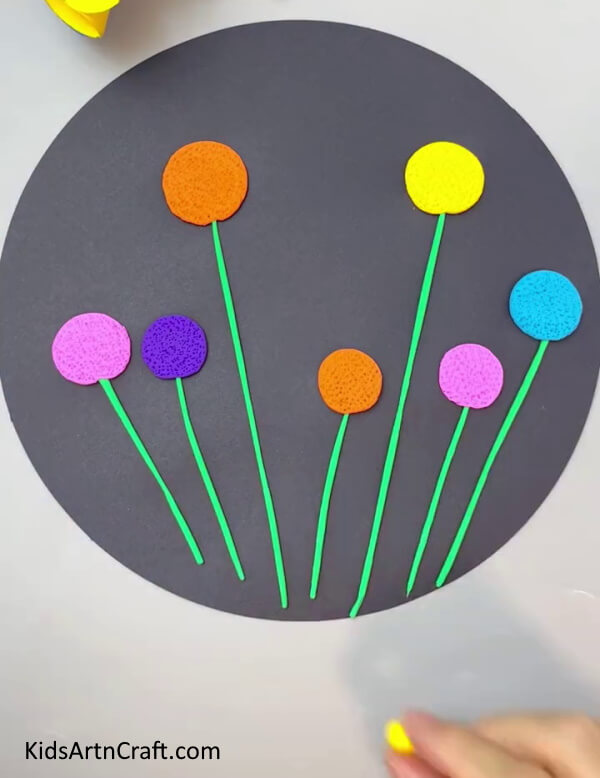
Repeating the above steps, add colorful clay circles on top of each stem and prick them with toothpicks. Now, take yellow clay. Make a small clay circle out of it and paste it near the bottom edge of the black circle, at the end of the green stems as shown.
Step 6: Adding Colorful Clay Circles At The Bottom
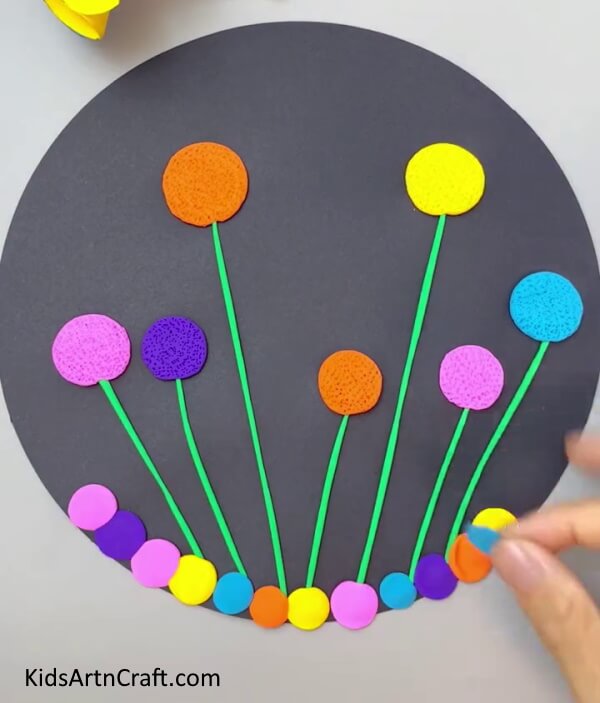
Repeat the above step to add more colorful clay circles at the bottom. Now, take blue clay to make the wings of the bee. Paste it near the orange circle.
Step 7: Making The Yellow Body Of The Bee
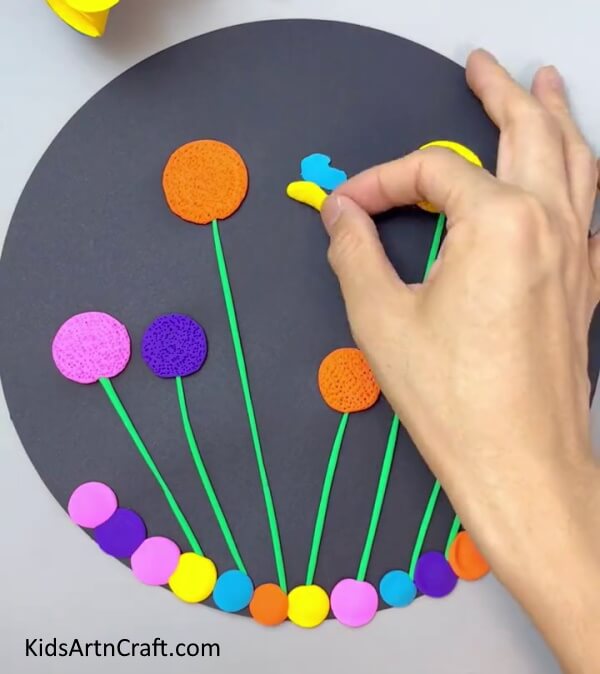
Take yellow clay and make the body of the bee. Paste the yellow body below the wings.
Step 8: Making Details Of The Bee With Black Marker
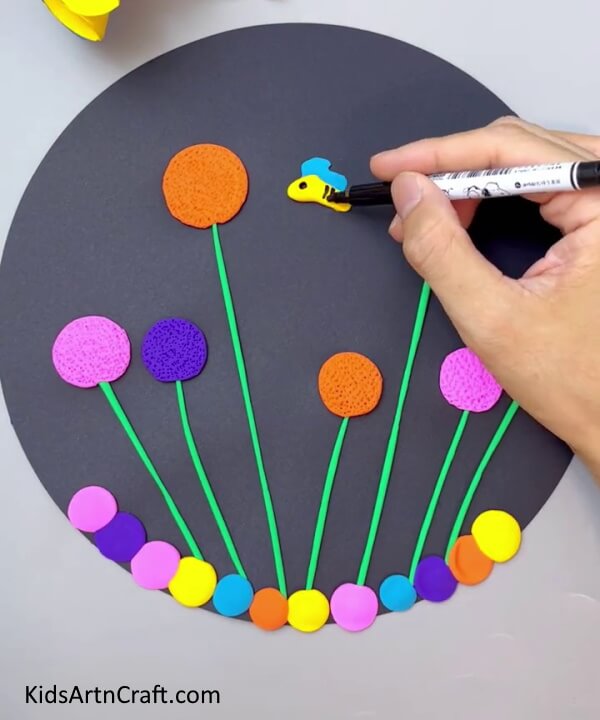
Take a black marker and make an eye and black stripes on the bee as shown.
Step 9: Making Antennas And Legs Of The Bee
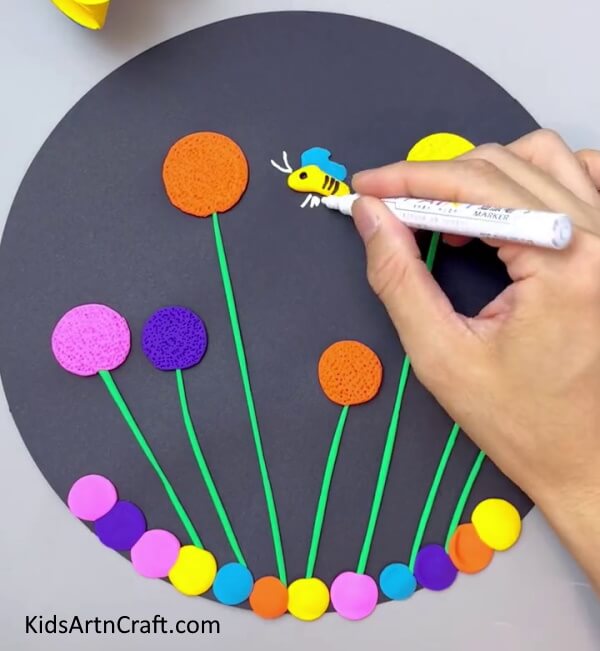
With the help of a white marker, draw the antennas and legs of the bee as shown. Make one more clay bee and place it on top of the pink flower. Make several small colorful clay circles and paste them all over the black circle.
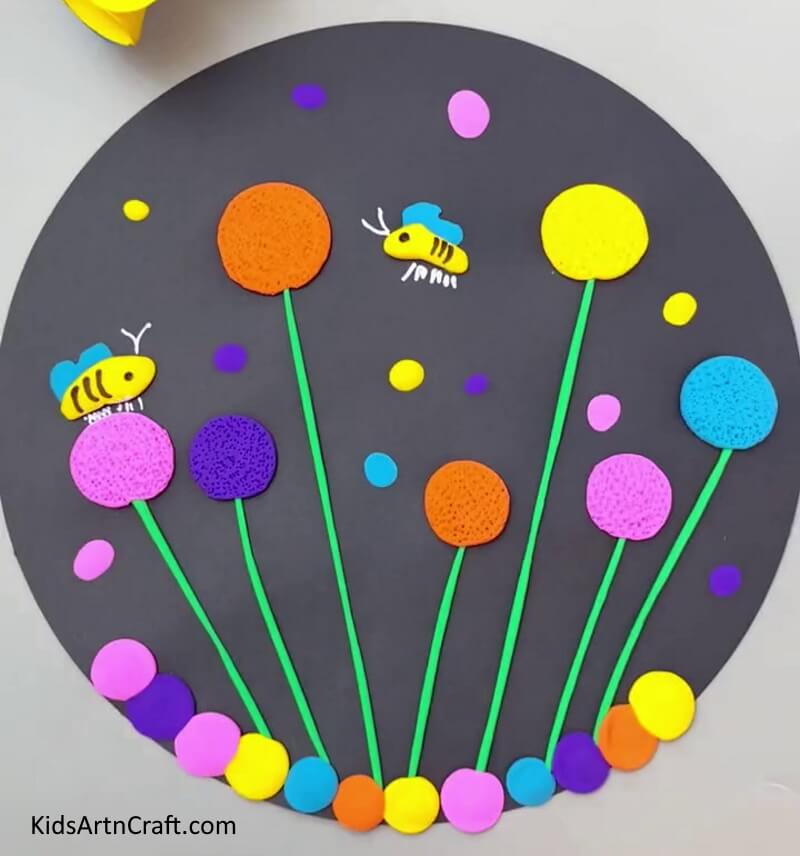
Yay! This Is The Final Look Of Our Garden Bees Clay Art!
Congratulations! The garden bees clay art project is a great success and the final look of the art is beautiful and ready to be put in the garden. This project is a great way to bring creativity and fun into our garden. This beautiful masterpiece is created by using a variety of colors. This clay art is the perfect addition to any outdoor garden. It is easy to make and can brighten up any outdoor space. This craft is perfect for kids and adults alike. With a few simple supplies, you can create a beautiful piece of art that you can enjoy for years to come. Have fun!
FAQs Related To DIY Garden Bees Clay Art For Kids
1. What type of clay is best for this project?
Air-dry clay is the best type of clay for this project. It is easy to shape and comes in a variety of colors.
2. How long will it take to complete this project?
The time it takes to complete this project depends on the size of your garden and the number of bees you are making. It can take anywhere from around 30 minutes or an hour to finish the project.
3. Is this project suitable for kids?
Yes, this project is suitable for kids of all ages. It is a great way to get them interested in art and nature.
4. How do I use the craft knife to make the bee body?
Roll out the clay and use the craft knife to cut out a bee’s body shape.
5. How do I make the wings for the bee?
Cut out a pair of wings from the clay and attach them to the bee’s body.
6. How should I display the finished project?
You can display the finished project on a wall, a window, or a shelf.
This DIY Garden Bees Clay Art Tutorial for Kids is a fun and creative way for your kids to express themselves and make a unique garden decoration.
Follow us on Youtube for art and craft tutorials and much more.
More Articles from Kids Art & Craft
- DIY Homemade Clay Art & Crafts Video Tutorials for Kids
- DIY Canvas Painting Art Video Tutorial for Beginners
- DIY Creative Clay Craft Activities Video Tutorial for Kids
- Awesome Canvas Painting Video Tutorial for Beginners
- Bubble Wrap Printed Pomegranate Craft For Kids


