Clay Crafts
DIY Birds on Tree Easy Clay Artwork Tutorial For Kids

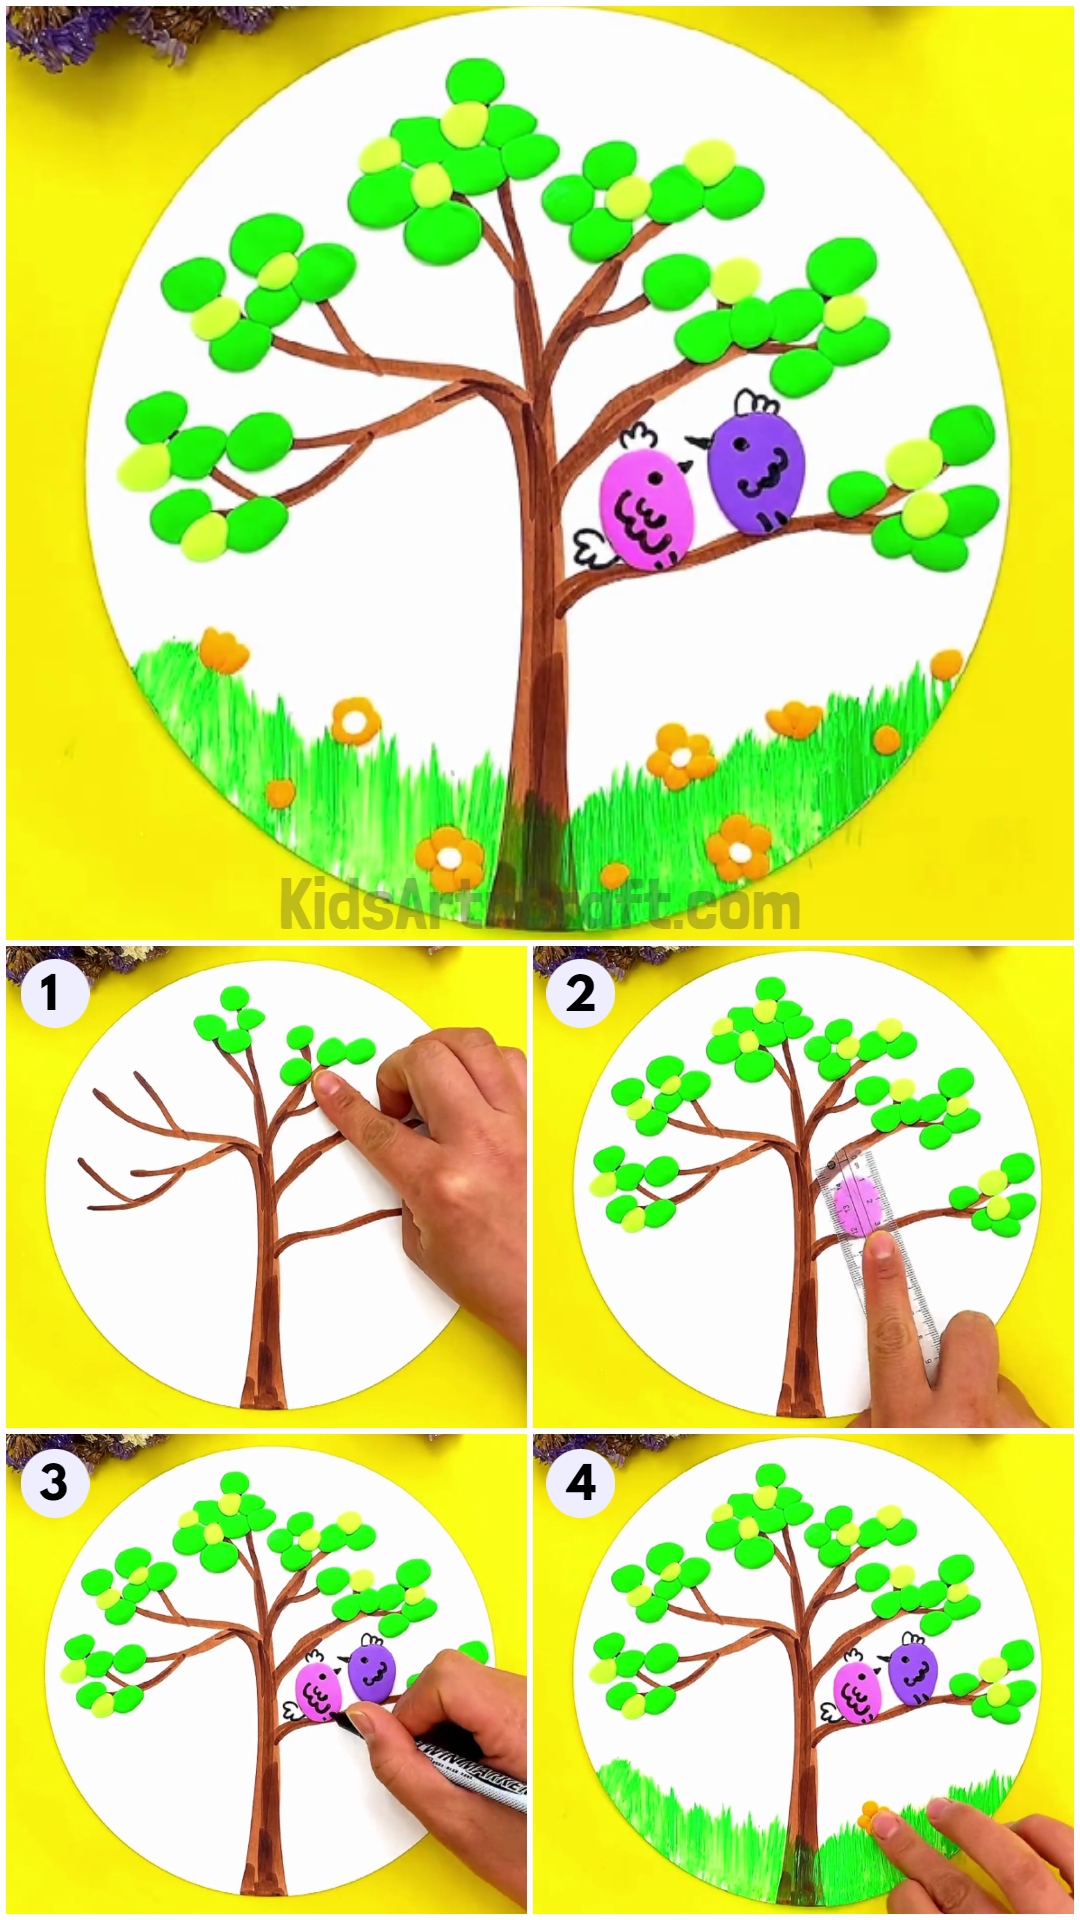
This is a great craft project for kids! You can make a unique and beautiful bird on a tree art piece with some basic materials and following the instructions. Have fun making art with your kids and bring a bit of nature into your home!
In the morning when we wake up, we love the soft sounds of the birds chirping on the trees in the morning as it really soothes our ears. Hearing the birds in the morning really makes the whole day. So, today we are going to make birds that are sitting on a tree and enjoying each other’s company. Let’s get started!
Bring all these materials to the table and follow the given steps to make a bird with your creativity.
Simple Bird On Tree Clay Craft
Read More: DIY Clay Giraffe Step-by-Step Tutorial For Kids
Materials Required
- White craft paper
- Marker/sketch pen (Brown and Black)
- Clay (Green, Yellow, Pink, Purple, Orange, White)
- Light green poster colour
- Old toothbrush
- Ruler
Procedure
Step 1: Take White Craft Paper And Green Clay
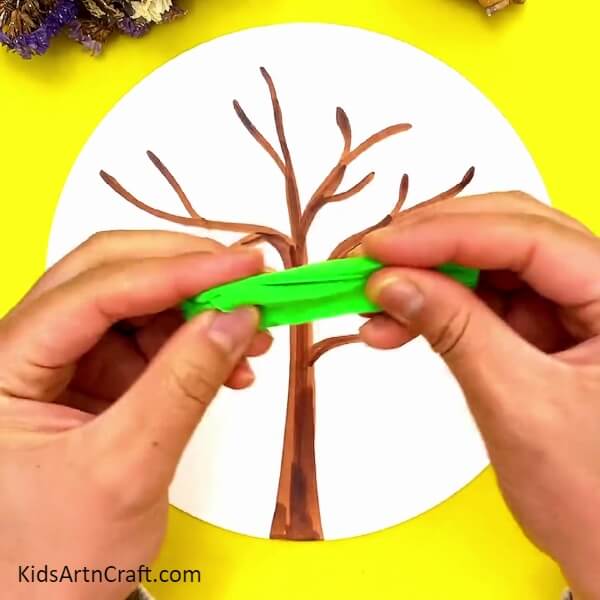
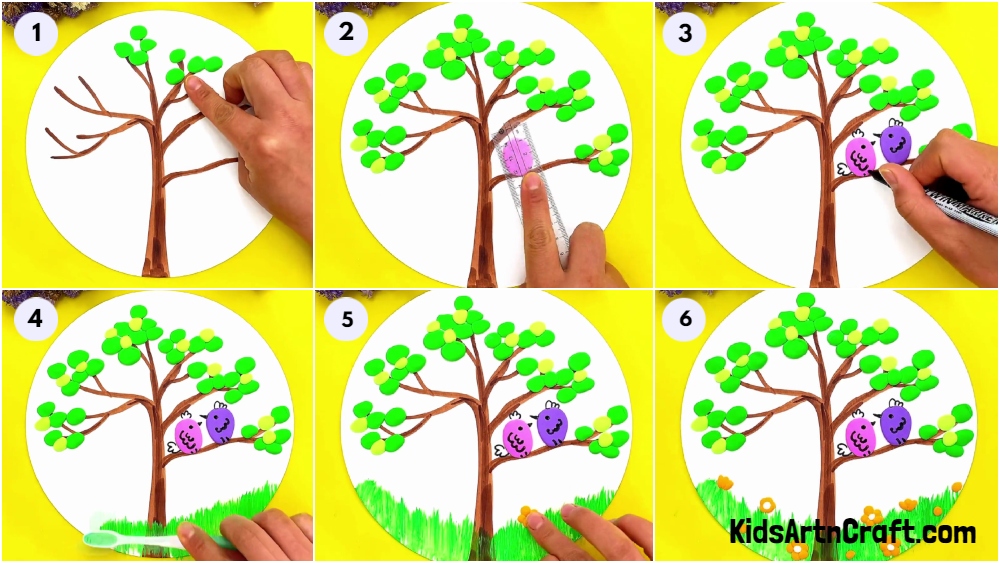
Your first step is to take a white coloured craft paper. The white coloured craft paper should be in a circle shape. Then, after taking a circular white coloured craft paper, take a brown marker/sketch pen and make a tree on the whole white coloured craft paper as shown. After making a tree with brown marker/sketch pen on white coloured craft paper, take a green coloured clay and pull it from both sides.
Step 2: Make Circles With Green Clay And Stick Them On Branches
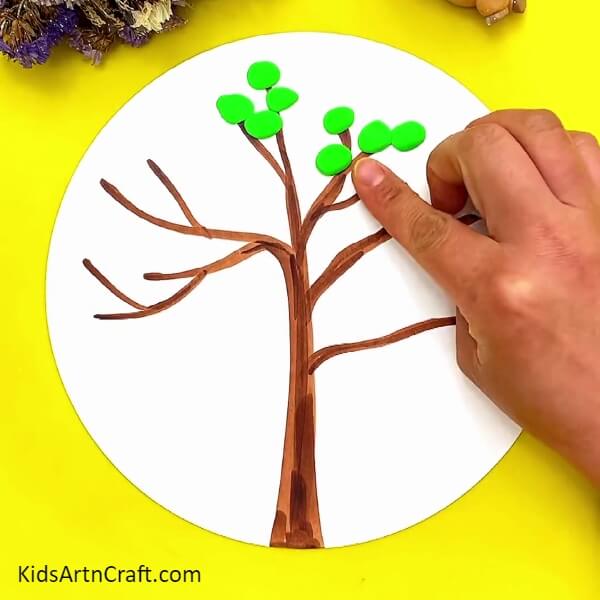
Now, take green-coloured clay. After taking green-coloured clay, make a circle with the help of green-coloured clay. After making a circle with green-coloured clay, stick it in the branches of the tree which you made from brown marker/sketch pen.
Step 3: Make Circles With Yellow Clay And Stick Them On Branches
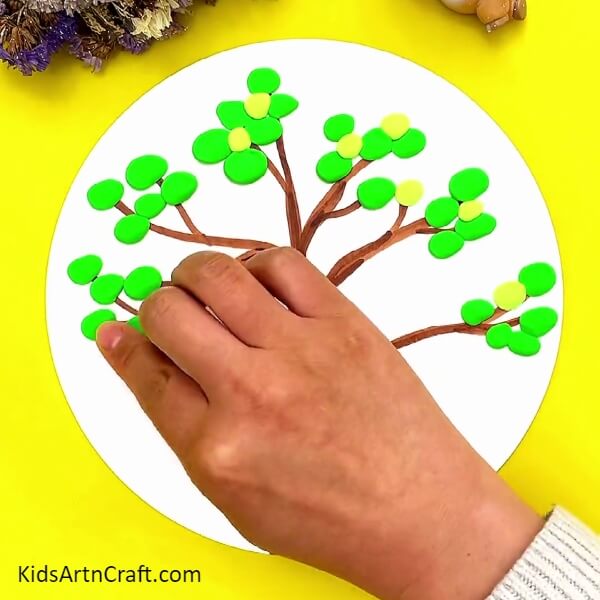
By repeating the same step as above, but in this step make a circle with the help of yellow coloured clay and stick it on the branches which you made from brown marker/sketch pen.
Step 4: Make An Oval Shape With Pink Clay
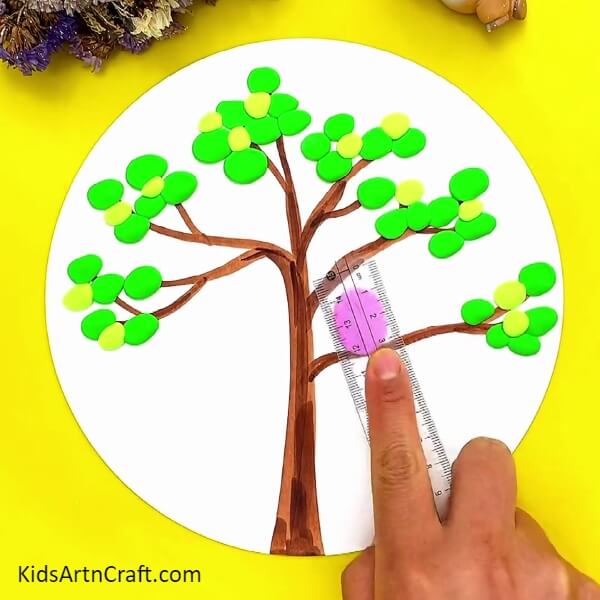
Now, take a pink-coloured clay. After taking a pink-coloured clay, make it into a shape of an oval. After making the pink-coloured clay into an oval stick it above one of the branches as shown in the picture. After sticking the pink-coloured clay on the branch, takes a ruler and press the ruler against the pink-coloured clay.
Step 5: Make An Oval Shape With Purple Clay
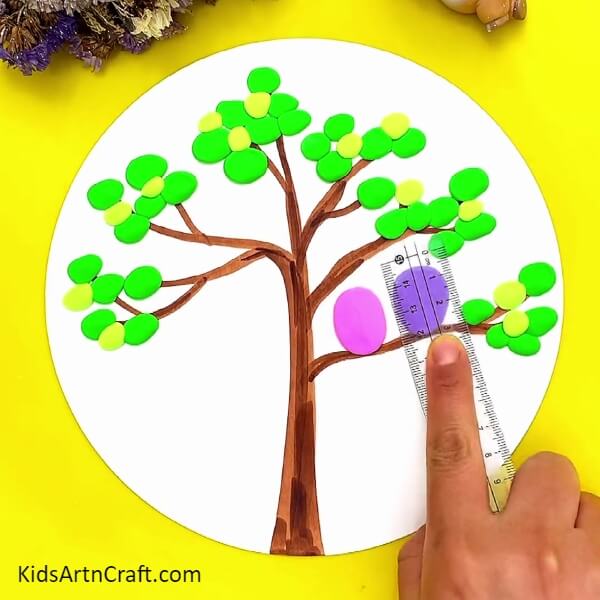
Now, take a purple-coloured clay. After taking purple-coloured clay, make an oval shape with the help of purple-coloured clay. After making an oval shape with the help of purple-coloured clay, stick the purple-coloured oval just beside where you have stuck the pink-coloured oval, then take a ruler and press the ruler against the purple-coloured clay as shown.
Step 6: Make Features Of The Bird With A Black Marker/sketch Pen
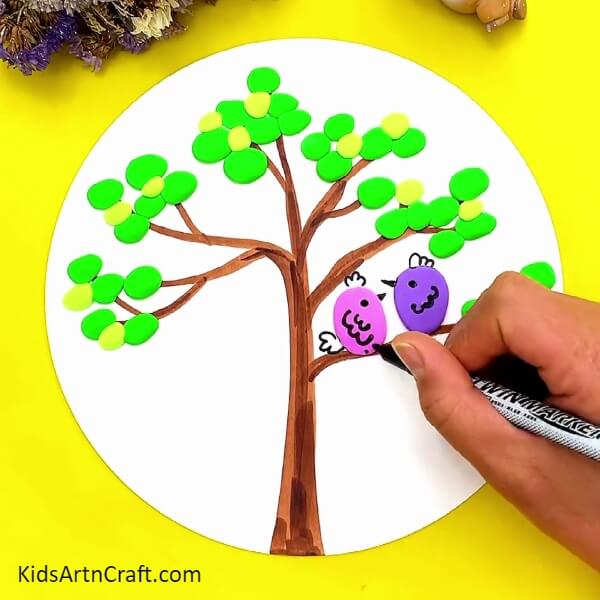
Take a black marker/sketch pen. After taking a black marker/sketch pen, make features such as beaks, eyes, feathers, tails and hair of the birds which you have made from pink coloured clay and purple-coloured clay.
Step 7: Make Grass With An Old Toothbrush
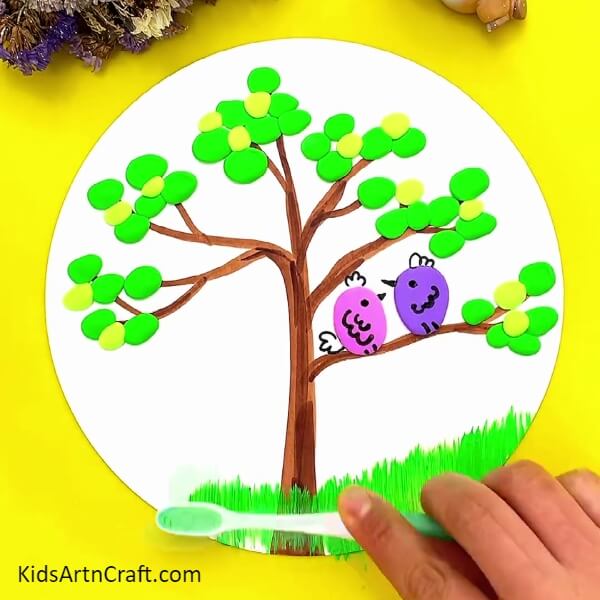
Now, take an old toothbrush and a light green poster colour. After taking an old toothbrush and a light green poster colour, add some light green poster colour to the old toothbrush. After adding a light green poster colour to the old toothbrush, move the brush in the upwards direction from the bottom as shown in the picture.
Step 8: Make Flowers With Orange And White Clay
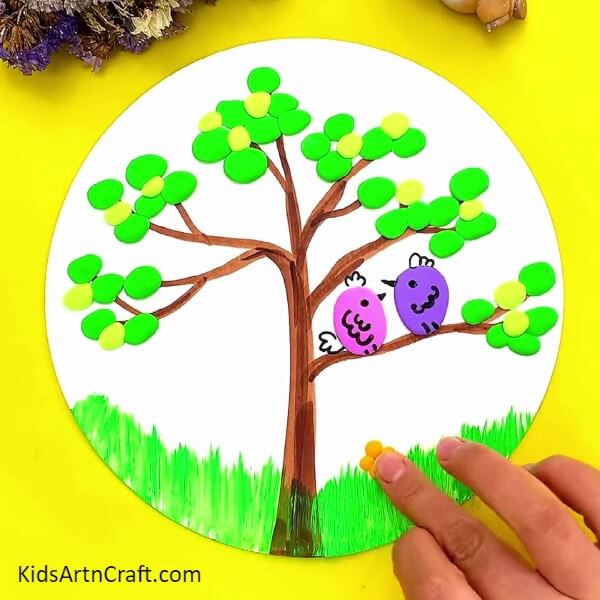
Take orange and white coloured clay. After taking orange and white coloured clay, make the flower with the orange flower by making small balls and sticking them on the grass together. Then, with the help of white-coloured clay, make small balls and stick them in the middle of the orange balls which you made from orange-coloured clay.
Keep repeating this step and make more flowers from orange-coloured clay and a lump of white-coloured clay and stick it on the grass which you made from an old toothbrush and light green poster colour.
Finally, Your Cute Little Birds Are Ready To Chirp Every Morning
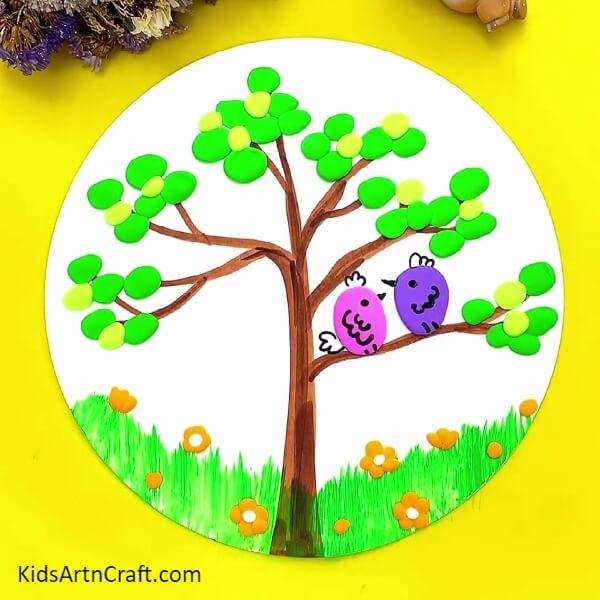
Finally, your cute little birds are ready to chirp every morning so that you can listen to their soothing voice and wake up fresh in the morning. This clay art is really very easy and you can make it very easily without much of a hardwork. Kids can learn many things from clay artwork such as they will learn to appreciate the surrounding beauty more and they will also learn different clay techniques.
Some More Birds Craft Tutorial
Hand Crafting Bird Artwork Using Leaves
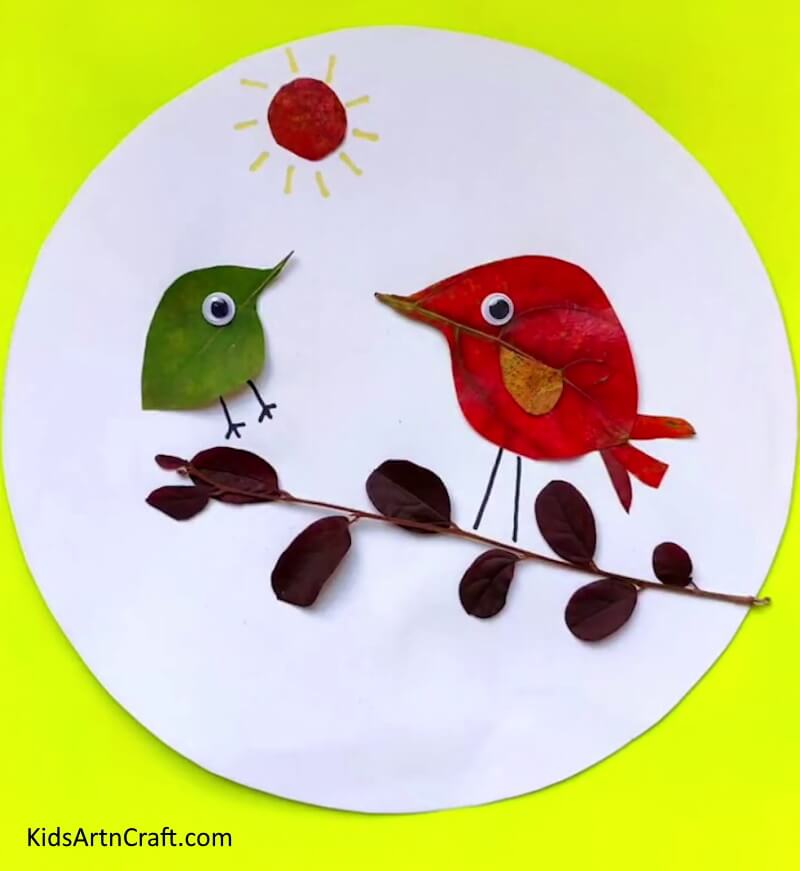
Image Source/Tutorial: Kids Art & Craft
Creating bird artwork using only leaves is a unique and creative craft. It is a great way to bring nature into your home and the pieces created are often stunningly beautiful. With a few simple supplies, anyone can craft these wonderful works of art.
Do you want to show your clay skills to everyone? Then, what are you waiting for, go and make this easy and simple clay art now and leave everyone in awe of your skills.
Follow us on Youtube for art and craft tutorials and much more.
More Articles from Kids Art & Craft
- How To Make Caterpillar Eating Apple Using Clay
- How to Make a Clay Bird Easy Artwork tutorial for kids
- How to Make Clay Flower Easy Tutorial for Kids
- Clay watermelon ice cream easy craft tutorial
- How to Make Worms Using Clay For Kids


