Paper Crafts
DIY Paper Origami Basket Step-by-step Tutorial For Kids

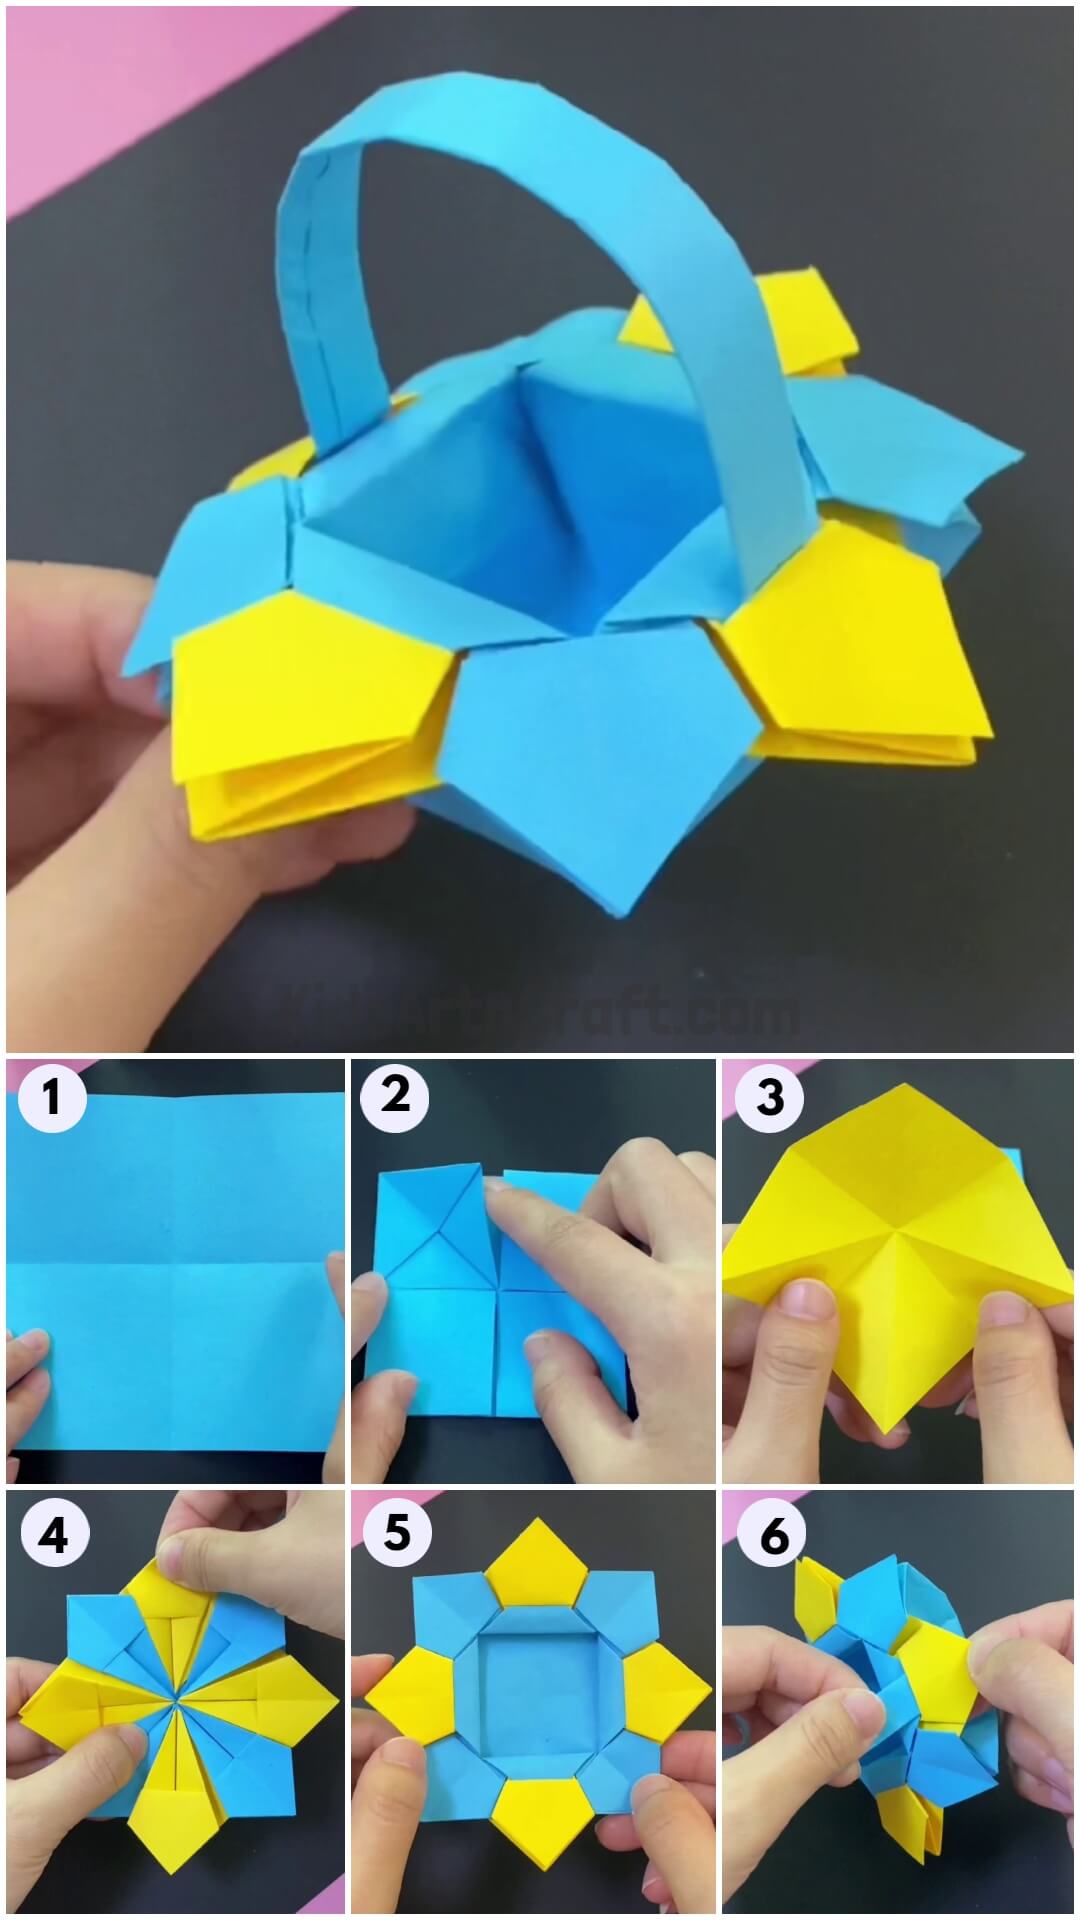
Follow this guide and make a cool, one-of-a-kind origami basket out of paper! It’s a great activity for kids and it can also be used as a decoration or to store small things. You just need paper, scissors and glue to make it!
If drawing, painting, origami etc. are your hobbies, you have unknowingly promoted positive health while outcasting your creativity. Crafting enhances your productivity skills and boosts your self-confidence. Also, it is essential for the holistic development of an individual. You can end your boredom and make this super cool DIY paper origami basket by just following these simple easy peasy guide. So, unleash your inner artist with this step-by-step tutorial. Let’s begin
Easy Paper Origami Basket For Kids

Read More: How to Make Origami Rose Easy Tutorial For Beginners
Materials Required
- Two square sheets of paper
- glue
- A pair of scissors
Procedure
Step 1: Taking A Blue Sheet Of Paper
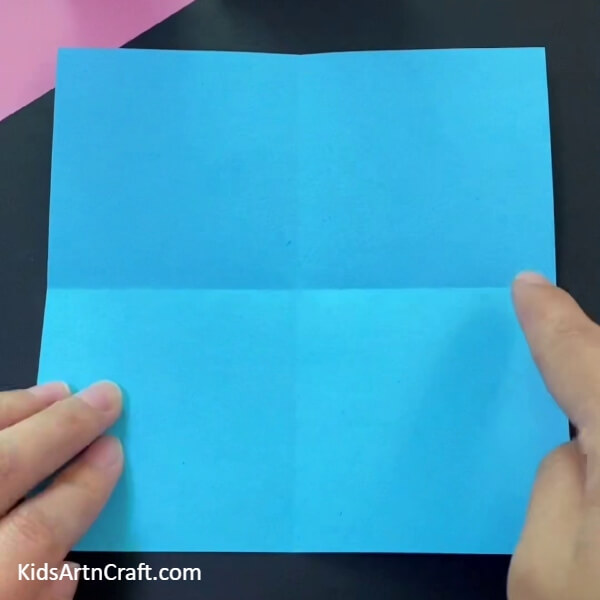

Take a blue sheet of paper and place it flat on the ground.
Step 2: Folding The Sheet Inwards From Both The Sides
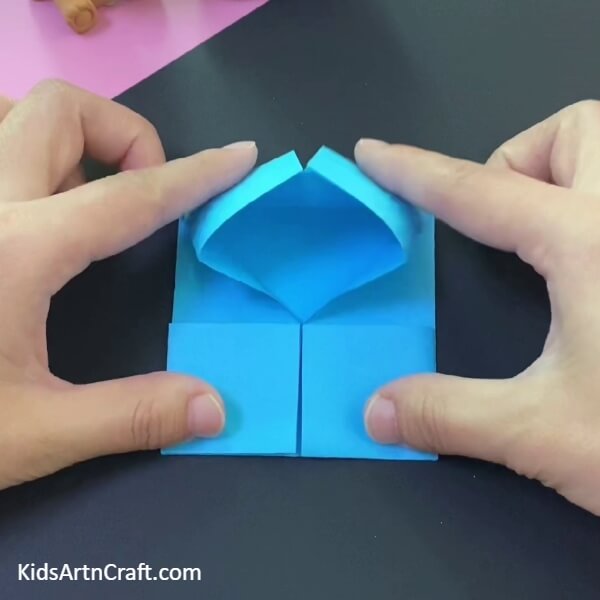
Fold the blue sheet making creases as shown in the image above.
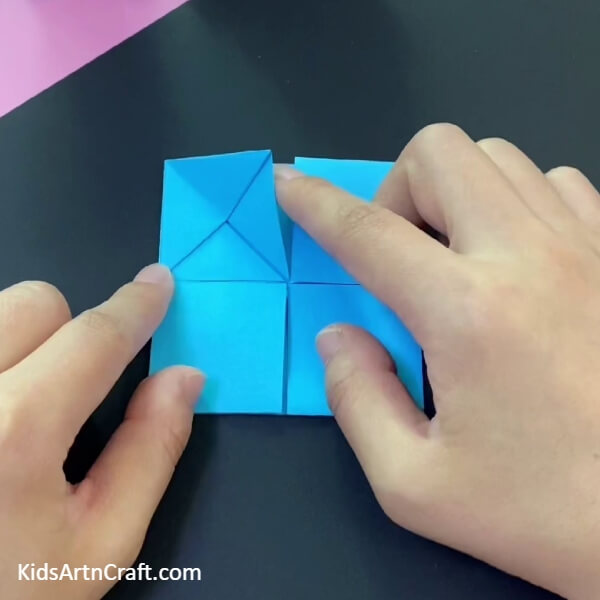
Step 3: Folding The Sheet From Upper And Lower Side
Fold the blue sheet from the upper and lower creases carefully.
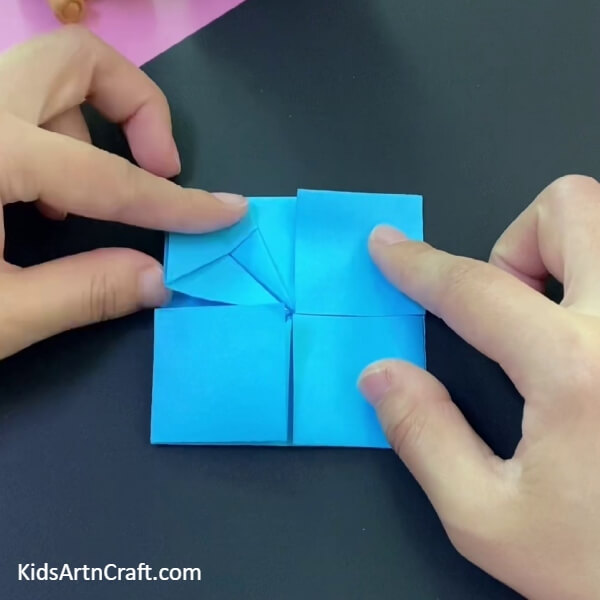
Step 4: Folding The Upper Square Into Half
Fold the upper left square into half as shown in the image above.
Step 5: Folding A Small Portion Of The Square From The Left End

Fold a small portion of the same square from the left end.
Step 6: Reversing The Square And Fold The Sheet
Reverse the square and fold the upper square in a similar manner displayed in the image above.
Step 7: Making One More Fold To Create A Design
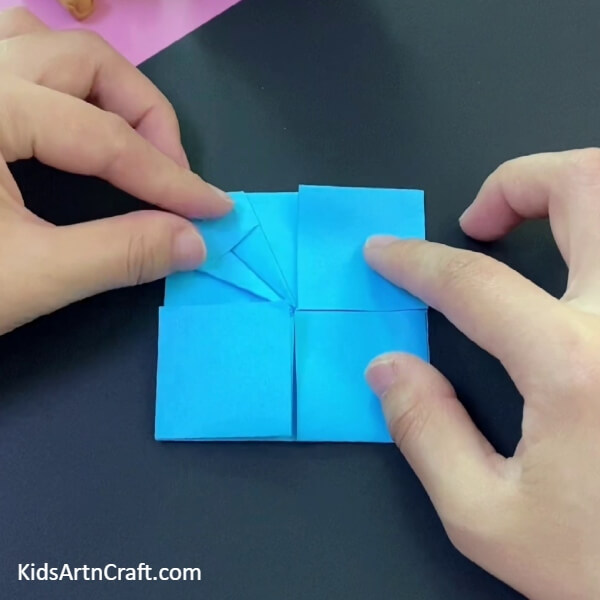
Make one more fold in the upper left square to create a design shown in the image above.
Step 8: Taking A Yellow Sheet And Make Creases
Take a yellow square sheet and make creases by folding it.
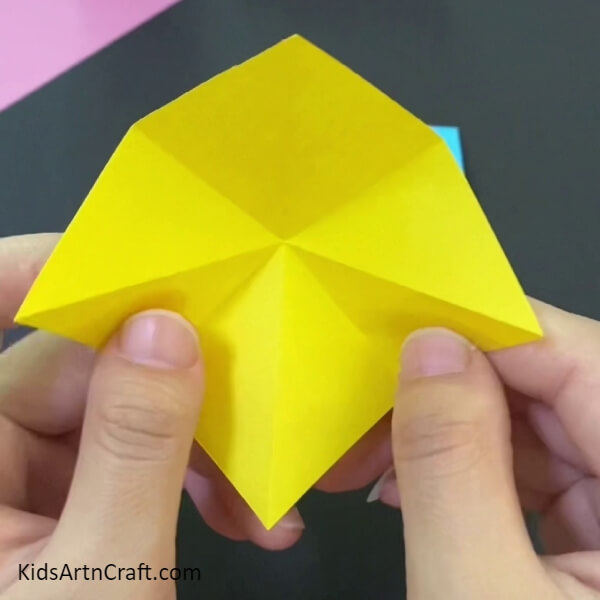
Step 9: Folding The Square Inside With The Help Of Creases

Fold the yellow square into a smaller square following the lines of the creases.
Step 10: Folding The Upper Sheet Of Square
Fold the upper portion of the yellow square into 1/3rd as shown.
Step 11: Making A Pattern By Folding The Yellow Square
Fold the other 1/3rd of the yellow square carefully to create a similar pattern shown in the image above.
Step 12: Reversing The Yellow Square
Reverse the yellow square and stick it.
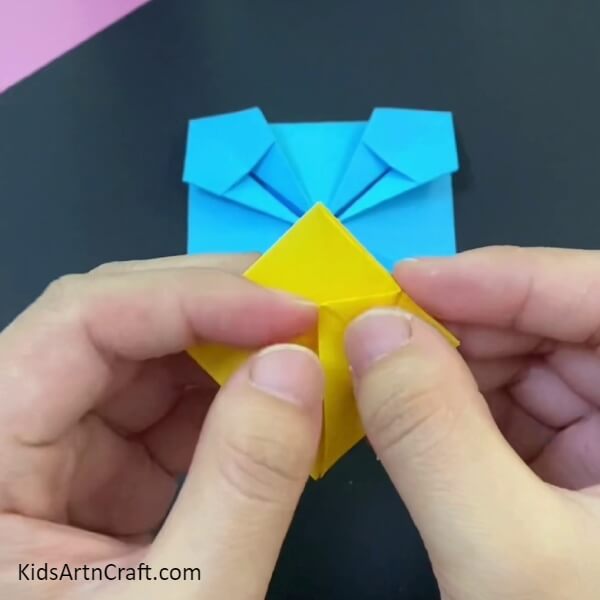
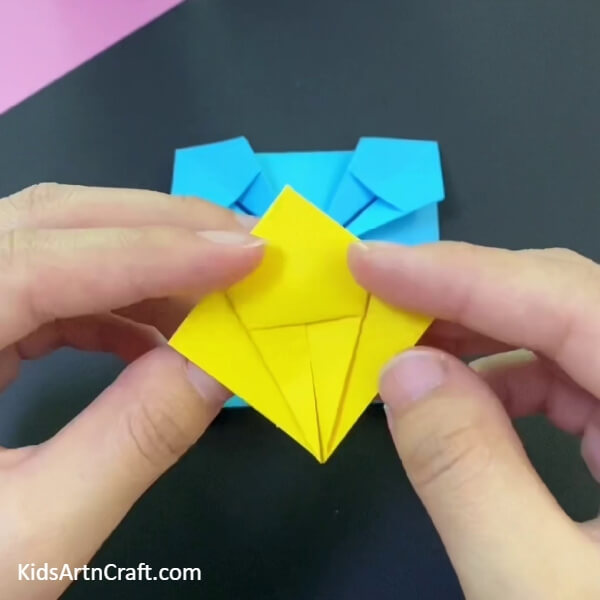
Step 13: Placing The Yellow Square Between The Blue Ones
Insert the yellow squares between the blue designs.
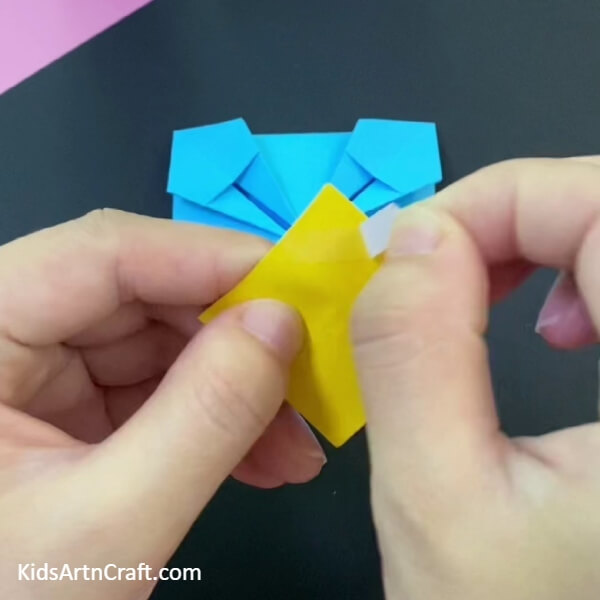
Step 14: Making More Such Yellow Squares And Insert It

Following the same guidelines create more such small yellow squares and place them in between the blue ones.
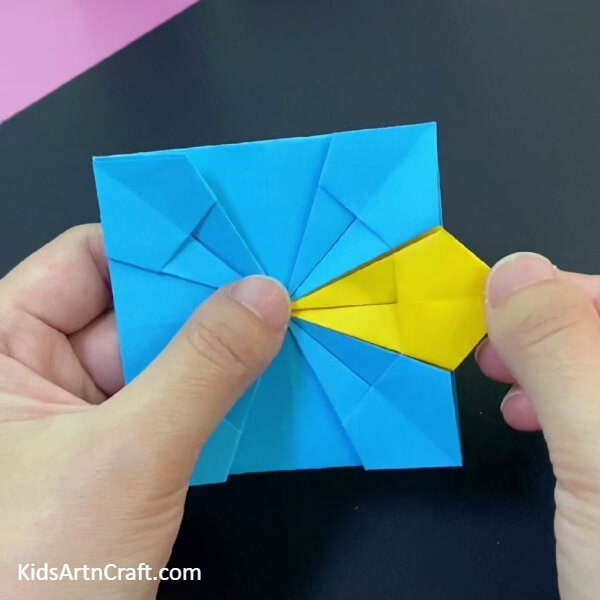
Step 15: PlacingThe Blue Pattern Above The Yellow One
Fold the blue design as shown and place it above the yellow design.
Step 16: Folding The Blue Design Again
Fold the blue pattern again into half.
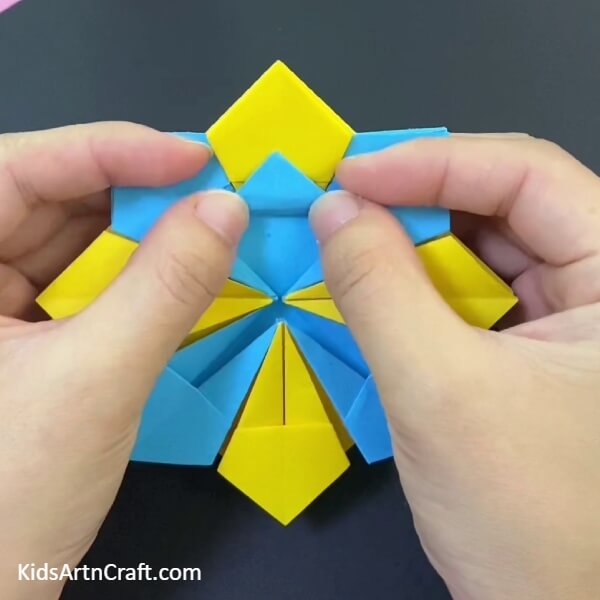
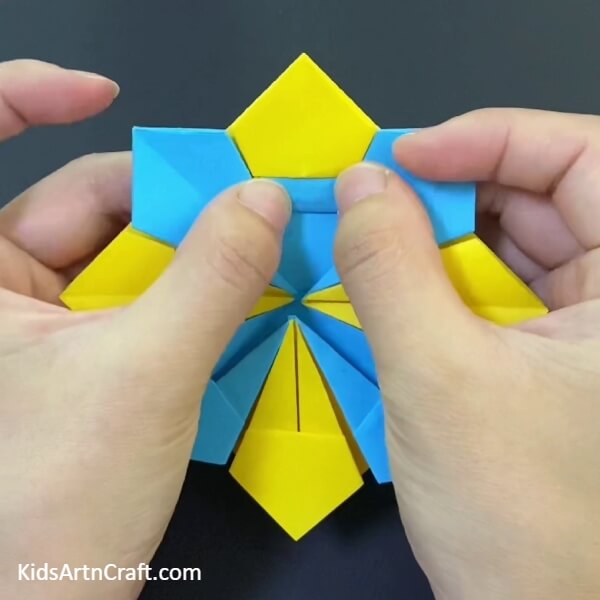
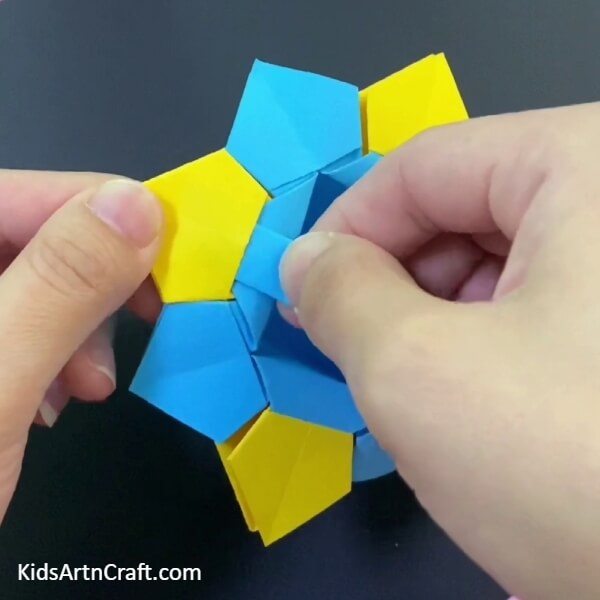
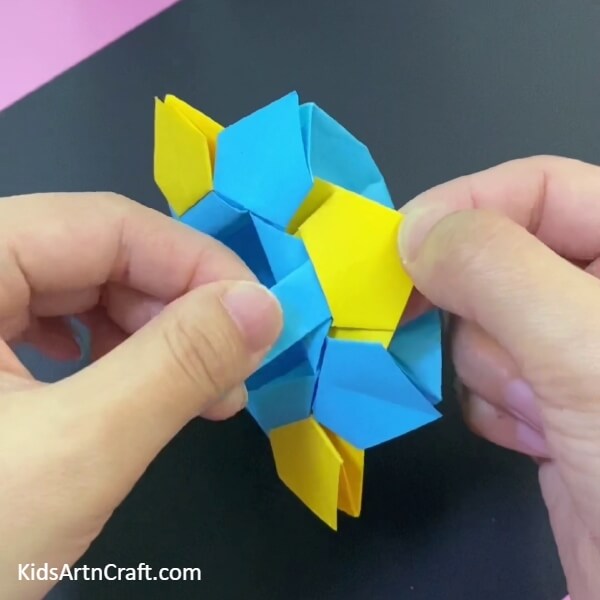
Step 17: Doing The Same Thing With The Other Designs
Make a similar pattern by folding other yellow and blue squares.
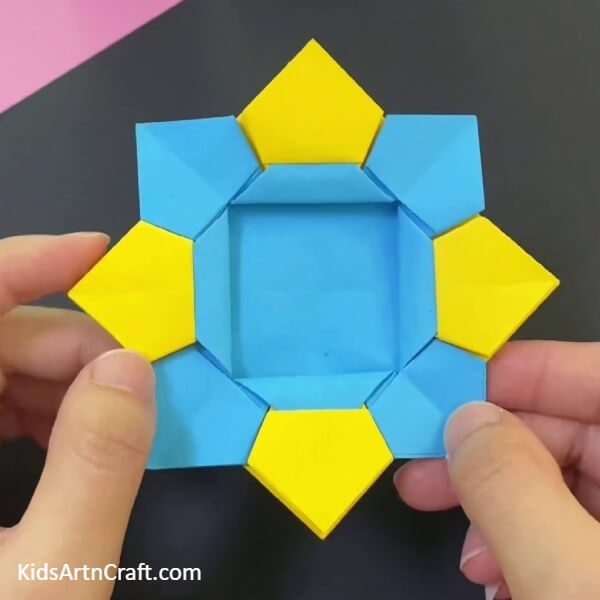
Step 18: Folding The Basket To Make The Creases Firm

Fold the basket inside and hold for a few minutes.
Step 19: Sticking The Handle On One Side Of The Basket
Stick the handle on now side of the basket with the help of glue.
Step 20: Sticking The Other Handle On The Basket
Stick the other handle on the basket using glue.
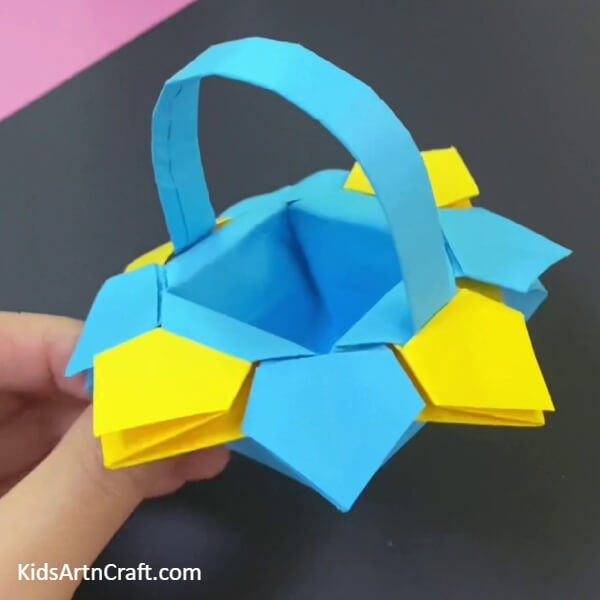
Tadaa! With This, We Have Successfully Made Our Basket
With some hard work and patience, we have successfully completed our DIY origami basket by just following some simple steps. I hope you have had a lot of fun and created some long-lasting memories while creating this beautiful yet simple DIY ORIGAMI BASKET. Share your experience and views with us in the comments section. For more such super cool and easy arts and crafts tutorials visit our website.
Have A Great Day Ahead!
Follow us on Youtube for art and craft tutorials and much more.
More Articles from Kids Art & Craft
- Beautiful Kimono Japanese Dress Craft Ideas For Kids
- How to Make Paper Umbrella Craft for Kids Tutorial
- How to Make Easy Paper Snowflakes Tutorial
- DIY Paper Butterfly Easy Craft For Kids
- Make a Handy Paper Origami Pouch For Kids