Popsicle Stick Crafts
Unique Popsicle Stick Flower Vase Craft Tutorial For Beginners

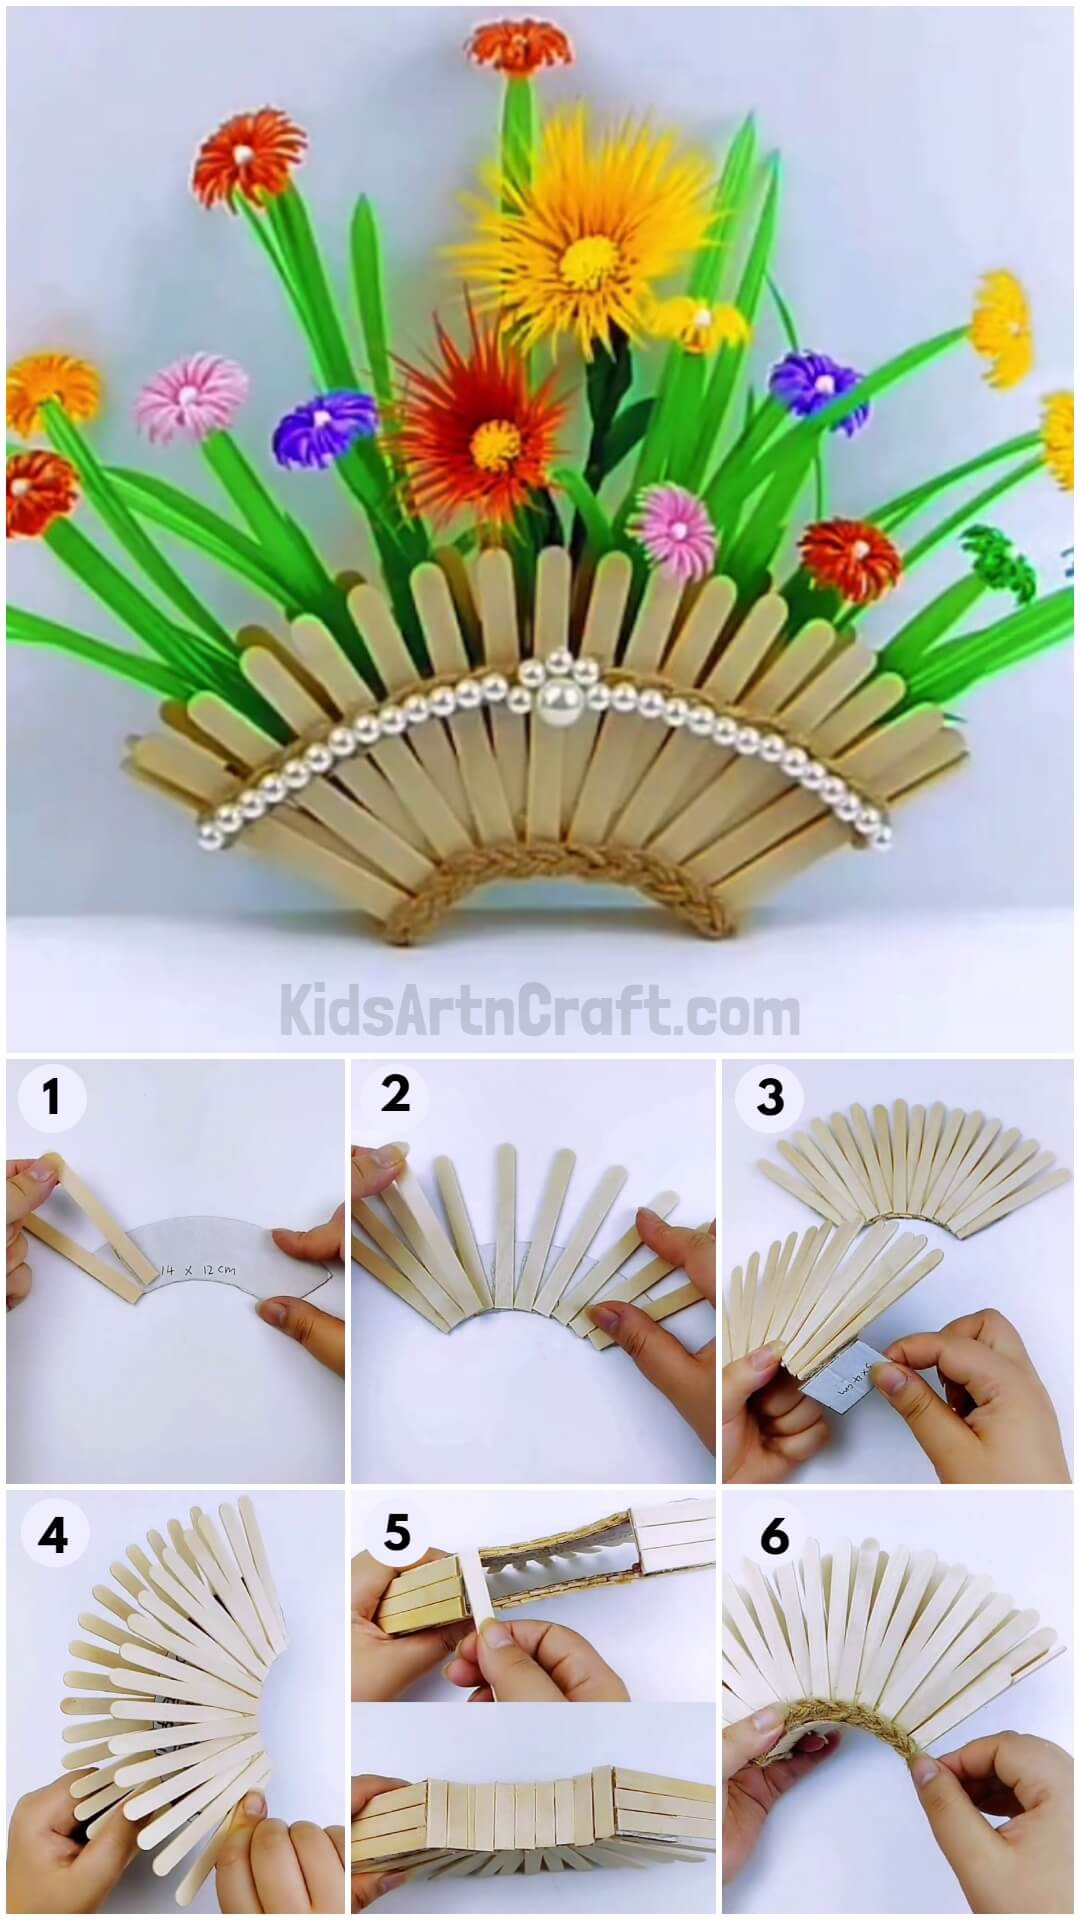
Create your own budget-friendly DIY flower vase which is unique and amazing! This step-by-step tutorial will guide you easily to the same!
Unique flower vases can be a little expensive when you go to buy them from the market. But, why worry when we are here to provide you with cheap alternatives? Today, we brought a step-by-step tutorial for you to make a flower vase on your own using up popsicle sticks! This flower vase will be a fun craft for you to make and will turn out to be uniquely amazing! The pattern of this vase, you may not find anywhere, it is so different! Everybody’s going to love it for sure! So, what are you waiting for?! Let’s begin!
DIY Unique Popsicle Stick Flower Vase Craft Tutorial

Read More: Learn To Make Popsicle Stick Dragonfly Craft
Materials Required
- Popsicle Sticks
- Hot Glue Gun
- Cardboard
- Pencil And Compass
- Scissors
- Jute Thread
- Craft Pearls
Procedure
Step 1: Opening Compass At Measured Lengths
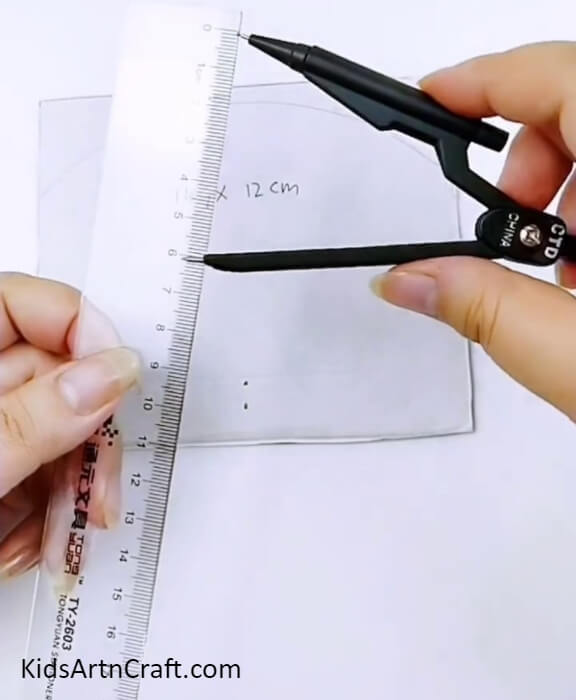

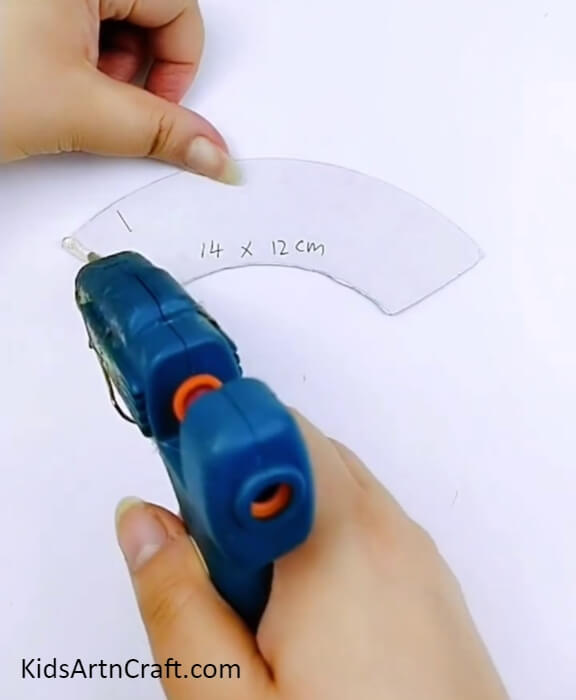
To begin the craft, take a cardboard piece 14 x 12 cm, a compass, and a scale. Now, measure the compass 6 cm using the scale and draw a circle from the mid-end of the cardboard. Now, open and measure the compass 4 cm and make another circle beneath the first over the cardboard.
Step 2: Taking Scissors

Take scissors to cut out the curve between the drawn circular lines.
Step 3: Cutting Out The Drawn Curve
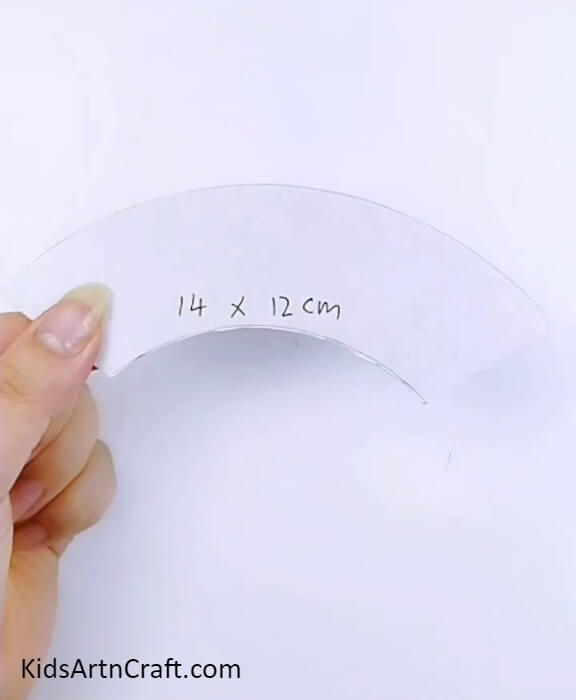
Using scissors, cut out the curve and make slanting curves from the ends of it to obtain a shape like shown in the image.
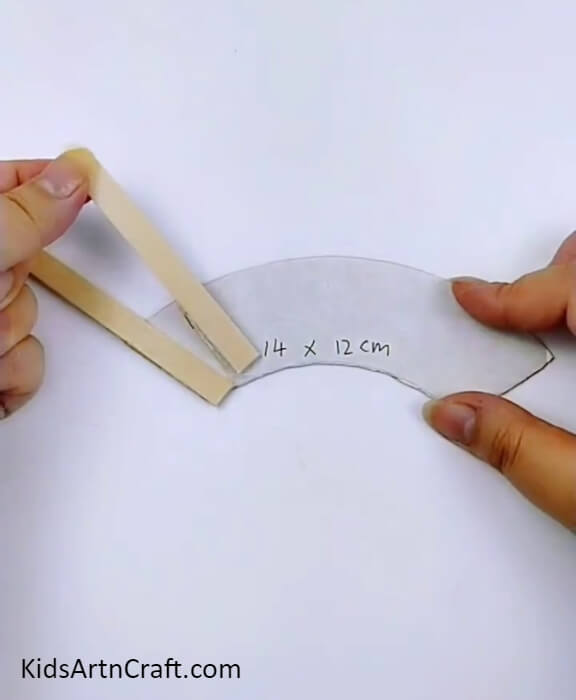
Step 4: Measuring 9 cm On Popsicle Stick

Using a scale measure the popsicle stick up to 9 cm.
Step 5: Cutting Out The Extra Length Of Stick
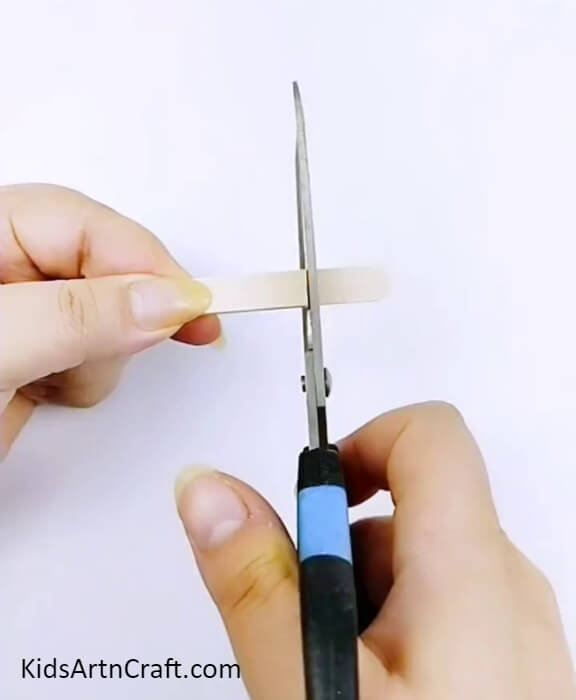
Using scissors, cut out the extra length of the popsicle stick other than 9 cm.
Step 6: 5. Original Fallen Leaf Lotus Craft
Apply a hot glue gun along the slanting border of the curve.
Step 7: Pasting Popsicle Sticks Over The Curve
Cut out more popsicle sticks of the same length s before and start pasting them over the cardboard piece along the curved side of it to make a complete layer of it covering whole just the bottom curve of the cardboard, you may still see spaces from the top boundary of the cardboard curve.
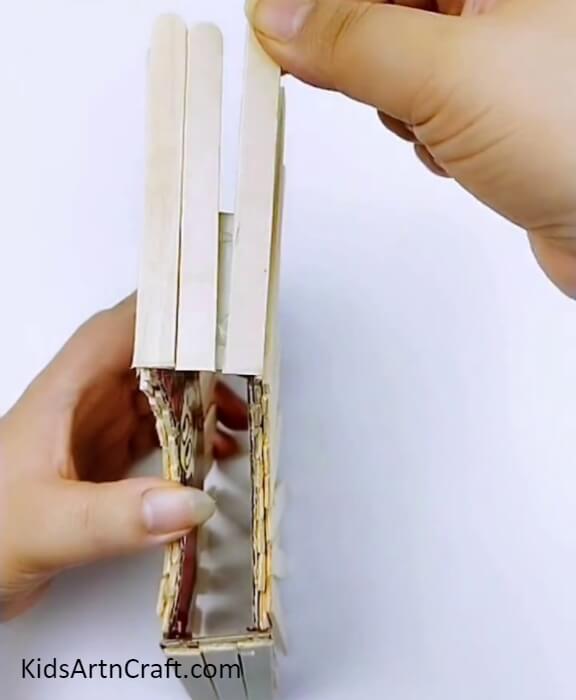
Step 8: Pasting Another Layer Of The Sticks
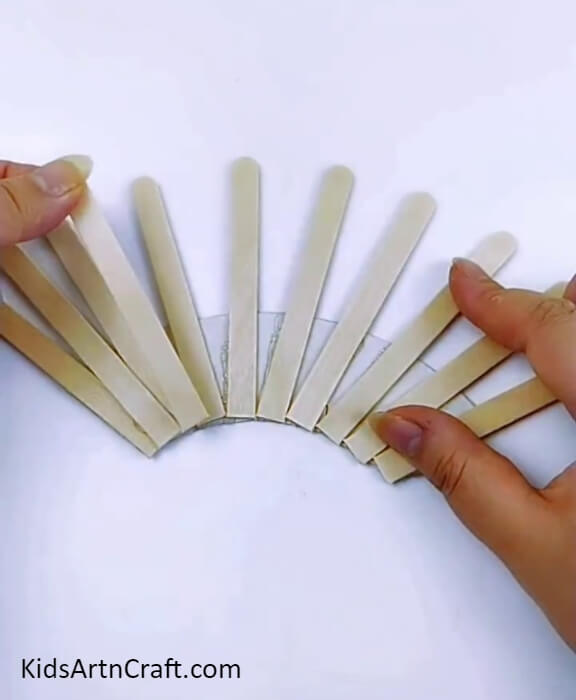
Paste another layer of the sticks between and above the already pasted sticks to cover the gaps using hot glue. This becomes the one-sided base of the vase.
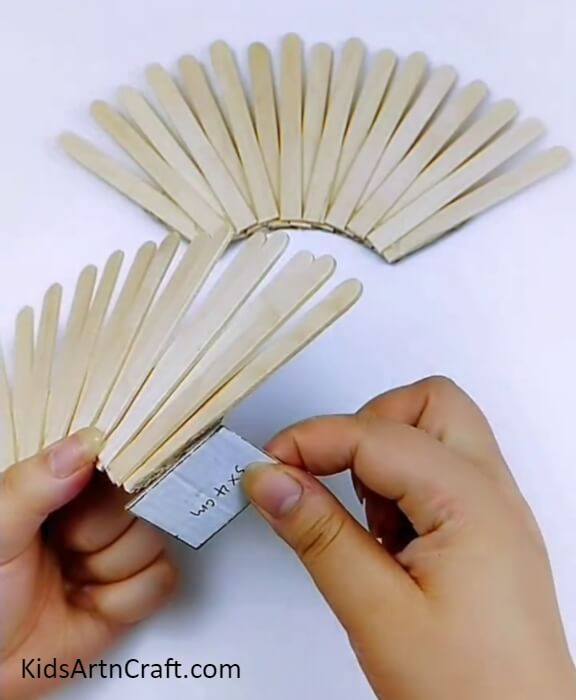
Step 9: Making Other Vase Side And Taking Cardboard Pieces
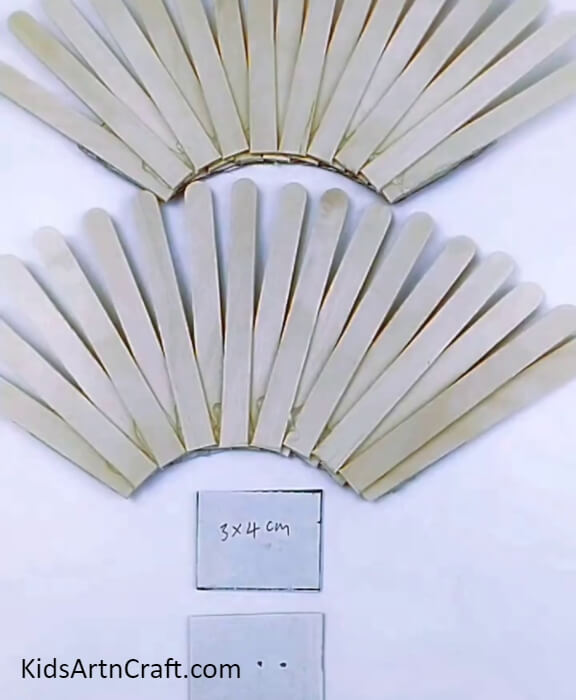
Following the same previous steps, create another same vase base using cardboard and popsicle sticks. Now, cut out two 3 x 4 cm rectangles from the cardboard using scissors.
Step 10: Pasting The Cardboard Rectangle On The Vase Base
Using hot glue, paste the cardboard rectangle on the bottom of the vase base perpendicular to it as shown in the image.
Step 11: Pasting The Other Rectangle On Vase Base
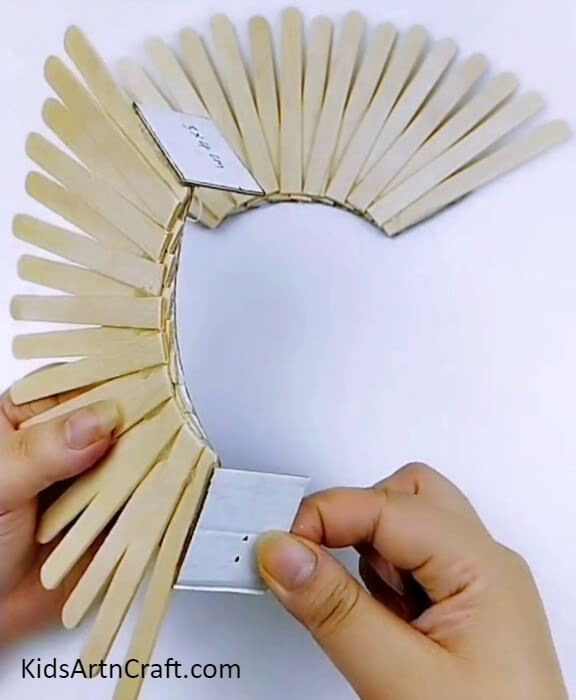
Paste the other rectangle on the other bottom side of the base perpendicular to it, in the same way, pasted the first one.
Step 12: Pasting The Vase Bases Together
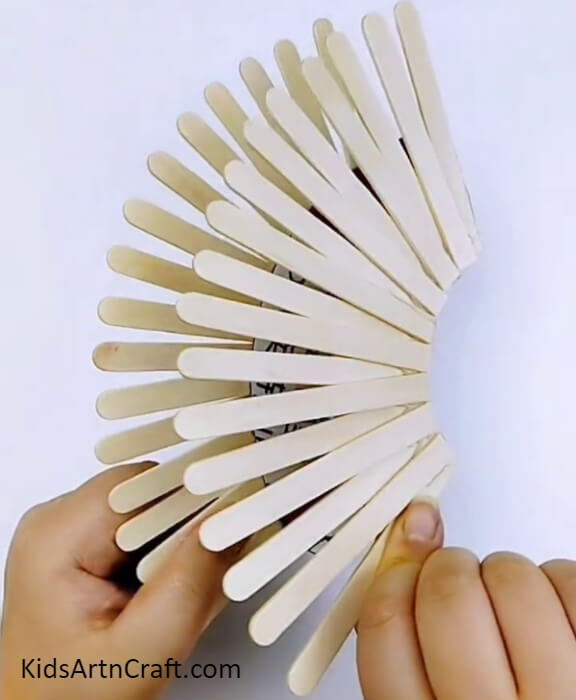
Over the cardboard piece apply hot glue and stick the other case base over it to overlap the vase bases together.
Step 13: Pasting Stick On Rectangles
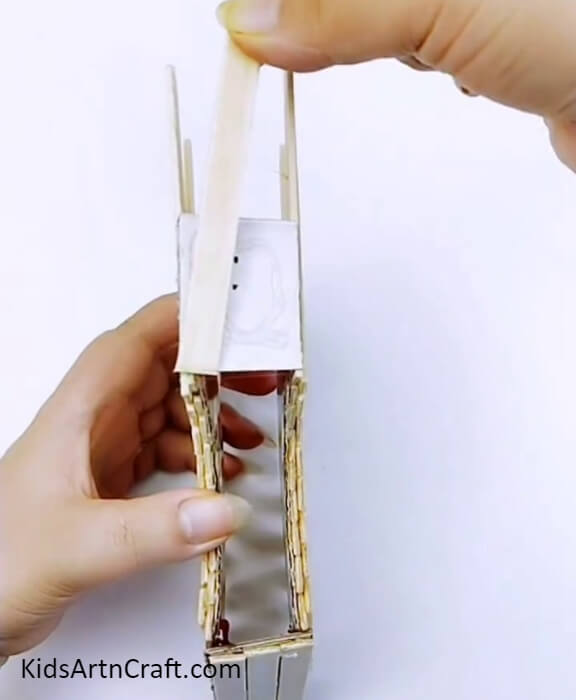
Using hot glue paste the same-length popsicle stick onto the rectangle cardboard piece.
Step 14: Pasting More Sticks
Completely cover the cardboard pieces by pasting the popsicle sticks on both.
Step 15: Pasting Popsicle Stick To Vase Breadth
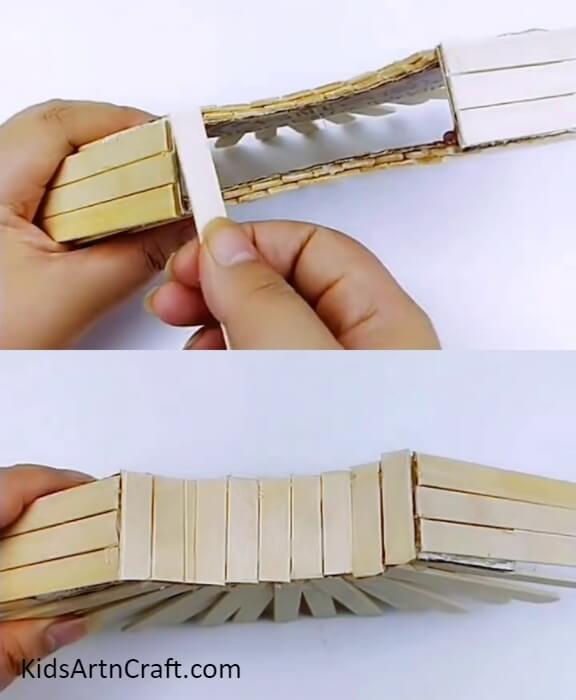
Measure the popsicle sticks from the bottom of the vase breadth, cut out pieces of sticks of the length as measured, and using hot glue, start pasting them to the bottom of the side as shown in the image.
Step 16: Braiding Jute Threads
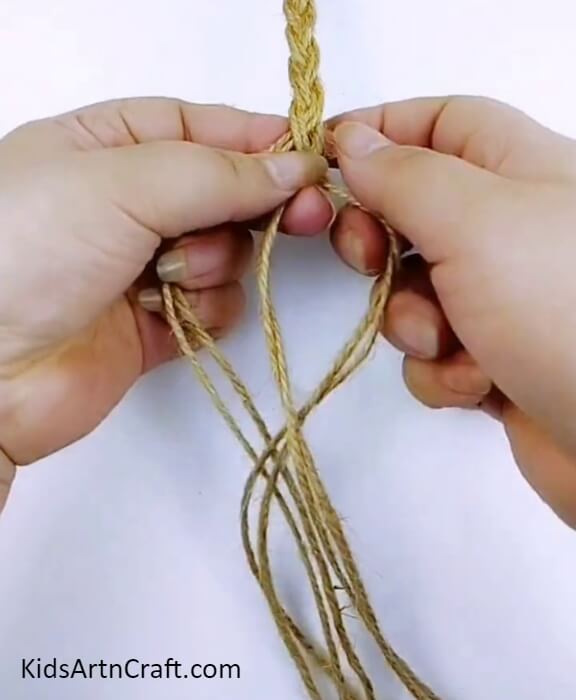
Take 6 pieces of jute threads and start to braid 2-2 strands of them all together.
Step 17: Pasting The Jute Braid
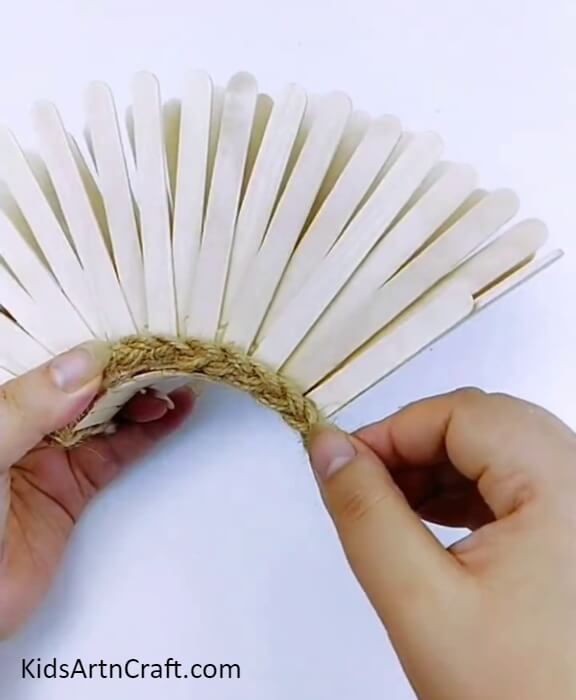
Paste the jute braid onto the bottom curve of the vase base and also, over the mid-top in a curve using hot glue.
Your Popsicle Stick Vase Is ready!
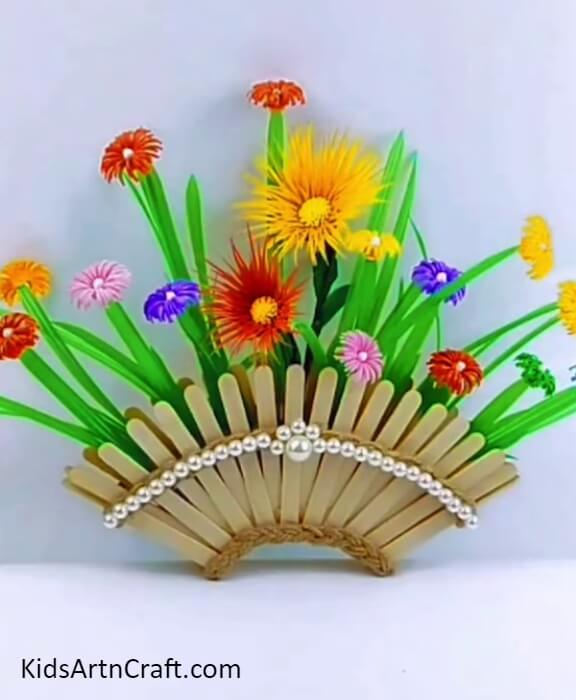
Paste craft pearls over the upper jute braid using hot glue.
Tada! Your crafty vase is ready! You can decorate the flowers in it!
Decorate this vase in any corner of your house to brighten it up! You can also customize this vase by adding colors to it by painting it or can even decorate it more! You can make this craft in the boring afternoon time to do something productive and crafty in it! Hope you liked this article and found it helpful! Give this craft a try and let us know the results in the comments section!
Follow us on Youtube for art and craft tutorials and much more.
More Articles from Kids Art & Craft
- Popsicle Stick Shark Craft Tutorial For Kids
- Butterfly Popsicle Stick Crafts For Kids
- Easy Popsicle Sticks Flag Crafts Tutorial
- DIY Monster Bookmarks for Kids
- Pinwheel from Popsicle Sticks Easy Tutorial For Kids