

DIY and Crafts
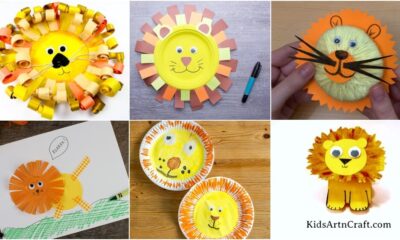
DIY Vases Gift Ideas Kids Can Make With Their Parents

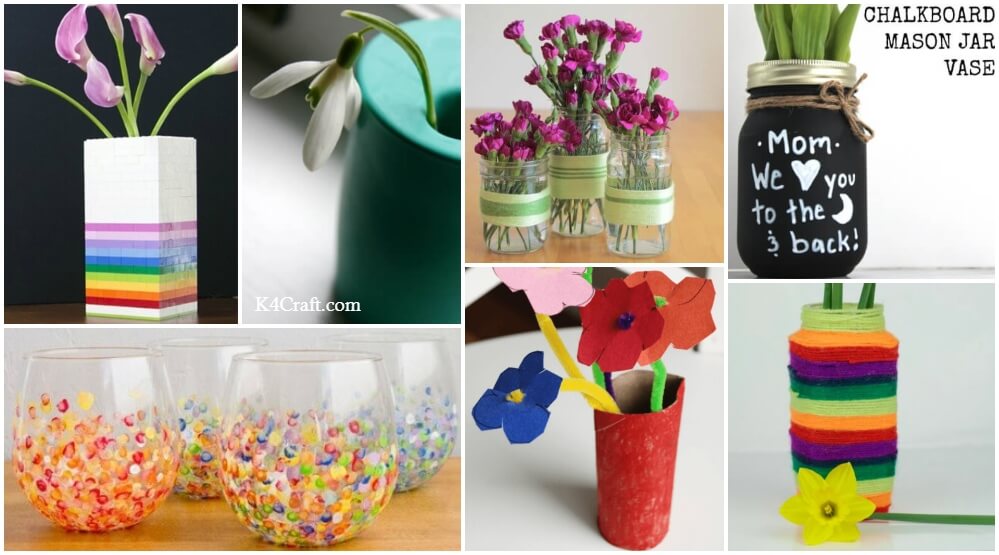
We have always loved my kids’ homemade gifts most of all. Here we have 10+ Amazing Vases Gift Ideas for kids to make with parents. Not everyone is looking for an expensive gift; some people want that gift that has the special touch that reminds them of you, your love, and all your heart that you poured into making it.
DIY Vases Gift Ideas for Kids
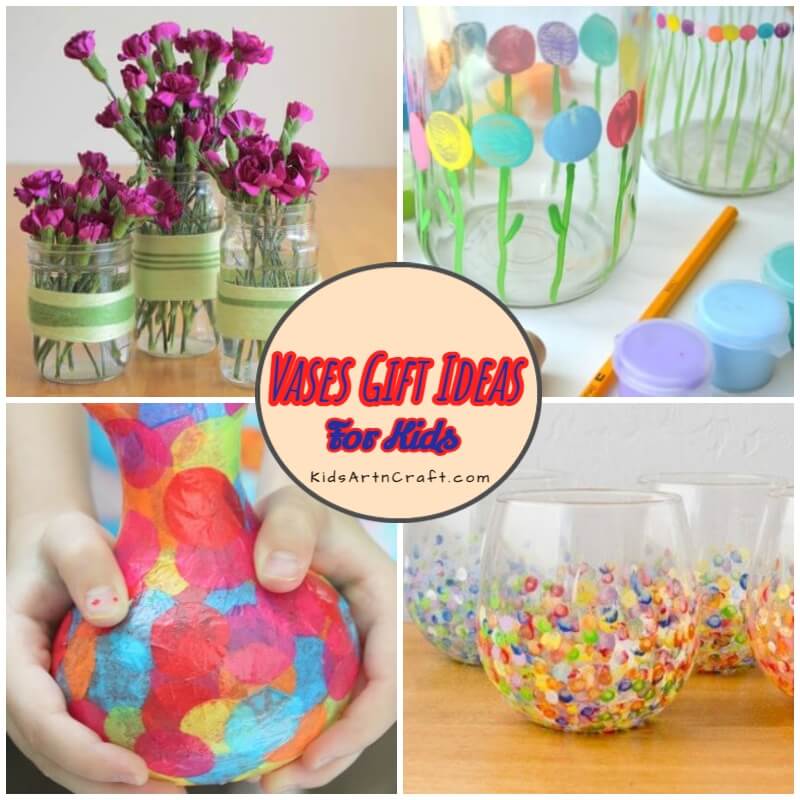
Kids would like to make easy Mod Podge vases using these craft ideas. These can be used as gifts and decorative items. There are 10+ gift ideas for vases that you can make with your children.
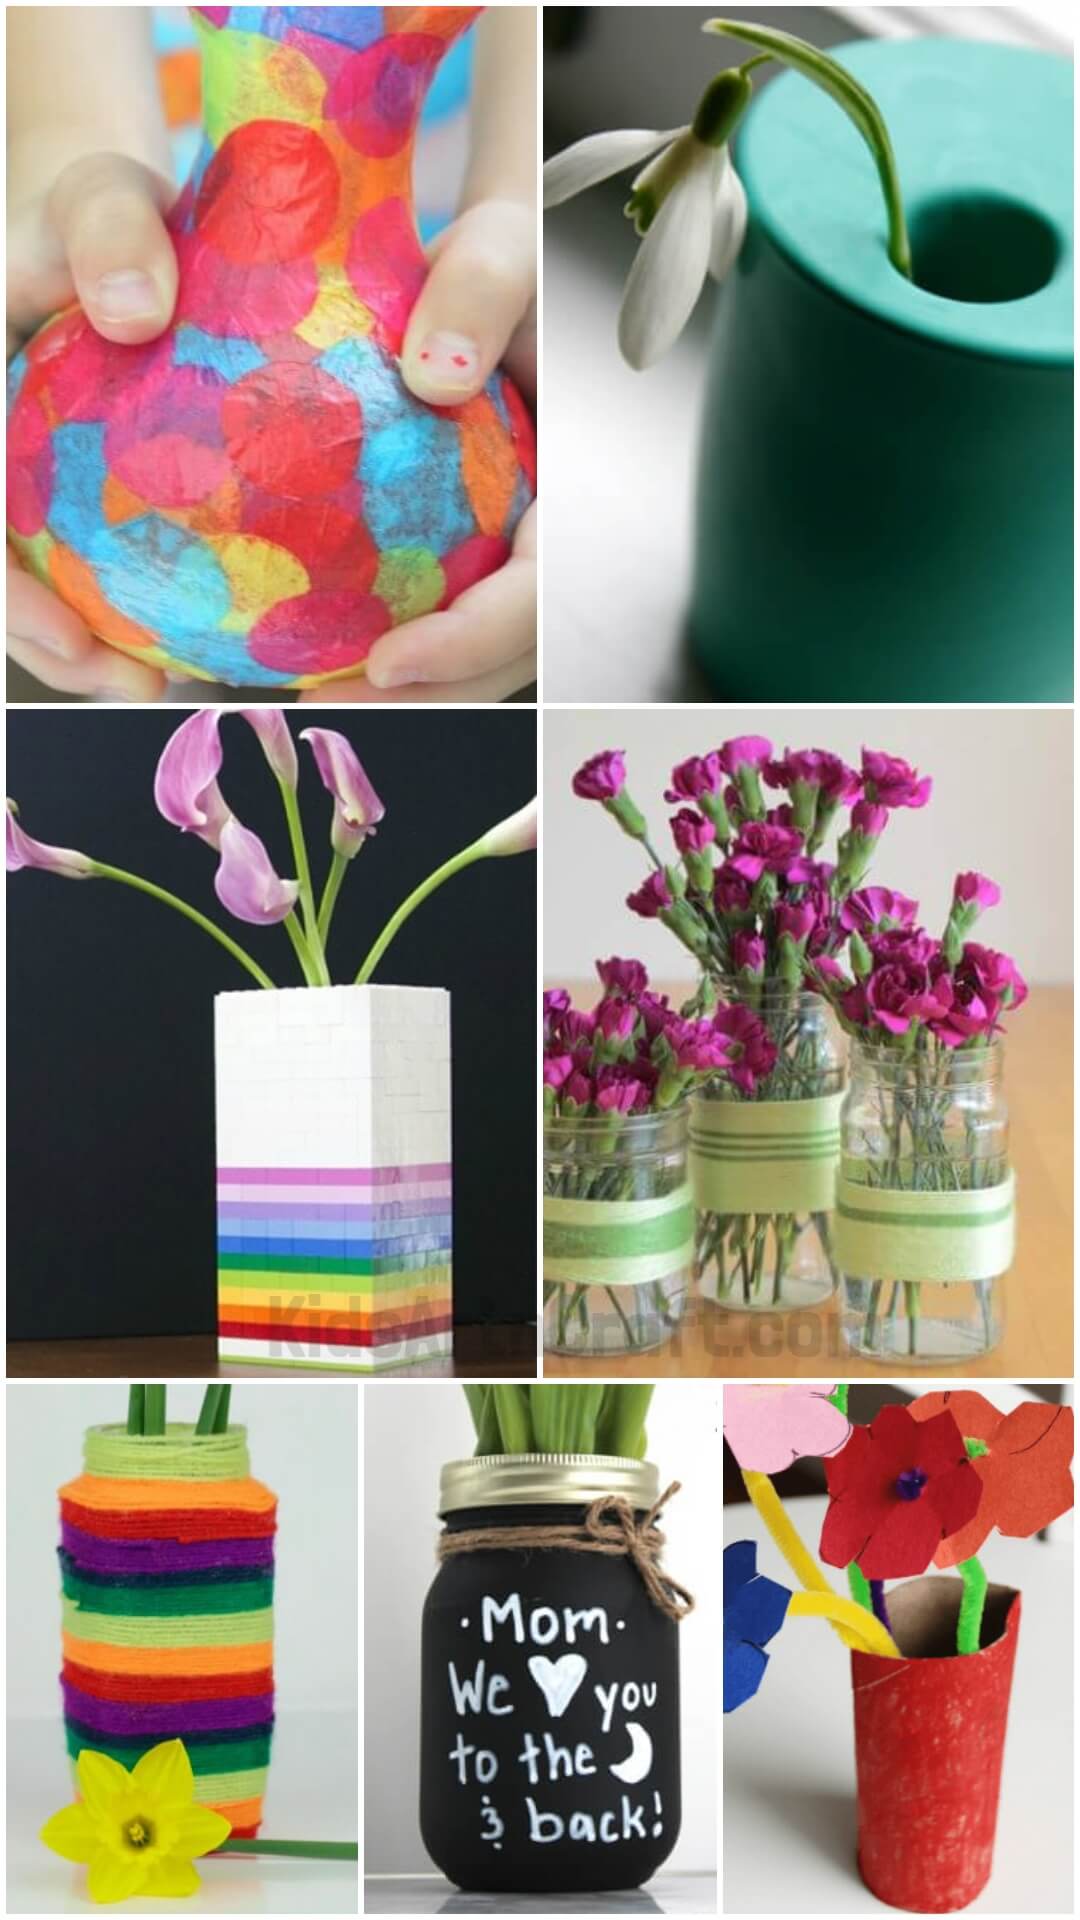
Chalkboard Mason Jar Vases Gift idea
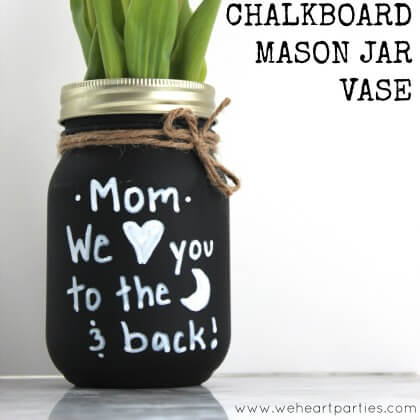
Image/Tutorial: We Heart Parties
Firstly, cut the white vinyl with your electronic craft cutter into the words of your choice. Then remove the excess vinyl surrounding the words as well as the insides of the letters (using a hook). Then you can use transfer tape to apply vinyl to the jar. The transfer tape is optional, but it makes the process a bit easier.
DIY Colorful Hand-Dotted Tumbler
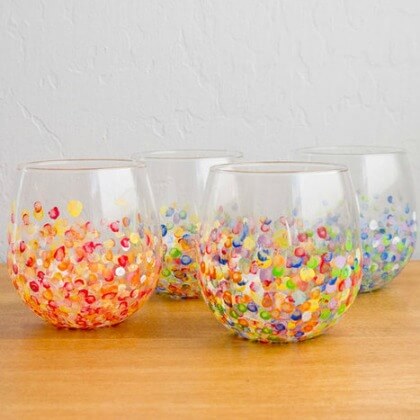
Image/Tutorial: Pop Sugar
Firstly, use an enamel or all-surface acrylic for long-lasting results. Then fold a sheet of paper towel in half and then in half again. Then, squeeze out a small dollop of each color of paint and mix together to create additional colors for your tumbler. You can experiment with mixing the primary colors to create oranges, greens, and purples. Then place a length of parchment paper on a sheet pan, and then place the glass upside-down on the pan. Now press the end of a cotton swab in one color of paint, and dot around the base of the glass. Then continue dotting with other colors to create a first layer of dots, and then let it dry for an hour. And then flip it over on the sheet pan. Place it in a cold oven and bake at 350F for 30 minutes to set the paint. Then allow the glass to cool in the oven for an hour before handling.
Tissue Paper Vases Gift idea
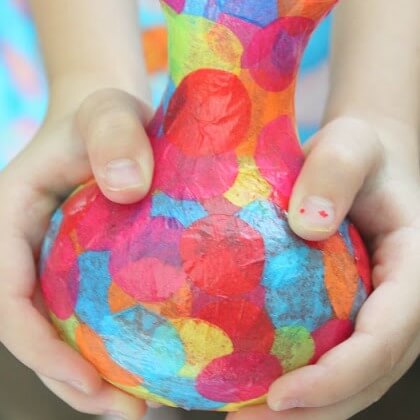
To make a tissue paper vase, firstly, brushed the vase with a light coat of Mod Podge and began applying small circles of tissue paper to it. Work in small sections as you go because Mod Podge dries quickly. Now let the edges overhang so that every edge is covered, and just trim them later when they are dry. Then every last inch was covered in tissue dots. Now layered all over each other, making sure to press them down as we went for a smooth finish. After that, we added a layer of Mod Podge on top to seal the vase and waterproof it. You can add a sweet-smelling flower from the front yard.
Vase Bottle Craft
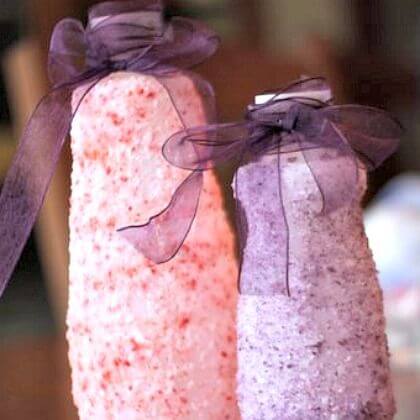
Image/Tutorial: Hands On As We Grow
Firstly, you have to paint the bottles with glue. We used Mod Podge, but regular school glue should work just as well. You can paint the glue on bottles with a paintbrush, but get creative with how you apply it. You can use a sponge, or even roll it in, as we did for the salt. Rolled the glue-covered bottle in the colored salt that I spread out on a baking sheet. If the bottle has some bare spots, then just have the kids reapply some glue to those spots and sprinkle the salt on. You can add the ribbon to the neck of the bottle yourself. It could also be covered in glue and salt, but the kids used that part as their handle for the most part.
Artwork On A Vase
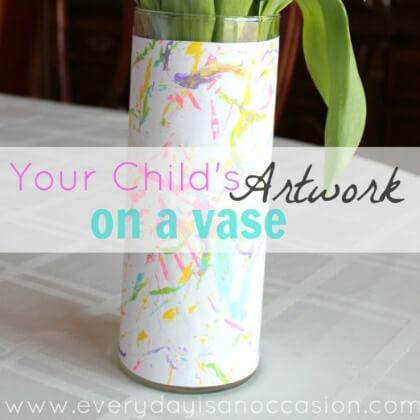
Image/Tutorial: Everyday is an occasion
Firstly, we will do some Spaghetti slap art… which means dipping spaghetti in paint and slapping it on a piece of paper.
Now, let the art dry and then cut it out so that it will fit around your vase. Then apply a healthy heaping of Mod Podge washout for kids onto the vase and back of the artwork. This step may get bubbles, so use your finger and smooth them out. And then put the artwork on a vase and Mod Podge on top of the artwork.
Allow it to dry and then use your new one-of-a-kind vase. You can use it for pens, flowers, craft supplies, or maybe just a decorative piece.
Lego Vase
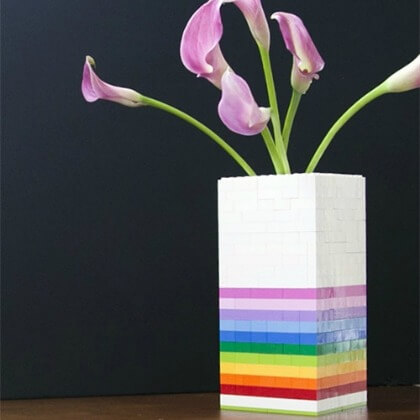
Image/Tutorial: Fab Art DIY
Kids have great fun and can spend hours figuring out those characters and molds there. They can adjust it according to the above image, and it can be used for decorative purposes.
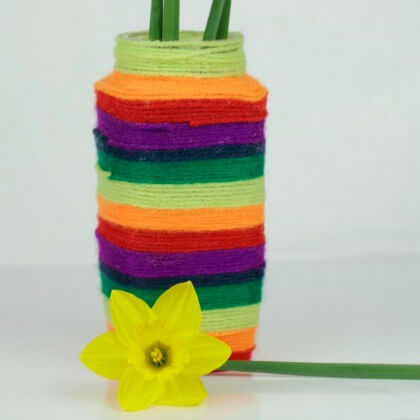
DIY Flower Vases Gift Ideas

To make it first, put the glass jar in the dishwasher. Then rub olive oil over any remaining glue and let it sit for 30-40 minutes. Next, light scrubbing with soap and water to clean the jar. Just tying the yarn around the jar and then wrapping it around worked. Next, mix the yarns that are various shades of the same color. Then start simple with a single band of the darker color surrounded on top and bottom by the lighter yarn. Then make three narrow bands with the darker color. Finally, experiment with texture by overlapping the yarn to create a pattern.
Desk Tidy
Image/Tutorial: My little 3 and me
Firstly, cut lengths of wool about the size of your outstretched arm span. Then tip the jar upside down and start at the base, which is now at the top. Now, you need to spread glue all around the outside of the jar for the wool to stick to, but we are going to do it in sections of about 3 cm to make it manageable, and so it does not dry out. Then take a length of wool and start at the bottom of the jar. Now hold the end in place with a gentle push of your finger and wind the rest of the wool around the jar. Then hold the wool still with one hand and rotate the jar with the other.
To hold the unglued section of the jar for turning, or you will end up in a sticky mess. Then, after 4 or 5 rotations, gently push the strands together to close up any little gaps. Then repeat the process with your next piece of wool, starting where your last piece finished. After you get halfway down your jar, you will probably find it easier to turn it back up the right way and continue working from the bottom to the top, carry on until you have covered the whole jar, and set it aside to dry.
Knit Wire Vases Gift Ideas
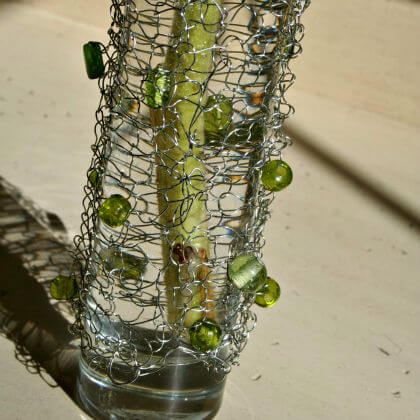
Image/Tutorial: Dukes and Duchesses
Firstly, start the beads onto the wire and begin knitting in a garter stitch, pulling the beads in at different intervals to get the look you want. Then you will knit a rectangle shape, making the width as wide as the item you want to wrap it around. Then you do not have to get the dimensions perfect since you will be able to easily hand shape the wire after it’s knit, simply by pulling it in different directions and stretching it out as needed. After finishing the knitting, cut the wire, then thread the ends of the wire into the loops, wrap the piece around the vase, and thread it together at the back with a separate strand of wire pulled through the holes.
Mini Vase
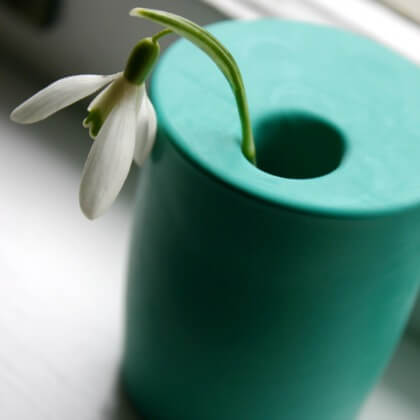
Image/Tutorial: Curbly
It can be made by snipping off the mouth of a balloon, leaving about an inch of the neck, and then slipping the balloon over the votive holder.
Pipe Cleaner Flowers Vases Gift Ideas
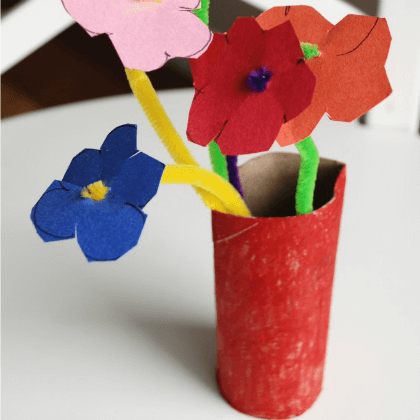
Image/Tutorial: The Craft Nest
To make it, lay three red pipe cleaners on top of each other in a star pattern. Then bend the pipe cleaners around each other to secure them together. But make sure that you maintain the same star shape. Now, pick a side of the pipe cleaner star, and start spiraling it into the center of the flower. But make sure to keep the spiral tight. Then, continue to spiral all pipe cleaners to the center of the flower. After that, use a pipe cleaner of a different color to make a stem for your flower. Then attach the stem to the flower by bending it over the center of the flower, where the pipe cleaners are connected.
Decorate a Vase with Acrylic Paints
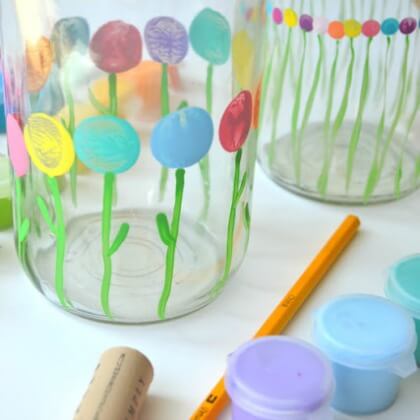
Image/Tutorial: Lemon Tree dwelling
Firstly, take a jar and dip the wine cork in assorted acrylic paints and make large flowers on the jar. You can also use a pencil eraser to make small flowers. Use a small paintbrush to make stems. To make leaves use little fingers.
Step-by-Step Tutorial to Make a Cute Flower Vase
Learn how to create beautiful DIY vase gift ideas for kids in this step-by-step tutorial. This easy craft activity shows children how to make a cute handmade flower vase with simple materials. Perfect for school projects, Mother’s Day gifts, or fun family craft time with parents at home.
Benefits of DIY Vase Crafts for Kids
- DIY vases are not just fun—they support children’s overall development.
- Help improve fine motor skills through hands-on crafting.
- Boost creativity by exploring shapes, colors, and materials.
- Encourage problem-solving skills during the creative process.
- Strengthen parent-child bonding when done together.
- Build confidence and self-esteem in kids.
- Give a sense of accomplishment and pride after completing the craft.
- Promote the use of recycled materials like bottles, jars, and cardboard.
- Teach sustainability and eco-friendly habits.
- Encourage creative reuse of everyday items.
Expert Tips for Parents
- Choose age-appropriate materials: For younger kids, avoid sharp tools and use child-safe scissors and glue.
- Encourage creativity, not perfection: Let kids explore their own designs rather than following strict instructions.
- Use eco-friendly supplies: Recycled materials like paper rolls, glass jars, and bottles are both safe and educational.
- Supervise closely: Always assist when using scissors, paint, or hot glue.
- Create a dedicated craft space: This keeps the activity organized and enjoyable.
Materials You Can Use at Home
- Empty plastic bottles
- Glass jars or mason jars
- Cardboard tubes
- Colored paper or tissue paper
- Paints (watercolor or acrylic)
- Glue, tape, and scissors
- Decorative items (buttons, ribbons, beads)
Eco-Friendly Crafting Ideas
- Turn old plastic bottles into colorful flower vases
- Decorate glass jars instead of throwing them away
- Use newspaper or magazine pages for collage designs
- Create vases from cardboard packaging
Creative Ways to Use DIY Vases
- Display fresh or artificial flowers
- Use it as a pencil holder
- Give it to friends, teachers, or family members
- Decorate study tables or bedrooms
- Use it as a centerpiece for small celebrations
Why DIY Vases Make Perfect Gifts
Handmade gifts always carry more emotional value than store-bought ones. DIY vases created by kids are unique, personal, and thoughtful.
They are perfect for:
- Birthdays
- Mother’s Day or Father’s Day
- Teacher appreciation gifts
- Festive occasions
FAQs
Q1. What age is suitable for DIY vase crafts?
Answer: DIY vase crafts can be adapted for kids aged 3 and above with proper supervision.
Q2. What is the easiest DIY vase idea for kids?
Answer: Using a plastic bottle and decorating it with paint or paper is one of the simplest options.
Q3. Are DIY crafts safe for children?
Answer: Yes, as long as parents supervise and use child-safe materials.
Q4. How do DIY crafts help child development?
Answer: They improve motor skills, creativity, focus, and problem-solving abilities.
DIY vases are a fun, creative, and educational activity that kids can enjoy with their parents. These simple crafts not only spark imagination but also teach valuable life skills like recycling, patience, and creativity. By using everyday materials and encouraging self-expression, parents can turn a simple crafting session into a meaningful learning experience. Try these DIY vase ideas today and create lasting memories with your child. Stay updated with our newest content—join our Telegram group today! Don’t forget to follow us on YouTube & Facebook for creative art and craft tutorials, fun ideas, and much more.
Hope you liked all these vase decoration ideas for kids. We will bring more such articles for you. We would love to hear back from you. You can leave your comments and opinions in the comments section below. Keep creating and smiling with Kids Art & Craft!
Reviewed by Yash Sharma
Read More:
- Easy Cork Crafts For Fall Season
- Egg Carton Craft Ideas For Kids
- DIY Gift Wrap Ideas For Festivals
- Egg Carton Flower Crafts
- Unique Popsicle Stick Flower Vase Craft Tutorial For Beginners