Paper Crafts
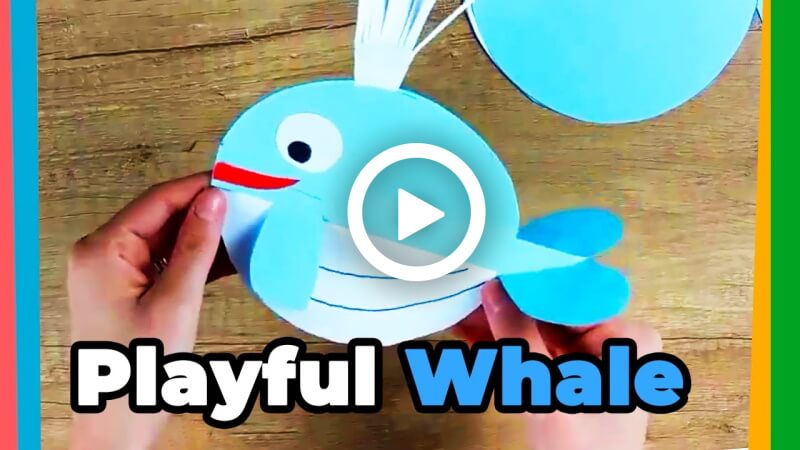
How to Make a Paper Whale


Spending each day during the pandemic can be a pretty taxing task. It’s really hard to keep up your productivity level every single day, especially with the same routine going around in loops. Seeking motivation and inspiration from basic things in life becomes a very difficult job when you don’t exactly find an expressive outlet.
We hope that today’s short article detailing the procedure to make a paper whale will breathe the same vivacity of the sea and the ocean into your life. Follow these extremely simple steps and fuel your creative persona within minutes!
How to Make a Paper Whale
Materials Required:
- 200 GSM Paper
- A pair of scissors
- Gluestick
- Pencil
Procedure:
- Take two circular 200 GSM papers- one blue and the other white.
- Fold both of them to form equal semicircular halves.
- Use the scissors to cut the blue circle in half.
- Take another blue piece of paper and draw a heart on it. Cut the heart shape out of it.
- Apply glue at the bottom edge of the heart and stick it on the white folded circle in such a way that either half of the heart lies atop each semicircle.
- On another blue paper, draw two fins for the whale and cut them out.
- Stick one on each blue semicircle, as were made in Step 2.
- Now, going back to the white circle folded in half. The flatter base of the folded circle should stay upward, so that the curved side can be used to rock the whale, back and forth(curved side should be downward facing).
- Bring out the blue semicircle with a fin on it, and stick its flatter base atop the white rocking structure’s flat base.
- Take another white piece of paper and cut fringes on it. Paste this on the blue upper half you pasted in the last step. Do it in such a manner that the fringes point upward.
- Turn the whale around and paste the other blue semicircle with the fin at the back of the blue semicircle you pasted in the last step.
- Take two smaller circles from the white paper and put a dot on each of them using a marker.
- Paste each of these circles on either side of the whale’s blue halves. These will work as its eyes.
Congratulations! You’ve finished making your paper whale. Place it in your room or anywhere you’d like for decoration. You can even teach your younger siblings to make this whale. It’ll be the best gift craft for them.
To find more such creative videos to feed your artsy soul, check out some other links on K4 Craft. You won’t be disappointed!
Read More:
- Easy to Make Paper Whale Craft Tutorial for Kids
- Cute Paper Whale 3D Craft Step-by-step Instructions
- How to Make Blue Whale Paper Craft Tutorial
- World Oceans Day Paper Plate Crafts for Kids
- Cute Whale Drawing Step-by-Step Tutorial For Kids