Clay Crafts
DIY Clay Modelling Tree Artwork Easy Tutorial For Kids

This easy step-by-step tutorial provides children with a fun and creative way to make their very own clay tree artwork.
We all love modelling with clay, especially kids. With clay, we can create whatever we want from our imagination and turn it into reality. So, today we are going to create something very beautiful just out of clay and nothing else. Let’s begin!
Easy Clay Modelling Tree Artwork for Kids

Read More: DIY Easy Paper Chick Craft For Kids
Materials Required
- Clay (Different colours)
- Glass apparatus
- White marker/sketch pen
- Thin stick
- Small whisk
- Blunt butter knife
- Wooden circle
- Glue
Procedure
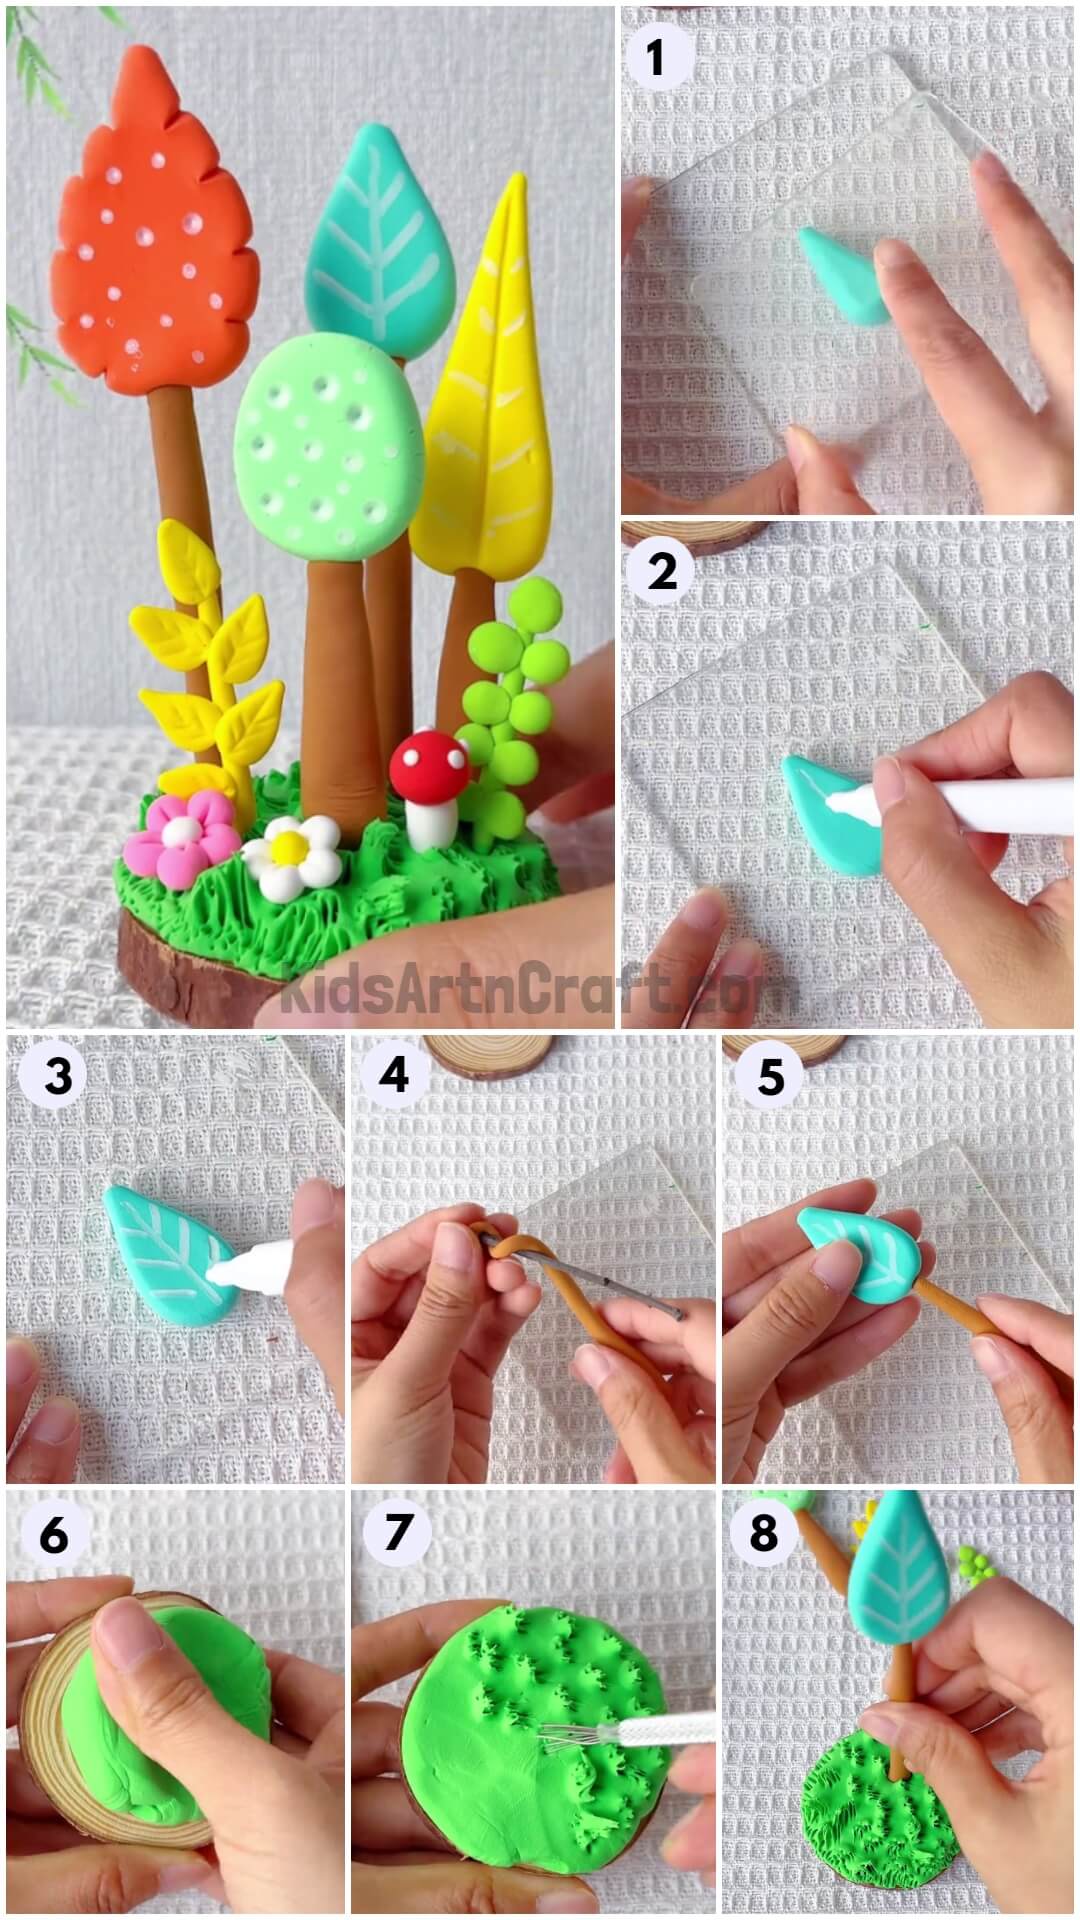
Step 1: Taking Sea Green Clay
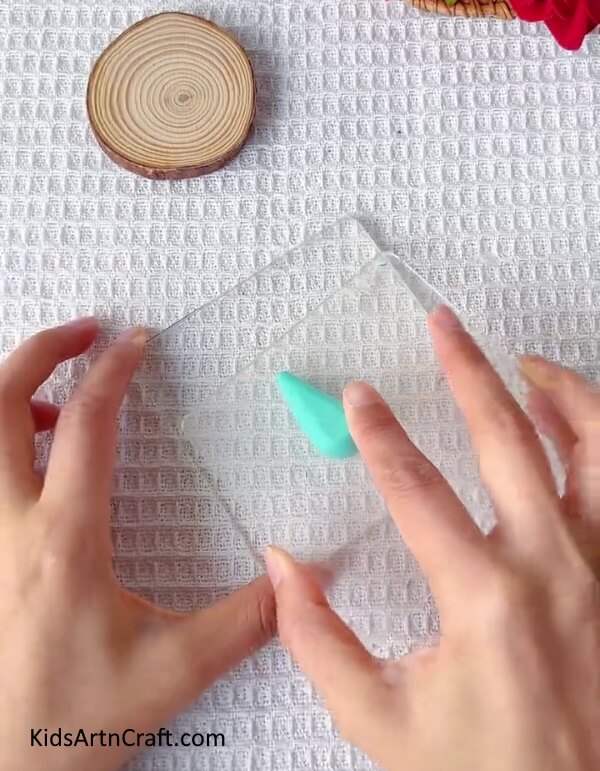

Your first step is to take a sea green-coloured clay. After taking a sea green coloured clay, make it into a drop shape as shown. Remember, while making your drop shape, keep it on the glass apparatus.
Step 2: Making A Line With White Marker/ Sketch pen On Drop Shape
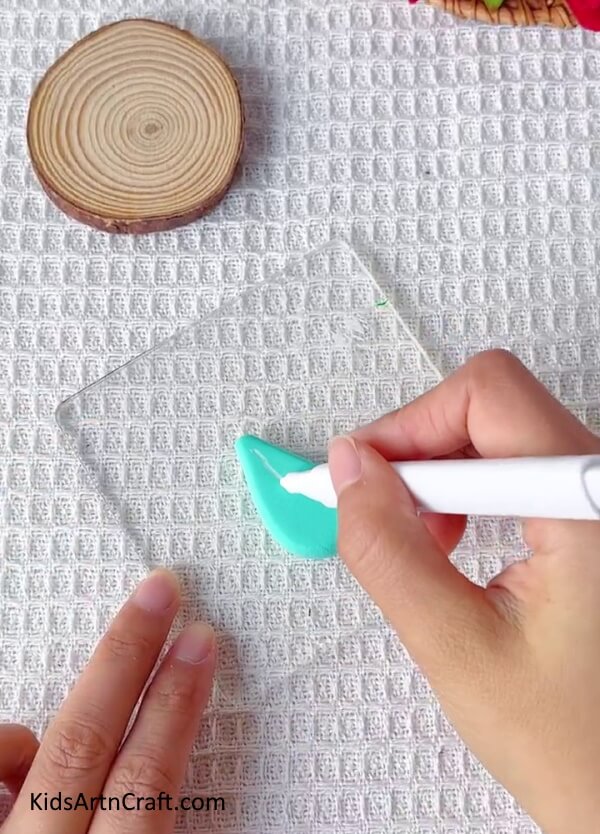

Now, keep the sea green coloured drop shape on the glass apparatus and with the help of a white marker/sketch pen make a line on the middle of the drop shape as shown.
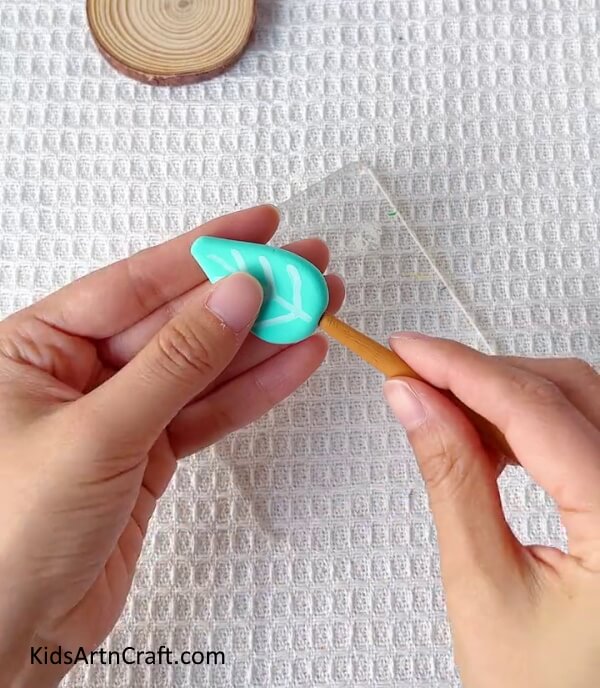
Step 3: Making Veins On The Drop Shape With White Marker/ Sketch pen


After making a white line in the middle of the sea green coloured shape, make slant lines on the straight lines with the help of a white marker/sketch pen. This will make white-coloured veins on the sea green-coloured drop shape.
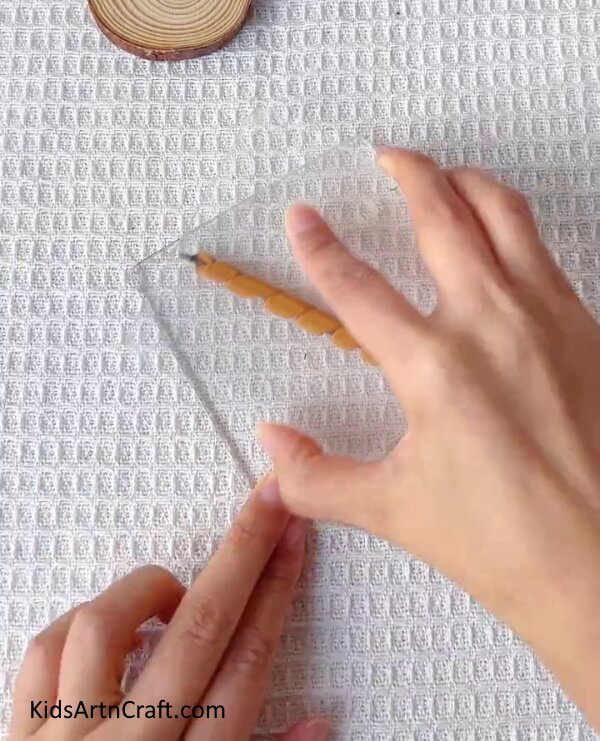
Step 4: Twisting And Turn The Brown Clay


Now, take the brown-coloured clay and take a thin stick. First, make the brown-coloured clay an elongated line. After making the brown elongated line, attach one part of the brown clay to the thin stick and do twists and turns along the thin stick.
Step 5: Presing The Brown Clay

Keeping the turned brown-coloured clay on the glass apparatus, press the brown-coloured clay against the thin stick to make a proper stem-type shape.
Step 6: Sticking The Stem Type Shape On The Bottom Of The Drop Shape

After making the stem-like shape with the help of a thin stick, paste the stem-type shape on the bottom of the sea green coloured drop shape with the help of glue.
Step 7: Making A Leaf Shape With Orange Clay
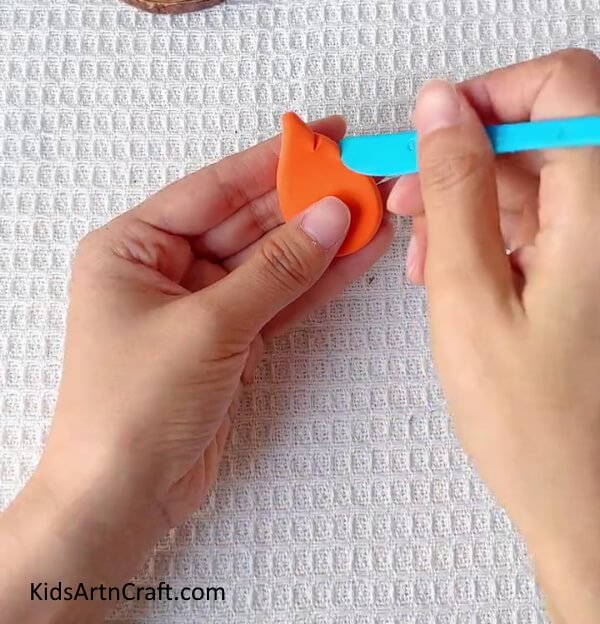

Now, take an orange-coloured clay and make a leaf-like shape with an orange-coloured clay.
After making a leaf-like shape with orange-coloured clay, take a blunt butter knife and give a cut-type shape on both sides of the border of the leaf shape.
Step 8: Making Dots With White Marker/ Sketch pen On Leaf Shape
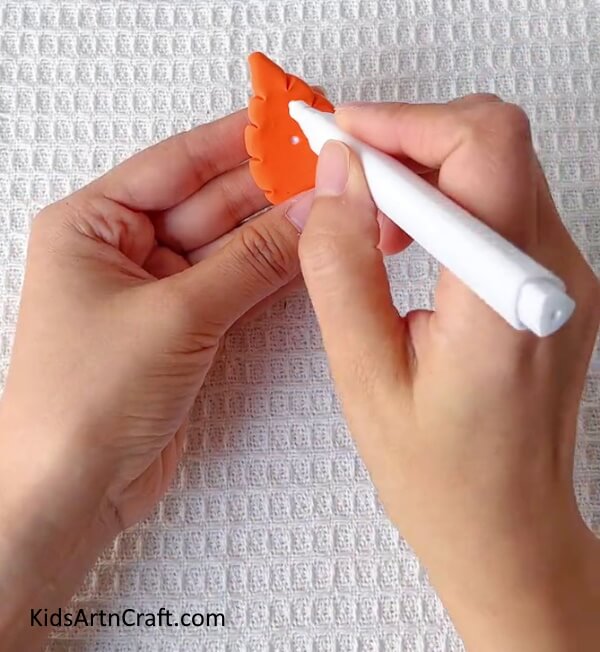

Now, with the help of a white marker/sketch pen, make small dots on the orange leaf-type shape as shown.
Step 9: Taking A Green Clay
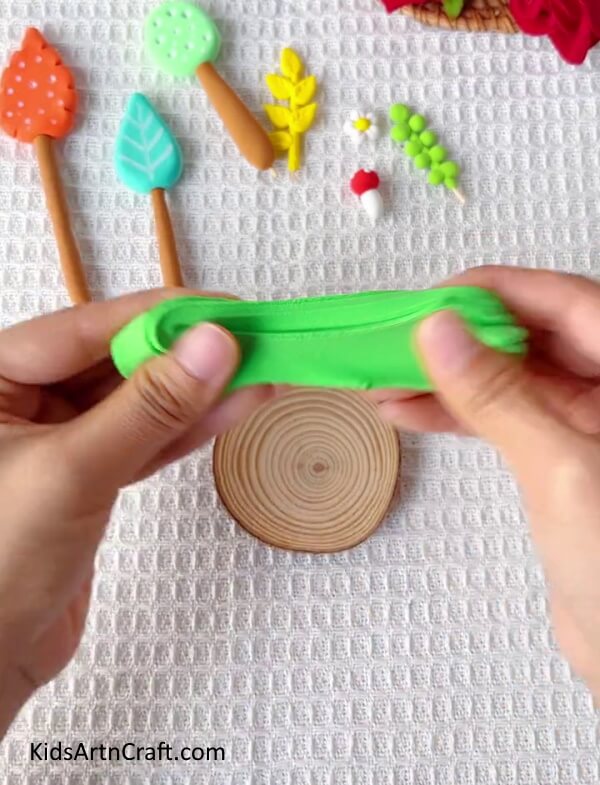

Take a green-coloured clay and pull it from both sides of the green-coloured clay as much as you can.
Step 10: Sticking The Green Clay On Wooden Circle
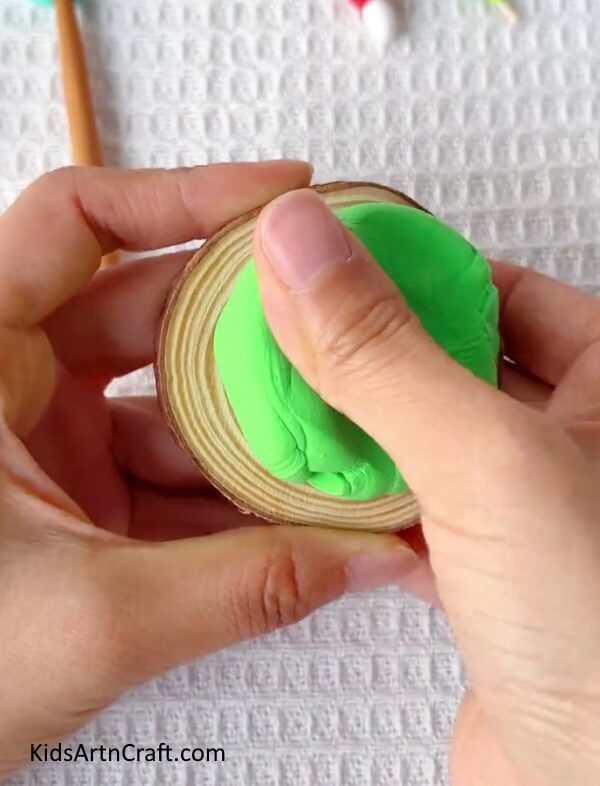

Now, take a wooden circle and the green-coloured clay which you were pulling above.
Stick the green-coloured clay with the help of glue on the wooden circle by spreading the whole green-coloured clay on the wooden circle in the same shape as the wooden circle.
Step 11: Making Grasses With a Whisk On Green Clay
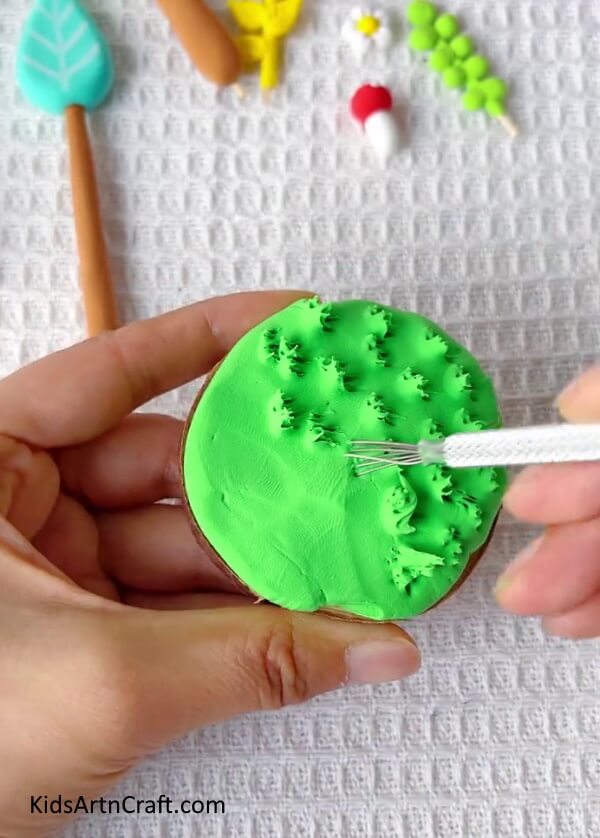

Now, take a whisk and the wooden circle where you have stuck the green-coloured clay. With the help of the whisk, make grasses on the green clay.
To make grasses, put the small whisk in the green-coloured clay, after putting the small whisk, pull the small whisk out of the green-coloured clay and you will get your desired grasses as shown in the picture.
Step 12: Sticking The Drop Shape Tree On The Grass Area
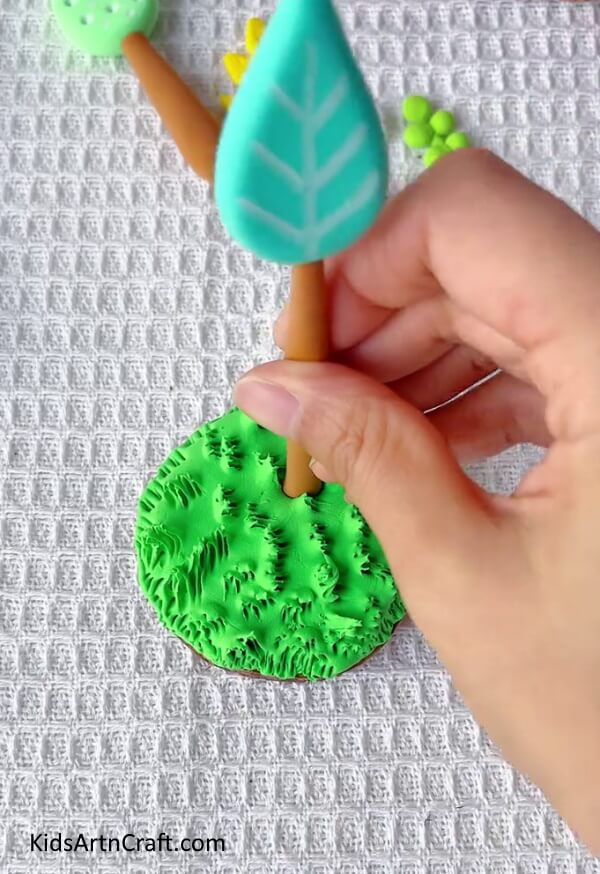

Now, take the drop shape tree which you made earlier. With the help of the glue, stick the drop shape tree on the green grass area which you made with the help of a small whisk in the above step.
Step 13: Sticking All The Tree Shapes With The Help Of Glue
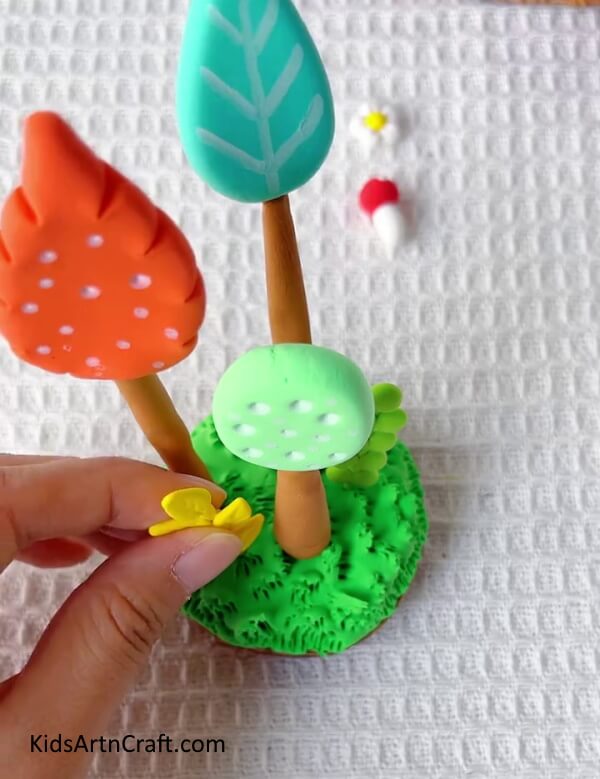

Stick all the tree and plant shapes which you have made with your creativity with the help of glue on the green grass area which you made from the small whisk as shown in the picture.
Finally, Your Craft Is Ready!!
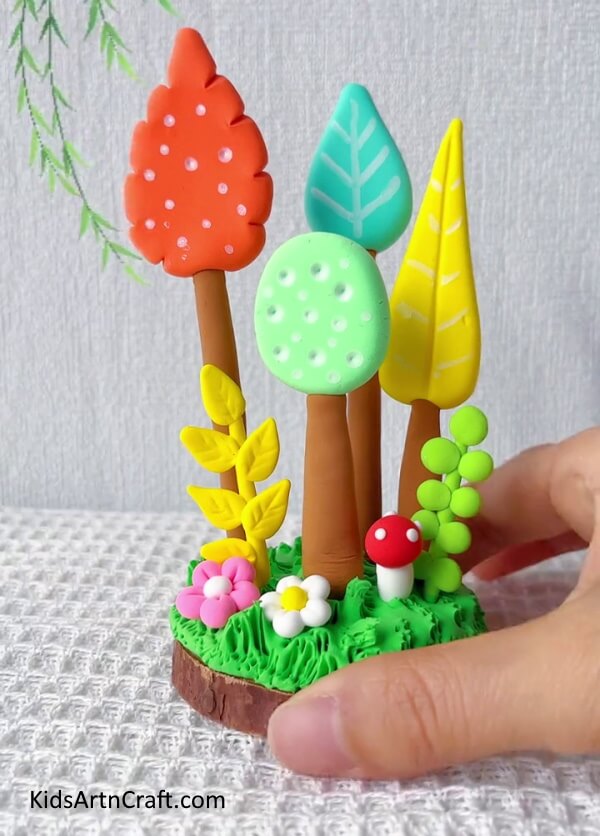

Finally, your miniature tree land is ready and it looks so amazing. The trees, the plants, the grass, everything is beautifully carved with just the help of clay.
From this craft, kids can learn how to work with clay and they can surpass their creativity level higher by making this clay model of tree. You can even use it as a showpiece or a decorative purposes.
If you want to leave everyone in awe of your clay modelling, then, what are you waiting for, go and try this amazing and creative clay modelling now.
Follow us on Youtube for art and craft tutorials and much more.
More Articles from Kids Art & Craft
- How to Make Clay Flower Easy Tutorial for Kids
- How to Make Worms Using Clay For Kids
- DIY Clay Giraffe Step-by-Step Tutorial For Kids
- Simple & Tasty Ice-Cream Craft Using Clay – Step-by-Step Tutorial
- DIY Step-by-Step Chicken Craft Tutorial